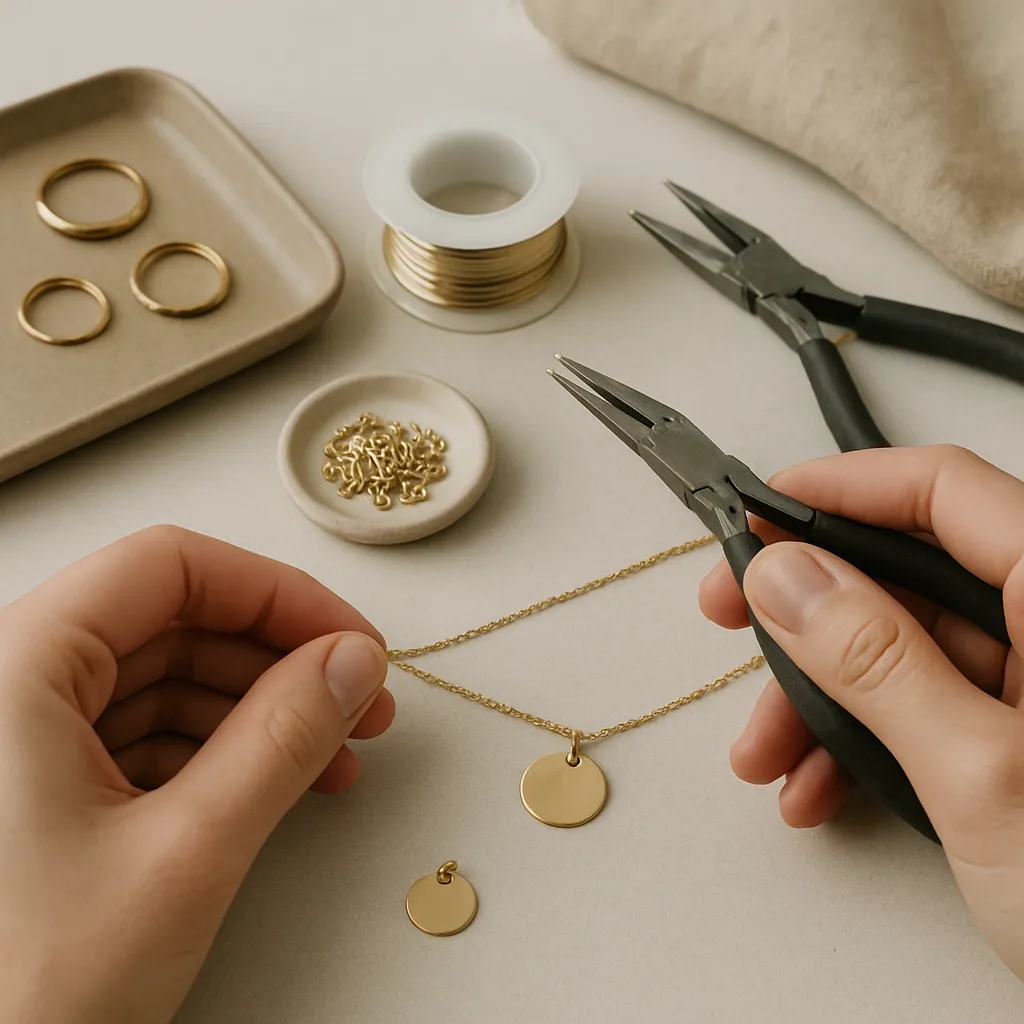
Jewelry designed for a minimalist aesthetic thrives on restraint, quiet detail, and the confidence to leave space unfilled. The craft is less about stripping things away and more about choosing what truly matters: line quality, refined surfaces, exacting fit, and honest materials. A handmade piece becomes compelling not because it broadcasts complexity, but because it resolves a clear intention with precision—a satin hoop with a seamless join, a slender bar pendant that lies perfectly flat, a threader earring that glides without catching. This guide shows how to build that clarity from the bench up: how to plan, select materials, master clean techniques, develop an eye for scale, and finish work that feels calm, wearable, and grounded in thoughtful making.
Understanding the Minimalist Aesthetic in Jewelry
Minimalist jewelry emphasizes deliberate restraint. Every curve, surface, and connection has a purpose. Instead of layers of ornament, the vocabulary centers on basic forms—lines, circles, arcs, bars—and the relationships among them. The result is a language of clarity: a single note played perfectly, rather than a chorus of voices competing for attention. In practice, that means reducing noise, refining edges, and paying close attention to comfort and long-term wear. The intention is not austere coldness; it is quiet warmth through precision.
Core visual principles include:
- Line and silhouette: The outer contour is your first impression. A clean silhouette reads from across a room; even tiny deviations in arcs or kinks in wire become large at this scale.
- Scale and proportion: A bar that is 24 mm long feels different from one that is 28 mm on the same chain. Dialing in proportion may involve half-millimeter adjustments.
- Negative space: What you omit is part of the form. A small gap in a ring, a window in a pendant—space becomes an active design element that lets the piece breathe.
- Texture and finish: Instead of ornate patterns, subtle texture shifts—matte against polished—create depth that reads intimate and close to the body.
- Rhythm: Repeating identical shapes at even intervals creates calm. Smart repetition can structure a design without adding clutter.
- Comfort: Minimalist work demands exceptional wearability; a sharp corner or heavy weight will stand out more when everything else is quiet.
Materials that suit this approach include sterling silver, gold-fill, 14k/18k gold, brass, and bronze; dense hardwoods and porcelain can also work elegantly when treated with the same care. Gemstones are typically used as small, singular accents—white sapphire, black spinel, onyx, or a single pearl—that support the linework instead of dominating it. Aim for palettes that are restrained and coherent: one metal hue per piece, or a deliberate contrast like cool silver against a single black bead. The emphasis is on essential qualities—weight, color temperature, and tactile feel—that reward close viewing.
While the forms are simpler, the demands are higher: edges must be even, join seams invisible, and surfaces consistent. This is where handmade excellence shows. A minimalist piece is an x-ray of your process. When something is slightly off, there is nowhere for it to hide. Lean into this reality: learning to remove marks, true a circle, and burnish a clean corner are the skills that make your designs read with authority.
Tools, Materials, and a Focused Workspace
You need fewer tools than you might think, but the quality and condition of each one matter. Minimalist jewelry becomes a study in consistency, so jigs, gauges, and measuring tools take center stage. Keep your bench clear and arranged for a short “reach path” from layout to shaping to finishing. Good light is indispensable; daylight-balanced task lamps will help you see scratches that warm bulbs miss.
Bench Essentials
- Flat-nose, chain-nose, and round-nose pliers with smooth jaws (no serrations). Mark each with tape for dedicated tasks to preserve surfaces.
- Flush cutters for wire; a high-quality jeweler’s saw with 2/0–4/0 blades for precise cuts in sheet.
- Bench pin, steel bench block, rawhide or nylon mallet for work-hardening without marring.
- Needle files (barrette and half-round) and wet/dry sandpapers from 400 to 2000 grit for edge refinement.
- Calipers or a reliable scribe-and-ruler combo for exact measurements.
- Ring and bracelet mandrels for shaping and sizing; bending jigs for consistent radii.
- Polishing setup: muslin wheels with compounds, or hand-finishing with micro-mesh pads for satin and mirror finishes.
- Optional soldering kit: torch, third hands, firebrick, flux, pick, solder (hard/medium/easy), and a pickle solution. If not soldering, develop cold-connection skills.
- Safety: eye protection, ventilation, and a fire extinguisher. Keep hair tied back and flammables clear.
Material Choices That Support Clarity
- Wire gauges: 20–18 ga for ear wires and threaders; 18–16 ga for small hoops; 14–12 ga for cuffs and strong structural lines.
- Sheet thickness: 22–20 ga for pendants and studs; 18–16 ga for statement bars or cuffs with crisp edges.
- Chain: fine but robust cable or box chain that does not compete with the pendant; aim for consistent soldered links.
- Findings: make your own ear wires and posts to match the language of the piece—uniform arcs and angles elevate even the simplest design.
Decide on surface character early: satin, brushed, or high polish. Matte finishes often read more serene and resist visible fingerprints, while a mirror polish can intensify minimal forms by amplifying the line and reflecting light in a single controlled band. Consider patina for contrast in silver or brass, but use it sparingly to avoid visual noise; a darkened recess against a crisp brushed surface can be striking without shouting.
Sourcing and stewardship matter. Use recycled metals where possible, and keep clean scrap by metal type for future refining. Build practices that support sustainability: avoid harsh solvents, capture dust, and reuse polishing cloths. Choose packaging that is minimal, recyclable, and tactilely pleasing—uncoated paper boxes, cotton pouches, or kraft cards that mirror the quiet confidence of the work.
Core Techniques for Clean, Quiet Lines
Minimalist jewelry succeeds or fails in technique. The fewer elements you use, the more every millimeter matters. Focus on consistent measurements, invisible connections, and controlled surfaces. Develop repeatable steps and calibrate your hands to precise pressures and angles.
Wirework Fundamentals
- Straightening: Run wire through cloth stretched over a bench block, pulling from the center out to the ends to avoid kinks. Repeat until true.
- Jigs and mandrels: Use dowels, stepped mandrels, or even machine screws to produce consistent loops and arcs; mark reference points in permanent marker.
- Angles: For right angles in bar forms, create a small score with a file before bending; support the outside corner to prevent rounding.
- Work-hardening: Light hammering on a nylon block stabilizes shape without changing cross-section; for springy ear wires, a few firm taps on steel are ideal.
Filing, Sanding, and Edge Control
- Edge sequence: After sawing, use a fine file to true edges, then progress through 400–800–1200–2000 grits. Sand in perpendicular directions between grits to reveal remaining scratches.
- Corners: Protect clean corners by backing with a crisp wood or steel edge while filing. Re-establish corners with the safe-edge of a barrette file.
- Surfaces: For a satin finish, draw-file and then stroke with Scotch-Brite in a single consistent direction to lay a uniform grain.
Connections: Solder or Cold Techniques
- Soldering: Fit is everything. A gap you cannot see often still exists. Use magnification to ensure flush joints; the solder should flow as a thin meniscus, not a bead. Quench, pickle, and immediately neutralize to prevent stains.
- Rivets and tabs: For mixed materials or when avoiding heat, use low-profile rivets with tight clearance holes. Back them with washers inside the design language—small circles or bars—so they read as part of the composition.
- Knots and wraps: In threader earrings or bead accents, controlled wraps read as linear elements. Keep coil spacing even and ends tucked so they do not snag.
Finishing Choices that Read as Intentional
- Mirror polish: Work through all grits before compound; polishing cannot remove deep scratches. Use separate wheels for tripoli and rouge to keep contamination down.
- Satin and matte: Cross-hatch then unify with single-direction strokes. The light should roll across the surface as a soft gradient rather than sparkle.
- Oxidation: Selective darkening can emphasize recessed lines. Seal lightly with microcrystalline wax if desired, but keep sheen consistent across the piece.
Above all, verify how a piece lives on the body. Wear test for a day: does a pendant flip, does a threader slide evenly, do studs sit flush? Real-world movement reveals what the bench hides. This embodied check binds aesthetics to ergonomics, ensuring your clean line is also a comfortable line.
Step-by-Step Projects to Build Skill and a Collection
The following projects emphasize precision and repeatability over complexity. Practice each in copper or brass before using precious metal, and track measurements and times in a small shop log for future consistency.
Project A: Ultra-Clean Geometric Studs
Materials: 20–22 ga sheet (silver or brass), 20 ga wire for posts, hard solder, 6 mm discs (or squares/triangles), earring backs.
- Layout: Scribe circles with a template or use a disc cutter for uniformity; aim for 4–8 mm diameters.
- Cut and true: Saw or punch, then file to a perfect profile. Back the disc on double-sided tape to keep fingertips safe while refining edges.
- Surface: Decide on matte or polish now; finishing is harder after soldering posts.
- Post solder: Center-punch the back, tin the area and the post with a tiny pallion of solder, and heat until flow. Posts must be perpendicular; use a third hand and a square to verify.
- Final finish: Remove any halo of solder, refine the face, and lightly round the front edge to catch light softly.
Variations: Offset the post slightly to shift how the stud sits on the lobe for a subtle asymmetry that still reads minimal.
Project B: Seamless Threader Earrings
Materials: 20–22 ga round wire, optional micro gemstone or tube bead, polishing tools.
- Cut two lengths at 120–140 mm. Straighten thoroughly; uniformity is paramount.
- Form a gentle U on a stepped mandrel; aim for smooth, continuous curvature with no flats.
- Work-harden the first third (the leading end) on steel for spring; leave the rest slightly softer for drape.
- Optional: Add a single tiny bead pinned near the midpoint for counterweight. Keep mass low to avoid tugging.
- Finish with a mirror on the leading tip and a satin stem for a subtle duality.
Project C: Bar Pendant with Perfect Alignment
Materials: 18–20 ga sheet or 16–18 ga wire, fine chain, jump rings.
- Cut a 24–30 mm bar. If using sheet, file to a crisp rectangular cross-section.
- Drill tiny, centered holes on each end for jump rings or saw two narrow side slots that thread the chain invisibly.
- Ensure symmetry: measure end-to-end and side-to-side to the tenth of a millimeter. The eye senses even small drifts.
- Finish in satin to highlight the bar’s length; polish the ends for a glow that punctuates the line.
Project D: Stacking Rings as a Study in Ratios
Materials: 16–18 ga round or square wire, ring mandrel, solder.
- Measure: Add 2.5–3 mm to ring size for 16–18 ga wire, adjusting for profile and comfort.
- Cut, form, and close a perfect circle; no daylight should show at the seam before soldering.
- Solder and round: Flow solder cleanly, then round and size on the mandrel with gentle taps that do not stretch unevenly.
- Finish sets in different profiles: one round, one square, one with a whisper of hammer texture. Together they read as unified but not identical.
Project E: Negative-Space Cuff
Materials: 12–14 ga flat or half-round wire, mandrel.
- Cut to wrist size plus a 25–35 mm gap; plan the open space as an intentional ellipse, not a random break.
- Shape gradually around the mandrel, keeping cross-section true and edges parallel.
- Work-harden strategically so the cuff keeps shape yet flexes slightly at the opening.
- Finish with a brushed grain running along the arc to accent the form.
Design Language, Prototyping, and Visual Restraint
Minimalist jewelry benefits from a disciplined design process. Sketch to clarify intent, prototype to test proportions, and iterate until the design speaks in a single, coherent voice. For many makers, the “quiet” of a piece emerges when competing ideas are removed rather than added.
Sketch with Measurable Intent
- Annotate sketches with dimensions and tolerances (±0.25 mm). The act of deciding measurements clarifies your aesthetic.
- Study geometry: circles, chords, arcs, and golden sections provide a framework that naturally reads calm.
- Mark wear points and balance lines: where the chain meets a pendant, where a hoop’s clasp sits, how weight centers behind a lobe.
Prototype with Affordable Materials
- Use brass, copper, or even card stock to test silhouette at scale. On-body tests reveal flipping pendants or crowded spaces.
- Photograph on neutral backgrounds at consistent angles. Compare iterations side-by-side to judge tiny differences.
- Time your build. If a design demands ten fussy steps, reconsider whether its essence can be achieved with five confident ones.
Visual Rules that Create Calm
- One focal point: a single curve, a single plane change, or one stone. Everything else supports it.
- Even spacing: if using multiple elements, keep intervals consistent; your eye will catch a drift more than you expect.
- Material unity: minimize mixed metals unless contrast is a thesis. When mixing, keep counts simple—one silver bar plus one gold ring feels intentional.
- Whitespace awareness: let the body supply context. Necklines, ear contours, and wrist bones contribute to composition. This is where balance lives.
Comfort, Durability, and Finishing for Everyday Wear
Minimalist pieces often become daily wear, so their technical underpinnings must be solid. Aim for longevity without bulk, and choose finishes that age gracefully. The smaller the form, the more any abrasion or catching edge disrupts the experience. Think of comfort as a major design constraint—one that strengthens the piece’s aesthetic rather than limiting it.
Comfort-First Details
- Ear wires: Taper leading tips microscopically and polish to a high gloss to avoid irritation. Standardize your arc radius so insertion feels familiar across designs.
- Necklaces: Balance pendants with chain weight so they do not migrate to the side. A lightweight pendant may need an offset jump ring or slightly heavier chain.
- Bracelets and cuffs: Chamfer inside edges lightly. A perfect rectangle inside a cuff can feel sharp; a micro-roundover preserves the crisp look while adding wearability.
Longevity in Minimal Forms
- Join integrity: Minimizing solder points reduces failure modes. Where joins are necessary, ensure full penetration and clean flow.
- Surface strategy: Expect micro-scratches on polished pieces. Either embrace patination over time or choose a satin that hides daily wear gracefully.
- Maintenance: Provide clear care notes—gentle soap, soft cloth, separate storage. Encourage occasional repolishing for mirror finishes.
Simplicity does not mean fragility. Choose cross-sections and alloys that support daily life. Sterlings with deoxidizers or gold alloys with robust hardness can extend life significantly. Your pursuit of craftsmanship is the quiet promise behind every minimal line.
Developing a Minimalist Collection and Brand Story
Coherence matters in a minimalist line. Limit your shapes, finishes, and materials to a small, deliberate set, and explore variations in scale or orientation rather than introducing new motifs. This creates recognition—clients learn your “voice” and trust your eye. Build families: a bar series, an arc series, a dot series. Each can include studs, pendants, rings, and cuffs that converse with one another.
Palette and Vocabulary
- Shapes: bars, arcs, circles, ellipses, and gentle tapers. Resist the urge to add a new shape unless it earns its place.
- Finishes: choose one primary (satin) and one accent (mirror edges or oxidized recesses). Apply consistently across the collection.
- Materials: one hero metal (silver or gold) plus a quiet counterpart (blackened steel accent, porcelain bead) used sparingly.
Photography, Presentation, and Pricing
- Photography: neutral backdrops, even daylight, and clean styling. Negative space in images mirrors the pieces’ calm.
- Packaging: uncoated stock, blind deboss, and understated labeling support the aesthetic without excess waste.
- Pricing: charge for precision. Minimal shapes still require time to true, finish, and QC. Be transparent about materials and process.
Invite wearers into your process with brief notes about measurement choices, finish philosophies, and material care. This respectful clarity reflects the ethic of simplicity at the heart of the work and builds trust without theatrics.
Troubleshooting and a Quality-Control Checklist
When something feels “off” in a minimalist piece, you can usually trace it to a small deviation magnified by restraint. The checklist below helps you diagnose and resolve issues quickly.
Common Issues and Fixes
- Crooked posts on studs: Use a jig with a 90° reference; correct by reheating and gently aligning with tweezers under magnification.
- Bar pendants that flip: Increase bar mass slightly, widen chain spacing, or shift the chain pass-through closer to the center of gravity.
- Visible solder line: Improve fit-up; reduce solder volume; ensure full heat saturation so solder flows into, not on top of, the joint.
- Uneven satin texture: Reset by sanding to 800 grit in cross-hatch, then unify with single-direction strokes end-to-end.
- Ring sets that rattle oddly: Adjust tolerances; a 0.25 mm diameter difference can restore pleasing movement without clatter.
Pre-Delivery QC
- Measure and log final dimensions against your spec sheet.
- Inspect surfaces under bright, raking light to reveal scratches.
- Test all moving parts and wearable comfort on the body for 30 minutes.
- Wipe with alcohol to remove oils; package with a clean polishing cloth.
Deepening Your Practice: Seeing, Refining, Reducing
To grow in minimalist jewelry, improve the two skills machines cannot replace: seeing and deciding. Seeing means recognizing when a curve is not continuous, when a reflection line is wavy, when a 0.5 mm offset pulls the composition off center. Deciding means stripping the design to what carries meaning, then committing to it with disciplined technique.
Training the Eye
- Light tests: Roll pieces under a single point light and watch the highlight. A perfect edge throws a straight, even line.
- Mirror checks: Photograph on-axis and overlay grid lines; micro-adjust angles or lengths until they lock into harmony.
- Body mapping: Note how collarbones, earlobes, and wrist tendons affect silhouette. Design to collaborate with anatomy.
Iterate with Constraints
- Set a design limit: three shapes, two finishes, one connection type. Explore depth inside the limit rather than breadth beyond it.
- Version control: Save prototypes and label them. The archive shows you where clarity sharpened and where it blurred.
- Material honesty: Let metal read as metal. Reserve coatings for protection or subtle hue shifts; avoid disguises that age poorly.
Minimalism is not about less for its own sake; it is about the right amount. A ring that lands lightly but secure on the finger, a pendant that centers and stays, a hoop that opens and closes silently—these are outcomes of careful decisions linked in a chain. When everything “clicks,” the piece feels inevitable, as if it could not possibly be any other way. That is the poetry of minimalism.
Ethics, Environment, and the Long View
Well-made minimalist jewelry values longevity and care for materials from source to end of life. Consider how your studio practices and supply choices echo in the world beyond your bench. Thoughtful sourcing and low-impact finishing are as much a part of the aesthetic as the visual form—they contribute to the quiet coherence your work aspires to.
- Traceable metals: Choose recycled sterling and certified gold where available; keep scrap segregated for refining.
- Chemical mindfulness: Use citric pickle, ventilate polishes, and contain dust at the source. Switch to water-based compounds when feasible.
- Packaging discipline: Omit plastic windows and foam inserts. Let tactile paper and precise folding speak for your brand.
- Repair culture: Offer refurbishment and resizing. A minimal piece that improves with time becomes a companion, not a consumable—a testament to durability and care.
In the end, the minimal path aligns process, object, and story. It values quiet over spectacle, rigor over fuss, and presence over display. By refining technique, tuning scale, and honoring materials, you create jewelry that feels both inevitable and alive: small, precise forms that meet the body with grace, carry meaning without noise, and whisper their way into daily life.
Glossary of Useful Minimalist Concepts
Having a shared vocabulary helps you diagnose and improve designs swiftly. These terms appear throughout minimalist practice.
- Silhouette: The outermost contour that defines first-read perception.
- Line quality: The consistency and intention behind edges and curves.
- Tolerance: Permissible variance in dimension before the eye reads “error.”
- Continuous curve: An arc without flats or kinks; best tested by rolling reflection highlights across the surface.
- Work-hardening: Strengthening metal through deformation without adding mass.
- Negative space: The purposeful voids that shape the whole composition.
- Satin grain: A directional brush pattern that diffuses reflected light.
- Cold connection: Mechanical join that avoids heat—rivets, tabs, screws.
- Visual weight: How heavy an element “feels” regardless of physical mass.
- Harmonic ratios: Proportional relationships that read as calm to the eye.
Closing Perspective: The Quiet Confidence of Less
Making minimalist jewelry is a conversation with restraint. You select a few elements, hone them until nothing extraneous remains, and deliver them to the body in a state of poised readiness. From the first scribed line to the final buff, your hand is visible in every decision. When you control edges, refine surfaces, and respect scale, your work earns the right to be simple. And in honoring that right—with precise balance, intentional finishes, and continual refinement—you create pieces that feel timeless: grounded in practice, resonant in daily wear, and vivid in their soft-spoken clarity.
