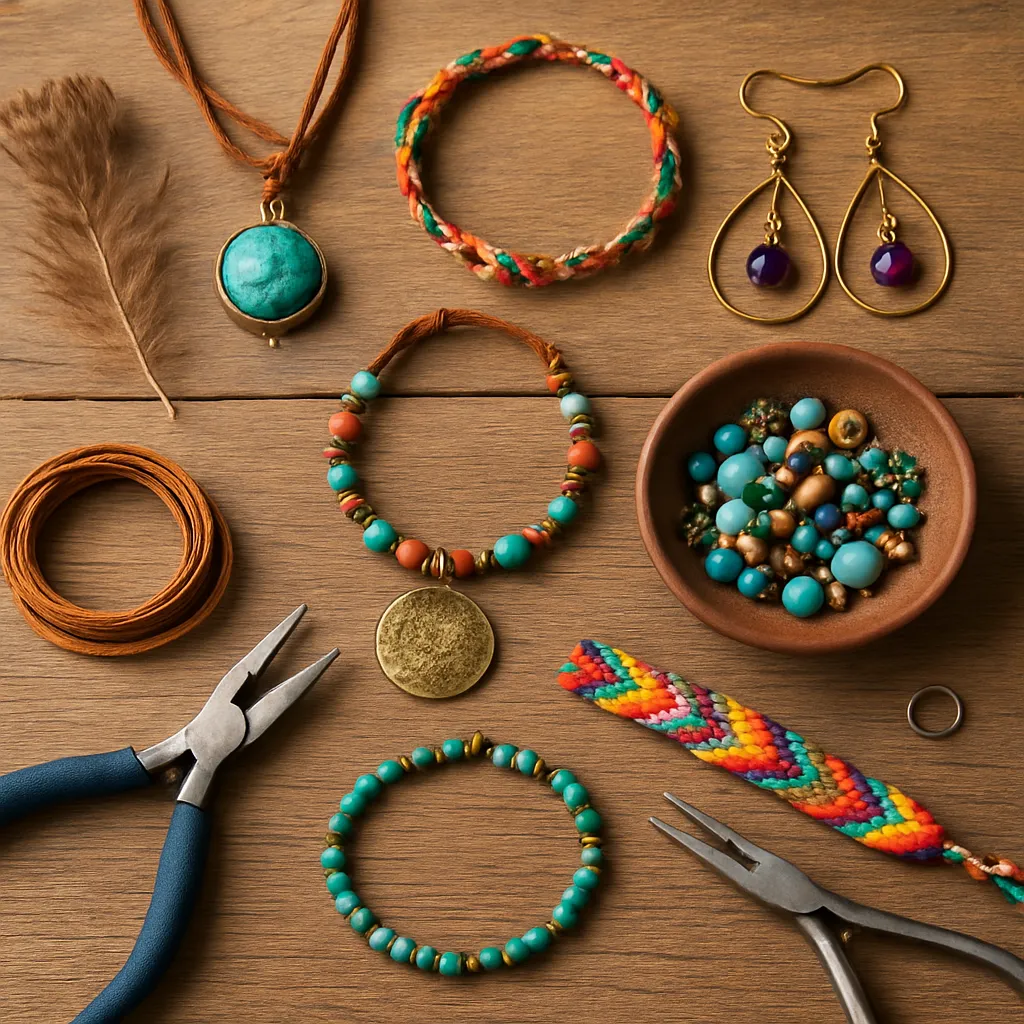
Music festivals are living galleries where color, sound, and movement merge, and jewelry is often the thread that ties an outfit to the energy of the crowd. Unlike formal adornments, festival pieces need to be expressive yet rugged, eye-catching yet wearable for hours of dancing, heat, dust, and sudden rain. In this guide, you will learn how to design and craft pieces that feel like a second skin: inventive, personal, and built to survive the weekend. We will explore materials, techniques, and design strategies tested by makers who set up camp at sunrise and return home with pieces that still sparkle. Whether you are a beginner with a bead kit or an experienced maker plotting a collection, you will find practical steps, creative prompts, and a spirit of craft that honors community and resourcefulness.
The spirit of festival adornment
Festival jewelry reaches back to ancient adornment traditions—amulets for courage, plant fibers braided into necklaces, shells worn to call the sea. Reimagined for modern stages, these pieces still carry meaning: a pendant that reminds you to hydrate, a bracelet exchanged in a sunrise trade, an ear cuff that hints at your favorite subgenre. The ethos is participatory: you do not only watch the show—you wear it. Making your own pieces is a form of handicraft that connects hand, eye, and rhythm, and it invites collaboration: swapping charms with a stranger, finishing a friend’s necklace just before gates open, or stitching a quick repair under shade cloth.
Good festival jewelry balances beauty with function. It moves with the body instead of fighting it. It avoids sharp edges that snag mesh tops or hair. It glows under UV or catches dusk in polished metal. It tolerates sweat and dust. Above all, it is modular, so you can subtract or add layers as the sun shifts and the bass deepens. The goal is not to look perfect; it is to feel like your favorite track sounds—textured, layered, and alive.
Materials, tools, and safe practices
Choosing the right materials makes the difference between a piece that dazzles in your mirror and one that survives a day at the main stage. Aim for materials that resist tarnish, minimize skin reactions, and remain comfortable when temperatures soar.
- Metals: stainless steel, anodized aluminum, titanium, and brass are durable festival choices. Sterling silver looks gorgeous but may tarnish quickly in sweat and humidity. For earring posts and hooks, consider titanium or niobium for hypoallergenic comfort.
- Beads: glass seed beads, pressed glass, acrylic for lightweight color, wood for warmth, and gemstone chips for sparkle. Avoid heavy focal beads in earrings; save weight for pendants and body chains.
- Cords and threads: nylon beading thread (size D or 0.006 inch), stretchy cord (0.7–1 mm), waxed polyester, silk for elegant drape, and paracord for bold utility looks.
- Chain: aluminum for featherlight drape, stainless for strength, and brass for warm tones. Prepare a mix of cable, figaro, and rolo chain for different textures and weights.
- Findings: quality jump rings (16–20 gauge, 4–8 mm), crimps, wire guardians, lobster clasps, toggles, and magnetic clasps with safety chains. Keep extras for on-site repairs.
- Adhesives and finishes: clear nail polish for sealing knots, flexible jewelry cement, and UV-curing products for specialty work. Use in ventilated spaces and allow full cure time before wearing.
- Core tools: round-, flat-, and chain-nose pliers; flush cutters; crimping pliers; beading needles (sizes 10–12); measuring tape; and a bead mat to prevent runaway findings.
Practical safety is part of design. Test all closures with a quick tug. File any rough wire ends. Keep earring weight gentle and back it with silicone or disc stoppers so they do not tilt. If your skin reacts to brass or plated items, paint contact points with barrier sealant or choose body-safe metals. Finally, pack a small repair kit so you can fix things without missing the headliner.
Design principles: color, form, and motion
Design for the environment. Midday light flattens color, while dusk and stage LEDs make reflective finishes and neon accents blaze. A well-chosen palette can maintain identity across changing light: matte black against holographic film, warm brass balanced with turquoise, or a wash of translucent beads that glow under UV.
Think in silhouettes rather than isolated pieces. Long, vertical pendants lengthen the torso; layered chokers emphasize collarbones; asymmetrical earrings lead the eye and interact with haircut and hat choice. Keep proportions in mind: when the outfit is voluminous, switch to bold, simple shapes; when the outfit is minimal, stack fine textures to build story. Embed convertible features—detachable charms, adjustable chain extenders, and clip-on components—so a set has modularity. Consider ergonomics in every decision: nothing should jab when you look up at the lights or lean on the grass, and nothing should bounce painfully when you dance.
Texture is a language of its own. Combine smooth polymer with hammered metal, macramé knots with glossy shell, and matte seed beads with mirrored sequins. Add small sonic details—tiny bell charms or chain fringe—that whisper rather than clang. Always test movement by shaking pieces lightly; they should sway with intention, not tangle.
Techniques you can master quickly
Festival deadlines come fast. Focus on techniques that give large visual impact with modest learning curves.
- Elastic stringing: perfect for stacking bracelets. Use 0.7–1 mm elastic; pre-stretch it; tie a surgeon’s knot; add a drop of flexible cement; hide the knot inside a bead.
- Crimping and beading wire: for durable necklaces. Use wire guardians to reduce friction at the clasp. Flatten crimps with the proper cavity for a professional finish.
- Macramé: square knots and half-hitches create surprisingly sturdy chokers and body chains. Waxed cord holds tension and resists sweat.
- Basic wire-wrapping: frame a crystal or shell with right-angle bends and spirals. Practice on craft wire before switching to copper, brass, or silver-filled wire.
- Seamless seed beadwork: even-count peyote or simple brick stitch edges transform a focal charm into a miniature tapestry. Use a bead mat to keep rows consistent.
- Polymer clay: featherweight statement earrings or pendants. Condition clay thoroughly, bake at correct temperature, and sand edges for comfort.
- Cold connections: rivets and micro screws let you combine leather, acrylic, and metal without heat.
- UV and epoxy resin: embed glitter, dried flowers, or tiny festival mementos. Work dust-free, use gloves, and fully cure before wear.
Project gallery: step-by-step builds
Glow stack elastic bracelets
These quick stacks add color you can swap throughout the day.
- Materials: 0.8 mm clear elastic; mix of 6–8 mm beads; 2–3 accent beads per bracelet; bead stopper; clear nail polish or flexible cement.
- Step 1: Measure your wrist and add 1.5–2 cm for ease. Cut elastic with extra length.
- Step 2: Pre-stretch the elastic gently, then string beads, interspersing accents for rhythm.
- Step 3: Test fit. Tie a surgeon’s knot, tighten slowly while pulling both tails evenly.
- Step 4: Add a drop of cement to the knot. After curing, trim tails and slide the knot into a bead.
- Style tip: Mix matte wood with neon glass for daytime depth and nighttime pop.
Wire-framed crystal pendant
A minimalist frame showcases a raw quartz or tumbled stone without drilling.
- Materials: 20–22 gauge wire; 26 gauge for binding; the stone; round-, chain-, flat-nose pliers; flush cutters; small file.
- Step 1: Wrap two tight turns of base wire around the stone’s widest point. Cross ends and twist once to lock.
- Step 2: Create two or three support bands to keep the stone from slipping. Bind intersections with fine wire.
- Step 3: Form a neat bail by turning both ends around a round-nose plier and wrapping the neck with the tail.
- Step 4: File any cut ends smooth. Hang on a braided cord or slim chain.
- Durability tip: If the stone is slippery, add a discreet dot of flexible cement under a support band.
Chain fringe ear threaders
Lightweight, dance-friendly earrings that shimmer without tugging.
- Materials: fine cable chain; 24–26 gauge ear threaders or handmade threaders; tiny jump rings; optional micro charms.
- Step 1: Cut 3–5 lengths of chain per earring, staggered from 2 to 6 cm.
- Step 2: Add a micro charm to one or two chains for asymmetry.
- Step 3: Connect chains to the threader’s end ring with tiny jump rings. Close rings fully.
- Step 4: Test drape; adjust lengths to avoid brushing shoulders.
- Comfort tip: Add silicone stoppers at the back to hold the threaders in place during big drops.
Macramé festival choker with sliding closure
Soft, breathable, and easy to adjust between sets.
- Materials: waxed polyester cord; 6–8 mm accent beads; lighter; ruler; clipboard or safety pin for anchoring.
- Step 1: Cut two working cords and one holding cord. Fold and anchor with lark’s head knots.
- Step 2: Tie square knots across the holding cord, setting beads at intervals.
- Step 3: Finish ends with a sliding closure: overlap tails and tie 4–6 square knots around both cords.
- Step 4: Carefully melt cord tips with a lighter and press flat to secure.
- Field tip: Tuck a bandana under the cord to absorb sweat and keep the choker fresh longer.
Resin confetti tag with UV pop
A see-through pendant that traps glitter, tiny text snippets, or pressed petals.
- Materials: silicone mold or bezel; UV-curing liquid; micro glitter; printed micro symbols; toothpick; UV lamp or sunlight; bail or jump ring.
- Step 1: Pour a thin layer into the mold. Partially cure until tacky.
- Step 2: Arrange inclusions with a toothpick. Avoid overfilling for clarity.
- Step 3: Top with another layer, remove bubbles, and cure fully on both sides.
- Step 4: Sand edges lightly if needed and attach a bail.
- Safety tip: Wear gloves, work ventilated, and cure completely before skin contact.
Safety pin charm brooch
A punk-classic fixer-upper that doubles as a micro tool.
- Materials: large coil-less safety pin; assorted charms; jump rings; a short chain length; optional letter tags.
- Step 1: Add chain and charms to the pin body with jump rings, balancing left and right.
- Step 2: Keep one ring empty for quick emergency use—attaching a torn strap or holding a wristband.
- Step 3: Round off any sharp charm corners with a small file.
- Placement tip: Pin to sturdy fabric or bags, not delicate mesh.
Convertible body chain harness
One piece that morphs from harness to long necklace to belt.
- Materials: lightweight aluminum chain; lobster clasps; 4–6 jump rings; extender chain; center ring or small O-ring.
- Step 1: Build a Y-shaped necklace with a center ring. Add clasps at strategic points so segments can detach.
- Step 2: Attach side chains that clip to belt loops or a bra strap for harness mode.
- Step 3: Include an extender at the back for layering over jackets at night.
- Field test: Dance, twist, and sit. Adjust so nothing bites when you breathe deep.
Eco-minded making and re-use
Festival jewelry can honor the land and still look fierce. Start with what you already own: broken necklaces become charm clusters; lone earrings become pendants; thrifted belts become bracelets. A cool ethos is to treat your kit like a traveler’s pantry—small, versatile elements that remix endlessly. This mindset feeds both creativity and sustainability.
Lean into upcycling by harvesting hardware from discarded bags, camera straps, or tent gear—D-rings and sliders are made for punk-luxe chokers. Repurpose past festival wristbands as connectors or bracelet cores. Choose recycled metals when possible, plant-dyed cords, and wood from certified sources. Avoid one-wear gimmicks; instead, make a core set you can refresh each season with a new focal charm or color accent. If you sell or gift your pieces, share the origin story of your materials; people love jewelry with a past life.
Comfort, testing, and all-weather resilience
From noon heat to midnight mist, festival conditions test every component. Build for durability by doubling jump rings on high-stress points and choosing thicker gauges where needed. Always close rings to a true circle; even a subtle gap invites failure. For stringing projects, add a crimp cover to shield the wire and make neckline contact smooth. Keep earrings under a comfortable weight threshold—many find 5–7 grams per ear the sweet spot for all-day wear.
Moisture and dust call for smart finishes. Seal porous beads with water-based varnish, and prefer non-tarnish metals or protective lacquers. Swap cotton cords, which stay damp, for waxed polyester or leather that dries quickly. In windy venues, test fringe lengths so they do not lash your neck. For long hair, ensure findings do not snag by running them across a silk ribbon; if it catches, file again.
Field test your pieces at home. Jump, nod, twirl, and simulate crowd bumping. If anything pops open, redesign the weak link now rather than hunting for a charm in a field at 2 a.m.
Style play: building looks that evolve across the day
Plan jewelry like a set list. Start minimal in the morning: a slim choker, a single pendant, and a bracelet stack. Add drama at dusk with ear cuffs, chain fringe, and a body chain. Cap the night with glow accents and mirrored pieces that scatter stage light.
- Layering formula: 1 bold focal + 2 supporting textures + 1 movement element (fringe or tassel).
- Balance: if the neckline is busy, keep wrists simple. If hair is up high, go statement earrings; if down, go statement necklace.
- Color mapping: echo one hue from your outfit in three jewelry points—ear, neck, wrist—for cohesion.
- No-pierce options: ear cuffs, ear climbers that hook, and adhesive-backed gems for quick sparkle.
- Hat and headphone friendly: keep ear pieces low-profile if you plan to wear over-ear cans or wide-brim hats.
Festival repair and survival kit
Pack a micro repair kit that fits a palm-sized pouch. It keeps the party going when a clasp fails minutes before a set.
- Mini plier trio and flush cutters.
- Assorted jump rings, crimps, spare lobster clasps, and earring backs (butterfly and silicone disc).
- Short lengths of chain and cord, 0.8 mm elastic, and a few crimps with covers.
- Clear nail polish, small tube of flexible adhesive, and alcohol wipes for quick prep.
- Safety pins, tiny sewing kit, and a few zip ties for bag and outfit emergencies.
- Anti-tarnish paper squares and a microfiber cloth to freshen shine.
Practice two-minute fixes: replacing a jump ring without losing a charm, converting a broken pendant into a pocket charm on a lanyard, or tying a surgeon’s knot that holds until you get home.
Ethics, inspiration, and cultural respect
Festivals cross cultures; your jewelry can, too—respectfully. Draw inspiration from geometry, nature, and music itself: waveforms as pendants, BPM patterns translated into bead sequences, or maps of the venue traced in chain. When referencing living traditions, study with care, credit artisans, and avoid sacred motifs that are not yours to wear. Better yet, collaborate with makers from those communities and buy components from them, sustaining craft lineages.
Budgeting and batching for a full weekend
Build capsules the way performers plan outfits—shared elements with nightly variations. Batch similar steps: crimp a dozen wires at once, cut all chain segments together, and condition all clay before shaping. Working in batches reduces time and scrap. Keep a simple spreadsheet or notebook: track bead sizes, wire gauges, and lengths that fit you well; note what survived best. This turns experience into a reusable library for next season.
Aftercare: clean, store, and evolve
When the lights go down and the dust settles, give your pieces a spa day. Wipe metal with a microfiber cloth and a mild soap rinse if needed; dry thoroughly. For cords, dab with diluted gentle detergent and air-dry flat. Refresh elastic stacks by testing knots and re-sealing if you see fray. Store items separated: anti-tarnish pouches for silver and brass, small zip bags for seed bead pieces, and rigid boxes for delicate shapes. Rotate components into new builds—last night’s pendant becomes tomorrow’s bag charm—so your collection stays living and lean.
Creative prompts to spark your next set
- Sound sketch: draw a favorite drop as jagged lines and translate it into staggered bar charms.
- Map memory: mark three festival landmarks as charms (main stage, water refill, meeting tree) and string them in walking order.
- Lyric code: pick a line, convert letters to numbers, and count beads accordingly for a secret-message bracelet.
- Sundial palette: build a gradient set from dawn pink to midnight indigo; add one chrome accent to catch lasers.
- Texture jam: combine three textures you rarely pair—leather, mirrored acrylic, and satin cord—into a single balanced piece.
From maker bench to festival field
DIY festival jewelry is a conversation between design and real life. When your necklace lies flat under a backpack strap, when your ear threaders wink under strobes without slipping, when your harness converts to a belt for an unplanned after-party—those small victories prove that making is a practice, not a single event. You learn, adapt, and refine. Bring your kit, share your skills, and trade pieces with new friends. The dancefloor will test your work and also reward it, turning raw materials into stories that you can clasp, tie, and loop around your days until the next season calls.
