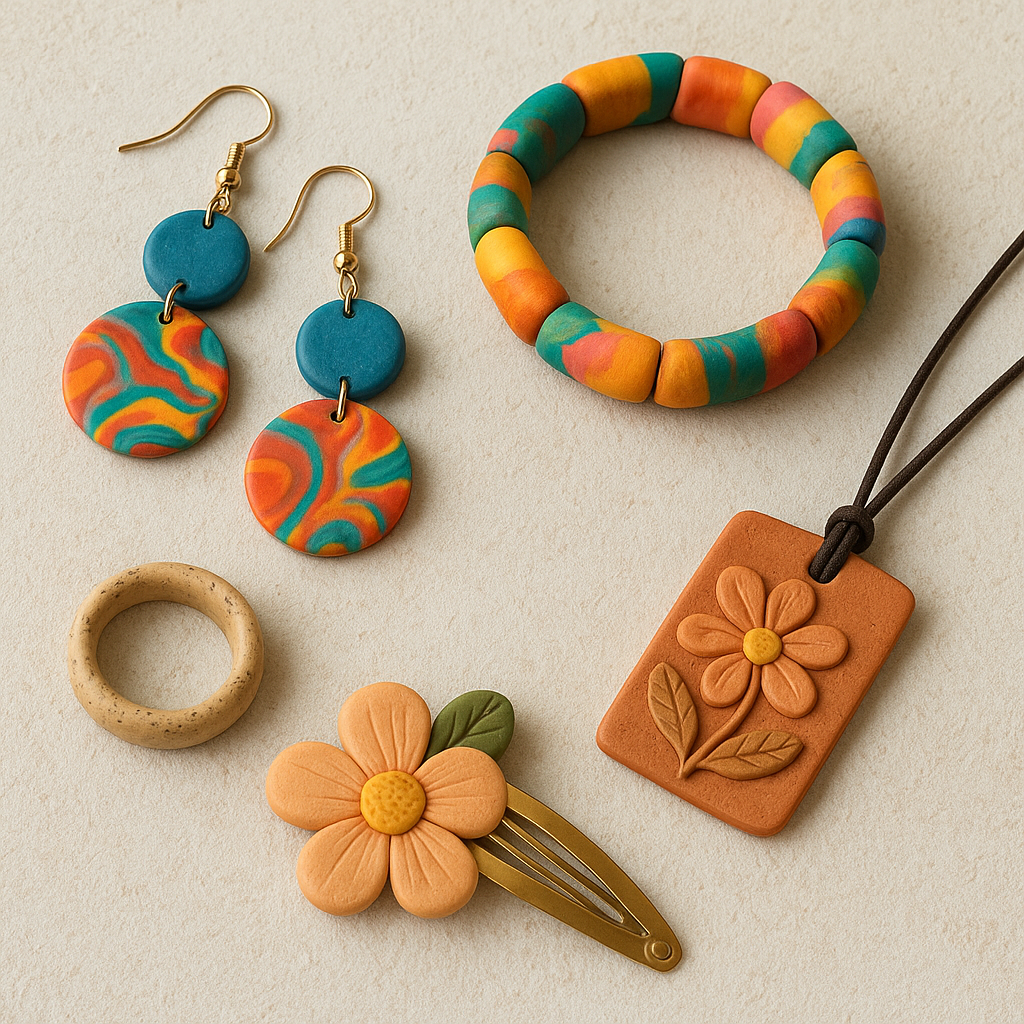
Few materials in the craft studio are as playful, portable, and persuasive as polymer clay. With a bar the size of your palm and a handful of simple tools, you can sculpt jewelry that looks like ceramic, metal, stone, glass, or even fabric, all without a kiln. Because it bakes at home-oven temperatures and comes in a spectrum of hues, this medium invites both beginners and seasoned makers to explore form, surface, and function. The possibilities reach far beyond flat studs and basic beads; think wearable mosaics, faux gemstones, layered textures, and mixed-media hybrids that make a signature statement on the body.
Why This Material Loves to Be Worn
Polymer clay thrives in the domain of accessories for several reasons. First, it is inherently lightweight, so dramatic, sculptural earrings or oversized pendants stay comfortable for all-day wear. Second, it accepts surface treatments—powders, foils, inks, paints, and resins—without the specialized firing schedules of ceramics. Third, the color range is vast and blendable, enabling precise palettes that match seasonal collections or brand stories. Finally, it cures into a tough, slightly flexible plastic that resists shattering, which makes it perfect for items that experience movement and occasional impact.
The medium also excels at imitation. With a few technique shifts, you can create the sparkle of opal, the swirls of marble, the grain of wood, or the crackle of raku. Careful selection of translucent clays, metallic mica, and surface glazes gives optical depth that fools the eye. And because clay is workable in stages—raw, partially cured, fully cured—you can build complex wearable structures that combine mechanical joins, embedded hardware, and post-bake embellishments.
From a maker’s perspective, the learning curve encourages play. A single slab might produce earrings, a ring topper, a barrette, a scarf slide, and buttons that together read like a capsule collection. The same sheet of decorated clay can be repurposed into pendants and key fobs if shapes shift during design. Mistakes translate into new designs: trimmed scraps become terrazzo chips, marbled canes, or micro-mosaics; the offcuts are a palette waiting to be remixed.
Foundations: Materials, Tools, and Studio Habits That Pay Off
Clay types and color strategy
Different brands and lines vary in firmness, flexibility, and brightness. Softer formulations condition quickly and blend smoothly—excellent for color work and marbling. Firmer clays hold crisp edges and fine details, ideal for canes, carving, and structural elements like ring shanks or hinged components. Keep both on hand and mix them to taste. Build a color library using primaries, a warm and cool version of each, plus white, black, and a translucent. With that set, you can mix nearly any shade and maintain brand consistency in your collections.
Plan palette with swatch tiles. Mix in 10% increments to map tints and shades. Create gradient “Skinner blends” to produce subtle ombré effects and to feed into cane building. Metallic and pearl clays amplify light; translucent varieties add depth when layered. Alcohol inks, pan pastels, and powdered pigments expand options, but always test a small sample to ensure compatibility and avoid sticky surfaces.
Tool kit essentials
A pasta machine (manual or motorized) standardizes sheet thickness and speeds up blending. Tissue blades—straight and wavy—slice clean lines. Needle tools, dotting tools, silicone shapers, and a set of small cutters cover most shapes. Texture plates, fabric scraps, and sandpaper serve as pattern sources. For finishing, keep wet/dry sandpapers from 400 to 3000 grit, micro-mesh pads, and a soft buffing wheel. Jewelry pliers, jump rings, eye pins, and a drill or hand reamer handle assembly. A dedicated oven thermometer is nonnegotiable; dial in accurate heat for consistent results.
Preparation and conditioning
Knead or roll clay until pliable and uniform, eliminating streaks. For crumbly clay, add a drop of clay softener or mineral oil and fold repeatedly. For clay that is too soft, leach it between sheets of copy paper to draw out plasticizer, which yields cleaner cuts for canes and sharper veneers. Work on a smooth, non-porous surface—glass, tile, or acrylic. Avoid raw wood, which may wick plasticizer unevenly.
Safe and smart curing
Most clays cure between 110–135°C (230–275°F); follow brand guidance and measure with an independent oven thermometer. Bake for at least the recommended minutes per 6 mm (¼ in) of thickness; underbaked pieces can be weak. A tile “sandwich” or foil tent reduces scorching and evens heat. If you smell burning or see dark smoke, the temperature is too high—ventilate and discard the piece. Reserve baking trays and tools for craft use only. While cured clay is non-toxic, it is not food-safe; keep it away from kitchen prep items and never bake on surfaces used for food.
Finishing, sealing, and storage
After curing, refine edges by wet-sanding under water to reduce dust and prevent heat. Progress through grits for a satin finish, then buff for gloss. Varnishes should be compatible with PVC; test first to avoid tackiness. UV resin provides a hard, glassy dome on pendants and earrings but adds weight—use sparingly on large designs. Store raw clay in airtight containers away from heat and sunlight. Wipe tools with baby wipes or alcohol between colors to avoid contamination, especially when working with whites and translucent clays.
Creative Techniques That Elevate Handmade Accessories
Marbling, terrazzo, and painterly slabs
Marbling starts with twisted ropes of related colors. Fold and compress gently, then slice to reveal fluid patterns. Limit passes to keep lines distinct; too much manipulation yields a uniform blend. For terrazzo, chop cured or raw clay scraps into small flecks. Scatter on a base slab, roll lightly, and sand after baking to expose crisp chips. For painterly effects, smear alcohol inks on white or translucent clay, spritz with isopropyl alcohol to bloom, then seal with a thin layer of liquid clay before baking.
Mokume gane and mica shift
Stack alternating sheets of metallic, pearl, or tinted clays, compress, and impress with texture tools or stamps. Shave thin slices from the surface to reveal topographical patterns—this is mokume gane for polymer. If using metallic clay, you can perform a mica shift: impress texture, then plane the surface flush with a blade, creating ghost images that seem embedded. Buffing afterward amplifies the shimmer for luxe earrings and pendant plates.
Caning for repeat motifs
Build a log of patterned clay—flowers, geometric tessellations, or animal prints—then reduce the cane by compressing and stretching. Slices yield consistent motifs for studs, hoops, bead covers, and mosaic tiles. Store canes wrapped to prevent drying, and seal ends with scrap clay to limit distortion. Use canes to create borders on bangles or to frame a focal stone in a brooch.
Faux stones and glass
Turquoise: mix blue-green with tiny inclusions of brown and black, then crackle with gentle stretches and fill fissures with dark-tinted liquid clay. Jade: tint translucent clay with green and a whisper of yellow, then embed tiny white wisps for cloudy depth. Opal: suspend iridescent flakes or chopped cellophane in translucent clay and back with white. After curing, dome with UV resin to magnify depth and light play.
Silk screens, stencils, and sgraffito
Silk-screen acrylic paint over raw clay slabs for crisp repeat patterns; cure to set the paint before slicing shapes. With stencils, apply soft pastels or mica powders for subtle tonal fields; burnish lightly to fix. For sgraffito, layer contrasting clays, apply a thin wash of diluted acrylic, then scratch designs to expose the color beneath—ideal for brooches and pendants with illustrative flair.
Surface foils and crackle
Metal leaf adheres to raw clay with static; burnish and then stretch gently to produce organic crackle. Cover with translucent clay for a stained-glass effect, or slice thin veneers to laminate onto ring blanks. Variegated leaf offers multicolor sparkle without additional pigments.
Liquid polymer clay and inlays
Liquid clay acts as a cold enamel: fill carved recesses or bezels, add pigments, and bake to a level, glossy finish. Layer colors between bakes to create depth or to lock in delicate inclusions like metal flakes and micro-glitter. For earrings, inlay lines into a base sheet, then sand flush post-cure for a professional surface.
Designing Accessory Types: From Ear To Hair
Earrings that balance weight and drama
For flat dangles, aim for 2–3 mm thickness in the main slab. Reinforce holes with a small ring of clay or by using metal eyelets post-bake to reduce tearing. Connect components with jump rings sized to allow swing without catching; 6–8 mm rings suit most medium dangles. For studs, roughen the back of the baked clay and the metal pad with 220–400 grit, then bond with two-part epoxy or UV resin. Many makers also embed raw clay around the post and pre-bake, then add adhesive after curing for belt-and-suspenders security.
Ear wires and posts should be nickel-free; stainless steel, titanium, or niobium minimize reactions. Keep large earrings under 8 grams per ear where possible. Counterbalance long drops with a lightweight top element to distribute pull. Consider mirrored pairs for symmetry when using patterned slabs.
Pendants and necklaces
Large pendants benefit from internal armatures: embed a hidden wire frame to keep shapes stable. Use bezels—commercial or handmade clay frames—to set faux stones or inlays. For corded necklaces, design a hidden bail on the reverse to preserve a clean silhouette. To achieve a glassy finish without resin, sand to 3000 grit and buff; metallic and pearl clays reward this effort with a deep, tactile sheen.
Rings, cuffs, and bangles
For rings, laminate layers for strength and comfort. A cured inner ring blank provides stability; wrap with a decorative veneer and bevel the inside for fit. For cuffs and bangles, bake on a curved form like a can or metal bracelet mandrel covered in parchment. Reinforce stress points with fiber mesh or thin wire embedded in raw clay, especially for open cuff ends. Sand inside edges silky smooth; the wearer’s skin will thank you.
Brooches and pins
Brooches are canvases for relief sculpture, inlay, and micro-mosaics. Choose pin backs proportionate to the piece’s width to prevent spinning. Carve channels to recess the pin back into the clay before curing, then secure with gel super glue or epoxy after baking. Consider magnets as alternatives on delicate fabrics; embed one magnet in the brooch and pair with a second magnet worn inside the garment.
Hair accessories and beyond
Barrettes, hair forks, and combs benefit from a sturdy base. Attach veneers to a metal barrette blank or a wood comb with epoxy; clamp while curing. Keep surfaces smooth to avoid snagging hair. Elsewhere, tie clips, cufflinks, bag charms, zipper pulls, scarf rings, and shoe clips all translate well in polymer. For wearable technology accents, decorate case bezels or locket-style charm carriers rather than coating electronics directly.
Structural Integrity: Hardware, Joins, and Wearability
Mechanical joins outlast adhesives. Where possible, embed eye pins or wire loops in raw clay, anchor them with liquid clay, and cure. For post-bake assembly, drill clean holes and use double jump rings to prevent loss. Roughen bonding surfaces to create “tooth,” and use high-strength two-part epoxy for metal-to-clay joins. Avoid hot glue: it becomes brittle and fails with body heat.
Edge management is a subtle hallmark of expert work. Slightly round every wearable edge; sharp corners catch on fabric and skin. Keep surfaces near the neck or hair matte or satin to decrease friction. For bracelets, test flex after baking; if you hear micro-cracking, the piece may be under-cured or too thin in stress zones—revise the thickness or cure longer at the correct temperature.
Consider the wearer’s skin. Choose hypoallergenic findings and avoid coatings known to remain tacky. If using fragrances in packaging, keep finished accessories sealed to prevent scent oils from interacting with finishes. Include care cards advising wearers to avoid prolonged exposure to sunscreen, insect repellent, and harsh solvents, which can dull glazes and resins.
Surface Mastery: Finishes, Sheens, and Special Effects
Sanding and buffing create a spectrum from velvety matte to piano-gloss. Wet-sand in progressive grits; rinse often to prevent grit contamination. A muslin wheel and a touch of plastic polish yield a brilliant shine without varnish, especially on metallic clays. For matte lovers, a fine abrasive pad or micro-crystalline wax achieves a tactile finish that resists fingerprints.
UV resin domes accentuate depth on faux stone and inked slabs. Always seal alcohol inks on clay with a compatible barrier (thin liquid clay layer or specialized sealer) before doming; raw inks can repel resin. Pop micro-bubbles with brief heat from a torch or heat gun, keeping distance to avoid scorching. Cure under a clean dust cover to prevent imperfections.
Seal structural patterns with thin layers. Heavy gloss can look “plasticky” on big surfaces; reserve it for focal elements. Combine finishes—matte backplates with glossy cabochons—to add sophistication through contrast.
Patterns With Purpose: Designing for Comfort and Story
Great accessories consider silhouette, movement, and narrative. Think in families: create a hero piece (statement necklace), supporting players (earrings, ring), and small accents (charms, hairpins) that share a motif. Repeat a cane slice or a screen-printed motif across items to connect the set. Map movement: where will pieces sway, twist, or rub? Place texture where it catches light but won’t abrade the skin.
On color, pull from fashion trend reports or your local environment. A year-round palette anchored by neutrals, a seasonal accent, and a surprise pop keeps collections fresh but cohesive. Tell stories: a pendant inspired by tide pools, a brooch reminiscent of moss on stone, earrings that echo city mosaics. Customers connect to narrative as much as to hue or shine.
Working Clean: Studio Practices That Boost Quality
Dust and lint are the bane of smooth surfaces. Keep a lint roller at the bench; roll over slabs before cutting shapes. Wear an apron to minimize fiber transfer. Warm hands can over-soften clay; if so, rest the slab on a cool tile or pop it in the refrigerator for a few minutes to firm up before cutting. Clean blades frequently; a buildup of residue drags and distorts lines.
Calibrate your oven quarterly. Place multiple thermometers in different zones and run a test bake with sacrificial tiles. Record which shelf produces the most even results and bake production items there. If edges tend to darken, reduce temperature slightly and extend time; polymer prefers slow, thorough cures to short, hot blasts.
Eco-Minded Making: Scraps, Systems, and Lifecycle
Scraps are design gold. Sort by color family and store in labeled tins. Immediate uses include terrazzo, marbling feeds, and bead cores. Chop cured offcuts into “aggregate” for stone effects. Build a habit: before mixing a fresh color, check if your scrap library already has a near match. This reduces waste and sparks serendipitous palettes.
Packaging can echo the material’s tactility. Mount earrings on recycled card printed with a small swatch of the collection’s motif. Offer repair or refresh services—replacing a lost stud or re-dome a scratched pendant—to extend product life and earn loyalty. Include a care card that explains cleaning with mild soap, storing away from sharp metal edges, and avoiding extreme heat.
From Hobby to Micro-Brand: Production and Presentation
Batch your workflow. Condition all clay at once, produce slabs by technique family, then cut shapes in a single session. Cure in scheduled cycles, assemble hardware in the next block, and finish with sanding and buffing. This reduces context switching and ensures consistency across pairs and sets.
Photography matters for online sales. Shoot on neutral backgrounds with soft side light to show surface texture. Include scale references—a hand, a ruler, or a coin—so buyers understand size and thickness. For earrings, show front, back, and profile; the back finish communicates quality. In descriptions, note weight per piece and materials, including metal types for sensitive customers.
Pricing reflects time and technique, not just materials. Account for design, test pieces, sanding, finishing, packaging, and customer service. Limited-edition canes or complex mokume slabs justify higher tiers. Offer made-to-order colorways where practical, but maintain clear lead times.
Troubleshooting: Common Pitfalls and Smart Fixes
- Cracks after baking: Often under-curing or too-thin sections near stress points. Cure longer at verified temperature and add subtle bevels where two planes meet.
- Cloudy resin domes: Unsealed alcohol inks or humidity during curing. Seal inks, dehumidify the space, and warm the piece slightly before doming.
- Adhesive failures on studs: Insufficient surface tooth or wrong glue. Roughen both surfaces, degrease with alcohol, and use epoxy; consider mechanical keys (tiny trenches) in the clay.
- Lint in light colors: Clean hands, tools, and roller. Keep a dedicated set of tools for white and translucent clay to avoid pigment transfer.
- Burnt edges: Oven hot spots or direct radiant heat. Use a ceramic tile sandwich and a cardstock buffer; move the rack away from the heating element.
Exploring Depth: Layers, Light, and translucency
Layering translucent sheets over textured or foiled bases produces depth akin to glass enamel. Vary thickness to play with light transmission; thinner layers glow, thicker ones veil. Build shadow by layering desaturated colors on lower strata and pop highlights near the surface. Jewelry that shifts under daylight and indoor light feels alive on the wearer, drawing compliments without shouting.
Try “window” pendants: cut apertures in colored clay and backfill with translucent tinted liquid clay. Bake, sand the window edges silky smooth, and dome on both sides for a jewel-like lens. Pair with minimal metal findings to let light be the star.
Comfort, Ethics, and Longevity
Test wear your prototypes. Walk, dance, and sit with them. Note any edges that rub or components that tangle. Round inner ring edges and polish contact points. Choose responsibly sourced metals and disclose materials fully. Avoid designs that mimic cultural artifacts without context; instead, collaborate or credit traditions respectfully.
Clean finished pieces gently: mild soap and a soft cloth. Avoid acetone or harsh cleaners, which can haze polymer surfaces. If a surface dulls over time, a fresh buff or thin wax coat can restore luster. With thoughtful care and mindful design, polymer accessories can remain favorites for years, standing up to everyday life while retaining their handmade soul.
The Maker’s Edge: Confidence Through Process
Ultimately, the secret ingredient in show-stopping polymer accessories is a consistent process. Keep a notebook of oven settings, clay mixes, and finish stacks. Label canes and slabs with dates and recipes. Photograph your benches at the end of technique sessions to remember tool setups. This discipline fuels repeatability—critical for made-to-order items—while leaving space for play.
Lean into the medium’s versatility. Let a single motif travel through a collection—etched circles become ring faces, pendant medallions, brooch centers, and hairpin toppers—shifting scale and finish so each piece feels fresh. Combine a handful of hallmark techniques—mokume layers, mica shift gleam, or translucent veils—to create a recognizable signature. When the craft is grounded in sound technique and patient finishing, the result is not just cute earrings or a pretty pendant; it is wearable craftsmanship that tells its story every time it is worn.
Quick Reference: Best Practices You’ll Actually Use
- Use a real oven thermometer; trust it over dials or digital readouts.
- Edge everything. A 1 mm bevel feels better than a razor straight edge.
- Embed hardware where possible; reinforce with adhesive post-bake.
- Sand wet, in stages; finish with buffing for depth without varnish.
- Test finishes on scraps; some sealers remain tacky on PVC.
- Respect the wearer: choose skin-friendly metals and smooth contact surfaces.
- Document clay mixes and bake schedules; consistency builds brand trust.
Closing Thoughts
Handmade accessories succeed when they harmonize material, technique, and comfort. Polymer clay delivers a rare combination of expressive color, tactile delight, and practical strength. Whether you’re sculpting a sculptural cuff, building a micro-mosaic brooch, or refining your perfect everyday hoops, the medium rewards curiosity and care. Use it to compose textures that catch light at the jawline, hues that echo a favorite coat, or patterns that carry personal meaning. In the studio, keep exploring. On the body, let your work move, sway, and make itself known—proof that small objects can hold big stories, crafted one intentional layer at a time.
Key terms worth remembering: polymer clay, durability, caning, curing, translucency, hypoallergenic, conditioning, versatility, mica shift, craftsmanship.