Bridal jewelry can set the tone for an entire celebration, linking a gown’s silhouette with the story of a couple’s journey. When you craft those pieces yourself, you don’t just create accessories—you make keepsakes that carry touch, intention, and time. This guide offers design wisdom, material insight, and step-by-step projects so you can build polished, wedding-ready adornments for the bride, attendants, and even the groom. From delicate pearl knotting to airy hair vines and Art Deco–inspired bracelets, every technique is approachable and adaptable, letting you craft pieces that look boutique-made and feel deeply personal.
The Foundations of DIY Bridal Jewelry
Before the first bead is threaded, establish a clear vision. Consider the wedding’s atmosphere—garden, modern minimalist, vintage ballroom—and the exact shades in the palette. Look at the dress’s neckline, fabric sheen, and level of embellishment. These details guide choices in scale, color, and the orchestration of sparkle versus luster. Aim for intentional balance: if the gown is ornate, select simpler jewelry that frames rather than competes; if the gown is sleek, you can introduce more detailed elements for visual interest.
Quality materials elevate the result. Choose hypoallergenic metals and glass or crystal over acrylic when possible. Crystals deliver prismatic brilliance; pearls provide a soft glow; cut stones add sophistication. Pay attention to finish—satin, high polish, matte—because finish affects both light play and how the jewelry photographs.
- Metals: Sterling silver, gold-filled, rose gold-filled, or non-tarnish brass and bronze. Avoid mystery alloys if sensitive skin is a concern.
- Pearls: Freshwater pearls are versatile and budget-friendly; choose round, near-round, or artistic baroque shapes depending on the vibe.
- Crystals and stones: Clear and champagne hues are timeless; pale blush, powder blue, or sage complement many palettes. Always assess weight for comfort.
- Threads and cords: Silk for pearl knotting, nylon for crystal stringing, and waxed linen or fine leather for rustic accents.
- Findings: Choose matching metal tones for clasps, jump rings, ear wires, and crimp covers. Opt for closed jump rings in high-stress points.
Tools determine how professional your work will look. Essential items include chain-nose pliers, round-nose pliers, flush cutters, crimping pliers, a bead reamer, calipers for measurement, and knotting tweezers or a knotting tool. A simple bead board helps organize patterns and maintain accurate lengths. To keep your bench tidy, use small trays and labeled containers; organization prevents mixing metals and losing tiny components in the flurry of wedding prep.
Finally, adopt a mindset of refined craftsmanship. Test techniques on scrap wire, sample beads, or inexpensive components before starting on final materials. A slow, iterative approach—layout, test, refine—avoids last-minute stress and leads to polished work worthy of the aisle.
Planning and Inspiration: From Moodboards to Mockups
Gather inspiration by collecting fabric swatches, dress photos, and color chips. Build a small moodboard showing textures—tulle, lace, satin—and any motifs like leaves, vines, or geometric lines. Develop your jewelry plan around three pillars:
- Palette: Classic ivory and silver; gold with champagne; or a romantic mix of blush, cream, and soft green. Add a personal “something blue” as a hidden bead near the clasp.
- Proportion: Balance large focal pieces with subtle supporting elements—studs or simple drops for attendants; a more distinctive piece for the bride.
- Harmony: Echo a single motif throughout: a marquise “leaf” stone in both the hair piece and the earrings; a repeated hexagon pattern in bracelet links.
Create paper or digital mockups for combinations of necklace lengths, earring drop lengths, and headpiece curves. Photograph each mockup against the dress or a similar color to evaluate reflectivity and silhouette. Leave space for last-minute changes, and consider the venue’s lighting; daytime garden light enhances pearls, while evening receptions amplify crystal sparkle.
Techniques for a Professional Finish
Technique choices shape durability and aesthetic. If you’re new, master a few foundational methods and build complexity as confidence grows.
Wire Basics and Cold Connections
Work with 18–24 gauge wire for most bridal applications. Use 20–22 gauge for ear wires and structural frames; 24–26 for wrapping delicate components. Practice clean loops and consistent wraps to avoid sharp edges. This is the heart of elegant wirework, where neat transitions and aligned coils create boutique-quality results without soldering. Cold connections—jump rings, wraps, and rivets—allow assembly without heat, keeping projects accessible at home.
Stringing and Pearl Knotting
Silk knotting between pearls prevents abrasion, adds drape, and looks luxuriously traditional. Measure carefully and pre-stretch silk. Use bead tips or French wire (bouillon) at the clasp to protect thread from metal wear. For crystals and faceted stones, nylon or flexible beading wire with proper crimping provides strength; finish with crimp covers to conceal mechanics.
Bead Weaving and Embellishment
Seed bead netting, peyote bezels, and right-angle weave enable lace-like jewelry that pairs beautifully with veils and lace gowns. Practice tension control; too tight curls the work, too loose sags. Adding picot edging gives soft, bridal scallops, while hex-cut beads introduce subtle sparkle.
Finishes, Textures, and Aging
A controlled surface finish can link a modern dress to vintage accents. Matte satin on metal softens glare; hammered textures add artisanal depth; liver-of-sulfur can create a warm patina on silver, making bright stones pop. Always seal and test finishes well before the wedding day to avoid residue.
Elegant Projects You Can Make
Each project below is designed to be adaptable. Swap metals, stones, and shapes to fit your theme and timeline.
1) Classic Knotted Pearl Necklace with Hidden Clasp
A traditional strand that suits many necklines, with a clasp cleverly disguised behind a pearl cap.
- Materials: 16–18 inches of freshwater pearls, silk thread, bead tips or French wire, small lobster or box clasp, two small bead caps, glue (for knot security), and jump rings.
- Tools: Bead board, needle, tweezers, small scissors, chain-nose pliers.
Steps:
- Arrange pearls on the bead board in the desired order, matching size from center outward for balanced drape.
- Pre-stretch silk. Thread the first half of pearls, tying a knot between each. Use a needle or tweezers to position knots snugly against pearls.
- Slide a bead tip and add the clasp, then secure with a reinforced final knot and a tiny dab of glue.
- Thread and knot the second half, mirroring spacing. Finish with the second side of the clasp and a neat crimp of bead tips.
- Hide the clasp behind bead caps placed over the ends to visually minimize hardware.
Customization: Insert a single colored stone near the clasp for a subtle “something blue,” or alternate small crystal rondelles amid pearls for extra sparkle.
2) Crystal and Pearl Drop Earrings
Lightweight drops that photograph beautifully and complement veils.
- Materials: Two pear-shaped crystals, two small pearls, four headpins, ear wires, small jump rings.
- Tools: Round-nose pliers, chain-nose pliers, flush cutters.
Steps:
- Wire-wrap the crystals onto headpins to form neat top loops.
- Repeat with pearls to create petite accent drops.
- Attach pearl drops to jump rings, then connect crystals below so the assembly swings freely.
- Finish with ear wires. Ensure both earrings hang symmetrically.
Tip: Keep drops under 40 mm total length for comfortable movement and to avoid catching on lace.
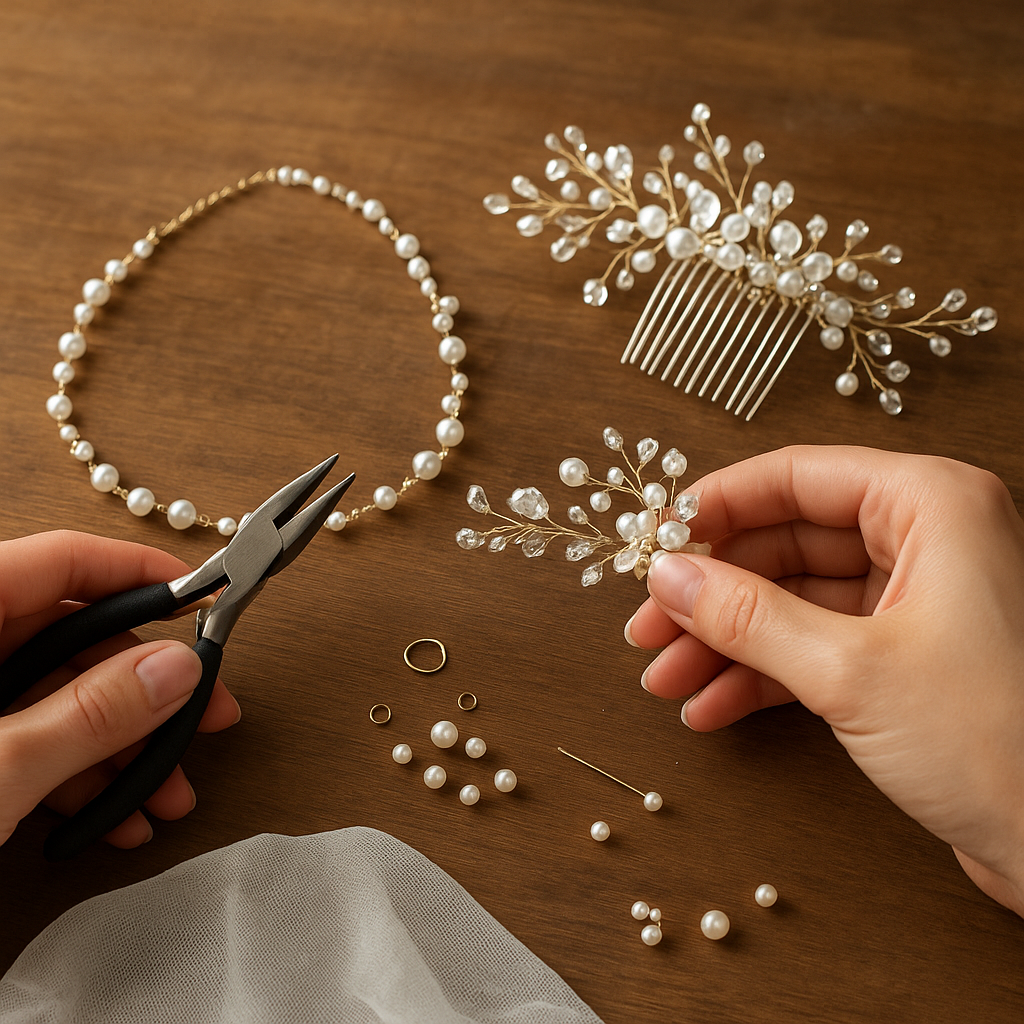
3) Botanical Hair Vine with Marquise “Leaves”
This flexible piece curves around buns, braids, or veils and secures with discreet pins.
- Materials: 24–26 gauge wire in the chosen metal tone, marquise crystals, small pearls, hair pins, optional ribbon for tie-ends.
- Tools: Chain-nose pliers, flush cutters, measuring tape.
Steps:
- Cut a 60–80 cm base wire. Create a central cluster by twisting stones and pearls onto short branches.
- Continue adding branches along the base, spacing elements evenly for lifelike rhythm.
- Finish ends with small loops for bobby pins or ribbon ties.
- Gently arc the vine to match the hairstyle. Test against the head form for comfort.
Variation: Add silk flowers or tiny mother-of-pearl leaves for soft romance.
4) Art Deco Bangle with Herringbone Accents
A structured bracelet that nods to vintage glam without requiring soldering.
- Materials: 18–20 gauge base wire, 24 gauge wrapping wire, baguette or rectangular crystals, small round beads, hook clasp or magnetic clasp, jump rings.
- Tools: Mandrel or bottle for shaping, pliers, cutters, nylon jaw pliers.
Steps:
- Shape the base wire around a mandrel, leaving a 1–2 cm gap for a clasp.
- Use wrapping wire to create herringbone cages around baguette crystals, spacing them along the bangle.
- Add round beads between focal elements to smooth transitions.
- File ends smooth and attach the clasp with secure wraps and jump rings.
Ensure edges are smooth and prevent snagging by burnishing any rough points with a nylon tool.
5) Delicate Back Necklace for Low-Back Dresses
A back-drop necklace draws attention to low or open-back gowns in candlelit settings.
- Materials: Fine chain in the chosen metal, a primary front focal (small pendant), a rear drop chain 8–15 cm with a crystal or pearl at the end, lobster clasp, extender chain.
- Tools: Pliers, cutters, small file.
Steps:
- Build the front necklace with the central pendant at the desired length.
- Add a rear drop from the clasp area using a sturdy jump ring.
- Finish with a tiny counterweight bead to ensure graceful drape without flipping.
Pro tip: Add a clear silicone stabilizer near the nape to keep the drop centered during movement.
6) Groom’s Boutonniere Pin with Subtle Spark
This pin complements floral boutonnières and ties groom accessories to the bridal set.
- Materials: Pin back, short lengths of 22–24 gauge wire, small pearls or hematite beads, leaf-shaped charm, tiny ribbon.
- Tools: Pliers, cutters, cyanoacrylate glue.
Steps:
- Wrap beads into a compact cluster using wire, ensuring a flat back.
- Attach the cluster to the pin back with wire and a dab of glue for stability.
- Finish with a minimal ribbon detail that echoes the bouquet.
Keep design masculine and understated; matte metals or brushed finishes work well.
7) Flower Girl Stretch Bracelet with Safety Features
Soft colors, round beads, and secure knotting are essential for little wrists.
- Materials: Soft elastic cord, 6–8 mm round beads, one small heart charm, crimp cover or surgeon’s knot, drop of flexible glue.
- Tools: Bead board, scissors.
Steps:
- String beads, measuring for a comfortable, snug fit that won’t slip off.
- Tie a surgeon’s knot, add a tiny drop of flexible glue, and hide the knot under a crimp cover or inside a larger bead.
- Avoid sharp-edged beads; test by rolling the bracelet across skin.
Personal Meaning and Customization
Jewelry becomes more resonant when it reflects your story. Consider adding family metal or stones to new designs so they can be passed down as an heirloom. Repurpose a single earring from a grandmother into a bridal hair pin, or attach a tiny locket with a meaningful photo near the clasp. Birthstones or seasonally appropriate gemstones layer meaning beyond color alone, and you can etch initials, dates, or vows on tags or inside bangles. Hand-stamping and micro-engraving keep messages subtle and intimate.
Symbolic motifs intertwine design with narrative: laurel leaves for victory and new beginnings; knots for unity; stars for guidance. Consider cultural emblems or regional patterns that honor heritage—Celtic knots, filigree scrolls, or folk florals. When decisions feel overwhelming, return to intentional personalization and symbolism: one motif, one inscription, one accent color repeated with restraint often looks the most cohesive.
Comfort, Safety, and Durability
Comfort drives confidence. Keep weight low in earrings, distribute weight evenly in necklaces, and avoid rough edges near delicate fabrics. Think about ergonomics: ear wires with slightly thicker gauges can be more comfortable; necklace extenders allow micro-adjustments so pendants sit precisely at the hollow of the throat; bracelets should permit two fingers beneath for ease without sliding excessively.
- Allergies and metals: Favor sterling, gold-filled, titanium, or niobium for sensitive ears. Avoid nickel-heavy alloys.
- Security: Use locking earring backs; double secure crimped ends with crimp covers and test tugs; choose magnetic clasps only if strong enough for the weight.
- Hem-safe surfaces: Smooth every metal edge; snagging lace is both heartbreaking and preventable.
Durability checks: Perform a “dress rehearsal.” Wear the jewelry at home for an hour while moving—dance steps, hugs, veil practice. Note any rotation, slipping, or catching and adjust length, weight, or components accordingly.
Sustainable and Budget-Savvy Crafting
Thoughtful sourcing saves money and supports the planet. Vintage necklaces can be harvested for high-quality beads and clasps, and thrifted chains often feature superior links. Embrace sustainability by repairing and reimagining rather than discarding: clean, polish, and replate when needed. When buying new, prefer certified suppliers and traceable stones; consider lab-grown options for consistent color and ethical provenance.
- Budget tip: Spend on focal components—pearls or a signature crystal—and save on filler beads and chain.
- Time economy: Batch tasks—make all ear wires, then all wrapped loops—to speed production without sacrificing neatness.
- Risk management: Buy a little extra wire and findings to cover errors; it prevents emergency store runs in the final week.
Styling Guide: Matching Jewelry to Dresses and Hair
Necklines dictate necklace choices. For sweetheart and strapless dresses, a centered pendant or graduated strand frames the collarbones. V-necks pair beautifully with drop pendants that echo the V. High necklines often shine with no necklace at all; choose statement earrings or a detailed hair piece instead. If your gown features heavy beading, select jewelry with fewer facets to avoid visual overload.
- Veils and hair: If wearing a long veil, keep earrings streamlined so they don’t tangle. Hair vines and combs integrate seamlessly with soft waves and updos; tiaras complement formal upstyles.
- Metal tone: Choose the metal that harmonizes with dress undertones—cool whites with silver or platinum, warm ivories with gold, and pale blush with rose gold.
- Attendant sets: Keep bridesmaid jewelry consistent in metal and motif, but vary length or bead size to suit each person’s features.
Shoes and bouquet details can inspire accents. If your bouquet includes blue thistle or eucalyptus, include a tiny blue or sage bead tucked near a clasp—a hidden thread that links all elements subtly.
Care, Storage, and Day-of Readiness
Proper care ensures longevity. Store pieces individually in soft pouches to prevent scratches. Keep pearls away from hairspray, fragrance, and household cleaners—wipe them with a soft cloth after wearing. For crystals and stones, mild soapy water and a soft brush remove residues; avoid soaking glued settings. Keep silver in anti-tarnish bags or with silica gel packs.
Assemble a day-of kit: spare earring backs, a few jump rings, tiny tube of adhesive, micro cloth, mini pliers, and safety pins. Add clear nail polish for emergency thread fray control, and a small mirror for on-the-fly checks. Assign a dependable friend to carry the kit so the bride can focus on the moment.
Troubleshooting: Common Issues and How to Fix Them
- Cloudy crystals: Clean gently with a soft, damp cloth; avoid alcohol-based cleaners on foiled backs.
- Uneven loops: Mark plier jaws with a fine-line marker to place loops consistently, then wipe off later.
- Loose crimps: Use the correct size crimp for your beading wire; test pull before adding crimp covers.
- Knot spacing: Practice with inexpensive glass pearls until knots land snugly; a knotting tool dramatically improves consistency.
- Chain kinks: Lay chain flat and run it through fingers after warming slightly with breath; replace overly stiff sections.
- Tarnish surprises: Pre-polish and store with anti-tarnish strips; consider a clear micro-wax seal on non-porous metals if humidity is high.
Design Language: Motifs, Color Nuance, and Visual Rhythm
Jewelry speaks through repetition and variation. Choose a primary shape—marquise, teardrop, oval—and repeat in different scales across earrings, necklace, and hair piece. Interleave smooth surfaces with facets to keep the eye moving. Mix lusters: pearls with satin-finished metal for quiet glow; crystals with polished metal for evening brilliance. If your palette includes multiple pastels, anchor them with a neutral metal so the look remains unified.
Color nuance matters in photography. Clear crystals can read cool against ivory; champagne stones often harmonize better. Pale pink pearls may lean peach under warm bulbs; test under both daylight and your venue’s lighting. Small test swatches photographed on fabric are worth their weight in calm nerves.
Advanced Ideas for Experienced Makers
For crafters eager to push further, resin inlay can capture tiny pressed blossoms from the engagement bouquet into pendant bezels. Porcelain or polymer clay petals shaped and gilded at the edges produce ethereal earrings. Tambour beading on tulle inserts adds couture sparkle to necklines or capelets without adding heavy weight. For metal lovers, explore riveted filigree overlays and collar-style structures that remain wearable by segmenting the build for flexibility.
When adding complexity, keep comfort central and test every joint. Balance structural ambition with the realities of a long wedding day—hugging relatives, dancing, and weather variables.
Honoring Heritage and Story
Consider how small design choices can honor family and place. If there’s a regional plant or flower in the ceremony—olive, fern, fern frond—translate it into a repeating leaf or frond motif. If your family has a tradition of blue sashes or embroidered patterns, tuck those designs into bead weaving or metal stamping on a pendant back. A unity motif carried secretly on the reverse of a pendant can be your private compass—visible only to you, yet present in every photograph.
Timelines, Checklists, and Smooth Execution
A realistic timeline keeps joy at the center of making:
- 10–12 weeks out: Gather inspiration, purchase core materials, practice techniques with samples.
- 8–10 weeks: Build and wear test the bride’s primary set. Photograph under different lights; refine lengths and components.
- 6–8 weeks: Make attendants’ jewelry; coordinate packaging and labeling to avoid mix-ups.
- 4–6 weeks: Complete hair pieces and groom accessories; confirm metal tone consistency across all sets.
- 2–3 weeks: Final polish, complete care cards, and prepare the day-of repair kit.
- 1 week: Do a full dress rehearsal with jewelry and hair to catch any last tweaks.
Keep an inventory list with counts for beads, findings, and finished pieces. Photograph each item for reference; it speeds last-minute checks and helps if replacements are needed.
Careful Sourcing and Ethical Choices
When possible, look for conflict-free supply lines and recycled metals. Lab-grown stones offer clarity and consistency at accessible prices. If you’re reusing family pieces, consult a reputable jeweler about reinforcing settings before wearing, particularly for antique clasps and prong-set stones. Document the story—the name of an ancestor, the original event—on a small card to store with the jewelry, transforming materials into living history.
After the Wedding: Rewear, Reimagine, Remember
Design with future wear in mind. Convertible elements—detachable drops from earrings, extender chains for different necklines, and modular hair vines that become necklaces—extend life beyond the wedding day. Consider turning the back-drop pendant into an everyday charm or converting the hair vine into a holiday headband. If you prefer to enshrine the set, store it with a fabric swatch and a photo from the day; these context pieces will matter to the next person who opens the box.
When anniversaries arrive, refresh gently: replace a clasp with one engraved with the date, add a small charm representing a new milestone, or re-string pearls to maintain strength. Through mindful updates, your pieces continue to evolve—physical reminders that love is a craft, too.
Final Notes on Polish and Presence
The best bridal jewelry achieves quiet confidence. It sits correctly, moves gracefully, and holds meaning. A subtle glow at the collarbone, the glint of a marquise in the hair, the whisper of pearls by the ear: these are small luxuries that shape how a day feels. By combining thoughtful design, clean technique, and attention to detail, your pieces will not only look refined, they will carry the intimacy of hands-on making. That intimacy can be felt in every photograph, every embrace, and every memory the jewelry helps you make.