Minimalist rings hold a special place in handicraft: simple enough to make at a small table, refined enough to wear every day, and endlessly adaptable to your style. Whether you’re exploring jewelry for the first time or looking to streamline your process, you can create elegant, durable bands with a modest toolkit and a thoughtful approach. This guide focuses on materials, sizing, step-by-step methods, surface finishes, and practical tips for building a reliable, personal routine. It balances traditional jewelry practices with clever household substitutions, so you can start where you are and grow at your own pace, ring by ring.
Why Minimalist Rings Work: Aesthetics, Wearability, and Craft Mindset
Minimalism in jewelry isn’t about doing less; it’s about doing precisely enough. A well-made simple band does three things at once: it frames the hand, captures light, and offers a quiet, tactile presence that fits with any outfit. Because the forms are restrained—clean edges, consistent proportions, subtle texture—your decisions about metal, shape, and finish stand out. When your design is distilled, every small choice matters: edge rounding, thickness, and finish all become visible markers of your evolving craftsmanship.
Minimalist rings also invite wearability. Slim stacking bands let you combine finishes (polished, brushed, hammered) without visual clutter; a single wide band can work as a signature piece. With everyday wear, rings accumulate micro-scratches that soften into a lived-in sheen. This patina of use can be part of the plan: you can engineer a ring to age gracefully, choosing textures and metals that look better the more you wear them. That philosophy aligns beautifully with handcraft values—make it once, make it well, and let it tell a story over time.
Finally, minimal forms are efficient to produce. By learning a handful of core skills—forming, joining or tension-fitting, refining, and finishing—you can replicate results consistently. That consistency will help you build sets, gifts, or even a small business with lower overhead and faster turnaround.
Materials and Tools: The Essential, the Optional, and the DIY Alternatives
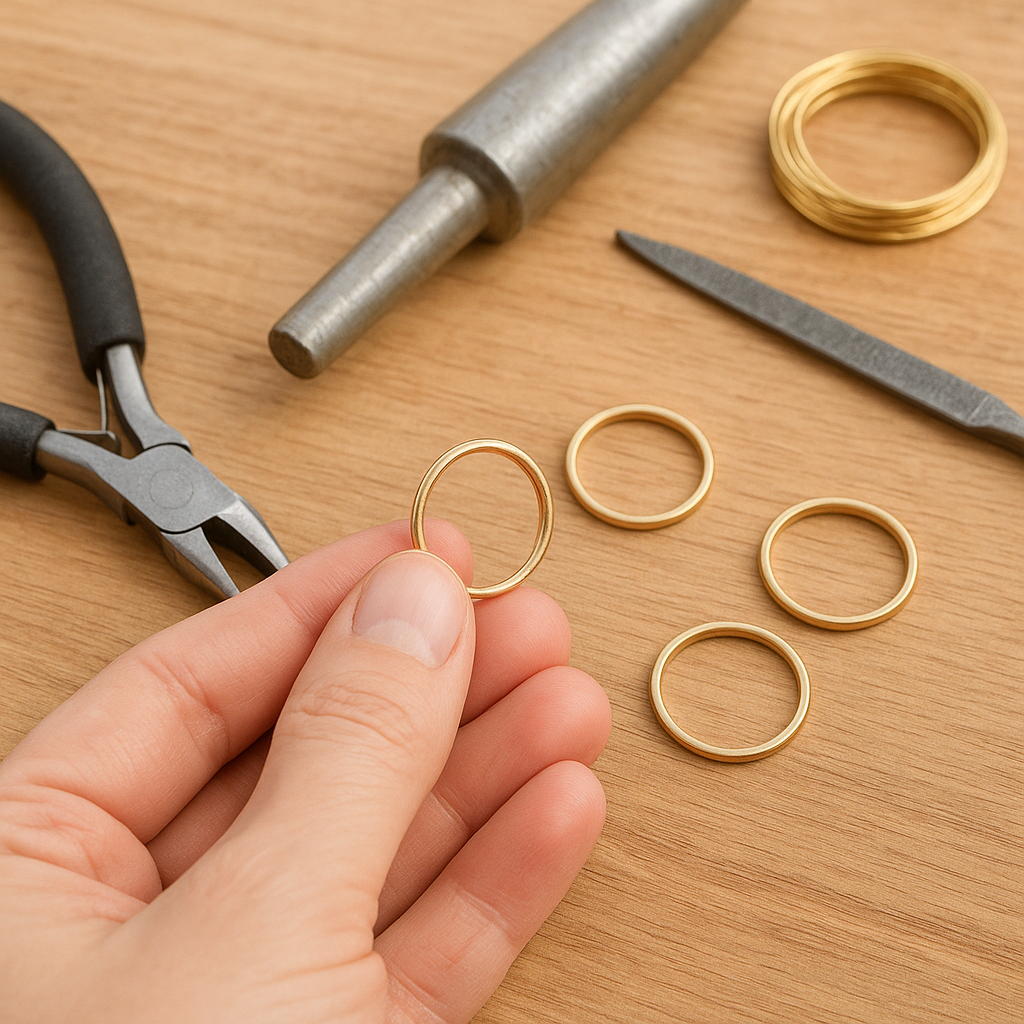
The beauty of minimalist rings is that you can start with a compact toolkit and scale up later. Below are the essentials for clean results, with household stand-ins where possible.
- Metals: brass, copper, aluminum, and sterling silver are forgiving and affordable. For hard-wearing everyday rings, sterling and bronze hold up well; brass and copper develop a warm tone over time; aluminum is lightweight and won’t tarnish easily.
- Stock forms: wire (round or square) or sheet (0.8–1.5 mm thickness for bands; lighter if stacking). Choose wire diameter or sheet thickness by desired look and comfort. Learn to read metal thickness by gauge numbers if you buy from US suppliers (higher number = thinner metal).
- Cutting: a jeweler’s saw is ideal for control, but a fine-tooth hacksaw can cut straight lines in sheet. For wire, heavy-duty cutters designed for non-ferrous metals preserve edges.
- Forming: a ring mandrel (tapered steel sizing rod) is wonderful, but a smooth metal socket from a socket-wrench set, a piece of pipe, or a thick marker can substitute for forming small sizes. A rawhide or nylon mallet shapes metal without denting it; a simple household hammer can work if you cover the ring in masking tape.
- Support: a bench block (steel), an anvil, or a thick slab of granite/marble tile provides a solid surface for hammering and flattening.
- Refining: a set of needle files, a flat file, and wet/dry sandpaper in grits 220–2000 (higher numbers leave smoother surfaces). Emery boards can work in a pinch for fine work.
- Joining: low-cost butane micro torch and hard/medium solder for silver or brass; paste solder simplifies handling. If you avoid a torch, choose cold connections (rivets), tension-fit bands, or open adjustable designs.
- Heat and cool: for heat-based work, basics include a firebrick or kiln shelf, tweezers, and a quench bowl. If you heat-harden or soften metal, you’ll also meet the concept of annealing (making metal softer for forming).
- Cleanup: pickle solution (a mild acid) removes oxides after heating. An alternative: a warm citric acid bath or a mix of white vinegar and salt, followed by a thorough rinse.
- Polishing: polishing papers, a bit of metal polish on cotton, or even a strip of denim for friction-based burnishing. A simple leather strop also works.
- Safety: eye protection, ventilation, heat-resistant surface, and nitrile gloves for chemicals. Good posture and proper hammer grip reduce strain.
With these basics, you can form and finish quality minimalist bands at home. As you advance, step up to specialized torches, professional mandrels, soldering stations, and tumblers—but the fundamentals remain the same.
Design Decisions: Profiles, Proportions, and Comfort
A minimalist ring’s profile—round, half-round, square, or softly rectangular—shapes how it feels and catches light. A parallel-width band in 3–4 mm is a sweet spot for daily comfort, while 1–2 mm stacking bands sit lightly and layer well. Wider bands (6–10 mm) create presence but may require a half-size up for comfort, since they contact more of the finger.
Edge treatment matters. Slightly rounded edges reduce sharpness without losing a modern line; fully rounded half-round wire feels soft and tactile; crisp edges offer contemporary minimalism but need careful deburring. Think in terms of balance: thickness versus width; texture versus polish; symmetry versus a whisper of asymmetry. Minimal doesn’t mean sterile—subtle variance can make a handmade piece feel alive.
Measuring and Sizing without Fancy Tools
Reliable sizing is the foundation of repeatable rings. If you lack ring sizers, you can measure at home with accuracy by following these steps.
- Measure at room temperature, mid-day. Fingers can swell in heat and shrink in cold; aim for the typical daily size.
- Wrap a thin strip of paper or non-stretchy thread around the base of the finger. Mark the overlap point, then measure the length in millimeters.
- Add 0.5–1 mm for comfort on narrow bands; add 1–1.5 mm for wide bands.
- Convert the length to a known size chart if needed, but you can also work with the raw circumference measurement.
If you’re cutting a strip from sheet, estimate the blank length using a modified circumference formula: Blank length ≈ inside circumference + (metal thickness × 3.14). The thickness allowance compensates for the material that occupies the inner curve when you form it. For very wide bands, add a touch more. Mark the blank carefully; a precise cut now saves time later.
Three Core Builds with Simple Tools
Option A: The Wire Band (No Torch, Fast Finish)
- Choose wire: 1.0–1.5 mm round or square for a slender stacker. Cut a length slightly longer than your inside circumference estimate to allow for filing and finishing.
- Straighten the wire by rolling it beneath a hard book or gently pulling it through folded fine-grit sandpaper.
- Form the ring around your substitute mandrel (socket, pipe, or marker). Start the curve with your thumbs; finish by tapping with a padded hammer or mallet over a firm surface.
- Align ends for a near-perfect butt joint. File both ends flat and square; check alignment by holding the ends together against light—no gaps should be visible.
- Join method 1 (tension-fit): Over-bend slightly smaller than target size, then open carefully to meet the joint with pressure. Hammer lightly around the band to distribute tension. This creates a surprisingly sturdy ring for everyday use, especially in harder metals like bronze.
- Join method 2 (cold connection): Flatten the joint area slightly with a file, then drill a tiny hole (hand drill/rotary tool) across the seam and stake a small brass or silver wire rivet. Peen gently on both sides; file and sand flush. The seam becomes a design detail.
- Refine: Round the ring evenly by tapping on the mandrel; alternate sides to avoid making a cone. Adjust size gradually.
- Finish: Sand progressively from 220 through 2000 grit. Choose brushed (finish with 800–1000 grit in one direction) or high polish (polish papers, then cloth and compound).
Option B: The Sheet Metal Band (Soldered for Seamless Look)
- Cut a precise strip: Width equals desired ring width; length equals your blank estimate. File ends square. Mark the inside face lightly with a scribe to keep orientation consistent.
- Form: Curve the strip into a “C” around the mandrel substitute, then into an “O.” Aim for a tight, flush seam. Gently compress with fingers and tape to hold if needed.
- Prepare for soldering: Clean metal (sand or scrub), apply flux, and place a small chip of solder at the seam. Heat evenly with a butane micro torch until solder flows; avoid overheating. Quench and pickle to remove oxides.
- Round: Return the ring to the mandrel and strike lightly with a mallet, rotating as you go, until it slides smoothly to the target size and feels round. Check that the seam is invisible; if not, file and reflow solder.
- Refine: File the outer and inner edges to soften corners. Remove file marks with 400–600 grit, then step through higher grits.
- Finish: For a mirror polish, burnish edges and flat areas, then buff; for a satin look, use a Scotch-Brite pad or 1000–1500 grit in straight passes. A micro chamfer (a tiny 45° edge) adds a crisp contemporary line.
Option C: The Open or Overlap Band (No Solder, Adjustable)
- Cut a strip slightly shorter than the measured circumference so that, when formed, the ends don’t meet.
- Form the band and deliberately shape a neat gap or a short overlap. For an overlap, taper one end so it nestles under the other in a minimal step.
- Work-harden the band lightly by tapping around it on a mandrel. This stiffens the metal and improves spring.
- Round all edges carefully; an open design puts more emphasis on comfort at the ends.
- Finish as desired. A brushed finish reduces the visibility of future scratches on open bands.
Heat, Hardness, and Control: A Quick Metallurgy Primer
Metal changes as you shape it. Hammering and bending align crystals and make the piece stiffer—a process called work-hardening. If metal becomes springy or starts to crack at an edge while forming, pause and relieve stress with annealing: gently heat until the metal reaches the right temperature (dull red for silver in a dim room, lower for brass and bronze), then cool. Annealing softens metal so it can be shaped further without breaking. After you reach the final form, light hammering or tumbling re-hardens it for durability.
Don’t skip cleaning between steps. Oils and oxides block solder flow and mar finishes. A clean cycle—form, pickle or scrub, rinse, dry, then finish—builds repeatable quality into your workflow.
Surface Textures and Finishes: From Satin to Mirror
- Brushed: Use 600–1000 grit in one direction for a modern matte. Reapply at home with a fine pad when the ring scuffs.
- Hammered: Use a small, slightly domed hammer over a steel block. Even light taps create facets that twinkle without high polish. Keep strikes consistent; rotate the ring a bit each hit.
- Satin/Scotch-Brite: Soft matte that hides small scratches, excellent for daily wear.
- Mirror polish: Progress through fine grits, then buff by hand with polish on cotton. A quick trick: finish with firm denim for friction-based burnishing that tightens the surface and enhances shine.
- Edge play: Micro-bevels, rounded edges, or a crisp square edge change the ring’s voice with minimal effort.
Coloring and Oxidizing: Controlled Patina without a Lab
A subtle patina adds depth to minimalist designs and highlights textures. Sterling and copper alloys accept patina readily.
- Liver of sulfur: Classic for darkening silver. Warm water bath, a tiny amount of solution, quick dips, and rinse. Repeat to build tone. Finish by lightly sanding high points to reveal contrast.
- Egg method: Place a freshly hard-boiled, crushed egg and your cleaned ring (on a small tray) inside a sealed container. Sulfur in the egg darkens the metal within hours—gentle and accessible.
- Ammonia fumes (with a closed jar and salt): Produces unique textures on copper/brass. Use with ventilation and caution.
- Wax or oil seal: Microcrystalline wax or a light jewelry oil slows oxidation and gives a soft sheen, especially on brass and copper.
Always clean and degrease before patination. Control is all about consistency: temperature, exposure time, and surface prep.
Troubleshooting: Clean Joints, Round Forms, Better Edges
- Gapped seam: File both ends square, check against a flat surface, and rebend until contact is uniform. For soldered bands, add flux, reposition a small solder chip, and reflow carefully.
- Out-of-round ring: Lightly tap around the high spots on a mandrel, rotating often. Avoid over-hammering one side—small corrections win.
- File marks won’t disappear: Move up grits gradually; don’t jump from coarse to fine. Sand in alternating directions at each grit so you can see when previous scratches are gone.
- Texture looks random: Establish a rhythm. For hammered textures, create a mental grid; for brushed finishes, maintain one direction or a neat crosshatch.
- Metal feels too soft: After final shaping, lightly hammer around the circumference to reintroduce stiffness. Alternatively, tumble-polish if you have a small tumbler.
- Patina is blotchy: Degrease thoroughly. Handle with gloves, and use fresh solution. Build color in short, repeatable dips.
Comfort and Durability: What Your Hands Will Thank You For
Comfort comes from thoughtful proportions and edges. A 3–4 mm width with a softened inner edge (a micro radius) often disappears on the finger. Avoid knife-sharp outer corners; even a tiny bevel improves wear. For wider bands, consider a gentle inside curve (comfort fit) by rounding the inner edges more aggressively. Durability comes from proper thickness and final hardening taps; a thin band with sharp corners will deform quickly, whereas a slightly thicker band with softened edges resists dings and feels better day to day.
Household Substitutions that Actually Work
- Mandrel substitute: Metal socket, smooth pipe, or a dense wooden dowel.
- Bench block: Inverted cast-iron pan base, a thick steel plate, or marble tile.
- Polishing: Denim scrap, old leather belt, or paper backed with felt for flat polishing.
- Pickle: Warm citric acid solution or white vinegar with a pinch of salt; rinse thoroughly afterward.
- Third-hand: Clothespins with steel paperclips; heat-resistant tweezers if you solder.
These substitutions get you started immediately, but upgrade when you can. A real mandrel, rawhide mallet, and needle files significantly speed up clean results.
Project Variations to Grow Your Skill
- Stacking set: Make three 1.2 mm wire bands—one polished, one brushed, one hammered. The contrast teaches finish control.
- Open torque band: A 4–6 mm strip with a 2–3 mm gap at the top; taper both ends for a feathered look. Slight twist adds dynamism.
- Inlay line: File a shallow groove around the band’s equator and fill with crushed stone epoxy or pigment. Minimal but striking.
- Flush detail: Drill a shallow seat and press a tiny ball of contrasting metal (e.g., copper dot in silver). Peen and sand flush for a dot that feels seamless.
- Edge polish: Keep a matte body and high-polish only the outer edges. The glint catches light without glare.
From Hobby to Micro-Batch: Repeatability and Workflow
Streamline steps so you can make multiple rings efficiently without losing the handmade character.
- Template library: Keep index cards with widths, blank lengths, and notes per size and thickness. Small differences in thickness change the cut length—track them.
- Batch steps: Cut all blanks first, then form, then join, then finish. Muscle memory and efficiency build quickly when you repeat a single action.
- Finish standards: Define what “satin” or “mirror” means in grits and time. Consistency is the heart of minimalist design.
- Quality control: Check roundness on the mandrel, inspect seams under bright light, and run a fingertip along edges for burrs.
Care, Tarnish, and Everyday Maintenance
Silver, brass, and copper will change color with air and wear. That’s not a flaw—it’s character. If you prefer brightness, store rings in small zip bags with anti-tarnish strips, avoid lotion and chlorine, and wipe after wear with a soft cloth. Restore brushed finishes with a fine pad, mirror finishes with a dab of polish. For darker, intentional patinas, seal lightly with wax and reapply after months of wear as needed.
Sizing for Different Hands and Contexts
Wide bands grip more of the finger and may require a half-size up; stacking sets worn together may need a fraction down if they trap each other. Temperature, hydration, and activity affect fit. If you’re gifting, err on a slightly larger size with an open or adjustable design; also consider the wearer’s lifestyle—someone lifting often may prefer thicker bands with a satin finish that masks scuffs.
Ethics and Material Choices
Simple rings pair well with intentional sourcing. Recycled metals, local suppliers, or reclaimed scrap reduce environmental load and celebrate craft frugality. Test metals for skin compatibility; some people react to certain copper alloys or nickel-containing brasses. Sterling is a safe, durable everyday choice, and many vendors now offer traceable, recycled stock. Material choices reflect your values, so articulate them in your shop notes. Thoughtful sustainability sits comfortably with minimalist aesthetics.
Safety Essentials without the Scare
- Eye protection anytime you cut, sand, or hammer.
- Ventilation if you heat metal or use chemicals. Keep a simple fan running across the workspace.
- Heat discipline: Clear flammables away; set a tile or brick as a work surface; quench hot metal deliberately, not reflexively.
- Ergonomics: Sit upright, support your forearms, and take breaks. Better posture equals better control and cleaner finishes.
Finishing Touches: Packaging and Story
Minimalist rings shine in understated packaging. A small kraft box, a clean business card, and a short care note match the aesthetic and protect your work. Photograph rings on neutral backgrounds with soft side light to show texture. Share process photos: a ring on a mandrel, the glint off a brushed edge, a before-and-after polish. When design is simple, process becomes your narrative.
Common Questions, Short Answers
- Can I make rings without a torch? Yes—wire bands, open bands, and riveted seams are strong and attractive. A torch unlocks seamless bands, but it isn’t mandatory.
- What thickness is “just right”? For a daily wear band, 1.2–1.5 mm sheet or 1.0–1.5 mm wire feels solid but comfortable. Stacking rings can be lighter.
- How do I avoid scratchy edges? Deburr aggressively: file, then sand progressively; finish with a soft rounding on inner and outer edges.
- How shiny should minimalist be? Shine is a choice, not a rule. Brushed matte often serves minimalism better than mirror polish.
- Will brass or copper turn skin green? It can for some wearers; sealing or choosing silver/bronze helps, and regular cleaning reduces reactions.
A Repeatable Minimalist Ring Workflow
- Plan: Choose metal, width, and finish. Measure finger or consult your template card.
- Cut: Mark, score, and cut the strip or wire; file ends square.
- Form: Bend around a substitute or real mandrel; adjust for roundness.
- Join: Choose tension-fit, rivet, or soldering with a butane torch.
- Refine: File seam, smooth edges, and correct roundness.
- Finish: Select brushed, hammered, satin, or mirror; consider subtle contrasts.
- Protect: Clean, seal if desired, and package.
Working in Specific Metals: Quick Notes
- Silver: Forgiving to form and solder; bright polish; easy to patinate; classic everyday metal.
- Brass: Warm gold tone at a fraction of the cost; tougher to polish to mirror; develops character fast.
- Copper: Rich color, very malleable; patinas deeply; may require a seal if the wearer is sensitive.
- Bronze: Harder than brass/copper; excellent for tension-fit designs; polishes beautifully.
- Aluminum: Lightweight and bright; no tarnish; best with brushed finishes; avoid harsh chemicals.
Edge Discipline: The Minimalist Signature
Edges are where the finger meets design. Build a habit: file square, break the sharp corner with two or three light strokes, then roll a tiny radius with 600–1000 grit. For designs that emphasize geometry, keep the micro-bevel consistent all the way around. For organic minimalism, soften a touch more; the difference is subtle but immediately felt by the wearer.
Texture with Intention: Make Every Mark Count
In minimal jewelry, random marks read as mistakes. Plan textures. If you hammer, decide on spacing and angle; if you brush, commit to a direction. Test a scrap before the final piece to calibrate your strike strength and grit progression. Small planning rituals translate to rings that look deliberately simple instead of accidentally plain.
Confidence Through Constraint
Simple tools foster skill. Without expensive machinery, your senses sharpen: you’ll hear when the hammer blow is right, feel when the seam meets perfectly, and see when a line is true. That sensitivity is the heart of handcraft. Over time, your rings will reflect that quiet confidence—minimal forms, clear intent, and finishes that invite touch. With nothing to hide behind, your best work can shine.
Glossary: Ten Terms to Keep Close
- Craft: The practiced habit of doing one small thing well, then another. Here, it’s your evolving craftsmanship.
- Sterling: Silver alloy (92.5% silver) that balances beauty and strength—hence the popularity of sterling silver bands.
- Gauge: A measure of metal thickness; higher gauge number means thinner metal (US system).
- Mandrel: The tapered rod used to size and round rings. A proper mandrel improves every step.
- Anneal: Heat to soften metal for forming; that’s annealing.
- Solder: A metal alloy used to fuse parts; soldering creates seamless joins.
- Burnish: Compact and shine a surface by rubbing or friction; thoughtful burnishing adds depth.
- Patina: Controlled surface coloration that enhances texture; a good patina elevates minimal designs.
- Work-harden: Strengthen metal through deformation; final light taps add work-hardening for durability.
- Sustainable craft: Choices that respect resources and people; hand-scale jewelry can embody sustainability in practice.
Start with one ring. Choose a width, pick a finish, and keep your lines honest. With practice, you’ll build a small language of curves, edges, and surfaces that feels like your signature. Simple tools, steady hands, and patient attention are enough to make minimalist rings worth wearing for years.