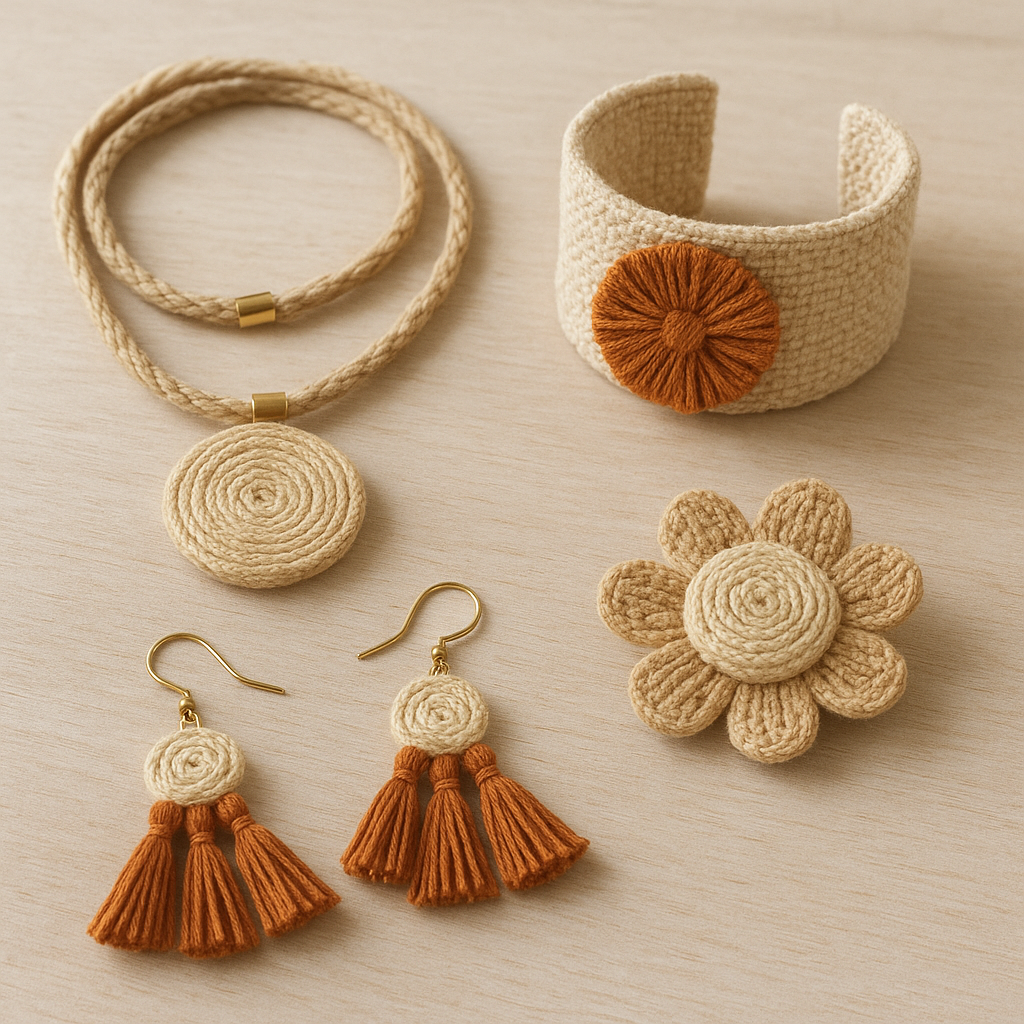
Fabric and fiber jewelry blends the warmth of handmade craft with the versatility of everyday materials. It welcomes absolute beginners, delights seasoned makers, and invites play with texture, scale, and color. From soft braids and sculpted felt beads to ribbon-wrapped bangles and knotted earrings, these projects are lightweight, comfortable to wear, and remarkably customizable. You can transform offcuts and thrifted garments into radiant adornments while learning meditative techniques that fit into a weekend afternoon. This article explores tools and materials, essential methods, and a range of step-by-step projects you can complete with minimal equipment, along with care, styling, and design tips drawn from the wider world of handicraft.
Why Fabric and Fibers Belong in Jewelry
Soft materials invite touch. They carry stories of garments worn, quilts pieced, and textiles passed between relatives. In jewelry, that softness turns into tactile statements: a silk tassel that whispers against the neck, a linen braid with subtle slubs, a lace choker catching light like frost. Compared to metalworking, fiber-based jewelry requires fewer specialized tools; scissors, needles, and household adhesives often suffice. This lowers the barrier to entry and broadens creative possibilities for classrooms, community studios, and at-home makers.
Comfort is another advantage. Fabric pieces adapt to body warmth and movement, avoiding the chill or heft of metal. They’re also travel-friendly and quiet—good companions for commuters, parents with sleeping babies, and anyone who prefers craft without hammering or torches. On a design level, fibers offer color blending, layered translucency, and form that ranges from delicate to dramatic. Finally, fiber jewelry has a natural kinship with mending and reuse: turning an old shirt into a braided necklace or a beloved dress into a keepsake bracelet preserves memory and reduces waste.
Materials and Tools: A Maker’s Palette
Gathering supplies is part treasure hunt, part color study. You can begin with what you have, add a handful of findings, and expand thoughtfully as you discover favorite techniques.
Fabrics
- Cotton: Easy to cut or tear into strips; holds knots; dyes well.
- Linen: Crisp hand, visible slubs for rustic texture; frays beautifully.
- Silk: Fluid drape for tassels and ribbon embroidery; luminous sheen.
- Wool and Felt: Sculptable, warm, ideal for beads and petals.
- Denim and Chambray: Sturdy base for wrapped bangles or layered cuffs.
- Lace and Tulle: Airy overlays for chokers and earrings.
- Knits (T-shirts): Curl into cords when cut; perfect for bold braids.
Fibers and Cords
- Cotton cord, waxed linen, hemp twine for knotting and stringing.
- Embroidery floss and pearl cotton for detailed surface work.
- Yarns: Smooth mercerized cotton, silk blends, or matte wool.
- Ribbons: Silk, velvet, grosgrain, and organza for ties and wraps.
Findings and Hardware
- Clasps: Lobster, toggle, magnetic (use strong ones with safety knots).
- Jump rings and split rings for connections.
- End caps, ribbon clamps, and cord ends for tidy finishes.
- Earring hooks and hoops, brooch backs, and headpins.
Tools and Adhesives
- Sharp scissors, rotary cutter and mat for clean strips.
- Needles: chenille for ribbon, embroidery needles for floss and beads.
- Pliers: chain-nose and round-nose for findings.
- Non-toxic fabric glue; quick-grab gel super glue for edges; fray preventer.
- Measuring tape, ruler, and clips or mini clothespins for holding wraps.
Design Principles for Textiles in Jewelry
A few guiding ideas will help your pieces look intentional and wearable.
- Scale and Proportion: Balance chunky braids with slender ties, or pair a statement tassel with delicate chain. Try testing silhouettes on a neutral T-shirt to judge impact.
- Texture Play: Contrast matte cotton against glossy silk, or pair airy lace with dense felt. Texture layering catches light without requiring complex metalwork.
- Pop and Restraint: Limit a palette to two or three hues and one accent. Let a single bright color punctuate neutrals.
- Movement: Tassels, fringes, and knotted fringework add animation. Keep lengths comfortable to avoid tangles with collars or scarves.
- Skin Friendliness: Use soft linings and finish cut edges to prevent tickle or irritation.
Essential Techniques You’ll Use Again and Again
Learn these foundations and most projects will feel intuitive.
Preparing Strips and Cords
- Tearing: For cotton and linen, snip the edge and tear to get straight, frayed strips.
- Bias vs. Straight Grain: Bias strips curve smoothly for wraps; straight-grain yields crisp edges.
- Rolling Knit Cords: Cut T-shirt fabric into 1–2 cm strips along the torso; stretch gently to make cords that curl inward.
Knots and Joins
- Overhand Knot: Simple stopper at ends or between beads.
- Lark’s Head: Anchor strips to rings, bars, or a central cord.
- Square Knot: Foundation for flat macramé designs; consistent tension is key.
- Whipping: Bind multiple strands with thread to create neat transitions.
Surface Work
- Embroidery: Add seed stitches, lazy daisies, or couching to turn plain fabric into miniature tapestries.
- Appliqué: Layer cut shapes, secure with blanket stitch.
- Bead Stitching: Backstitch and picot edges outline motifs along a felt base.
Structure and Form
- Twisting: Twist two cords in one direction, then twist them together the other way for a rope effect.
- Braiding: Three-strand basics, four-strand round braids, and fishtail variations build texture quickly.
- Wrapping: Spiral strips around bangles, rings, or large beads to unify color and cushion metal bases.
- Folding and Pleating: Create scallops or bows for chokers and brooches.
Ten Easy Jewelry Projects with Fabric and Fibers
No-Sew Fabric-Wrapped Bangle
- Materials: A plain bangle (wood or plastic), 2–3 cm-wide fabric strips, fabric glue, small binder clips.
- Steps:
- Anchor one strip with a dab of glue inside the bangle; clip until tacky.
- Wrap tightly with slight overlap; smooth as you go.
- Finish by tucking the tail under the last wrap with glue; clip until dry.
- Optional: Add a contrast thread whipping at two points for polish.
- Tip: Use bias-cut silk for a sleek spiral or denim for rugged texture.
T-Shirt Yarn Statement Necklace
- Materials: T-shirt cords, large jump rings, ribbon clamps, chain or ribbon ties, optional beads.
- Steps:
- Cut multiple cords to collarbone length plus 10 cm, stretch to curl.
- Gather ends; bind with whipping thread to keep them aligned.
- Slide on a few oversized beads or wrap a section with contrast floss.
- Trap the bundle in ribbon clamps; connect to chain or ribbon ties.
- Style: Layer three strands in graduating lengths for visual rhythm.
Macramé Hoop Earrings with Silk Accents
- Materials: Thin cotton cord, small metal hoops, silk scraps, earring hooks, fabric glue.
- Steps:
- Wrap hoops with silk; secure tails inside with glue.
- Use lark’s head knots to attach short cords along the bottom third.
- Tie repeating square knots to form a fringed arc; trim evenly.
- Attach hooks; seal cut ends with fray preventer.
- Note: Adjust cord thickness to keep earrings light and balanced.
Silk Ribbon Tassel Pendant
- Materials: Silk ribbon, jump ring, bead cap, headpin, small bead, chain.
- Steps:
- Cut multiple 15–20 cm ribbons; fold in half through a jump ring.
- Bind the neck below the ring with fine thread; slide on a bead cap.
- Create a simple loop with the headpin and bead as a decorative top.
- String on chain; trim tails for a blunt or angled finish.
- Variation: Blend velvet and organza strips for depth.
Felt Bead Necklace
- Materials: Wool roving or pre-made felt balls, warm soapy water, needle, strong thread, clasp.
- Steps:
- Wet-felt small balls by rolling roving between soapy palms; rinse and dry.
- Pierce beads with a needle; string on waxed linen with spacer knots.
- Finish with a loop-and-button or standard clasp.
- Tip: Alternate bead sizes to create a gentle gradient.
Woven Fabric Bead Bracelet
- Materials: Cardboard loom (postcard size), narrow fabric strips, embroidery floss, ribbon clamps, chain.
- Steps:
- Warp the postcard with floss; tape ends to the back.
- Weave fabric strips over-under; pack gently with a comb.
- Tie off warps; trim and glue both ends flat.
- Attach ribbon clamps and add chain for adjustable fit.
- Detail: Couch a few seed beads across the surface for sparkle.
Lace Choker with Velvet Ties
- Materials: Lace trim (2–3 cm wide), velvet ribbon, needle and thread, jump rings, charm (optional).
- Steps:
- Cut lace to neck circumference minus tie length.
- Sew small loops at each end with folded velvet tabs.
- Attach jump rings; tie velvet bows or add a delicate chain back.
- Optionally stitch a tiny charm at center front.
- Comfort: Line scratchy lace with a soft ribbon band.
Scarf Knot Necklace
- Materials: Lightweight scarf, large wooden or fabric-covered beads.
- Steps:
- Lay the scarf flat; roll lengthwise into a tube.
- Tie an overhand knot, slide in a bead, tie another knot; repeat.
- Finish ends with tidy knots or sew to create an infinity loop.
- Proportion: Space beads farther apart for a soft, draped look.
Sari Silk Wrap Bracelet
- Materials: Sari silk ribbon or torn silk strips, small charms, jump rings.
- Steps:
- Attach a charm to the strip’s midpoint with a jump ring.
- Wrap the wrist multiple times, overlapping edges.
- Tuck in the tail or tie a small bow; secure with a discreet stitch if needed.
- Travel: Soft, flat, and rollable—ideal for on-the-go accessories.
Upcycled Denim Pendant and Cord
- Materials: Denim scrap, fusible interfacing, fabric glue, leather punch or awl, cotton cord, jump ring.
- Steps:
- Fuse interfacing to denim; cut a clean geometric shape.
- Seal edges with a very light coat of fray preventer.
- Punch a hole; add a jump ring.
- Braid or twist cotton cord; tie adjustable sliding knots.
- Accent: Hand-stitch a contrasting running line around the edge.
Kumihimo Friendship Anklet
- Materials: DIY foam or cardboard disk, 8 strands of floss or thin yarn, end caps or knotted ends.
- Steps:
- Make a simple disk with a center hole and notches.
- Tie strands together; seat the knot in the center, place strands in notches.
- Braid using a basic 8-strand sequence to form a round cord.
- Finish with tight whipping; add end caps or sliding knots.
- Pattern: Alternate colors in mirror pairs for crisp chevrons.
Finishing Touches That Elevate Handmade Pieces
- Edge Control: For frayed styles, intentionally trim to a consistent halo; for crisp looks, turn under and stitch.
- Neat Bindings: Use fine thread or thin floss in invisible or contrast wraps to transition between materials.
- Hardware Integration: Hide ribbon ends in clamps; use a dab of glue before crimping for longevity.
- Endings that Match the Aesthetic: Rustic knots for boho styles; sleek ribbon clamps for minimalist silhouettes.
- Polish: Steam fabric components lightly to restore shape after handling.
Comfort, Care, and Longevity
Textile jewelry thrives with gentle use and mindful maintenance. Consider the wearer’s skin and climate when selecting fibers; silk breathes in summer, wool insulates in winter. Sweat and perfume can dull sheen or stiffen fibers, so let pieces air out between wears. Spot-clean with mild soap and cold water; blot rather than rub. Store earrings and necklaces laid flat or hung to prevent kinks, and keep tassels combed with a clean, dry lash brush.
Plan for durability from the start: double-stitch stress points, backstitch starts and ends, and reinforce knots with tiny drops of flexible glue. If using magnetic clasps, choose strong grades and add a short safety chain for bracelets. For tassels, bind the neck securely and trim only after the final comb-through. When adding beads, alternate hard and soft elements mindfully to avoid abrasion—thread guards at clasp points help.
Sourcing with Purpose
Craft supply shops are wonderful, but the wider world is an abundant pantry. Thrift stores, estate sales, and your own closet hold garments with beautiful fiber content and prints. Look for natural fibers that handle well and age gracefully. Curtains, dress hems, and even neckties can be deconstructed into ribbon, cord, and focal pieces. This mindset dovetails with sustainability: transforming castoffs into heirlooms reduces landfill waste and encourages slower, more value-centered making. It also celebrates upcycling as a design choice, not a compromise.
When you do buy new, support small mills, fair-trade vendors, or hand-dyers. Sample cards help plan palettes without excess. Save offcuts sorted by hue and width to spark future projects. Trading scraps in local craft groups or online swaps builds community while diversifying your stash.
Color, Texture, and Storytelling
Every fiber carries a mood. Velvet whispers evening and candlelight; raw linen smells like summer threshing floors; indigo denim feels adventurous and grounded. Use that emotional vocabulary as you combine textiles: one satin ribbon can elevate cotton, a snippet of lace can soften tweed. Try monochrome pieces with shifting textures, or ensembles that repeat a single color across bracelets, earrings, and brooches. Mood boards—fabric swatches, photos, and paint chips—help translate atmosphere into materials before you cut anything.
Beyond Basics: Techniques to Explore
- Macramé: Expand from square knots to half-hitches, Josephine knots, and alternating patterns for nets and diamonds.
- Fibre Weaving: Mini looms for cuffs or pendants; tapestry techniques for pictorial motifs.
- Kumihimo: Create round, square, and hollow braids; incorporate beads pre-strung onto strands.
- Needle Felting: Sculpt petals, pods, and abstract forms for pins and pendants.
- Fabric Origami: Fold cotton into stars and flowers; stiffen with diluted glue.
Hardware, Knots, and Practical Closures
The way a piece opens and closes affects both comfort and style. Toggle clasps suit chunkier cords; they’re easy to fasten with one hand. Lobster clasps are discreet and secure on fine ribbons. Sliding knots create adjustable lengths without metal—ideal for beach jewelry or metal-sensitive skin. For ultra-sleek looks, conceal ends within end caps filled with flexible glue; crimp gently and allow full cure time. Consider redundancy: a tiny safety knot or backup jump ring prevents catastrophic drops.
When working with hems and selvedges, fold raw edges under and stitch a narrow channel to pass a cord through, making an instant ribbon necklace with integrated tie ends. Heavier braids benefit from tapered ends—trim a few inner strands shorter before binding so the transition into the cap is smooth.
Finishing Aesthetics: From Boho to Minimalist
- Boho: Mixed tassels, layered wraps, visible stitches, charms from found objects.
- Minimalist: Monochrome cords, precise edges, hidden joins, architectural silhouettes.
- Vintage Romance: Lace, pearls, soft fray, tea-dyed hues.
- Modern Rustic: Denim, linen, visible selvedges, matte beads.
Choose one dominant visual language and repeat its cues: the same knot style across a set, or a repeating stitch along multiple elements. Repetition creates cohesion and reads as intentional design.
Teaching, Gifting, and Small-Batch Selling
Fabric jewelry is perfect for quick workshops: minimal hazards, accessible tools, and immediate wins. Break projects into stations—cutting, knotting, finishing—and rotate learners. Provide color-labeled kits so participants focus on method rather than measuring. For gifts, tailor palettes to wardrobes or shared memories—grandparent shirts into keepsake bracelets, bridesmaid ribbons into coordinated earrings. If selling, photograph on neutral backdrops and on models to show scale; include care cards. Price by time, material quality, and design complexity, not just length or weight.
Troubleshooting and Maker’s Notes
- Slipping Wraps: Use a thin coat of fabric glue under spirals and allow tack time.
- Fraying Past Intent: Seal with dilute PVA or clear fray preventer; test on scraps first.
- Bulky Ends in Caps: Taper the bundle and bind tightly before inserting.
- Uneven Braids: Anchor the top, mark consistent tension points, and rest if hands tire.
- Stiff Tassels: Rinse out sizing; steam lightly and comb straight while drying.
- Skin Sensitivity: Swap metal findings for fabric ties or hypoallergenic hooks.
Inspiration Exercises to Spark Ideas
- Five-Strip Challenge: Limit yourself to five strips in one palette; produce a set (earrings, bracelet, necklace) unified by a single stitch.
- Texture Pairing: Combine one glossy and one matte fiber; design three small prototypes exploring contrast.
- Memory Cloth: Harvest elements from a meaningful garment and create a pendant that preserves a seam, button, or embroidery.
- Shape Study: Build three silhouettes—circle, triangle, bar—and iterate in different fabrics.
Care for the Maker: Ergonomics and Workflow
Small movements add up. Cut at table height, keep wrists neutral, and alternate tasks—cut, then stitch, then press—to avoid strain. Organize a tray with tiny bowls: one for jump rings, one for needles, one for offcuts. A simple photo log of each piece (materials, lengths, techniques) becomes your repeatable recipe book. Batch steps when making multiples: prepare all cords one day, knot the next, finish hardware last.
From First Piece to Personal Signature
As your hands memorize knots and wraps, your voice will emerge. Maybe you’ll lean toward geometric linen braids with crisp edges, or toward dreamy lace pendants with bead-whispered motifs. Perhaps your signature is a specific palette or a consistent stitch running like a heartbeat through every design. Keep a small notebook for sketches, color swatches, and reflections—what worked, what felt awkward, what thrilled you. The tactile intelligence you build will guide you to bolder compositions and finer details.
Closing Thoughts
Fabric and fiber jewelry sits at the generous intersection of art, adornment, and everyday life. It invites experimentation, celebrates resourcefulness, and turns simple materials into pieces that feel alive on the body. With a spool of thread, a scrap of cloth, and a curious eye, you can knot a wearable story that accompanies you to the market, the studio, or a quiet walk at dusk. Whether your path favors neat precision or wild texture, keep honoring the humble strength of fibers—and the way they bind memory, craft, and community into something beautifully resilient.