Brooches are tiny stages where materials perform, memories fasten to fabric, and a wearer’s personality quietly shines. They can be dramatic or whisper-soft, heirloom-inspired or playfully modern, and—perhaps most delightful of all—crafted with simple, affordable tools. This guide walks you through accessible methods to design, assemble, and finish elegant brooches at home, whether you’re working at a kitchen table or a small studio bench. Along the way you’ll learn to refine your eye, keep pieces secure and comfortable, and develop a repeatable process that rewards patience and curiosity.
Why Brooches Captivate: Function, Story, and Scale
Unlike necklaces or earrings, brooches occupy a flexible place on the body and the garment. They can pin a scarf, close a cardigan, anchor a sash, or simply become a focal point on a coat lapel. A brooch also bridges fashion and narrative: it can be a keepsake made of a grandmother’s buttons, a souvenir of a city’s flea market, or a tiny gallery for experimental textures.
Historically, brooches were functional clasps—objects of ingenuity before they were ornaments. Today, they carry that dual nature forward. Elegance comes from restraint, proportion, and attention to detail rather than expensive gear. With a handful of tools and a mindset of deliberate craftsmanship, you can create pieces that look refined, wear comfortably, and age beautifully.
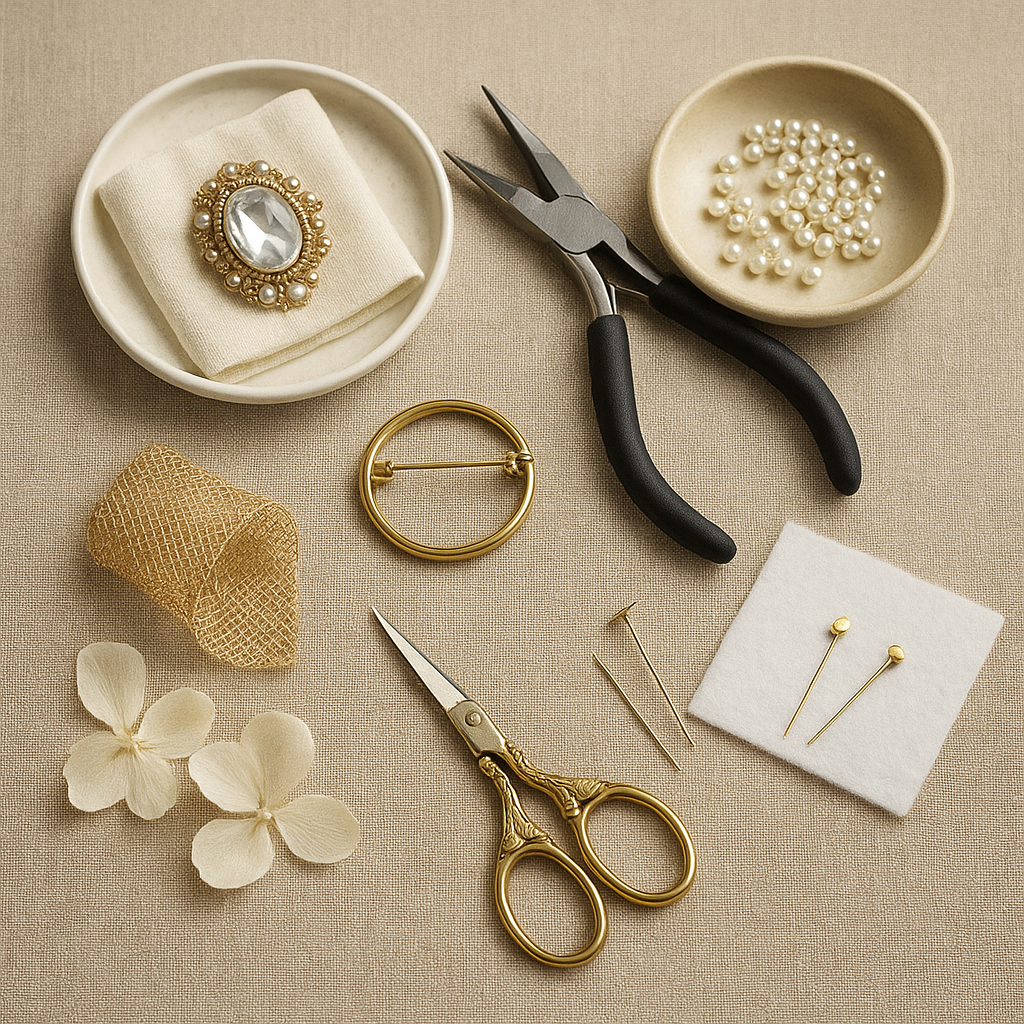
Essential Tools and Materials on a Budget
The right kit is modest yet versatile. You can start with what you have and add selectively as your techniques evolve.
- Cutting and shaping tools: small scissors (fabric and paper), craft knife, nail file or fine sandpaper (400–800 grit), small wire cutters.
- Pliers: needle-nose and round-nose (for gentle bends), and optionally flat-nose for firm holds.
- Adhesives: clear-drying PVA for paper/fabric, gel cyanoacrylate for small rigid joins, two-part epoxy for structural bonds. A small tube of contact cement can help with leather and felt.
- Textiles: felt sheets, ribbon, lightweight cotton, silk scraps, lace, denim offcuts.
- Metals and findings: inexpensive craft wire (brass, copper, or stainless, 20–24 gauge), jump rings, and brooch pin backs. Safety pins can stand in for dedicated pin backs early on.
- Ornament: buttons, beads, sequins, vintage keys, watch parts, charms, seashells, pressed leaves, small stones.
- Measuring and marking: ruler, tailor’s chalk or removable fabric pen, fine marker for metal and paper.
- Support and protection: cutting mat or thick cardboard, scrap wood or a ceramic tile for gluing, low-tack tape, cotton swabs, toothpicks.
Optional but handy tools include a small household hammer, a nail set or awl for tiny holes, alligator clips to hold parts while glue cures, and a simple polishing cloth. You don’t need torches, anvils, or specialized metalsmithing gear to create elegant results.
Design Principles That Make Brooches Look Elegant
Elegance is a feeling you can engineer. A few principles guide the eye and keep your choices cohesive.
- Silhouette and proportion: From across the room, the brooch reads as a shape first. Aim for a clear, intentional silhouette and a size that relates to the garment’s scale. A coat welcomes bolder forms; a silk blouse prefers lighter, smaller pieces.
- Color harmony: Combine 2–3 hues plus metallic accents. Use the 60–30–10 rule—dominant, secondary, and accent—so nothing shouts.
- Texture contrast: Pair smooth with rough, matte with glossy, soft with hard. Texture creates quiet drama.
- Line and rhythm: Repeated motifs (three leaves, five beads) create rhythm. Odd numbers often feel natural.
- Balance and symmetry: Symmetry can connote formality; asymmetry can feel organic. Both work when elements relate by weight and spacing.
- Negative space: Let the fabric show through. Gaps can feel as intentional as filled areas.
- Wearability: The back should be smooth, the weight distributed, and the clasp oriented for easy fastening.
Project 1: Felt Camellia With Hidden Pin
This textile brooch is soft, light, and elegant. It pairs with coats and dresses and invites experimentation with color.
- Cut five large, five medium, and five small petals from wool felt. Slightly vary edges for a natural look.
- Shape each petal by gently stretching one edge with your fingers; this arcs the felt like a real petal.
- Create a small felt disc as a base. Glue or stitch the large petals around the edge, then medium, then small, spiraling inward.
- Add a center: a cluster of tiny beads or a rolled felt bud.
- Attach a brooch back to a second felt disc and glue the disc to the flower’s underside, hiding stitches and glue lines.
Refinements: edge the petals with fabric paint for dimension, or add a slender ribbon leaf. Keep the underside neat—elegance lives on the back as much as the front.
Project 2: Wire Wreath With Minimal Beads
Wire yields delicacy without solder. A simple ring forms the base for a refined wreath.
- Form a 3–4 cm ring with 20–22 gauge wire. Overlap the ends and wrap one end around the other to lock the ring.
- With a second wire, spiral around the ring to add texture, trapping small beads at intervals. Keep wraps tight and even.
- Add two or three leaf shapes by bending short wire lengths into marquise forms and lashing them to the ring.
- Attach the brooch back: lash the clasp’s perforated plate to the ring with fine wire or stitch it to a small felt strip that bridges the back.
Finishing: lightly file any wire cut ends so they won’t snag. A quick hand polish enhances luster. Over time, copper and brass can develop a gentle patina that enriches the look.
Project 3: Ribbon Rosette With Vintage Button
Rosettes are classic accessories that cross from formal wear to everyday blouses.
- Use 2–3 cm wide grosgrain or silk ribbon. Seal cut ends with clear nail polish or a lighter’s indirect heat.
- Hand-stitch a running line along one edge of a 40–60 cm ribbon. Pull to gather and coil into a spiral, stitching to secure.
- Sew or glue a vintage button at the center.
- Add a felt backing and brooch pin. Consider a trailing ribbon tail or a tiny bow for extra flourish.
Color tip: a monochrome rosette in the same hue family as the garment reads refined; contrasting color reads playful.
Project 4: Beaded Crescent on Felt Base
Bead embroidery looks ornate but only requires patience and consistency.
- Cut a crescent from stiff felt. Sketch a simple motif (vines, stars, or a radiating fan).
- Stitch beads with short runs, anchoring every 2–3 beads to keep lines smooth.
- Edge the crescent with blanket stitches or a bead-on-edge technique for a clean perimeter.
- Back the piece with ultrasuede or felt; attach the pin back between layers.
Use two bead sizes for visual rhythm. Mix matte and glossy finishes to avoid a flat, “plastic” look.
Project 5: Decoupage Under Glass Cabochon
A paper image under domed glass yields a jewel-like micro-world without resin or specialized tools.
- Choose a small image (botanical illustration, postage stamp detail, tiny map). Punch or trim to the cabochon shape.
- Glue the glass to the image with a clear, non-clouding medium, pressing out bubbles. Let it cure thoroughly.
- Create a bezel: wrap the edge with thin ribbon or wire, or mount in a pre-made setting.
- Affix the assembly to a felt or metal base with epoxy and add a pin back.
The domed glass magnifies texture and color, giving a museum-case feel to humble materials.
Project 6: Polymer Clay Monogram Cameo
Polymer clay permits sculptural detail in a home oven.
- Condition clay and roll to an even sheet (3–4 mm). Cut an oval.
- Hand-cut or impress a monogram, wreath, or tiny botanical into the surface. Keep relief low for snag-free wear.
- Pierce two tiny holes for stitching to a backing later, or plan to glue post-bake.
- Bake per manufacturer’s instructions on a ceramic tile. Sand edges, then optionally dry-brush acrylic to highlight raised areas.
- Mount to a felt or leather backing and attach the pin back.
A thin wash of metallic paint on the edges creates a quiet frame. Seal lightly to protect paint without excessive gloss.
Project 7: Found-Object Assemblage
Elevate everyday fragments—watch gears, keys, pressed leaves—into a miniature tableau.
- Choose a central anchor (a small brass key or oval pendant blank).
- Arrange supporting pieces around it: three small items often feel balanced.
- Use gel cyanoacrylate for small, rigid parts; epoxy for weight-bearing joins. Hold with clips until set.
- Back with leather or felt to hide glue joins and fasten a pin back.
Let negative space breathe; avoid crowding. The story is as important as the arrangement—consider the objects’ provenance and how they converse.
Fastenings and Backs: Security Meets Comfort
The clasp is your brooch’s handshake—firm, considerate, and reliable. A dedicated brooch pin back is ideal, but a safety pin can serve when hidden between backing layers. Orient the pin horizontally for heavier brooches to reduce torque on fabric.
- Mounting plate: choose pin backs with holes or a pad for gluing. Stitch through holes where possible for extra security.
- Back plates: create a small leather or felt plate that sandwiches the pin hardware, distributing stress and preventing rotation.
- Alignment: place the pin slightly above the brooch’s center of gravity to keep it from tilting forward.
Smooth the back thoroughly. Run the brooch across a gauzy scarf—if it snags, sand or cover the offending area.
Surface Finishes: From Soft Glow to Statement Shine
Finishing is where ordinary parts elevate. A few low-tech methods refine surfaces without specialized gear.
- Textile grooming: trim stray threads, steam to set shapes, and lint-roll the backing.
- Metal touch-up: file sharp wire ends, then hand-buff with a soft cloth. Light burnishing (rubbing with a smooth spoon back) compacts surface fibers or soft metal edges for a subtle sheen.
- Color unification: a tiny wash of diluted paint over mixed materials can harmonize tones. Wipe back to keep relief crisp.
- Antiquing: encourage a controlled patina on brass or copper with vinegar fumes, then seal lightly with microcrystalline wax to stabilize the color.
Restraint matters. Let details whisper; let one accent sing.
Comfort, Weight, and Wearability
A brooch that looks beautiful but pulls fabric or scratches skin will stay in a drawer. Small choices ensure graceful wear.
- Weight distribution: keep heavier components close to the pin line. Add a hidden counterweight if a design lists to one side.
- Profile: aim for low relief on delicate garments. Save higher relief for sturdy coats and bags.
- Edges: bevel or soften all perimeters. Leather, felt, and ultrasuede create gentle borders for harder parts.
- Back-of-garment awareness: test on a blouse, sweater, and coat. The same brooch behaves differently across fabrics.
Thoughtful ergonomics make elegance effortless. The wearer should forget the brooch until someone admires it.
Testing and Quality Checks
Before calling a piece finished, perform these quick tests:
- Shake test: handle the brooch like luggage at an airport. Nothing should rattle or shift.
- Snag test: brush across netting or silk scraps. Sand, stitch, or cover any sharp points.
- Stress test: gently flex components. If movement occurs at a joint, reinforce with a stitch or epoxy fillet.
- Pin test: insert and remove the pin ten times. It should glide without sticking or bending.
Document what passes or fails. Over time, you’ll create an internal checklist that speeds production.
Adhesives and Cold Connections: Choosing the Right Join
Without solder, you rely on glue, stitching, wire wraps, and simple mechanical traps.
- PVA (white glue): ideal for paper and porous textiles. Not for structural joints.
- Cyanoacrylate (gel): quick, clean bonds for small, rigid parts. Avoid saturating fabric edges; they can go brittle.
- Two-part epoxy: best for metal-to-metal and mixed-material bonds that must bear weight.
- Stitching: secure components to a felt base before gluing a backing; thread invisible in the final piece adds strength.
- Wire wrapping: lash items to frames with fine wire, tucking tails smoothly.
- Rivets and makeshift eyelets: use a small nail and hammer to create holes in thin sheet or leather; secure with tiny brads or wire peened flat.
Match the join to the forces it must endure: shear, peel, or tensile. When in doubt, add a second method—stitch plus glue is a reliable duo.
Color, Texture, and the Art of Editing
Editing is where elegance often emerges. Build a palette first: lay out materials on white paper, remove one item, then another, until only the essentials remain. Pair matte felt with a satin ribbon, rough linen with smooth glass, or hammered wire with velvet. Repeat a color at least twice in small ways to knit the composition together.
Keep eye travel in mind. A gentle S-curve through the brooch leads viewers past highlights and back again. That’s intentional composition, not accident.
Inspiration Exercises to Spark Ideas
- Five-minute silhouette sketching: draw 20 thumbnail shapes without detail. Circle three favorites for prototyping.
- Monochrome challenge: design a brooch using only one color plus metal, focusing on texture and light.
- Found poem: pick three objects from a drawer and make them “rhyme” through spacing and scale.
- Museum echo: reinterpret a motif from pottery, textiles, or architecture into a brooch form.
Keep a small box of pre-made elements—wire leaves, felt petals, bead clusters—so you can compose quickly without starting from scratch each time.
Working Clean: Small Habits, Big Results
Cleanliness supports refinement. Decant a little glue onto a tile and apply with toothpicks. Wipe metal oils with alcohol before gluing. Keep a scrap of white fabric as a “truth mirror”—if the back scuffs or stains it, you know what a blouse will suffer. Label glues with open dates and cap tightly. These habits save you more time than they cost.
Safety and Workspace Tips
Protect your hands and lungs with simple measures: ventilate when using adhesives, wear a dust mask when sanding, and cut away from your body. Store sharp tools in a container, not loose in a drawer. Keep beverages far from the crafting area to avoid contaminating tools and materials.
Sustainable Sourcing and the Beauty of Reuse
Brooches are ideal for reimagining existing materials. Harvest buttons from worn garments, rescue beads from broken necklaces, and reuse fabric offcuts from tailoring. This is practical and poetic—each piece carries a whisper of its former life. Thoughtful upcycling also trims costs and reduces waste.
- Thrift strategy: look for garments with interesting trims (lace collars, embroidered edges) to repurpose.
- Hardware aisle finds: small washers, O-rings, and brass screws can become modernist elements.
- Nature’s archive: press leaves and flowers between book pages for botanical motifs. Seal gently under glass or clear varnish.
From Hobby to Gift to Micro-Brand
Presentation matters. A simple backing card with your name, material notes, and care tips elevates a brooch from “craft” to “keepsake.” If selling, photograph on neutral fabric with soft daylight. Share scale by including a hand or a ruler in one image. Start with small batches; iterative feedback will refine your line faster than guesswork.
- Pricing: materials × 2 or 3 plus a fair hourly rate is a baseline; raise for unique techniques or limited editions.
- Packaging: kraft boxes, tissue, and a tiny note about inspiration or materials build connection.
- Story: collectors respond to narrative—explain why you chose that leaf, map, or fabric. That’s living provenance.
Troubleshooting: Quick Fixes for Common Issues
- Glue bleed on fabric: wick with a corner of paper towel; cover with a small applique or bead cluster if a mark remains.
- Wobbly pin back: add stitches through the hardware holes, then reinforce with a felt plate and epoxy.
- Tilting brooch: shift the pin higher or add a hidden counterweight (a small coin or thick felt pad) opposite the heavy side.
- Snagging wire ends: file, fold back on itself, or bury inside a wrapping coil.
- Overbusy design: remove one color and one texture. Focus the eye with a single strong directional line.
Cleaning, Storage, and Longevity
Store brooches in shallow trays or on carded boards so backs don’t tangle. Keep textiles away from heavy metals to prevent denting or discoloration. For cleaning, use a soft brush to dust, a barely damp cloth for felt or leather, and a jewelry cloth for metal highlights. Avoid soaking mixed-material brooches—water can migrate into seams and weaken adhesives. Lightly wax exposed brass or copper to slow patina if you prefer a brighter look; otherwise, let the metal age gracefully.
Beyond Basics: Illusions and Details That Read as Luxury
- Faux filigree: twist two fine wires together and flatten gently with a spoon to mimic lacy metalwork.
- Edge painting: with a fine brush, paint edges of leather or card; a crisp edge looks bespoke.
- Shadow lines: lift a central motif on a thin foam or felt pad to cast a tiny shadow—dimension without bulk.
- Hidden magnets: for very delicate fabrics, pair a pin with a magnet backer to distribute weight (test for pacemaker safety when gifting).
Small, thoughtful additions telegraph care and taste. Elegance is cumulative.
A Repeatable Workflow for Consistent Results
- Define intention: one sentence—“A winter leaf in brass and felt.”
- Choose palette and textures: three materials, one accent.
- Sketch five shapes; pick one.
- Build subcomponents (petals, leaves, bead clusters).
- Dry-fit composition; photograph for reference.
- Commit joins in order of permanence: stitch first, then wire, then glue.
- Attach backing and pin; test thoroughly.
- Finish surfaces; sign or tag.
This scaffold prevents backtracking, glue smudges, and design drift. The more you repeat it, the more natural it becomes.
Material Pairings That Rarely Miss
- Wool felt + brass wire + glass bead: warm, crisp, and luminous.
- Leather + linen thread + mother-of-pearl button: earthy luxury.
- Silk ribbon + seed beads + tiny freshwater pearl: soft opulence.
- Denim + copper coil + enamel charm: casual modern.
Each trio balances hardness and softness, shine and matte, mass and delicacy. These are starting points; make them your own.
Heirloom Touches Without Heirloom Tools
To evoke age and gravitas, control color fade, texture, and micro-detail. A muted palette with one high note (cream, charcoal, and a single gold accent) feels intentional. A whisper of off-black paint rubbed into crevices and wiped away can simulate shadow depth. Gentle surface wear—carefully scuffed felt edges or softened metal corners—suggests a life lived, not factory perfection.
Ethics and Sensitivity in Motif and Sourcing
If your brooch borrows from cultural motifs, research and credit respectfully. When reusing animal-derived materials (bone, shell, vintage fur), verify legality and consider alternatives. Elegance includes empathy—designs feel richer when their origins are thoughtful.
Keeping Momentum: Practice Plans and Skill Stacking
- Weekly practice: one miniature study (2–3 cm) focused on a single skill—wrapping, edging, or color pairing.
- Monthly series: three variations on a theme—same shape, different textures.
- Skill stacking: combine two techniques you know—felt florals plus wire leaf frames, or decoupage cabochon set into bead embroidery.
Small, frequent repetitions build muscle memory and a personal visual language.
A Note on Restraint and Confidence
Elegance often means stopping one step early. If you’re unsure whether to add the extra bead, flourish, or tassel, pin the brooch to a garment and step back. Ask what the piece does for the wearer. If it already directs the gaze, enhances proportion, and sits comfortably, you’ve likely arrived.
Closing Encouragement
With a few tools, a careful eye, and patient hands, you can turn scraps into keepsakes and ideas into heirlooms. Keep a small notebook of sketches, palettes, and lessons learned. Over time, you won’t just make brooches—you’ll weave a practice: deliberate, joyful, and grounded in the quiet power of handwork. The lapel becomes your gallery, and each piece a signature of your evolving style and skill.
As you experiment, keep returning to fundamentals: clean composition, intentional silhouette, balanced symmetry, mindful ergonomics, and respectful provenance. Pair that with gentle burnishing, living patina, a touch of faux filigree, and resourceful upcycling. These tenets, practiced steadily, will lead you to brooches that look and feel unmistakably refined—made by hand, to be worn with ease, and to be noticed for all the right reasons.