Men’s jewelry rewards clarity of design, honest materials, and work you can feel in the hand. This guide shows how to design and craft bracelets, rings, pendants, and necklaces that fit male aesthetics without losing the warmth of the handmade. You will learn how to choose materials, set up a small bench, cut and shape metal, work with leather and cord, finish surfaces, and personalize pieces with symbol and story. Whether you are a hobbyist or planning a microbrand, the goal is the same: create pieces with integrity, intention, and long-wearing performance rooted in genuine craftsmanship.
What Makes Men’s Jewelry Distinct
Men’s jewelry often leans on restraint, weight, and tactile strength. Across cultures you will find recurring preferences: a sober palette, satisfying heft, deliberate textures, and simple geometry. Even when designs are bold, they usually emphasize structural clarity over ornament. Think of a cuff that telegraphs force through a single hammered plane, or a signet ring where a crisp silhouette carries more power than ornate engraving. As you design, keep three pillars in mind: proportion, wearability, and message.
- Proportion: Larger wrists and hands often call for thicker gauges, wider bands, and bolder silhouettes. Even minimal pieces benefit from robust lines and edges softened for comfort.
- Wearability: Rounded interiors, beveled edges, and low-profile settings prevent snagging and improve all-day comfort. Design for typing, tools, jackets, and gloves.
- Message: Materials and textures transmit meaning. Brushed steel whispers utility. Weathered leather tells a travel story. Blackened silver suggests depth and time.
Men’s jewelry thrives when pieces are purposeful. A pendant could house a message or a small reliquary. A ring might mark an achievement. Be intentional with the narrative and let it guide form and material.
Materials That Work: Metals, Leather, Wood, and Stone
Material choice determines not only look and feel but also longevity. Know how metals age, which fibers hold knots, and how surface finishes evolve. Your decisions here define eventual durability.
Metals
- Stainless steel: Affordable, tough, and corrosion resistant. Hard to solder at home, but excellent for ready-made components, wire forms, and chain.
- Titanium: Light yet strong. Hypoallergenic. Hard to cut and finish with hand tools; mostly suited to machined or purchased parts.
- Brass and bronze: Warm color, easy to work. They develop a rich patina. Great for cuffs, pendants, and tags. Needs sealing if you wish to avoid skin discoloration.
- Copper: Soft, expressive color, fantastic for texturing and hammering practice. Patinates quickly. Consider lining rings to prevent green skin stain.
- Silver (sterling or Argentium): Classic balance of workability and strength. Soldering is accessible. Can be blackened for contrast. Argentium resists tarnish better.
- Gold: Higher cost, luxurious feel, and timeless value. Alloys (e.g., 14k) offer strength and different hues. Useful for accents, inlays, and signets.
Non-metal Accents
- Leather: From braids to folded straps, leather adds warmth and flex. Veg-tan edges can be burnished to a glass-like finish using gum tragacanth or simple water and friction.
- Cords and fibers: Waxed cotton, nylon paracord, and microcords excel for knotting and adjustable bracelets. Match cord thickness to bead hole diameter for secure fits.
- Wood: Stabilized hardwoods (ironwood, ebony, olive) offer grain and tone. Use oil or wax finishes. Consider liners or inlays to prevent breakage in rings.
- Stone and ceramic: Matte onyx, hematite, and lava stone complement muted palettes. Use durable elastic or knotted cords to handle weight and movement.
Plan for mixed-media synergy. For example, a brushed brass tag on oiled leather pairs metallic structure with organic depth, while a silver pendant on oxidized chain delivers visual contrast and rugged poise.
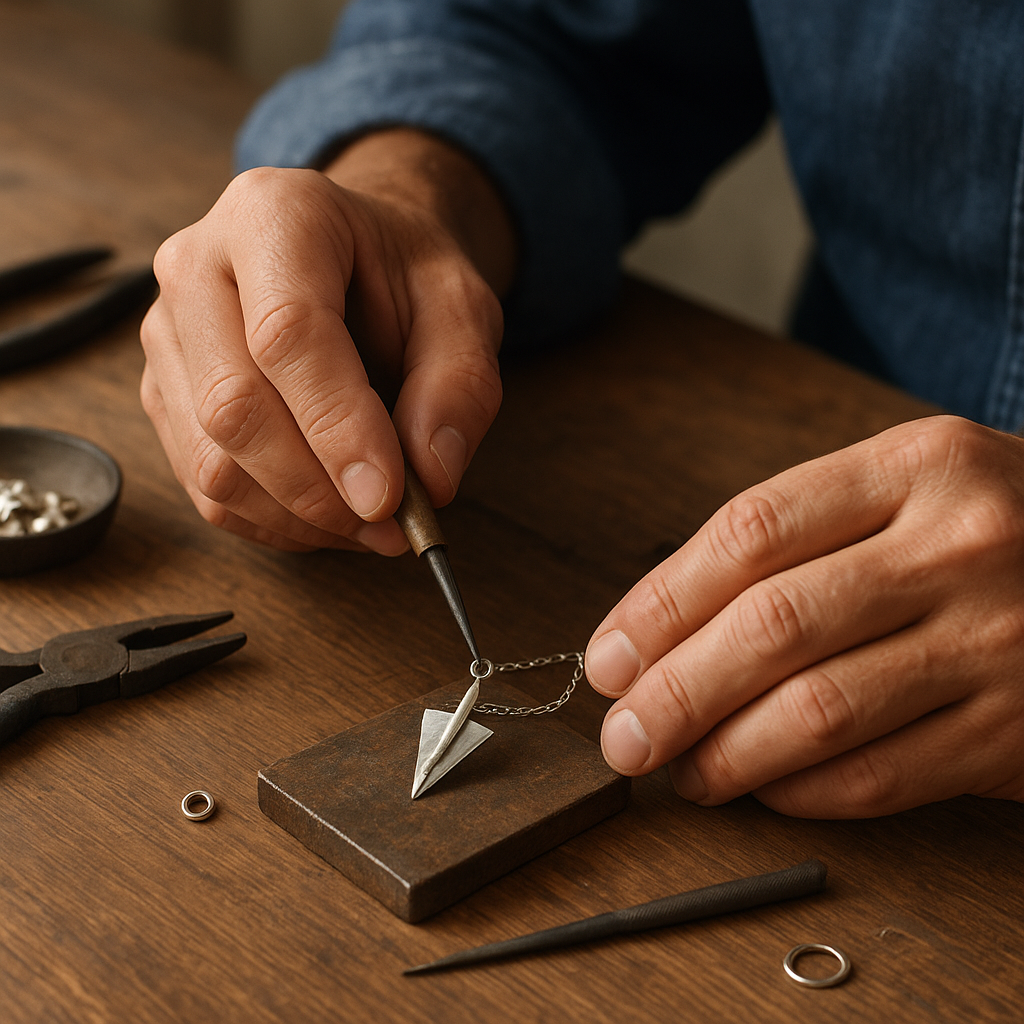
Tools and Workspace Setup
You can build professional-looking pieces with a small, efficient bench. Start modestly and add as projects demand. Place safety at the core; it enables confidence and quality.
- Measuring and marking: steel ruler, calipers, scribe, center punch.
- Cutting: jeweler’s saw with assorted blades, metal snips, flush cutters.
- Shaping: files (coarse to fine), needle files, half-round file, sandpaper (120–3000 grit), ring mandrel, bracelet mandrel, rawhide or nylon mallet.
- Joining: torch (butane or propane), silver solders (easy, medium, hard), flux, pickle pot for cleaning, binding wire, third-hand.
- Cold connections: riveting tools, doming block, hole punches, eyelet flaring tools.
- Leatherwork: cutting mat, utility knife, stitching chisels, edge beveler, burnisher, rivet setter, snap setter.
- Finishing: polishing compounds (Tripoli, rouge), rotary tool with buffs, Scotch-Brite pads, micro-mesh, abrasive wheels.
- Safety: eye protection, nitrile gloves, ventilation, firebrick or soldering board, quench cup, fire extinguisher.
Organize abrasives by grit, keep a log of solders used per piece, and label chemicals. Good habits eliminate confusion, reduce rework, and improve consistency in your finishing.
Core Metalworking Techniques
Metal responds to rhythm, heat, and patience. Control these and you will solve most bench problems. The underlying science of heat and work-hardening—basic metallurgy—explains why annealed metal bends smoothly or why solder flows.
Measuring, Cutting, and Fitting
- Mark your metal lightly with a scribe; a thin line yields accuracy.
- Use the jeweler’s saw with gentle pressure; let the blade do the work. Lubricate blades with beeswax.
- Deburr all edges before test fitting. Tiny burrs can hold gaps open and weaken joints.
Filing and Sanding
- File in long strokes, keeping flats flat and curves consistent.
- Sand progressively. Skipping grits leaves deep scratches that reappear after polishing.
Annealing and Forming
- Heat metal until it reaches a dull red (for copper and brass) or a faint color change for silver. Allow a brief air cool, then quench.
- Use mandrels and a rawhide mallet to shape without marring surfaces.
Soldering Basics
- Clean, tight joints are essential. Flux both sides, place small solder chips, and heat the whole piece evenly until solder flows along the seam.
- Quench, pickle, rinse, and inspect. Re-solder if you see pits or gaps.
Cold Connections
- Rivets join metal to metal or metal to leather without heat. Drill precise holes, cut rivet wire slightly proud, and mushroom it with a hammer.
- Use screws and barrel nuts for modular designs and easy repairs.
Texturing and Hammering
- Planish for strength and shimmer. Cross-peen for directional grain. Try texture plates under heavy pressure for repeatable patterns.
Walkthrough: Forged Band Ring
- Measure: Using a ring mandrel, determine finished size. Add length for thickness and solder seam allowance.
- Cut strip: 1.5–2 mm thick silver for a robust men’s band; width 5–8 mm.
- Form: Anneal, then wrap around the mandrel, aligning ends perfectly flush.
- Solder: Use medium solder for the first join. Heat evenly, watch for a clean seam.
- True the ring: Return to mandrel, tap with mallet until round and to size.
- Refine: File the seam, break outer and inner edges to a soft bevel for comfort fit.
- Finish: Sand through grits, then choose satin or high polish, or blacken recesses for contrast.
Walkthrough: Hammered Cuff Bracelet
- Cut: 6-inch strip of 1.6–2 mm brass or copper, width 10–20 mm.
- Edge prep: Round corners, soften long edges.
- Texture: Anneal, then hammer with a cross-peen for a rugged surface. Re-anneal as needed to avoid cracking.
- Form: Shape on a bracelet mandrel, leaving an even gap of about 25–35 mm for on/off.
- Seal: Apply wax or lacquer to control long-term color change.
Leather, Cord, and Beadwork
Leather and cord add adaptability and warmth to metal cores. They also allow for quick, affordable prototypes before committing to precious metals.
Leather Strap Bracelet
- Cut: 20–22 mm wide veg-tan strip to wrist length plus clasp allowance.
- Edge: Bevel and burnish with water and canvas. Apply oil for flexibility.
- Attachment: Rivet or stitch a metal tag or plate at center for personalization.
- Closure: Use a low-profile magnetic clasp or double cap rivet with button stud.
Macrame and Sliding Knots
- Use waxed cord for grip. A square knot sinnet makes a sturdy, masculine band.
- Create adjustable ends with a sliding knot so the bracelet fits various wrists.
Beaded Bracelets for Men
- Choose matte stones (onyx, lava, labradorite) and intersperse with metal spacers.
- String on pre-stretched elastic or use beading wire with crimp covers for longevity.
Surface Treatments: Polishes, Textures, and Controlled Oxidation
Surface is your voice. A satin finish whispers confidence; a mirror polish shouts precision. Darkened recesses, brushed planes, or hammered facets animate light and depth through controlled oxidation.
Mechanical Finishes
- Satin: Scotch-Brite or 600–1000 grit abrasive in one direction for a unidirectional grain.
- Brushed: Cross-grain scuff for a subtle, lived-in look.
- Mirror: Progress to 3000 grit, then polish with Tripoli and rouge on separate wheels.
Chemical and Heat Patinas
- Silver blackening: Use liver of sulfur to darken, then highlight raised areas. Seal with microcrystalline wax.
- Brass and copper color: Ammonia fumes, vinegar-salt, or heat coloring can build rich tones. Neutralize and seal to stabilize the patina.
Test finishes on scrap. Keep notes on timing, temperature, and dilution. Consistency is a professional habit and supports brand identity.
Ergonomics and Sizing
A piece succeeds when it disappears in daily use yet feels solid when noticed. Attend to ergonomics early to avoid returns and discomfort.
- Rings: Comfort-fit interiors and softened edges prevent hotspots. Size late in the day when fingers are warm. Account for band width; wider bands often require a half size up.
- Bracelets: Aim for a gap that permits on/off without deforming the cuff. Leather should sit snug but not constrict circulation.
- Pendants: Balance pendant weight with chain thickness and length. Avoid sharp backs that press against the sternum.
Design Language and Story
Design is a conversation between material, form, and meaning. Decide your vocabulary: maritime, industrial, mountaineering, urban minimalism, or ancestral motifs. Limit the palette to avoid noise. A single crisp symbol or texture can carry the message farther than a crowded surface.
- Geometry: Use strong primitives—rectangles, circles, hexagons—lightly altered by bevels or chamfers.
- Texture: One dominant texture supported by one secondary finish produces depth without clutter.
- Narrative: Stamps, coordinates, or meaningful dates anchor personal connection.
Personalization Techniques
- Stamping: Use hardened steel stamps on annealed metal. Support on a bench block and strike confidently once.
- Engraving: Hand or rotary engraving yields intricate monograms or symbols. Fill with black enamel or liver-of-sulfur for contrast.
- Inlay: Channel inlay with wood or stone creates bold contrast; epoxy and precise fit are critical.
- Edges and liners: Two-tone metals or leather linings elevate comfort and style.
Quality Control and Longevity
In the field, jewelry meets jackets, desks, tools, and salt air. Build to last. Careful inspection is the simplest path to reliability and reputation.
- Stress testing: Gently flex cuffs and pull-test clasps and knots. If anything fails at the bench, it would fail in the wild.
- Seam integrity: Under magnification, look for pinholes and cold joints. Re-solder rather than hope.
- Edge discipline: Every edge should be softened. Hard edges chip finishes and abrade skin.
- Coatings: Wax or lacquer can slow tarnish on copper alloys and preserve the intended look.
Care, Cleaning, and Aging Gracefully
Provide clients with simple routines. Good care enhances appearance and extends life.
- Daily: Wipe with a soft cloth after wear to remove sweat and oils.
- Weekly: Mild soap and warm water for metal; re-oil leather with a tiny amount of conditioner as needed.
- Periodic: Reapply wax on patinated surfaces, inspect clasps and knots, and touch up satin textures with fine abrasive pads.
Many men appreciate authentic wear. Design pieces that age well—edges that polish with use, valleys that darken—and make the patina part of the story.
Sourcing Ethically and Building a Responsible Practice
Materials tell moral stories too. Choose recycled metals, traceable stones, and reclaimed leather. Responsible sourcing builds trust and differentiates your brand while advancing genuine sustainability.
- Metals: Recycle scrap and request mill certificates where possible.
- Stones: Seek suppliers who declare origin and adherences to labor standards.
- Leather: Favor byproducts from responsible tanneries or upcycled belts and boots.
From Hobby to Brand
Set clear standards, keep records, and present work with clarity. The path from bench to market is pragmatic: process control, storytelling, and service.
- Pricing: Track time, materials, overhead, and profit margin. Do not underprice durability and detail.
- Photography: Use directional light to show texture and dimension. Show on-body shots for scale.
- Packaging: Minimal, reusable pouches protect finishes and reinforce brand values.
- Documentation: Include care cards and a sizing guide to reduce returns.
- Legal: Investigate local standards for precious metal marks and consider proper hallmarking where applicable.
Troubleshooting Common Problems
- Solder will not flow: Clean joint, increase flux, ensure pieces fit tightly, and heat the larger mass first.
- Firestain on silver: Use protective flux or switch to Argentium for reduced risk; polish back carefully.
- Splotchy patina: Degrease thoroughly, preheat slightly, and apply patina evenly. Seal once uniform.
- Ring went too small: Stretch slightly on mandrel if plain band; otherwise, cut and insert a sliver, then re-solder and refinish.
- Leather cracking: Too dry or over-dyed edges. Condition lightly and avoid heavy soaking. Burnish edges smoother.
- Elastic bracelet breaks: Use thicker, high-quality elastic, double-surgeon’s knot with adhesive, and pre-stretch cord.
Project Blueprints You Can Build
1. Minimalist Signet with Matte Top
- Square top with softened corners; brushed finish on face, polished shank.
- Option: Micro-engrave initials and blacken for contrast.
2. Braided Leather Wrap with Riveted Tag
- Three-strand braid in oiled leather; brass tag stamped with coordinates.
- Closes with gunmetal snap; edges burnished for comfort.
3. Oxidized Dog Tag Pendant
- Thick sterling plate with milled bevels; darkened recesses, satin flats.
- Hang on 3 mm oxidized chain for rugged balance.
4. Hammered Copper Cuff with Steel Rivets
- Cross-peen texture, sealed to stabilize tone.
- Cold-riveted stainless tabs add contrast and structure.
5. Stone-and-Steel Bead Stack
- Matte onyx, lava stone, and brushed steel spacers on beading wire.
- Secure with crimps and lock with crimp covers.
6. Paracord Survival Bracelet with Custom Buckle
- Cobra weave in muted colors; stainless shackle or custom metal buckle.
- Integrate a small engraved plate on the underside.
7. Silver Bar Pendant with Satin Grain
- Rectangular bar with single diagonal bevel; satin finish in one direction.
- Stamp discreet date on the reverse.
8. Two-Tone Riveted Ring
- Brass outer band with silver liner for skin-friendly wear.
- Riveted join for mechanical interest; edges rounded.
9. Textured Tie Bar
- Spring-tempered brass strip with linear file texture.
- Apply micro-wax to keep a clean, subdued sheen.
10. Leather Necklace with Metal Slider
- Flat leather lace with a silver slider bead; adjustable knots.
- Seal cut ends to prevent fray and improve longevity.
Deepening Skill: Practice Drills That Pay Off
- Seamless soldering: Solder short test rings in different gauges until seams vanish under 10x magnification.
- Texture library: Create a swatch panel of hammer, file, and abrasive textures labeled with tools and process.
- Finish consistency: Reproduce a satin grain across different shapes and record your grit sequence.
- Edge mastery: Practice uniform bevels on scrap strips until muscle memory locks in.
A Note on Comfort, Safety, and Lifestyle
Consider lifestyle when designing. For those who lift weights or work with machinery, lower profiles and snug fits reduce snags. For water sports, corrosion resistance matters. For office wear, smooth interiors and softened corners protect shirts and laptops.
- Remove rings before heavy lifting to prevent injury.
- Ventilate during soldering and patination; keep chemicals labeled and separate from food areas.
- Wear eye protection whenever cutting, grinding, or polishing.
Aesthetic Cohesion and Small-Batch Production
When you develop a line, define three constants: material palette, signature texture, and silhouette family. Locking these in makes every piece read as kin while allowing variation. Document cut lengths, solder types, and finish steps. This creates scalability without sacrificing hand-made character.
Evolving with Feedback
Let wearers teach you. Ask what catches on sleeves, what turns skin, and which finishes they prefer. Iteration transforms a good piece into a trusted companion. Keep an archive of prototypes and notes so each cycle elevates function and feel.
Closing Perspective
Making men’s jewelry blends discipline and intuition. You will count thousandths of an inch and, in the same hour, chase a feeling of weight and presence. Balance structure with soul. When in doubt, refine edges, simplify forms, and allow materials to speak. With practice and purposeful choices, you will craft work that fits the body, honors use, and ages into quiet authority—work defined by proportion, thoughtful finishing, and the patient, rewarding arc of honest craftsmanship.