Egypt’s beetle sun-bearer has crawled across millennia of human adornment, from royal pectorals buried beneath desert sands to modern pendants that hold a whisper of myth. Making ancient-inspired jewelry at the workbench is more than imitation; it is a tactile conversation with history. By learning a few time-tested techniques—carving, forming, simple casting, and stone setting—you can create amulets and wearable sculptures that merge symbolism with durable craft. This guide blends cultural context with practical steps, enabling you to fabricate pendant amulets, winged collars, and signet rings anchored in authentic visual language and thoughtful technique.
Myth, Meaning, and the Visual Grammar of Ancient Scarab Jewelry
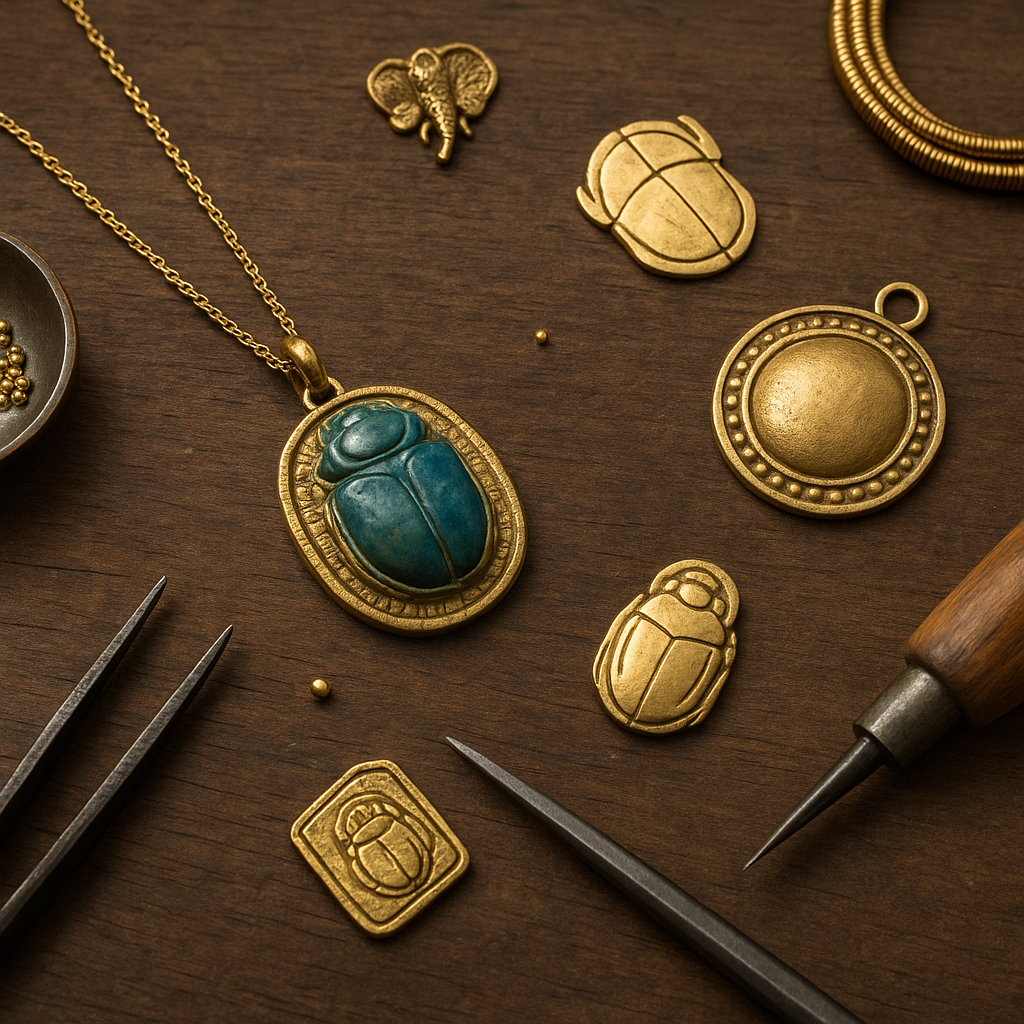
In the Nile Valley, the dung beetle embodied the daily rebirth of the sun. Rolling its sphere across sand was equated with Khepri, the morning sun god, forever pushing light back into the sky. The scarab became a talisman of regeneration, protection, and right action—worn on strings of beads, set into rings that doubled as administrative seals, and mounted on elaborate pectorals as offerings to the gods and the dead.
Color was code. Lapis blues signified the heavens; deep carnelian echoed the vitality of blood and sunset; turquoise and glazed earthenware blues aligned with renewal and fertility. On many pieces, the underside of the beetle holds inscriptions or a flat seal face carved in intaglio with names, prayers, and navigational spells for life and the afterlife. Wings—sometimes flanking a solar disk and uraeus—signify ascent and divine vigilance. Lotus and papyrus cycles, ankhs, and cartouches build a vocabulary of balance and protection. Understanding this visual grammar helps you design pieces that feel rooted instead of decorative pastiche.
What made these objects so compelling was their matter-of-fact craftsmanship. Modest materials like copper alloys and fired clays lived beside precious gold and stones. Surfaces were often burnished, stippled, hammered, or glazed, with edges softened by wear. When translating this language to your bench, aim for proportion, rhythm, and restraint; a good ancient-inspired piece reads as a concise sentence, not a paragraph of ornament.
Materials, Tools, and Bench Setup for Handcrafted Authenticity
Ancient aesthetics thrive on honest materials and visible handwork. You can begin with a compact tool kit and expand only when a project demands it.
Metals and substitutes
- Brass and bronze: Affordable, warm-toned, and historically plausible; ideal for pendants and pectoral components.
- Silver: Ductile, solders cleanly; excellent for rings and bezel settings.
- Gold-filled or low-karat gold: Offers a period-appropriate hue with modern affordability.
- Copper: Good for practice, rich color under controlled oxidation.
Gems, glass, and glazes
- Lapis lazuli, carnelian, turquoise, jasper, soapstone, and serpentine: Traditional stones for carving or cabochons.
- Cast glass and modern ceramic glazes: Useful stand-ins for ancient glass pastes.
- DIY faience: A silica-rich body that self-glazes with copper colorants, evocative of Nile blue-green amulets.
Foundations and fittings
- Sheet and wire (0.6–1.0 mm sheet; 0.6–1.2 mm wire): For bezels, backplates, hinges, bails, jump rings, and chain links.
- Natural cord: Linen, leather, or plant fibers; beeswax for conditioning.
- Non-toxic adhesives: For cold-joining in mixed-media pieces.
Essential tools
- Jeweler’s saw, files (needle and barrette), sandpapers (220–2000 grit).
- Bezel pusher, burnisher, prong pusher, bench block, rawhide mallet.
- Soldering setup: Torch, solder grades, flux, pickle, tweezers, third hand.
- Pliers: Chain nose, round nose, flat nose; side cutters.
- Measuring tools: Dividers, calipers, scribe, square.
- Polishing wheels, bristle brushes, rouge, pumice, and micro-mesh.
Advanced and optional
- Pitch bowl and chasing tools for low relief.
- Micro-motor or flex-shaft with burrs for lapidary work.
- Wax-carving tools and sprues for lost-wax casting.
- Kiln for small ceramics and experimental faience bodies.
Safety and ergonomics
- Ventilation for soldering and patination fumes; fume hood if possible.
- Eye protection, dust mask for stone and glass grinding, flame-resistant apron.
- Maintain sharp tools and neutral body posture; your hands are your primary instruments.
Core Techniques: From Beetle to Amulet
Carving the beetle
Whether you carve stone, bone, or wax, start with a drawn profile scaled to your setting. Block out the elytra (wing covers) and thorax first, then refine transitions so light slides across domes rather than snagging on ridges. The underside may be flat for a bezel-set cabochon or detailed as a seal with incised motifs. Work progressively: coarse shaping, medium refinement, and final detailing with sanding sticks and a polished burnisher to compact the surface.
For stone, practice on soapstone before moving to harder jaspers. Keep a water drip to control dust and heat. For wax, carve crisp geometry, leave a polished surface, and add sprues that promote clean metal flow later.
Raising and forging
Ancient silhouettes often sit proud of their backplates. Softly dome sheet metal with a dapping punch, then planish to tighten the grain. Use controlled annealing cycles: heat to a dull red, quench (for non-ferrous metals), pickle, then resume forming. The cadence of heat-work-rest prevents cracking and keeps forms lively rather than overworked.
Surface enrichment
- Repoussé and chasing: Push metal from the back and refine from the front for wing patterns, lotus veining, or sun disks.
- Filigree and granulation: Fine twisted wires and micro-spheres add discreet sparkle; keep patterns rhythmic and sparse.
- Stipple and matte: Use a beading tool or textured pumice to break reflections, echoing age-softened surfaces.
Settings that feel period-correct
Low bezel cups suit beetle cabochons. For a seal-style ring, create a flat platform with a protective rim. Tabs or prongs appear occasionally in ancient contexts; if you use them, give them generous width and smooth terminals to avoid a modern spiky look. When attaching components, prefer clean soldered joins or riveted cold connections, both historically plausible and mechanically robust.
Project: A Winged Scarab Pendant with Hieroglyphic Backplate
Design and scaling
Sketch a central beetle about 20–30 mm long with stylized wings spanning 60–80 mm. The backplate carries a vertical register: solar disk, ankh, and a name in a cartouche. Keep thicknesses sensible: 0.8 mm for backplate; 0.5–0.6 mm for bezel walls and wing overlays. Mark a hidden bail behind the solar disk for balance.
Carve or choose the beetle
Shape a cabochon from carnelian or lapis; aim for an oval footprint with a high dome and subtly indicated elytra. Polish to 1200+ grit and burnish. If using a ready-made cabochon, refine its base to fit your bezel exactly; a close fit is both secure and visually quiet.
Fabricate the bezel and backplate
- Saw a bezel strip to the perimeter of your cabochon; file butt ends square; form and solder into an exact oval.
- Trace the bezel on sheet and saw a backplate; add alignment marks for wings and symbols.
- Tack-solder the bezel onto the backplate; check for gaps; fill and clean with files and scrapers.
Wings, symbols, and texture
- Cut two wing blanks; shape with files; score feather divisions lightly with a liner tool over pitch.
- Solder wings to the backplate, staggering heat to protect the bezel; quench and pickle between heats.
- Chisel or chase the solar disk and ankh; keep lines rounded and confident rather than deep and harsh.
Hidden bail and finishing
- Form a rectangular bail and solder behind the solar disk; test the pendant’s balance on a chain.
- Round all edges; remove solder spills and ripples; pre-polish only the high points.
- Apply a subtle patina (sulfur for silver, liver-of-sulfur gel; ammonium sulfide or commercial solutions for copper alloys). Rinse, then selectively polish highlights to reveal relief.
Stone setting
Seat the cabochon on a thin bed of jeweler’s shellac or beeswax if needed to level it. Press bezel walls evenly with a pusher, then burnish. Make sure wings and symbols do not visually compete with the beetle; the eye should land on the amulet first, then read outward.
Optional color touches
- Cold enamel or glass seed bead accents in narrow recesses to echo inlaid stones.
- Microscopic inlay of contrasting metal (silver drops against bronze) for star-like points around the sun disk.
Project: A Broad Collar with Scarab Pectoral
The wesekh collar’s power lies in repetition and gradual color transitions. Build yours as modular rows that drape comfortably and terminate in a hook-and-eye closure styled as papyrus buds.
Module planning
- Row 1: Tubular beads in alternating lapis-tone and gold-tone (brass).
- Row 2: Disc beads in turquoise and carnelian hues; small spacer links.
- Row 3: Winged plaques: three panels with chased feathers and soldered loops.
- Center pectoral: Your winged beetle pendant attached via discrete jump rings.
Construction hints
- Assemble rows on waxed linen; test drape on a mannequin or your own neck to avoid stiff curves.
- Distribute weight by tapering plaque sizes toward the clasp; the collar should neither twist nor gape.
- Finish with a robust S-hook clasp; flare and harden the eye so it resists opening.
To keep the finish coherent, use the same patination regime across metal components, then unify sheen with a light hand-buff and a microcrystalline wax seal.
Project: A Scarab Ring with Functional Seal
A swivel ring pays homage to ancient administrative life. The beetle aligns longitudinally for wear and flips to reveal an intaglio for stamping clay or soft wax.
Making the swivel
- Forge a stout U-shaped yoke; drill matched holes for a pivot rod.
- Carve a flat-bottom beetle and inscribe the base with a mirror-image monogram or short prayer.
- Set the beetle in a tight rim with two lateral lugs; insert the pivot rod and peen gently into countersinks so rotation is smooth but secure.
Shank and setting
- Form a tapered ring shank; solder the yoke; refine angles so the beetle sits flush in wear position.
- Work-harden the shank; add a subtle chased border to echo the pectoral aesthetic without clutter.
Finish with a deep polish on the high points only; leave recessed stipple to catch pigment or soot if you want the intaglio to print crisply.
Color, Glaze, and Time’s Hand: Finishes that Look Lived-In
Nothing flattens an ancient-inspired piece faster than an over-bright mirror polish. Strive for layered surfaces that record both tool and time.
Patinas and selective brightening
- Sulfur-based patinas for silver: build a range from charcoal to blue-gray; reduce with a soft fiber wheel to reveal relief.
- Ammonia fuming and cupric nitrates for bronze and brass; neutralize thoroughly.
- Heat-tint copper to bloom rose and plum before sealing.
Seal with wax or lacquer, choosing a matte to satin luster. Re-polish contact points (bezel rims, wing ridges) to mimic hand-rubbed age.
Faience experiments
For small amulets, a silica body with soda-lime flux and copper oxide produces that luminous Nile blue. Self-glazing occurs as salts migrate to the surface during drying, then fuse at temperature. Test tiles first; track colorants and kiln curves to dial in hue and crackle.
Glass and enamel notes
Crushed glass in narrow cells can be torch-fused or kiln-baked to simulate cloisonné fragments; keep cells shallow and isolated from heat-sensitive stones. Cold enamel epoxies add color without firing—use sparingly to avoid a plastic look and always on recessed, well-keyed surfaces.
Cords, Chains, and Ancient-Style Closures
Neckwear changes a pendant’s voice. A bright modern chain can feel anachronistic; hand-made cords or simple link chains provide context.
- Linen cord: S-twist three strands waxed with beeswax; splice ends under a binding wrap to keep bulk minimal.
- Leather thong: Skive ends thin for low-profile knots; condition lightly; avoid modern dye bleed.
- Simple loop-in-loop chain: Fuse fine silver rings and draw through a drawplate to uniformity; the supple motion harmonizes with pectorals.
- Closures: S-hook and eye with flared terminals; toggle bars shaped like lotus buds; a riveted tube clasp for collars.
Design Grammar: Motifs, Proportion, and Restraint
When composing plaques and pendants, think in registers—horizontal bands that hold symbols—and in central axis symmetry. Let the beetle dominate the vertical axis; float the sun disk above; anchor with lotus blossoms below. Wings can span one-and-a-half to two beetle lengths without overpowering the form. Keep motif counts low: beetle plus one or two accompanying symbols, no more. Lines should be rounded, almost calligraphic, with terminals that taper softly.
Use a 3–5–8 rhythm in bead sizing across a collar to avoid visual monotony. Repeat small textures—stipple, rope edge, feather lines—to knit disparate modules together. A consistent edge treatment (rolled or chamfered) makes mixed techniques read as one family.
Troubleshooting and Bench Wisdom
- Bezel too tight: Sand the underside of the cabochon subtly or thin the bezel rim from the inside with a scraper; never force the stone.
- Solder seams showing: Re-flow with a tiny paillon and abundant flux; after cleanup, add a light stipple to blend.
- Warped backplate: Stress relieve with a brief torch pass and planish on a flat stake; re-establish textures afterward.
- Uneven wing symmetry: Make a single master wing, mold or template it, and mirror-trace; file both together secured with double-stick tape for identical edges.
- Patina blotchy: Degrease thoroughly; warm metal slightly before solution; apply in thinner passes and stop early—depth comes from repetition, not duration.
- Stone chipped during setting: Mask edges with Kapton or painter’s tape; use a polished steel pusher; consider a micro-bezel step to distribute pressure.
Keep a swatch board of finishes: small squares of your metals labeled with patina formulas, abrasives, and sealing methods. When a project goes sideways, reference the board instead of guessing; this develops a personal finish vocabulary aligned to your studio conditions.
Responsible Inspiration and Sourcing
Studying museum collections—especially open-access images with scale—sharpens your eye for proportion and technique. Let those references inform your decisions while clearly presenting your work as contemporary, documented to avoid confusion with antiquities. Seek ethically sourced stones and recycled metals where possible. When carving motifs such as cartouches, use fictional or personal monograms unless a client requests their own name; avoid replicating modern people’s names in ancient royal frames unless it’s clearly playful or commemorative.
Going Deeper: Casting, Replication, and Modular Thinking
Once a beetle carving feels right in your hand, you may want multiples to explore variations. Silicone molds of a wax or stone master let you produce consistent waxes for investment casting. A careful sprue tree and controlled burnout yield crisp results; keep walls generous to avoid shrinkage pits. With clean castings, reserve hand steps—light chasing, refined feather lines, punctuated stipple—to reintroduce soul. Casting should deliver shape, not finish; your hands provide the final signature.
Modularity is the secret to ambitious collars and pectorals. Design interchangeable wing panels, columns of symbols, and connector links that share hole sizes and jump-ring geometry. This lets you reconfigure a piece for different cords, necklaces, and ceremonial moods without remaking everything. Over time, your bench accrues a library of parts that combine like a language—useful, expressive, and deeply efficient.
Care, Wear, and the Life of the Amulet
Jewelry earns dignity through wear. Expect edges to burnish and recesses to darken. Encourage clients to handle pieces with clean, dry hands and to store them individually in soft pouches. Refresh finishes seasonally: wash with mild soap, dry thoroughly, touch up highlights with a soft cloth, and re-wax patinated surfaces. For rings and collars, occasional check-ups—tightening jump rings, confirming bezel security—are part of amulet stewardship.
A well-made ancient-inspired piece condenses myth, proportion, and hand skill into a compact token of protection and beauty. Whether you carve one beetle a month or assemble a whole aviary of winged pectorals, the path is the same: study the originals, draft with intention, form with patience, and let marks of process remain. The quiet dome of a beetle’s back, a shallow chased feather, the soft glow of aged metal—these are the elements that make your work feel timeless, wearable, and alive beneath the sun that rises anew each morning.