Old jewelry carries stories, metals, and stones that deserve a second act. Repurposing gives those pieces fresh life without erasing their history. It blends craft, design thinking, and problem-solving to turn a broken clasp or a single orphan earring into something wearable and exciting again. Whether you are a handcraft enthusiast seeking a personal project or a maker building a small studio practice, transforming what you already own is an art that rewards curiosity, patience, and a feel for materials.
Why Repurposing Jewelry Matters
At its heart, repurposing is about honoring materials while creating designs that fit the way you live now. Many pieces in jewelry boxes remain unworn because of outdated styles, damaged components, or a change in personal taste. Instead of discarding them, you can reimagine their parts—stones, chains, findings—into forms that shine again.
- Environmental value: Repurposing supports sustainability by reducing demand for newly mined metals and stones. Mining has a real footprint. Using what already exists is kinder to the planet.
- Economic sense: Precious metals and gem components represent stored value. Redesigning preserves that value while avoiding the cost of entirely new materials.
- Emotional resonance: Family pieces become more wearable when redesigned. You carry memories forward in a way that suits your style and daily life.
- Creativity and identity: A redesigned piece becomes singular—an expressive object that reflects your taste and story.
It helps to distinguish between refresh, repair, and redesign. A refresh cleans and polishes; a repair restores original function; a redesign changes the structure or style entirely. All three have a place in the handcraft toolkit and can be combined within a single project.
Assessing What You Have
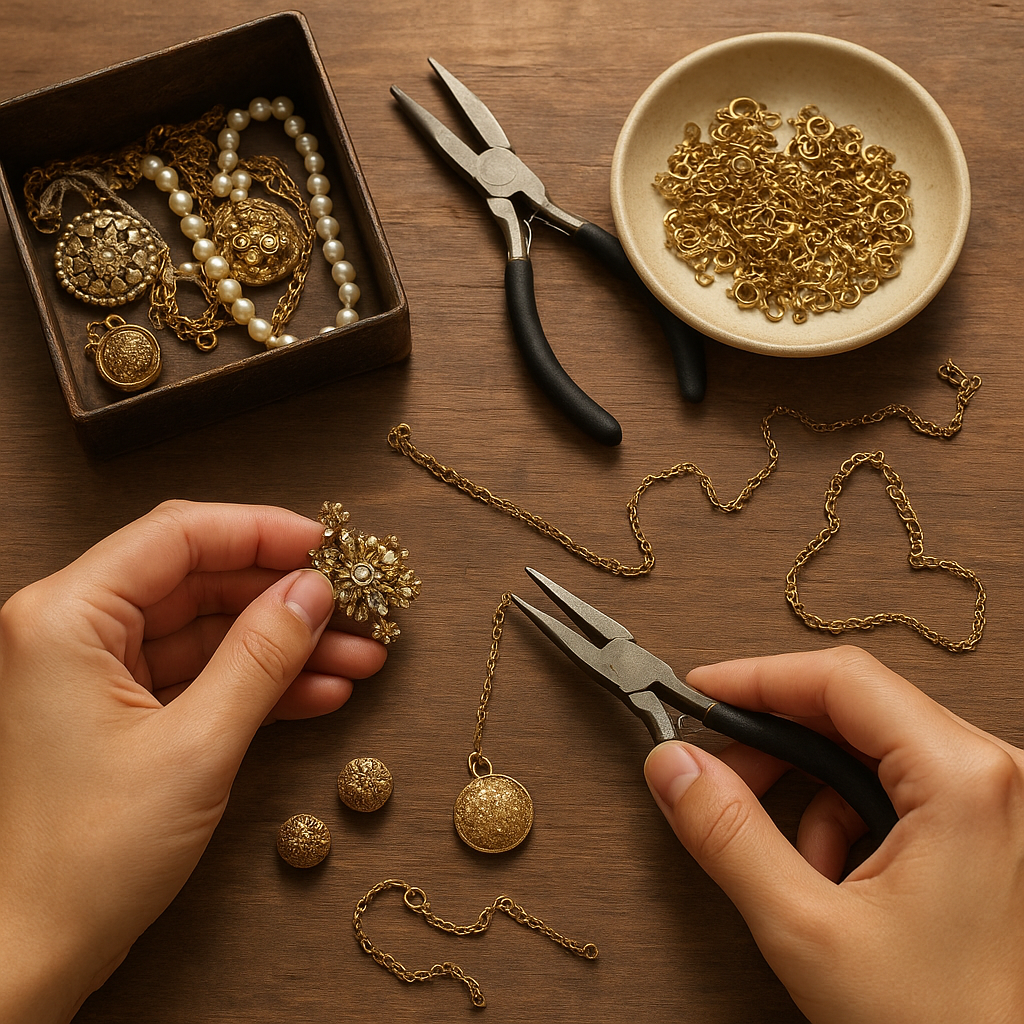
Start with a systematic review. Lay everything on a soft cloth and look closely, with good light and a loupe (10x) if you have one.
- Identify metals: Look for hallmarks such as 925 (sterling silver), 375/585/750 (9k/14k/18k gold), PT or 950 (platinum). A magnet can help: most precious metals are not magnetic, though findings like springs and some chains may contain steel parts. Note that plating can disguise base metals.
- Evaluate stones: Observe cut, color, and clarity. Heat-sensitive gems (opal, pearl, turquoise, coral, amber) need special care. Press a warm fingertip to a stone: glass warms quickly; many natural stones feel cool longer. Avoid scratch tests that risk damage.
- Check structural integrity: Examine solder joints, hinges, prongs, and clasps. Look for cracks in shanks or jump rings that have thinned with wear.
- Document provenance: Photograph piece-by-piece and note sentimental or historical details. Maintaining provenance can matter for value and storytelling later.
- Decide the path: Keep some items intact as keepsakes or display in shadow boxes. Mark the rest for parts—chains, stones, charms, brooch findings, earring posts—to feed your new designs.
When in doubt, have potentially valuable or antique items assessed by a trusted appraiser before altering them. Some objects gain value from original finishes, maker’s marks, or period detail, and thoughtful planning ensures you preserve what matters most.
Tools and Materials for Handcrafting
You can start small and build as your skills grow. A beginner set may include:
- Flat, round-nose, and chain-nose pliers; flush cutters; nylon-jaw pliers for gentle shaping.
- Assorted jump rings, head pins, eye pins, crimps, crimp covers, earring hooks, lobster clasps.
- Files and polishing papers (400–3000 grit), a jeweler’s loupe, a small steel block, and a rawhide or nylon mallet.
- Beading wire (19- or 49-strand), silk thread for pearls, needles, and a bead board for layout.
- Two-part epoxy for non-porous bonds and gel cyanoacrylate for quick jobs. Use sparingly and ventilate.
Intermediate to advanced makers often add:
- Bench pin, saw frame with blades (2/0–4/0), needle files, and a flex shaft or rotary tool with polishing bits.
- Mandrels (ring, bracelet), dapping set, and forming stakes.
- Butane or propane torch, solder (hard/medium/easy), flux, and a pickle solution for cleaning oxides.
- Third-hand tweezers, soldering blocks, heat-resistant surfaces, and quench bowl.
- Safety gear: eye protection, respirator for dust, good ventilation, and heat-resistant gloves.
Keep a small stash of replacement findings like pin backs, brooch converters, and pendant bails. They can turn a single brooch into a pendant, a tie clip into a bar necklace, or a cufflink into a charm.
Design Thinking for New Lives
Successful repurposing begins with intent. Ask: What story should this piece tell now? What lifestyle does it serve—everyday, formal, tactile, minimal? Sketch a few layouts. On a bead board or paper, experiment with placement until a focal element emerges.
- Balance and proportion: Heavier focal elements deserve broader chain or counterweights on the opposite side. Consider how the piece sits on the body and moves.
- Color and texture: Pair warm metals (gold, brass) with warm stones (citrine, garnet); cool metals (silver, white gold) flatter cool tones (amethyst, sapphire). Mix surfaces—matte with high polish—so elements don’t compete.
- Modularity: Design with interchangeability. Use jump rings, small hinges, or clips so pendants double as brooches or charms detach for different looks.
- Wearability: Consider snag points, weight, and clasp location. Jewelry that irritates skin or catches hair stays in a drawer.
This is where old parts suggest possibilities: a vintage brooch becomes a pendant centerpiece; a broken strand of pearls gets reknotted with colorful spacers; single earrings evolve into mismatched pairs or charm clusters. Let the material lead.
Beginner-Friendly Methods: No-Heat Approaches
Many transformations require no torch at all. These “cold” methods are perfect for mixed materials and heat-sensitive stones.
Wire Wrapping Basics
Use soft wire (18–24 gauge) in copper, brass, silver, or gold-fill to create loops and cages for stones. Wrap a broken pendant loop with 22-gauge wire to form a secure bail. Wire wrapping can unite formerly unrelated components while offering a decorative texture that complements vintage surfaces.
Jump Rings and Chain Reconfiguration
Open jump rings sideways with two pliers, attach and close carefully to a near-invisible seam. With a handful of jump rings, you can combine short chain segments from several necklaces into a long, layered chain. Add a swivel lobster clasp to prevent twisting.
Crimping and Stringing
Rebuild broken bead strands on coated stainless-steel beading wire (49-strand is flexible and durable). Slip on a crimp, go through the clasp loop, back through the crimp, and compress with crimping pliers. Hide crimps with crimp covers for a tidy finish. For pearls, silk knotting protects each bead and adds elegant drape; use French wire (bullion) at clasp ends to prevent thread abrasion.
Rivets and Tabs
Rivets and bent tabs are dependable cold connections for attaching components without heat. Drill a snug hole through both layers and secure with a wire or tube rivet peened on each side. Tabs are cut from the base metal and bent over a component’s edge to hold it mechanically—ideal for fixing a flat cameo onto a metal backplate.
Adhesive Techniques
Quality two-part epoxy can secure cabochons, flat-back crystals, or vintage glass onto metal backings. Roughen both surfaces lightly, degrease with isopropyl alcohol, then clamp gently while curing. Use adhesives sparingly and consider reversibility for delicate or historic items.
Heat-Based Methods: Classic Metalwork
When you are ready to expand, metalworking techniques open powerful options. Work slowly, plan each step, and protect stones that don’t tolerate heat.
Preparing for Heat
- Remove heat-sensitive stones (opal, pearl, turquoise, coral, emerald with fillers). If removal isn’t possible, submerge the stone in a heat-protective clay or a wet tissue barrier and keep heat localized.
- Clean metal thoroughly; oil and dirt sabotage solder flow.
- Use appropriate solder flow order: start with hard, then medium, then easy, to avoid reflowing earlier joints.
Joining and Repairs
Classic soldering lets you rebuild broken chains, reattach jump rings, and add decorative elements. Heat the assembly evenly, feed solder where the joint meets, and allow capillary action to do the work. After heating, quench, pickle to remove oxides, and rinse. Neutralize with a baking soda bath before polishing.
Stone Settings
Create or modify settings: prongs for faceted gems, bezels for smooth stones. A bezel is a metal collar that wraps the stone’s perimeter; it is secure and protective, especially for softer gemstones. Use fine silver for easy burnishing, or 14k gold for durability. For faceted stones, prongs require precise seat cutting and careful tightening.
Annealing and Forming
Metals work-harden as they are hammered or bent. Gentle annealing softens the metal so you can reshape a ring, dome a disk, or curve a pendant without cracking. After annealing, pickle and rinse before further fabrication.
Fusing and Casting Scraps
Small scraps of gold or silver can be melted into a ball for decorative elements or cast into an ingot, then rolled into sheet or drawn into wire. Keep metals separated by type to maintain predictable properties. Refining mixed scrap professionally is wise when you accumulate enough.
Surface Revival and Finishes
You can alter an entire piece’s personality through surface treatment.
- Cleaning and polish: Start with mild soap and soft brushes. Use polishing papers or compounds like Tripoli and rouge for progressively finer finishes. Ultrasonic cleaners work on many metals, but avoid them with fragile stones or glued components.
- Selective shine: Mask areas with tape to maintain contrast between high polish and satin or hammered textures.
- Patination: Encourage or stabilize patina on silver and copper with liver of sulfur, ammonia fuming for copper, or commercial antiquing solutions. Seal with wax to preserve the effect.
- Plating and coating: Gold plating or vermeil can unify mixed components, while clear lacquers or nano-coatings reduce tarnish and skin reactions.
Remember that original finishes sometimes carry historical value; gentle cleaning and a satin refinish may be better than mirror brightening when preserving age and character.
Project Ideas and Step-by-Step Concepts
Brooch-to-Pendant Conversion
- Assess the pin: If the back is ornate, a simple bail may suffice. If not, add a decorative backplate with rivets.
- Attach a bail via solder or rivets so the piece hangs straight. Test orientation on a chain before finalizing.
- Finish by adding a chain that balances the pendant’s visual weight.
Charm Bracelet from Singles
- Collect single earrings, cufflinks, or tiny pendants. Standardize with matching jump rings.
- Choose a sturdy chain with larger links. Space charms evenly or cluster near the clasp for dynamic movement.
- Consider a theme—botanical, celestial, travel—to tie a diverse group together.
Mismatched Earrings
- Turn single earrings into a complementary pair by echoing one element (color, shape, or length) between them.
- Use lightweight chain to balance heavier components and avoid ear fatigue.
- Add silicone backs or leverbacks for security.
Stacking Rings from Broken Bands
- Trim deformed sections, resize, and straighten on a ring mandrel.
- Add texture with a cross-peen hammer, chase a pattern, or inlay a contrasting metal strip.
- Coordinate finishes—matte, hammered, polished—so the set feels intentional.
Watch Movement Necklace
- Disassemble a nonfunctional vintage watch to reveal the movement. Protect moving parts with a clear domed crystal set using adhesive or a custom bezel.
- Mount the movement to a backplate with micro screws or tube rivets.
- Hang on a chain that matches the movement’s metal tone to keep the look cohesive.
Pearl Restring and Modernization
- Clean pearls gently with damp cloth; avoid chemicals.
- Reknot on silk with contrasting seed-bead spacers every few pearls for a modern rhythm.
- Add a magnetic clasp with safety chain for easy wear.
Working with Sentimental and Antique Pieces
Heirloom redesign balances respect and creativity. Plan with care:
- Photograph and measure before altering. Keep removed parts—original clasps, links, or settings—in labeled envelopes.
- Decide what must remain untouched: engravings, maker’s marks, or a distinctive silhouette. Preserve these wherever possible.
- Choose reversible techniques when sentiment runs high: rivets, tabs, and bolt-together assemblies can be undone later.
- Document the story. A small card noting the piece’s origin and how it was transformed keeps the narrative alive.
Clarity with family is essential. Get written approval if multiple relatives share interest. A gentle redesign that maintains recognizable motifs often satisfies both memory and modern wearability.
Material Knowledge for Better Results
Metals and stones behave according to their nature. Work with, not against, those properties.
- Silver: Soft and bright, easy to form and solder. Tarnishes but cleans readily. Sterling benefits from periodic work hardening to resist bending.
- Gold: Durable and resists tarnish. Karat and alloy color affect hardness and melting point; solder choice must match.
- Brass and bronze: Affordable and strong, but can cause skin discoloration; seal or plate for sensitive skin.
- Platinum: Tough and heat tolerant, but demands higher temperatures and careful tool use.
- Gemstones: Know the heat, chemical, and ultrasonic sensitivity of your stones. Porous or treated gems need gentle methods.
If you prefer avoiding heat entirely, explore mixed-media alternatives: leather collars for metal ornaments, textile cords, resin domes encapsulating tiny components, or polymer-clay bezels for fragile vintage glass.
Safety, Ethics, and Legal Considerations
- Allergies: Nickel is a common irritant. Use hypoallergenic findings (titanium, niobium, surgical steel) for ear hooks and posts.
- Hazardous residues: Vintage solder may contain lead or cadmium. Work with ventilation and avoid heating unknown solders.
- Stone treatments: Fractions of gems are fracture-filled or oil-treated. Heat or chemicals can compromise them; proceed cautiously.
- Hallmark and tax law: In some regions, altering hallmarked items triggers assay or disclosure obligations. If you sell, learn local requirements.
- Cultural sensitivity: Sacred or culturally significant symbols deserve respect and context; avoid decontextualizing important motifs.
Upcycling Aesthetics: Bringing Old and New into Harmony
Sometimes the magic lies in contrast. Combine a delicate Victorian pendant with a stark modern chain. Suspend a rustic hammered element beneath a faceted gemstone for depth. Aim for cohesion in at least two of three aspects—color, texture, or silhouette—so the final composition feels intentional.
One practical trick: build a small “palette board” of candidate components and live with it on your bench for a day. You will notice surprising relationships or conflicts that only time reveals.
Case Study: A Three-Piece Transformation
Imagine a small stash: a broken gold chain, a single emerald stud, and a tarnished silver brooch with floral engraving.
- Step 1: Clean and assess. The chain is 14k, the emerald is small but vivid, the brooch is sterling with deep engraving and a bent pin.
- Step 2: Design. Sketch a pendant using the brooch’s floral element as a backplate, the emerald as a feature accent, and the gold chain as the neckpiece.
- Step 3: Fabrication. Remove the brooch pin and straighten the silver plate. Create a small bezel for the emerald on a contrasting silver disk. Solder the assembly with careful heat control, pickle, and polish the raised areas while leaving low relief dark to emphasize texture.
- Step 4: Integration. Add a gold bail that echoes the chain color, linking silver and gold harmoniously. Install the emerald and burnish the bezel.
- Step 5: Finishing. Lightly matte the silver field, polish highlights, and apply microcrystalline wax. The leftover brooch pin becomes a stickpin by adding a new cap, while the stud’s empty setting is repurposed as a tiny charm.
In one process, three forgotten pieces become a pendant, a stickpin, and a charm—each connected by material and motif.
Troubleshooting Common Issues
- Loose stone in a setting: For prongs, carefully tighten with a pusher or prong pliers. For bezels, burnish evenly around the edge. If instability persists, replace the seat or add support beads behind a cabochon.
- Chain kinks and weak links: Replace suspect links near clasps; solder closed high-wear jump rings.
- Mismatched metals clashing: Unify with a small repeated accent—three gold jump rings spaced along a silver chain—or apply selective plating.
- Skin discoloration from copper or brass: Seal contact areas with lacquer or wax; consider lining the back with sterling or adding a comfort pad.
- Glue failure: Degrease surfaces thoroughly and allow full cure time. Consider mechanical backup like a tab or micro screw.
Workflow, Time, and Skill Building
Plan your bench time in small, focused sessions:
- Session 1: Assessment and design layout.
- Session 2: Disassembly and part preparation (cleaning, trimming, test fits).
- Session 3: Primary assembly—cold connections or soldering.
- Session 4: Finish work—filing, sanding, polishing, patination.
- Session 5: Final assembly, quality checks, and photographs.
Track hours and materials. Even if you are not selling, a simple log teaches you where effort accumulates and which techniques save time.
Photography and Presentation
Good images help you evaluate design and share results. Use diffused daylight, a neutral background, and a reflector. Photograph from multiple angles: the clasp, bale, and backside finish show craftsmanship. For storage, include a small card with material notes and any special care instructions.
Care, Maintenance, and Longevity
- Store in anti-tarnish pouches or boxes. Keep pieces separated to avoid scratching.
- Wipe jewelry after wear to remove skin oils and cosmetics. Avoid chlorine and bleach; take jewelry off before swimming or cleaning.
- Restring beads and pearls periodically—silk stretches and can fray.
- Refresh surface treatments: wax patinated pieces, repolish high-wear edges, and check clasps and jump rings annually.
A small care routine extends the life of redesigned pieces, preserving both beauty and structure.
If You Decide to Sell
Repurposed jewelry occupies a vibrant niche. Buyers appreciate clarity, craft, and story.
- Describe materials accurately and disclose alterations or plating.
- Frame the narrative: highlight the heirloom origin, the design intent, and the techniques used.
- Offer sizing and alteration services to accommodate different wearers.
- Include care cards and, when appropriate, appraisal documentation.
Lean into the language of upcycling and craft. Focus on durability, thoughtful design, and the reduced environmental footprint. A consistent style—whether minimalist, bohemian, or architectural—helps your work stand out.
Advanced Notes for Enthusiasts
- Explore mixed metals with diffusion bonding or bi-metal sheet for subtle color fields.
- Experiment with keum-boo (gold foil fused to fine silver) for luminous highlights without full plating.
- Use a rolling mill to impress lace or paper textures into annealed metal.
- Try granulation with tiny metal spheres for ancient-inspired decoration.
- Develop custom clasps that echo design motifs—form follows function but also becomes jewelry’s signature.
As skills grow, so does your ability to orchestrate complex assemblies that look effortlessness itself. Mastery lies in clean fundamentals: tidy joins, intentional surfaces, and ergonomic wearability.
Ethos and Aesthetics: What Your Jewelry Says
Redesign is more than technique—it is an ethos. Choosing to renew materials says you value stories embedded in metal and stone. It acknowledges craft lineage while expressing your own era’s sensibility. When someone asks about your necklace, you can speak about the grandmother’s brooch at its heart, the rescued chain, and the design problem you solved to make it sit just so at the collarbone. That story is the invisible clasp that fastens maker and wearer to a wider human tradition.
Getting Started Today
- Pick one “low stakes” piece to learn on—perhaps a broken chain or a single earring.
- Decide on one focal technique to practice this week: rivets, silk knotting, or a simple bezel.
- Set up a small, consistent workspace with good light, a bench mat, and organized trays.
- Learn one new term and put it to use—perhaps annealing or a neat prong seat cut.
You do not need a perfect plan to begin—only attention and a willingness to iterate. Soon you will recognize materials at a glance, feel the right tension in a loop, and trust the rhythm of your hands.
Conclusion: Designing the Next Life
Repurposing old jewelry is an invitation to design the next life of cherished materials. It combines historical awareness with practical craft, respects resources, and delights in problem-solving. From subtle refreshes to bold transformations, your bench becomes a small laboratory where fragments become forms, and forms become the jewelry you reach for every day. With knowledge of metals, sensitive handling of stones, and a steady practice of design, the pieces in your drawer can step forward again—as singular, personal artifacts that fit the present without forgetting the past.
As you explore this craft, remember a handful of potent concepts—sustainability, provenance, patina, cold connections, soldering, bezel, cabochon, annealing, heirloom, and upcycling. They are the tools and ideals that will guide your hand and sharpen your eye as you give old jewelry a new, thoughtful design.