Starting a monthly jewelry crafting routine is less about squeezing creativity into a calendar and more about shaping a gentle, repeatable arc that welcomes experimentation, reflection, and steady progress. When you commit to one coherent cycle each month, you give yourself a rhythm that supports learning new techniques, refining your eye for detail, and building a body of work that tells a story. Whether you bead at the kitchen table or solder at a dedicated bench, this approach connects the quiet joy of making with a practical plan that fits real life—work, family, and the inevitable surprises. The routine below blends structure with play, giving you a clear path without smothering the spark that brought you to jewelry in the first place.
Set Your Intention and Choose a Cadence That Fits
Before tools and timetables, clarify what “success” looks like for you. Do you want to complete one signature necklace a month, or a small collection of three coordinating pieces? Are you honing a specific skill—like soldering jump rings cleanly or mastering bezel settings? Write down a simple, high-level intention for the next three months, such as “develop a cohesive capsule of everyday earrings using mixed metals and ceramic beads.” Intentions guide your experiments, influence your shopping list, and help you say no to distractions.
Next, set a cadence that matches your lifestyle. Some makers thrive with a single long Sunday session, while others prefer three 45-minute micro-sessions each week. A monthly routine should support your energy, not drain it. Try starting with two units: one focused studio block (2–3 hours) and one light block (30–60 minutes) for sketching, notes, and cleanup. This pattern preserves momentum even in busy weeks, building creative discipline and reliable follow-through.
Finally, pick a theme per month. A theme might be a material (brass, sterling silver, polymer clay), a technique (wire weaving, stone setting), an inspiration source (botanical forms, architecture, folk motifs), or a constraint (all recycled beads, monochrome palettes). Themes create playful boundaries and make design choices faster, which is crucial for finishing pieces rather than getting lost in possibilities.
Design a Simple Four-Week Template
A monthly template creates a repeatable workflow that feels familiar after a couple of cycles. Think of it as a map:
- Week 1: Inspiration and planning. Gather references, sketch thumbnails, choose a color palette, and finalize your theme. Make a concise materials list.
- Week 2: Sampling and technique drills. Create small swatches of chain styles, ear wires, clasps, or test samples for resin or patina. Identify what needs further practice.
- Week 3: Production and assembly. Build your pieces with calm focus. Work in batches where possible—cut all wires, then shape, then hammer, then assemble.
- Week 4: Finishing, photography, and reflection. Polish, tidy connections, conduct a quick wear test, photograph, record notes, and clean your station.
Keep this template visible near your workspace. If life interrupts, resume at the current week rather than “starting over.” Progress is cumulative, not linear.
Essential Tools, Materials, and Workspace Setup
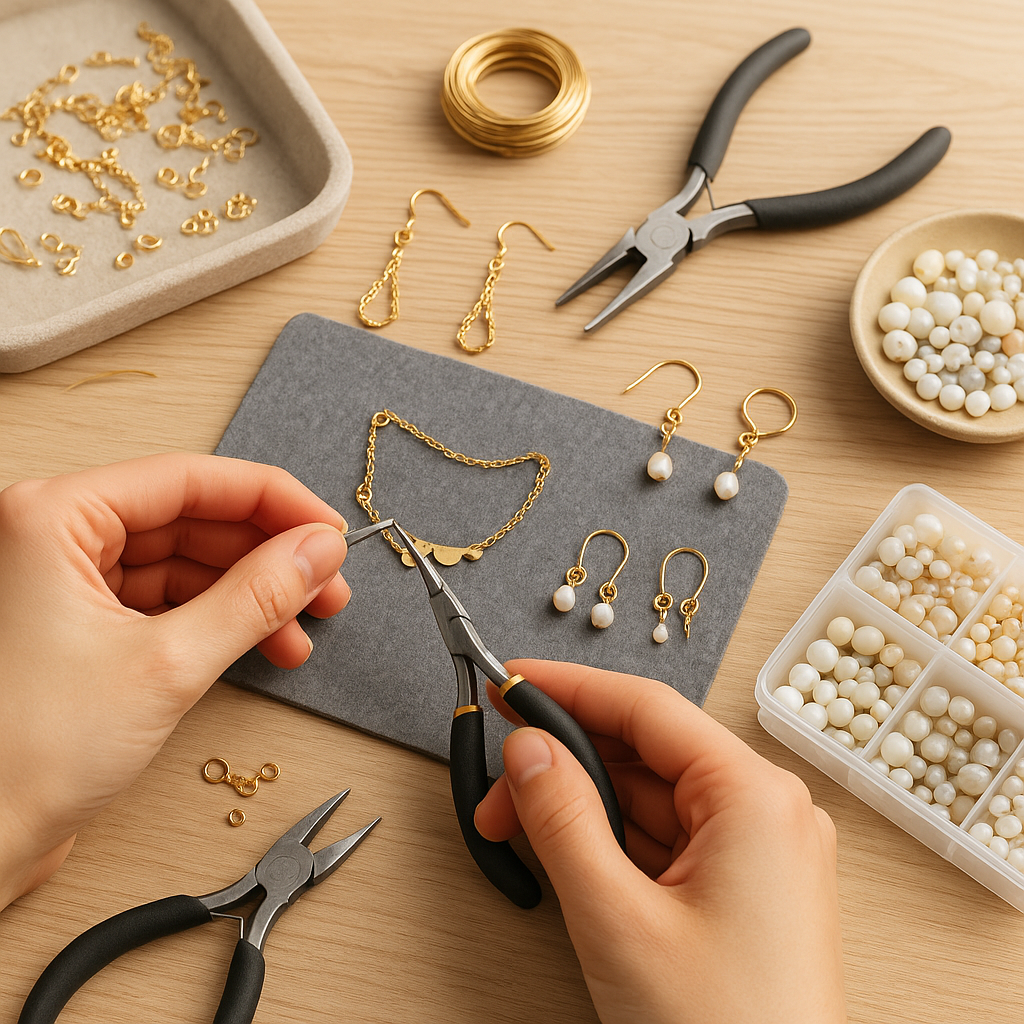
Jewelry making is versatile—you can create beautiful work with a modest kit. For beading and wire-based projects, start with round-nose pliers, chain-nose pliers, flush cutters, a ruler or calipers, nylon-jaw pliers for gentle straightening, and a bench block with a chasing hammer for hardening wire. Add a set of needle files, fine-grit sandpaper (600–2000), and a polishing cloth for finishing. For metalwork: a jeweler’s saw with assorted blades, bench pin, torch (micro-torch for small work), solder, flux, pickle solution, tweezers, third-hand tool, and safety glasses. Polymer clay work benefits from an acrylic roller, tissue blades, a pasta machine for conditioning, texture sheets, and a small oven thermometer for accurate curing. Resin artists need mixing cups, sticks, a scale for 1:1 or 2:1 ratios, a silicone mat, isopropyl alcohol for cleanup, and a dust cover for curing pieces.
Create simple zones in your space: cutting/shaping, joining/assembly, finishing/polishing, and photography. Even if your “studio” is a portable tray, label bags and small bins so you can set up quickly and pack away without losing momentum. Pay attention to ergonomics: adjust chair height so your wrists stay neutral, position lighting to minimize glare and shadows (a daylight lamp is ideal), and keep essentials within easy reach to reduce strain. Good ergonomics prevent fatigue that sneaks up on creativity.
Manage your inventory with an index card or digital note per material category: chains (by link size and metal), wires (by gauge and hardness), beads (by type, size, and finish), findings (ear wires, jump rings, clasps), adhesives, and packaging. At month’s end, note what ran low, what you never used, and any items that disappointed in quality. Over time, a tidy inventory protects your budget and ensures you aren’t scrambling mid-project.
Ethical Sourcing, Safety, and Budgeting
Materials carry stories—where metals are mined, how beads are produced, who benefits. Consider prioritizing recycled silver and brass, fair-trade beads, and verified suppliers. Simple changes elevate both integrity and design: vintage chains repurposed into modern silhouettes, offcuts from local metalsmiths, or handmade ceramic components purchased directly from artisans. Fold sustainability into your monthly decisions: plan to use remnants first, design around what you have, and challenge yourself to reduce waste with clever clasps and modular parts.
Safety matters. Ventilate when soldering, torching, or using resin. Wear eye protection when cutting or hammering; keep hair secured; use heat-resistant surfaces. Label chemical containers clearly and store them away from children and pets. Establish a tiny “safety checklist” on a sticky note near your bench and glance at it before each session—it quickly becomes second nature.
Budget with purpose. Create a tiny ledger that tracks materials purchased, shipping costs, consumables (solder, sandpaper), tool upgrades, and packaging. If you plan to sell, add a line for labor time and experiment with pricing models (materials × markup + labor + overhead). If you craft purely for pleasure, a budget still helps you prioritize quality tools that will serve you for years.
From Idea to Form: Design Practices That Work
Design thrives when it’s visible. Start each month with a mood board: small printouts or swatches pinned to cork, or a digital board with color palettes and texture references. Sketch quickly without judgment; tiny thumbnail drawings are faster than polished renderings. Include callouts for connection types, jump ring sizes, and the orientation of components so you plan mechanics alongside aesthetics.
Build a habit of low-stakes prototyping. Make “throwaway” samples from copper instead of silver, or craft ear wires and clasps in bulk to test comfort and scale. When working with beads, thread short segments to audition color rhythm and spacing. For resin or polymer clay, cure small tiles to test pigments, mica powders, and finishes. Prototyping keeps you agile and prevents disappointment at the finishing stage.
Consider wearability as a design constraint: earrings should remain lightweight, bracelets should not catch on knitwear, and necklaces should balance gracefully on the collarbone. Refining these invisible aspects builds pieces people reach for again and again.
Time Management Rituals That Protect Your Energy
Creativity loves a consistent container. Use a simple timer: 50 minutes of focused work, 10 minutes of rest. The break is for stretching, hydration, and a quick bench tidy—not for scrolling. Short daily rituals amplify consistency: put on your making apron, cue a specific playlist, or light a studio candle. These cues become a doorway into flow.
Start sessions with a five-minute warm-up: shape three ear wires, file a scrap to a mirror edge, or practice evenly wrapping three coils. Like scales for musicians, warm-ups sharpen hand memory. End sessions with a reset: label in-progress parts, lay out the first three tasks for next time, and cover sensitive pieces from dust. The next session becomes easier to start because it’s already mid-step.
Guard your attention with constraints. Decide in advance how many variations you’ll attempt—perhaps three colorways or two chain styles. Constraints push clarity and stop the “what-if” spiral from stealing hours.
A Technique Roadmap for Your First Year
A month-by-month rotation lets you taste multiple methods without overwhelm. Mix light and heavy techniques to keep energy balanced:
- Wire 101: Learn basic loops, wrapped loops, and ear wires. Explore gauges (20–26 AWG for earrings; 16–18 for structural elements).
- Beadwork Basics: Crimping for secure closures, stringing with soft beading wire, simple seed bead accents.
- Chain and Findings: Experiment with jump ring sizes and orientations, lobster vs. toggle clasps, extender chains, and layered lengths.
- Cold Connections: Rivets (wire or tubular), tabs, and screw-fasteners for joining pieces without soldering.
- Texturing and Forming: Hammer textures, dapping domes, forming cuffs on a mandrel, work-hardening strategies.
- Intro to Soldering: Clean joints, flux application, heat control, pickling, quenching, and polishing workflow.
- Surface Finishes: Patinas, liver of sulfur toning, matte vs. high polish, sealing methods.
- Resin or UV Resin: Bubble control, embedments, tinting, doming, and safe curing environments.
- Polymer Clay: Conditioning, canes, veneer techniques, sanding/finishing to glassy smoothness.
- Stone Settings (Beginner): Glue-in bezels, prong basics on practice blanks.
- Weaving and Braids: Kumihimo cords, leather braids, macramé closures.
- Advanced Assemblies: Hinges, articulated components, kinetic earrings.
Use this as a sampler menu. Revisit favorites and go deeper on months that excite you.
Finishing Standards and the Art of Subtlety
The difference between a good piece and a cherished piece often hides in the finish. Train your eye to spot common pitfalls: visible tool marks, misaligned jump rings, rough wire ends, and dull surfaces where you intended shine. Build a personal finishing checklist: sand from coarse to fine grits systematically; use a polishing compound appropriate to the metal; tumble-polish if you have a rotary tumbler; and wipe final surfaces with a clean cloth before photography. These micro-steps compound into refined craftsmanship.
Comfort is part of finishing. Ensure earring hooks are smooth at contact points, bracelets have no burrs, and necklace clasps can be operated easily by the wearer. Test closures with your non-dominant hand—if it’s fussy for you, it’s fussy for customers too.
Documentation, Photography, and Archiving
Good notes save time. Keep a small studio log with date, materials used, gauges, lengths, solder types, and finishing steps. Jot failures, too—what cracked, what warped, what contaminated your patina. Add a quick sketch with dimensions, and tape in a scrap of chain or wire if helpful. Over months, this log becomes a private encyclopedia.
Photography doesn’t require a pro setup. A neutral background, diffused light (near a window or with a softbox), and a simple reflector (white card) can produce crisp, honest images that show texture and scale. Shoot a straight-on product view, a close-up of a detail, and an in-context styling shot. Capture a ruler shot for yourself to verify dimensions later. Ever so slightly underexpose shiny metals to protect highlights; adjust white balance to preserve true color in beads and stones.
Archive patterns and templates in labeled envelopes or clear sleeves: earring silhouettes, bracelet length guides, ring sizing strips, and common component maps. When you revisit a theme, you’ll have a head start.
Community, Feedback, and Gentle Accountability
Creativity blossoms in connection. Join a small group—a local maker meetup, an online forum, or a monthly video call with two friends. Share wins, near-misses, and process photos. Ask for specific feedback: “Does the scale feel balanced?” or “Which clasp suits this chain weight?” Consider setting a friendly challenge each month—like “three pairs in three colorways”—to nudge momentum.
If you sell your work, collect feedback through casual wear tests with trusted people. A week of real-life wear often reveals more than any studio trial. Track notes: did the ear wires maintain shape, did finishes tarnish too fast, did a clasp snag hair? Fold these insights into next month’s plan.
Care, Maintenance, and Tool Upgrades
Put your tools to bed properly: wipe pliers, store saw blades dry to prevent rust, keep solder and flux lids closed. Replace worn files and invest in high-quality flush cutters when your budget allows—clean cuts save time on finishing. For materials, use anti-tarnish strips and labeled zip bags for silver and brass, store resin away from direct sunlight, and keep clay wrapped and conditioned.
Plan one maintenance micro-session per month. Sharpen, oil, sort, and restock. The small upkeep preserves flow during creative sessions because you’re not wrangling dull tools or mystery metal scraps.
Mindset, Ritual, and Creative Resilience
Many makers underestimate the role of attention and emotion in a routine. Add a breath of mindfulness to your practice: start sessions with one minute of deep breathing or a short note about what you want to explore. Give yourself permission to make an “ugly” or purely experimental piece each month—an intentional space where outcomes don’t matter. This paradoxically invites risk and yields fresh ideas for future collections.
When motivation wanes, simplify. Return to your most comfortable technique and produce a tiny edition—three pairs of minimalist hoops or a single pendant in two finishes. Small wins rebuild momentum faster than big ambitions.
Troubleshooting Common Roadblocks
Overwhelm from too many ideas: Narrow with a hard constraint, like using only two metals and one accent color. Pre-decide findings so you’re not reconsidering every junction.
Inconsistent results in soldering: Cleanliness is king. Scuff joints lightly, degrease with dish soap, apply fresh flux, and practice heat placement on scrap. Keep a log of what worked—torch tip, flame size, and sequence.
Wire ends that scratch: After flush cutting, angle your file to break the corner, then burnish with a polishing pad. For ear wires, test against the inside of your wrist; if you feel a catch, it needs refinement.
Resin bubbles and dust: Warm components slightly, mix slowly, exhale gently over the surface or use a quick pass with a flame/heat tool, and cure under a dust cover. Batch small pieces to reduce waste.
Color palettes that fall flat: Introduce contrast in texture (matte vs. glossy beads), temperature (cool vs. warm metals), or scale (tiny seed beads contrasted with a single oversized focal). Often one intentional contrast is enough.
A Practical Monthly Checklist You Can Repeat
- Theme: Write a one-sentence brief for the month.
- Plan: Sketch 6–12 thumbnails, choose 2–3 to execute.
- Materials: Audit inventory, finalize a short shopping list, set a spending cap.
- Safety: Review your torch/resin checklist and clear ventilation path.
- Sample: Create at least three technique swatches.
- Build: Batch steps—cut, form, connect, finish.
- Finish: Polish systematically and conduct a quick wear test.
- Photograph: Shoot product, detail, and styled images.
- Document: Log dimensions, materials, time spent, and any issues.
- Reflect: Note one skill to carry forward and one constraint to try next month.
Going Deeper: Collections, Narrative, and Seasonal Flow
Once your routine feels steady, explore small collections. A “capsule” might include two earrings, one necklace, and a bracelet united by a motif—leaf forms, hammered constellations, or geometric arches. Collections teach coherence: each piece echoes the others without duplicating them. Consider seasonal arcs: spring might feature pastel enamel and airy chains; autumn could emphasize brushed brass and warm stones. Seasonal flow keeps your routine fresh and aligns naturally with markets and gifts.
Collaborations also energize the month. Pair with a ceramicist for custom pendants or a textile artist for fiber-wrapped components. Collaboration introduces constraints that spark invention and invites audiences to cross-pollinate.
Design for Repair, Modularity, and Longevity
Thoughtful design anticipates the future. Use standardized jump ring sizes and chain styles so you can repair or extend pieces later. Favor modular elements—interchangeable charms and removable extenders—so one design serves multiple occasions. Document metal types for allergy-sensitive customers and keep a small stash of hypoallergenic ear wires on hand. Repair-friendly design delights wearers and quietly reduces waste over time.
Closing the Loop: A Monthly Reflection That Fuels Growth
At the end of each month, set aside 20 minutes to review. Lay out your pieces, samples, and notes. Ask: Which decisions felt confident? Where did I hesitate? What tiny improvement would have the biggest impact next month? Write a single sentence that captures the lesson—“Heat from the opposite side for small bezels,” or “Matte surfaces sing with faceted stone contrast.” These reflections transform a routine into a learning engine.
Your monthly jewelry practice doesn’t have to be grand to be meaningful. It can be a quiet ritual that delivers steady joy and surprising breakthroughs: a strand of beads that sits perfectly at the collarbone, a clasp that closes with a satisfying click, a patina that glows like dusk. Protect the cycle, celebrate small completions, and trust that piece by piece, month by month, you’re building not just jewelry but creative stamina and a life woven with making. In time, you’ll look back and see a body of work shaped by patience, curiosity, and care—the hallmarks of true discipline, refined craftsmanship, and a routine that honors both play and purpose.