Few things add soul to handmade accessories like the subtle bloom of patina. The word names a family of surface changes—color, texture, sheen—that suggest time and touch, telling silent stories of use. For handcrafters, patina is not merely decay; it is a design tool. With it you can make a new brass buckle feel heirloom-rich, a leather strap carry the warmth of years, a wooden handle glow as if it has always fit a palm. This guide gathers essential knowledge and practical methods so you can build controlled age into jewelry, bags, belts, watch straps, fasteners, and mixed‑media pieces without sacrificing durability or function.
What Patina Is and Why It Matters
At its simplest, patina is a transformation at the surface of a material caused by environment and handling. On metals, reactions like oxidation, sulfidation, and carbonation change chemistry and color. On leather and wood, oils, light, abrasion, and air shift sheen and tone. These transformations can either protect the substrate—chemists call that passivation—or undermine it, if corrosion goes too far. For makers, the goal is to stop the clock at an evocative stage: a hint of history without mechanical weakness.
Patina matters because human perception reads it as authenticity. A shiny new buckle looks manufactured; a subtly darkened one reads as lived-with. Strategic patination lets you cue users where to touch, where to look, and what to feel. It also brings harmony between materials made at different times, blending a newly stitched strap, a recently cast clasp, and an inherited bead into a single, coherent whole.
Materials and Their Natural Patinas
Copper, Brass, and Bronze
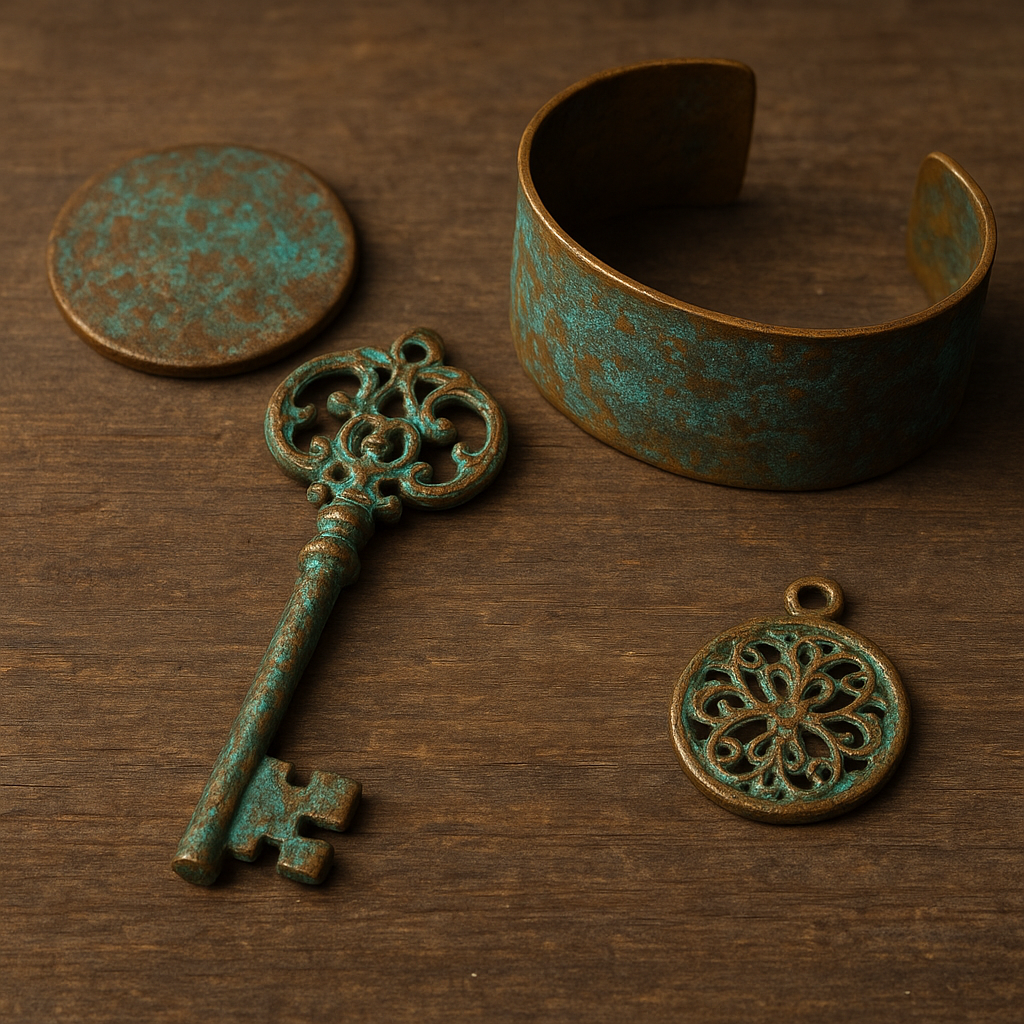
Copper and its alloys are patina superstars. Fresh copper starts salmon-pink, then deepens to russet and brown. Given moisture, carbon dioxide, salts, and time, it may grow the famous blue-green called verdigris—a mix of basic copper salts. Brass and bronze follow similar paths but skew more toward warm browns because of zinc and tin content. In accessories, most people aim for warm honey to chocolate browns, with soft shadowing around edges and hardware recesses.
Left alone, these alloys patinate slowly; handled daily, they change faster where skin oils reach them. Controlled acceleration involves subtle surface preparation, mild acids (such as vinegar), salts, and vapor fuming with household chemicals. Because brass comes in many formulations, always test on a scrap or hidden area before treating your hero piece.
Silver
Sterling silver naturally tarnishes when sulfur-bearing compounds in the air convert the surface to silver sulfide. This tarnish can be smoky gray at first and deepen to a charcoal black. Jewelers often speed or steer this with compounds like potassium polysulfide, commonly called liver-of-sulfur, to create gradient grays or iridescent blues and purples. Subtlety is key: high points polished back to bright and low points darkened yield high-contrast detail that highlights engraving and texture without making the whole piece look sooty.
Steel and Iron
Carbon steels can develop rich browns and blacks. Controlled browning creates ferric oxides for warm chocolate tones; bluing produces magnetite for a cool black. These treatments can be done cold or hot, with solutions designed for gunsmiths or metalworkers. For accessories, cold browning is often preferred because it introduces less warpage and is easier to stop and restart at will.
Leather
Vegetable‑tanned leather ages beautifully as it absorbs oils, darkens from sunlight, and compacts at contact points. The chemistry of vegetable tanning leaves polyphenolic compounds—known as tannins—within the fibers; these react with light and iron to form deeper hues and sometimes smoky blacks. Natural patina on leather favors high-touch edges, belt holes, strap bends, and handle grips. You can accelerate this with oiling, sunning, polishing, and selective burnishing on edges and high points.
Wood
Hardwoods mellow with UV and oxygen. Oak, for instance, fumed with household solutions generates a darker, aged look because its tannin content reacts readily; maple amberizes with oil and light. Makers emulate old-tool handles by selectively compressing fibers, adding hand oils, and softly rounding edges that would have worn over decades. Thin wax and oil finishes enhance depth while keeping reflection low.
Textiles and Thread
Cotton and linen can be tea- or coffee-stained for warm beiges; silk develops luster and shifts tone with gentle washing and sun. For accessory stitching, consider a light glaze of diluted dye set with ironing: the goal is to avoid theatrical stains and instead chase a lived-in softness and micro-variation.
Tools, Workspace, and Safety
Although many patina methods use mild household agents, treat all chemicals with respect. Work where ventilation is good. Wear gloves that resist chemicals, eye protection, and clothing you do not mind staining. Keep acetone, isopropyl alcohol, or citrus-based degreaser for surface prep, and baking soda for neutralizing acidic residues. Glass, HDPE plastic, and ceramic containers are typically safe for most solutions. Label everything, and never mix cleaners or reagents unless you know the reactions—most importantly, never combine chlorine bleach with acids or with ammonia.
Have dedicated brushes and abrasives: Scotch‑Brite pads in fine grades, 800–2000 grit wet‑dry paper, brass-wool for delicate burnishing, and cotton swabs for micro‑placement. A small heat source—a craft heat gun or alcohol lamp—extends technique range. Keep a spray bottle of distilled water to avoid mineral spotting.
Core Techniques for Handcrafters
Surface Preparation
- Degrease thoroughly. Skin oils prevent even reactions. Wipe with acetone or alcohol, then rinse with distilled water. Handle with clean gloves.
- Establish tooth. Very light abrasion helps patinas key into the surface. Brush or scuff uniformly and then selectively polish high points you plan to keep brighter.
- Map wear. Study vintage references. High points brighten, recesses darken, edges round over. Sketch your plan before you start.
Chemical Patination: Copper Alloys
- Vinegar-salt spray and humidity: Make a 5% white vinegar solution with a pinch of non‑iodized salt. Lightly mist the metal, place it on a plastic grate above a tray, and tent with a plastic container to hold humidity. In one to three hours you will see warm browns. Rinse, dry, and repeat for depth. Neutralize gently with a baking soda solution, then rinse again.
- Salt-and-ammonia fuming: Place a small open jar of clear ammonia and a separate dish of salt in a sealed plastic box. Suspend the metal above them so it does not touch the liquids. Vapors create quick, dramatic color shifts. Check every 10–20 minutes. This method can overshoot quickly; be ready to stop, rinse, and dry when tones look right.
- Selective resist: Apply a thin wax or petroleum jelly to high spots before fuming. After patina forms, remove the resist and lightly polish for believable contrast.
Chemical Patination: Silver
- Controlled darkening with liver-of-sulfur: Warm distilled water to about body temperature. Dissolve a pea-sized piece or a few drops of solution until faintly yellow. Dip clean silver, watching color progression: straw, brown, gray, then near black. Quench in water to arrest the process. Use a soft cloth to bring back the highlights.
- Gradient finishes: Paint LOS solution onto recesses with a swab rather than dipping the whole piece. Blend edges with a damp brush to avoid harsh lines.
Chemical Patination: Steel
- Cold browning: Degrease. Swab on a commercial browning solution or a mild ferric chloride mix. Let it rust lightly in humid air, then card back with fine steel wool, repeating until depth is achieved. Oil lightly when done.
- Cold bluing: Gun-bluing solutions produce fast, dark films. Work in thin passes to avoid streaks. Rinse and oil between coats.
Heat Patination
- Steel temper colors: Clean to bright. Heat gently until colors bloom—from pale straw to deep blue. Move heat in circles; quench to lock a hue. Protect with wax or oil.
- Copper rainbowing: A small torch can draw peacock tones on copper. Keep oxygen high and heat low; stop early for subtlety.
Mechanical Aging and Resists
- Edge rounding: Files and fine abrasives simulate wear, but less is more. Compare edges often to natural references.
- Micro-dings: A leather mallet and a bag of shot can soften corners of hardware. Avoid repetitive marks; randomness reads as real.
- Wax resists: Candle wax rubbed onto likely contact points shields them from chemicals. Later, a warm cloth removes the wax, revealing brighter metal beneath.
Leather Patina Acceleration
- Sun and oil: Very lightly oil vegetable‑tanned leather with pure neatsfoot or jojoba, expose to morning sun for short sessions, and repeat. Over‑oiling causes blotchiness; aim for even, thin coats.
- Edge burnishing: Moisten edges, apply a small amount of gum tragacanth or a bar soap slick, and rub with a wooden burnisher. Heat from friction compacts fibers to a glossy heirloom look.
- Ebonizing: For deep browns to black, apply iron‑acetate solution made by soaking steel wool in vinegar and filtering. Tannin-rich leathers respond strongly—test first.
Finishing: Neutralizing and Sealing
- Neutralize acids. A mild baking soda bath followed by thorough rinsing prevents later corrosion.
- Dry completely. Trapped moisture ruins finishes. Warm, moving air is best; avoid baking pieces unless materials tolerate it.
- Seal judiciously. Wipe-on waxes like microcrystalline wax preserve color and feel without high gloss. For metals that will rub against skin or fabric, thin lacquer or clear enamel can lock in color but may look too perfect; use satin or matte sheens and feather the edges.
Building a Patina Box and Reliable Test Protocols
A simple patina cabinet increases control. Use a clear plastic storage bin with a tight lid. Inside, add a plastic grate for your pieces, a small dish of saltwater or vinegar for humidity, and an optional cup containing household reagents for fuming kept well below the work. A cheap digital hygrometer-thermometer helps you correlate conditions with outcomes. Preheat by closing the lid for 10 minutes. Track variables—temperature, humidity, time, solution ratios—in a notebook, along with photographs. Make identical test tokens from your accessory materials so you can decide on a finish before touching the real piece.
Design Principles for Believable Age
- Highlight-and-shadow logic: High points catch light and polish; recesses collect dark. Apply this rule consistently across the piece.
- Continuity across materials: If a brass clasp is deeply aged, the stitching near it should not look freshly bleached. Add a whisper of color to thread or soften leather edges to match.
- Directional wear: Straps polish near buckling holes; pendants brighten where they swing against fabric; zipper pulls fade at the finger pinch. Think about how the accessory moves.
- Color temperature harmony: Pair warm brown metals with honey leather; cool gunblue with charcoal leather or indigo textiles. Stained wood can bridge both with mid-tone ambers.
- Scale: Micro-detail on small jewelry; broader gradients on bags and belts. Oversized scratches look fake on tiny components.
Care, Longevity, and Rejuvenation
Good patina is not static; it continues to evolve. Provide care notes with handmade goods. Recommend wiping metal with a soft cloth after wear, avoiding silver dips or abrasive polishes that strip deliberate finishes, and re-waxing leather and metal lightly every few months. Scratches can be blended by local re-patination and gentle polishing. Favor reversible methods so future adjustments remain possible and long-term conservation is straightforward.
Sustainability and Ethics
Handicraft thrives on integrity. Choose low-toxicity reagents where possible: vinegar over strong acids, waterborne lacquers over solvent-heavy ones, plant oils and waxes from responsible sources. Upcycling hardware preserves embodied energy and often brings ready-made character. When selling, be transparent. Distinguish true age from crafted age so customers understand what they are buying. Ethical clarity builds trust and celebrates the maker’s skill rather than counterfeiting history.
Quick Project Walkthroughs
Warm-Brown Brass Key Fob
- Prep: File and sand the blank to 1000 grit, rounding corners slightly. Degrease.
- Patina: Mist with 5% vinegar and a pinch of salt. Place in the humidity box for 45 minutes. Rinse, dry, repeat once.
- Accents: Rub high points with a soft cloth and a trace of metal polish for gentle highlights.
- Seal: One thin coat of wax, buffed to a satin low glow.
Silver Accent Rivets for a Leather Cuff
- Prep: Lightly texture rivet caps with a fine abrasive pad. Degrease.
- Patina: Dip in faint liver-of-sulfur solution until medium gray. Rinse. Polish domes with a sunshine cloth, leaving gray in the microtexture.
- Assembly: Set rivets through the cuff. Burnish leather edges to complement the metal highlights.
Bronzed Steel Belt Buckle
- Prep: Clean and scuff uniformly. Mask the prong tip to remain brighter.
- Browning: Apply cold browning solution. Let haze, then card with steel wool. Repeat to depth.
- Warmth: Rub with a tinted wax (brown-black) to shift black toward chocolate.
- Protection: Final micro-wax and a light oil rub on contact surfaces.
Fumed Oak Zipper Pull Tabs
- Prep: Shape small oak blocks, sand to 600 grit, gently round edges.
- Fuming: Place in a sealed bin with an open dish of household ammonia nearby for 1–3 hours. Vent outdoors before opening. The wood deepens several shades.
- Finish: Thin oil, then wax. Pair with antique-brass zippers to match warmth.
Troubleshooting Common Issues
- Blotchy metal patina: Usually uneven prep or residue. Strip with abrasive pad, degrease meticulously, and reapply in lighter, repeated passes.
- Patina rubs off on skin or fabric: Film is unconverted or unsealed. Re-neutralize, dry thoroughly, then seal with wax or satin lacquer.
- Over-darkened silver: Reverse by polishing high points; for deeper reset, use a baking soda paste or dip in hydrogen peroxide briefly, then re-patinate slowly.
- Green powdery corrosion on brass after weeks: Trapped salts. Rinse longer after treatment, neutralize, dry in warm air, and re-seal.
- Cloudy lacquer: Applied over moisture or heavy wax. Strip, fully dry the piece, then reapply in a thin coat at room temperature.
Advanced Layering and Nuance
Real depth emerges from layers. Begin with a gentle chemical base coat; burnish selective edges faintly; add a second, cooler or warmer glaze to shift tone; micro-polish highlights; finish with a tinted wax that settles into creases. On leather, shadow stitches with a diluted dye wash and brighten edges through friction. On mixed-media pieces, step the contrast: warm brass, cool steel, softened silver, and a mid-tone leather tie the palette together. Revisit after a day—fresh eyes catch imbalance, and surfaces stabilize as moisture equilibrates.
Documentation for Repeatability
Professional-looking results rely on records. Keep a log of ratios, temperature, humidity, times, and brand names of materials. Photograph each stage beside a gray card for color accuracy. Save a small offcut from each batch of leather or metal as a reference chip. Over time your own recipes become a personal library: the finish that works for a summer market may need adjustment in winter’s dry air, and your notes will tell you how.
Integrating Patina Into the Making Sequence
Plan finishes early. Many processes are easier before assembly: patinate buckles and rivets off the strap; darken zipper sliders before stitching; treat wood before gluing to leather. Think about adhesives and finishes that must bond later—avoid oily films where glue needs to grip, and mask bond lines during patina work. Dry fit, mark orientation, and test mechanical clearances: a few microns of lacquer can tighten a hinge or a clasp fit.
From Subtle to Statement
Not every accessory needs dramatic age. A whisper of warmth on a new brass snap, a slightly darkened edge bevel, or a soft haze in recesses can nudge a piece from factory-fresh to studio-made. Conversely, for showpieces, bolder moves—deep browns on steel paired with honey leather and a smoky silver accent—can carry a strong narrative. Let function set limits: anything that touches skin or fabric repeatedly should be sealed and smooth; working surfaces of buckles and clasps must remain friction-friendly and free of gritty buildup.
A Short Reference to Key Concepts
- Surface films can protect or corrode; steer them toward protection and beauty.
- Prep is half the outcome; degreasing and uniform abrasion pay dividends.
- Humidity, time, and temperature are your dials; change one variable at a time.
- Layering yields depth; stop before the piece looks theatrical.
- Seal for the context; wax for feel, lacquer for high-wear zones.
- Document everything; repeatability turns happy accidents into recipes.
Closing Thoughts
Patina rewards patience. It invites you to slow down, listen to materials, and guide change instead of forcing it. Learn the tendencies of copper, brass, silver, steel, leather, wood, and cloth; study how old things actually age; and practice on small tokens until your hands remember the sequence. When done well, the result is more than a finish. It is character woven into utility—the quiet confidence that lets a handmade accessory feel like it has always belonged with its wearer.