Color fused to metal has lured makers for millennia. Few crafts let you paint with glass, sculpt with fire, and finish with the fine-tuned hand of a jeweler quite like enamel. This guide introduces the foundations, shows you how metals and glass interact, and walks you through a beginner project with practical tips for safe, satisfying results. Whether you want to craft keepsake pendants or add fresh texture to your metalwork, the fundamentals below will set you up to succeed.
What Enamel Jewelry Is and Why It Captivates
At its core, enamel jewelry is metal decorated with colored glass that has been melted and bonded on the surface. When heated, powdered glass softens, flows, and fuses to metal, creating a permanent coating that can be glossy, satin, or matte. Because the color is literally glass, it will not fade like dye or paint. You can achieve gradients, painterly strokes, crisp graphic fields, or delicate translucent veils that glow over textured metal.
From ancient Egypt to Byzantine icons, from Persian and Mughal treasures to Art Nouveau brooches, artisans used enamel to broadcast color on precious metals without gemstones. The appeal is both visual and tactile: rich hues, luminous depth, and a smooth yet resilient surface that invites touch.
Beginners often confuse true vitreous enamel with so-called cold enamel. The former is silica-based glass fired at high temperature to fuse permanently to metal. The latter is epoxy resin tinted with pigment and cured at room temperature. Resin has its place in craft, but it does not match the hardness, heat resistance, or longevity of fused glass. This guide focuses on vitreous enamel for jewelry.
Materials That Matter: Glass, Metal, and Their Chemistry
Vitreous enamel is a blend of silica, fluxes, and colorants milled into a fine powder. The powder can be opaque, transparent, or opalescent. Transparent enamels show the metal texture underneath, so they are beautiful over engraved or hammered surfaces. Opaques cover more assertively, creating pure blocks of color. Opalescents glow softly with a milky depth.
Metals must be compatible with the thermal expansion and chemistry of the enamel. Common choices include copper, fine silver, and gold. Copper is affordable and forgiving, making it ideal for learning; fine silver gives a bright, reflective base for transparent hues; gold produces unmatched warmth but at a premium. Sterling silver can be used but requires careful preparation because it contains copper that can oxidize during firing. Nickel and aluminum are generally unsuitable for vitreous enamel.
Think of the enamel layer like a thin skin of glass bonded to the metal substrate. When both cool, they contract. If the rates differ too much, stress builds and the enamel may crack or shiver off. That is why enamel manufacturers specify compatible metal types and firing ranges, and why even small process tweaks—like cleaning, thickness control, and balancing with a backside coat—matter so much.
Another key concept is the use of a clear base coat known as flux. Clear flux on the front can level the surface and improve the brilliance of subsequent transparent colors. A neutral clear can be used under opaque colors when you want a glassy smoothness or to isolate the metal from colorants that might react.
To control warping and stress, enameled pieces often receive a balancing glass layer on the reverse, called counter-enamel. It does not have to match the design side in color or polish, but its thickness should be similar. Skipping counter-enamel on moderately sized work often invites cracks or limbing along edges, especially on copper.
How Enamel Fuses: Heat and the Firing Cycle
Enamel softens and flows between roughly 730 and 820 degrees Celsius (about 1345 to 1505 Fahrenheit), depending on the brand and color. You can achieve this with an electric jewelry kiln or with a torch. Kilns offer consistent, controllable temperatures and even heating—ideal for larger batches or delicate techniques. Torches allow speed and flexibility but require practice to avoid uneven heating.
The firing cycle has stages that are useful to learn to read through the kiln window or by observation during torch work:
- Sugar stage: the powder sinters into a surface that looks like coarse sugar.
- Orange-peel stage: the surface becomes pebbly, like citrus peel.
- Gloss stage: the glass flows and smooths, becoming glossy. Most jewelry firings aim for a full, even gloss, but some techniques use earlier stages to create texture.
Multiple firings are common. You might fire a clear base, then add color layers, then add linework or decorative elements, polishing between firings to level the surface. Each firing is typically short—30 seconds to a few minutes—because the thin metal heats quickly. Prolonged firing can over-soften the glass, encourage devitrification (a cloudy crystallization), or burn colors, so you learn to watch and time rather than rely solely on minutes.
Core Techniques and Aesthetics You Can Explore
Enamel is not a single look but a toolbox of methods. Below are popular techniques beginners can approach with practice:
- cloisonné: Thin wires are shaped and affixed to create tiny compartments (cloisons) that hold powders or wet-packed enamel. Colors are fired and ground flush, producing crisp patterns reminiscent of stained glass.
- champlevé: Recesses are carved, etched, cast, or milled into metal. Enamel fills these pockets and is fired and leveled so the surface becomes smooth with colored pools framed by metal ridges.
- plique-à-jour: Translucent enamel spans openings without a metal back, letting light pass through like miniature windows. It demands precision and support during firing but yields sublime luminosity.
- Basse-taille: Enamel is laid over engraved or relief patterns so light refracts through variable depth and texture, creating subtle gradients.
- Sgraffito: A layer of contrasting enamel is applied, then a tool scratches through while unfired to reveal the color below, yielding hand-drawn effects.
- Stenciling and masking: Powders are sifted through stencils, or liquid enamels are painted and blocked off with resists to produce sharp graphics.
- Painting enamels (Limoges style): Finely ground enamels mixed with oil or water are painted onto enamel bases in layers, then fired, allowing shading and fine detail.
You can combine techniques—stencil over cloisonné, or carve basse-taille under transparent fields. Much of the artistry lies in sequencing: building a base, adding features that can survive subsequent firings, and finishing cleanly.
Tools and Workbench Essentials for the Handicraft
The beauty of enameling is that a basic setup can be assembled in a small studio. Here is a practical list:
- Heat source: small electric jewelry kiln with a peephole and temperature control, or a torch with a stable firing surface.
- Firing supports: stilted trivets, firing racks, mesh screens, and a firing fork to move hot work.
- Application tools: fine sifters for dry sifting; enamel spoons; brushes and droppers for wet packing; stencils and masks.
- Prep and finishing: files, sandpaper, abrasive stones, small lap or diamond plates, polishing papers, burnishers, and a rubber block.
- Cleaning: pickle pot (sodium bisulfate solution) to remove oxides; baking soda bath to neutralize; ultrasonic or detergent and distilled water; brass brush.
- Safety gear: respirator for fine particulates (P100 or equivalent), heat-resistant gloves, eye protection, and good ventilation.
- Metalworking basics: saw frame and blades, dapping tools, mandrels, doming block, punches, pliers, and a bench pin for shaping and creating settings.
Organization supports craftsmanship: keep enamels labeled by color and transparency, store powders closed to avoid moisture, dedicate brushes to specific colors, and maintain clean containers. Dust and oil are enemies of flawless surfaces, so a tidy routine pays dividends.
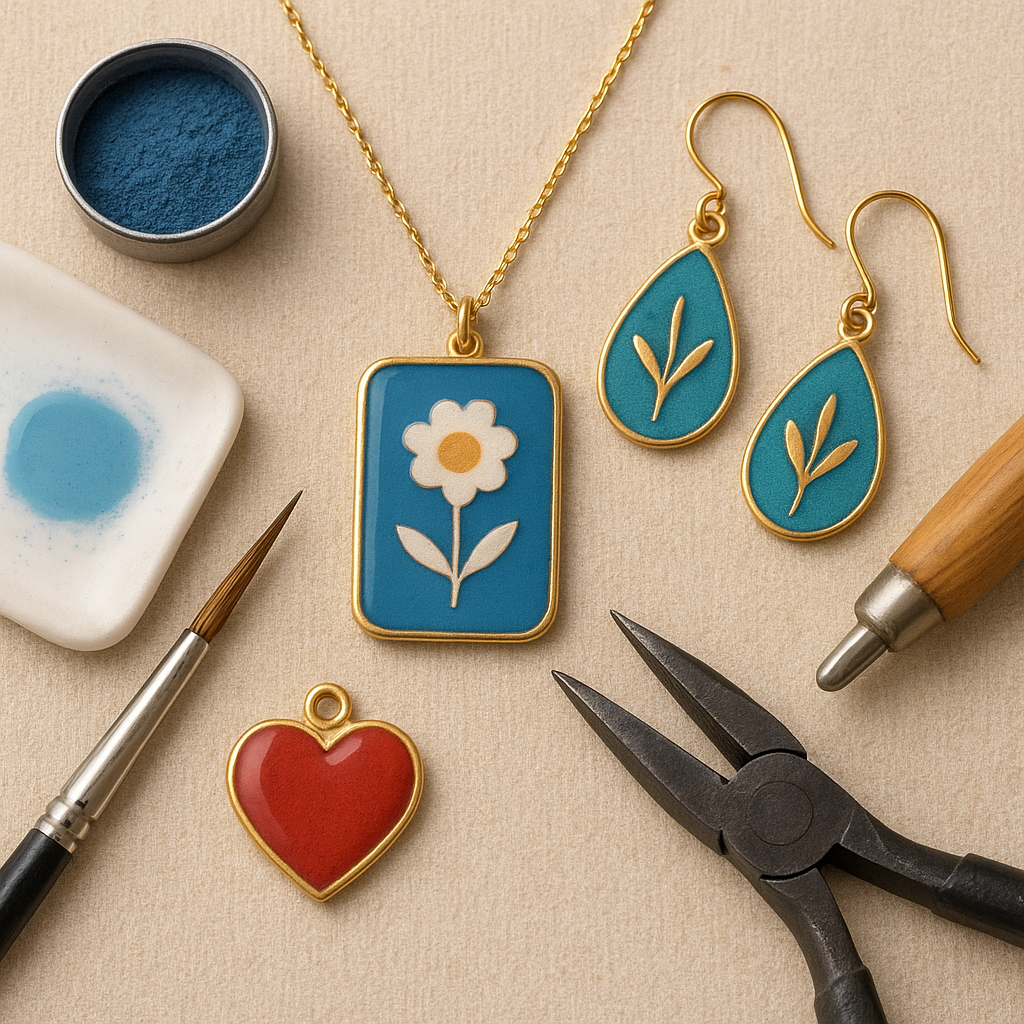
Step-by-Step: Your First Enamel Pendant
This project uses copper, transparent and opaque enamels, and a simple stencil. You will prepare the metal, apply a base, add color, and finish to jewelry quality. It keeps tools modest while illustrating core processes you will use repeatedly.
1. Design and Metal Prep
- Cut a copper blank about 25 to 30 mm across in your chosen shape. Round any sharp points; easier edges reduce chipping and create a more durable piece.
- File and sand edges to a smooth bevel. The edge is a weak point; a rounded profile helps enamel wrap and adhere.
- Anneal gently and pickle if needed to remove oxides. Scrub with a brass brush and detergent. Rinse thoroughly, preferably with distilled water to avoid mineral spots.
2. Counter-Enamel the Back
- Sift or wet-pack a uniform layer of a neutral color on the back. Fire to full gloss. Cool, then stone the edges lightly to remove overhangs.
- Repeat for a second thin coat if needed. Balanced coatings on front and back combat stress and warping.
3. Base Coat the Front
- Apply a thin clear base (a transparent neutral) on the front and fire to gloss. This prepares the surface for crisp color and can prevent unwanted reactions on copper.
4. Add Color and Pattern
- Place your stencil and sift opaque enamel in the exposed area. Lift the stencil carefully. Fire briefly to orange-peel, then to gloss.
- For translucent fields, pack transparent enamel around the opaque motif. Fire again, watching the color brighten as it flows.
- If combining colors, work from hard-to-soft firing enamels or from paler to darker tones, testing a small sample if you are uncertain about compatibility.
5. Level and Finish
- After multiple layers, the surface may be uneven. Use silicon carbide stones or diamond laps under water to grind gently until the surface is level and the edge transitions are clean. Rinse often.
- Return to the kiln for a brief refire to restore the gloss. Avoid holding too long to minimize devitrification.
- Stone the edge so the enamel rounds over slightly rather than ending in a sharp ledge. This reduces chipping during wear.
6. Setting as Jewelry
- Drill a small hole and add a bail, or build a simple metal frame. For a more formal result, set the enameled plate in a metal border with a bezel that protects the edge. Avoid soldering directly after enameling unless you use heat sinks, protective media, and precise control; high heat risks damage.
By the end of this project, you will have handled cleaning, base coats, color sequencing, firing, grinding, and edge management—skills that scale up to more complex work such as wired compartments or carved recesses.
Color, Texture, and Design Choices That Shine
Color in enamel is both intuitive and technical. A few guidelines:
- Transparency vs opacity: Transparent colors glow over bright metals and textures but can muddy on copper if you do not isolate with a clear base or fine silver foil. Opaques cover consistently and are great for bold motifs and stencils.
- Light and depth: Layering transparent enamels can create optical mixing and depth. Pale layers over engine-turned metal can ignite light play; darker transparents benefit from reflective underlayers.
- Metal texture: Hammered or engraved textures influence how light bounces through transparent glass, enriching the final look.
- Foils and leaf: Silver and gold foil add sparkle under transparent colors. Apply small pieces, fire lightly to tack, then cover and refire.
- Lines and details: Use fine wires in cloisonné, graphite transfer for guidelines, or glass painting mediums for detailed illustration. Fire sequence is critical—linework must withstand later firings without smearing.
- Surface finish: High gloss looks jewel-like. Satin or matte finishes, achieved by light etching or very gentle abrasion after firing, feel modern and tactile.
Plan designs with firing in mind. Elements that require more heat and time should be laid first; delicate highlights or low-fire colors come later. Test tiles—small squares with your exact stack of layers—save time and heartbreak. Record each firing time and temperature so you can reproduce successful results.
Firing Nuance and the Art of Finishing
Mastery often comes from controlling small variables. Here are refinements that lift your work:
- Washing enamels: Rinse transparent powders to remove fines that cause haze. Let settle, pour off the clouded water, then dry the heavier particles. Use distilled water to prevent mineral contamination.
- Thickness control: Multiple thin coats produce fewer bubbles and better adhesion than a single thick layer. Aim for an even layer that barely obscures the metal when wet-packed.
- Heat strategy: Preheat supports so the powder does not shock upon entry. When torch-firing, move the flame to heat the metal from below or from the back, letting radiant heat melt the glass without blasting the surface.
- Devitrification management: If a color tends to devit, fire minimally, use clean surfaces, and avoid overfiring. A light coat of clear transparent can restore gloss if haze appears.
- Grinding and stoning: Level complex pieces with wet abrasives. Start with a coarser stone to remove high points, then shift to finer grits. Always refire briefly to reflow and seal micro-scratches.
- Edge integrity: Round the metal edge before enameling and stone the fired edge to eliminate sharp transitions. Edges that are too thin or sharp are prime sites for chips.
Surface character is a design choice. Some makers favor the subtle orange-peel texture for a soft sheen; others push to mirror gloss. Either direction benefits from consistent technique and clean handling.
Safety, Health, and Best Practices
Enameling is safe when you respect heat and dust. Adopt these habits:
- Ventilation: Work with good airflow. Firing releases minimal fumes under normal conditions, but ventilation is essential for soldering and for any adhesives or painting media used around the craft.
- Respiratory protection: Wear a particulate respirator while sifting or mixing dry powders. Avoid creating dust; clean with a damp cloth rather than sweeping.
- Heat discipline: Treat the kiln or torch area as a hot zone. Use firing forks and heat gloves, and give fired pieces time to cool on a heat-proof surface before handling.
- Lead considerations: Many modern jewelry enamels are lead-free, but verify via manufacturer data sheets. Keep food and drink out of the studio.
- Chemicals: Store pickle safely, label clearly, and neutralize waste with baking soda before disposal according to local regulations.
- Organization: Dedicate brushes and tools to specific colors to avoid cross-contamination, and keep your bench free of oils that can cause adhesion problems.
Troubleshooting: Common Problems and Fixes
- Pitting or pinholes: Caused by trapped air or contamination. Apply thinner coats, tap or vibrate the piece gently to settle powders, and ensure the metal is impeccably clean.
- Cracking or shivering: Often from thermal stress, insufficient counter layer, or uneven thickness. Use balanced coatings, avoid quenching hot pieces, and let work cool gradually.
- Fishscale lifting on copper: Copper oxides can form a barrier. Use a clear base on the front, keep firing times short, and pickle between firings if heavy oxides appear.
- Color shift: Overfiring can brown some transparents. Test fire each color and reduce dwell time. Use fine silver or foil under transparents that dull on copper.
- Devitrification haze: Lower temperature or shorter time, wash transparent enamels to remove fines, and refire with a thin clear coat if needed.
- Uneven surface: Build with multiple thin layers, level by stoning, then refire just to gloss.
From Bench to Wearable: Findings, Settings, and Structure
While enamel is hard, it is also glass and can chip if edges are unprotected or if the piece flexes. Sound construction makes jewelry last:
- Supportive forms: Gentle curves, domes, and slight dish shapes add stiffness to thin metal and distribute stress more evenly than flat sheets.
- Protected edges: Frames, rims, and well-designed borders shield enamel during daily wear. For rings and bracelets, protect edges aggressively since these pieces take more knocks.
- Mechanical assembly: Rivets, screws, and tabs allow cold connections that avoid reheating. If you solder, do it early; clean thoroughly before enameling and be cautious with later heat.
- Settings: For pendants and earrings, simple bails or tabs suffice. For brooches or rings, robust settings that cradle the enamel make a big difference to longevity.
Care, Cleaning, and Everyday Use
Well-made enamel jewelry is surprisingly resilient and suited to daily wear with a little mindfulness. Clean with mild soap and soft cloth; avoid abrasive scrubbers that can scratch the gloss. Store pieces so the enamel surfaces do not rub against hard stones or metal. Thermal shock—such as moving from a hot car dashboard to icy water—can stress the glass, so remove jewelry before saunas or plunges. Over years, surrounding metals may darken or develop a gentle patina, which can add character if you prefer a lived-in look; polish the metal frame lightly without abrading the enamel.
Sourcing Materials and Making Ethical Choices
Reliable suppliers list the firing range, transparency, and compatibility of each enamel. Begin with a palette of a few opaques and a few transparents you test together. Purchase metals from reputable sources with known alloys, especially for silver. Consider recycled metals and ensure conflict-free gold when you scale to precious work.
For studio ecology, consolidate shipments to reduce packaging, reclaim metal offcuts, and keep a dedicated container for enamel sweepings. Clean water usage and responsible neutralization of pickle reduce your environmental footprint. If teaching or selling, label materials accurately, especially if any legacy stock contains lead-bearing colors for non-wearable art.
Expanding Your Repertoire: Next-Level Techniques
Once comfortable with base coats and color layering, try these expansions:
- Wire bending for complex cloisonné motifs with graduated color shading from light to dark within compartments.
- Hand-engraved basse-taille patterns under transparents, using bright-cut techniques to bounce light.
- Electro-etching champlevé recesses on copper or silver for precise, repeatable designs.
- Engine turning (guilloché) for mesmerizing geometric reflections under pale transparent hues.
- Foil collage to combine textures of crinkled vs smooth leaf beneath thin transparent veils.
- Torch-only projects to build comfort with heat movement and localized firing for small components.
Pricing, Selling, and Storytelling
Handcrafted enamel jewelry carries the value of both material and labor. Track your time, including design, prep, firing cycles, and finishing. Keep notes on each color combination and firing for reproducibility—a boon when a piece sells well and you wish to create a series. When sharing your work, emphasize the craft: explain how glass and metal merge, how multiple firings build depth, and why your finishing choices affect the feel and durability. Clear stories help customers appreciate the skill and the care embedded in every piece.
Community, Learning, and Inspiration
Join enamel and metalsmithing groups, take workshops, and study historical pieces in museums and books. Community critique accelerates learning, and seeing masterworks helps calibrate your eye for proportion, contrast, and finish. Keep a swatch book of test tiles with notes; it becomes a personal dictionary of your palette. When you hit a wall, return to fundamentals: clean metal, thin coats, controlled heat, and patient finishing. Skill builds layer by layer, just like the glass itself.
Quick Reference: Best Practices Checklist
- Prepare metal meticulously: smooth edges, clean surface, and pickle as needed.
- Balance stress: use counter layers, thoughtful shapes, and consistent thickness.
- Build in thin layers: fire short and watch for gloss; avoid overfiring.
- Level and refire: stone wet to flatten, then reflow to restore shine.
- Protect edges and plan settings to guard against knocks in wear.
- Record every test: color, firing time, temperature, and sequence.
- Work safely: ventilate, wear a respirator when handling powders, and manage heat with care.
Final Thoughts
Enamel rewards both curiosity and discipline. The chemistry can seem exacting at first, yet within those boundaries lies abundant room for play—color that glows from within, lines that endure, and surfaces that invite the hand as much as the eye. Start simple, iterate with intent, and let each firing teach you something about your materials and your aesthetic. With practice, your bench will become a small laboratory of light and color, and your pieces will carry the unmistakable presence that only handcrafted glass-on-metal can offer.