A handmade piece only becomes complete when its finish invites touch, quiets visual noise, and stands up to years of use. Finishing is the conduit between craftsperson and audience, the last stage where intention is translated into surface. It is also where tiny choices—abrasive grit, solvent strength, humidity, fiber direction, cure time—compound into either a flawless result or a tangle of compromises. While materials and techniques vary across wood, fiber, leather, metal, clay, paper, resin, and glass, the principles of surface control remain surprisingly unified: thoughtful preparation, measured application, and rigorous evaluation. This guide organizes best practices from multiple disciplines so your projects leave the bench with confidence and consistency.
The mindset and science of finishing
Professional finishing begins long before the first coat touches a surface. It starts with setting measurable goals—target sheen, color depth, tactile feel, and performance—then aligning process and environment to meet them. The better your environmental control, the better your consistency: temperature, humidity, airflow, and dust all steer outcomes. Microscopically, finishing is a conversation between peaks and valleys; abrasion flattens, fillers level, and film-build bridges. Optics intertwine with material physics: gloss is angular light reflection; satin scatters by micro-texture; depth comes from translucent layers that refract and tint.
- Define the “why” of your finish: protection, appearance, tactile feel, or a balanced mix. Let that decision frame all subsequent steps.
- Standardize grit progressions and dwell times. Skipping grits leaves deep scratches that shallow films cannot hide.
- Prototype with test boards or swatches using the same substrate and shop conditions; record ratios, passes, and cure times.
- Control dust with air filtration, tack cloths, and clean garments. Timing is key: apply when the surface is coolest relative to air to minimize outgassing bubbles.
- Respect cure windows; “dry to touch” is not cured. True durability requires full polymerization, which can take days or weeks.
- Safety is process: ventilation, respirators rated for solvents or particulates, gloves, eye protection, and fire-safe disposal of oily rags.
Wood and bamboo: from surface to sheen
Surface prep and pore control
On wood, the most effective “finish” is often invisible: crisp geometry, refined surfaces, and intentionally managed pores. Plane or scrape to minimize torn grain, then sand through a disciplined progression (for example 120/150/180/220/320). After 180–220, mist with water to raise grain on species prone to fuzzing; re-sand lightly to shear raised fibers. Open-pored woods (oak, ash, walnut) benefit from pore-filling to achieve piano-flat gloss; use oil-based paste filler, waterborne filler, or traditional pumice-and-shellac slurry for historic texture control. End grain drinks finish—seal it first to prevent dark halos.
Coloring: dye, stain, toner, and glaze
Aniline dyes penetrate and illuminate figure without obscuring; pigment stains sit in pores and highlight texture. Combine both by dyeing first for depth, sealing, then glazing to adjust value. Toners—transparent color in a sprayable clear—shift hue uniformly and rescue blotch-prone species when applied over a washcoat. Always test on the same species; color perception shifts under different lighting, so judge under the light where the piece will live.
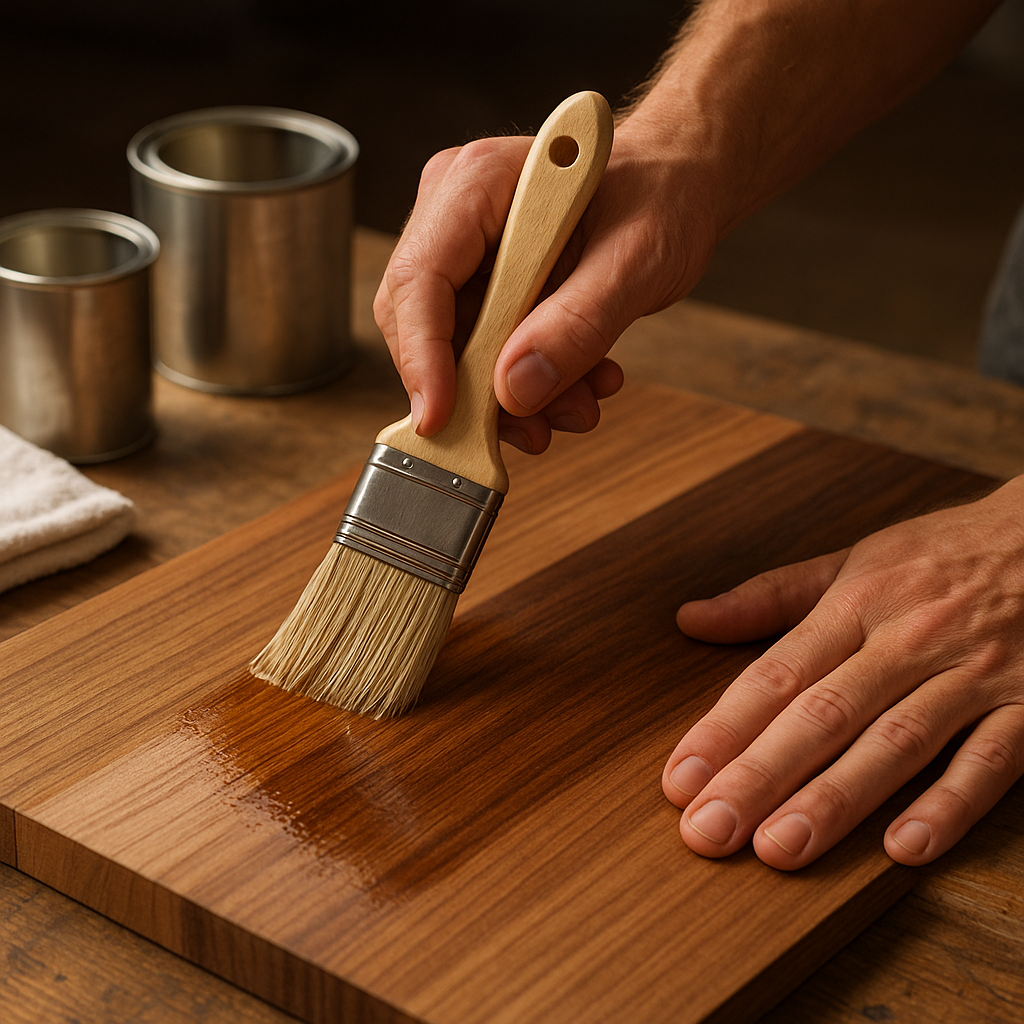
Sealers and topcoats
- Dewaxed shellac is a universal sealer, excellent for locking in dye, evening porosity, and improving adhesion between dissimilar systems.
- Wiping varnish (oil-varnish blend) enhances chatoyance with moderate protection; wipe thin, multiple coats, scuffing lightly between.
- Modern waterborne polys offer clarity and fast build; avoid over-brushing to prevent air entrainment and lap marks.
- Oil finishes (polymerizing oils like tung) deliver tactile warmth but need maintenance; buff with wax for a low-sheen protective boost.
- For heirloom gloss, traditional French-polishing builds ultra-thin shellac layers with a lubricated pad; the secret is micro-thin passes, spiraling pressure, and patience.
Rubbing out and defect control
After full cure, level dust nibs with 800–1200 grit, then compound and polish to target sheen. Use soapy water for wet sanding oil-based films; keep the surface clean to avoid grit contamination. Common issues: fish-eyes (silicone contamination—use barrier coat of dewaxed shellac), orange peel (high viscosity—thin appropriately and improve atomization), and witness lines between coats (insufficient cure or incompatible chemistries).
Textiles and fiber arts: clean edges and dimensional control
Seam finishes that last
- French seams encapsulate raw edges; ideal for lightweight, fray-prone fabrics.
- Hong Kong binding adds a slim bias-bound finish to unlined garments and exposed seams.
- Overlock/serger stitches offer fast edge security; tune differential feed to avoid rippling.
- Zigzag or pinking is acceptable on stable, low-fray fabrics but less robust for heavy wear.
Press every seam stage; steam sets shape, and a clapper locks it. Backstitch or tie-off to prevent unraveling at stress points; trim threads cleanly inside liners.
Hems, edges, and closures
- Blind hems hide stitches; calibrate machine tension so dimples do not telegraph on the face.
- Rolled hems on fine fabrics benefit from differential feed and lightweight thread.
- Bias-bound edges protect curves and add contrast; pre-shape bias with steam for smooth application.
- Buttonholes: stabilize with interfacing; cut with a chisel for crisp edges; seal knits with fray preventer.
Pressing, blocking, and surface finishing
Pressing is sculpting: use tailor’s hams, sleeve boards, and point pressers to echo body contours. Blocking knitwear realigns fibers; lightly mist, pin to dimensions, and let dry flat. Stabilizers and fusibles support embroidery and appliqué; remove or trim carefully to restore drape. Fabric paints, foils, and heat-transfer vinyls require accurate temperature and dwell; pre-press to purge moisture. For wearable art, wash-fastness and bleed control are key—test laundering protocols and label care instructions.
Leathercraft: edges, dye, and protective coats
Edge preparation and finishing
Edges define leather’s professionalism. Bevel both sides after squaring; progressively sand to refine. For traditional slick edges, moisten lightly, apply gum tragacanth or tokonole, and commit to firm, brisk burnishing with wood, bone, or canvas until glassy. Alternatively, build edge color with multiple thin coats of polyurethane edge paint, heat-set between passes with a creaser for resilience.
Dyeing and sealing
Prep veg-tan with a light casing to even absorption. Apply alcohol or water-based dyes in thin, overlapping passes, moving from light to dark; buff thoroughly to remove excess pigments. Lock in color with a compatible topcoat—acrylics like Resolene give a bright sheen, wax emulsions yield a mellow glow. Proper sealing prevents rub-off, especially on belts and bags that contact clothing.
Stitch and hardware finishing
- Backstitch or saddle-stitch for symmetry and strength; melt and bury synthetic thread ends with a thread zapper for a clean termination.
- Skive folds and overlaps to reduce bulk; crease lines with a heated iron for elegant definition.
- Protect metal hardware with masking during dyeing; polish and wax after assembly.
Metalwork and jewelry: luster, protection, and patina
Abrasive progression and polishing
Metal finishing hinges on controlled scratch patterns. Move systematically through files, stones, and papers (320 to 1200+), aligning scratch direction each step to confirm progress. On wheels, Tripoli cuts, brown compound prepares, and rouge or Zam refines; keep separate wheels for each compound to avoid cross-contamination. Support thin parts to avoid heat warping; quench as needed.
Surface chemistry and color
- Pickle after soldering to strip oxides; neutralize thoroughly to prevent future corrosion.
- Passivate stainless and reactive alloys when appropriate for added corrosion resistance.
- Apply patina (e.g., liver of sulfur) to bring depth; seal with microcrystalline wax or lacquer for wearables.
- Electroplating adds color and hardness; bright nickel underplates improve perceived depth; rhodium resists tarnish but is unforgiving of pre-polish flaws.
For chain and small findings, rotary or magnetic tumblers burnish uniformly; choose media that matches geometry to avoid peening delicate details.
Ceramics and glass: surface and gloss management
Clay-body finishing and glaze application
Start at leather-hard: compress rims and burnish greenware for natural sheen on low-fire bodies. Bisque at a cone appropriate for your clay to open pores without over-vitrification. Apply glaze by dipping for uniformity, pouring for interior coverage, or spraying for layered effects. Measure specific gravity and viscosity; sieving prevents pinholes. Respect thickness windows—too thin starves gloss, too thick risks crawling and runs.
Defects and remedies
- Pinholing: improve bisque soak, raise glaze temperature a cone, or add a drop of bentonite.
- Crazing: glaze too tight—adjust recipe with more silica/alumina or choose a body with compatible expansion.
- Crawling: dirty surface or overly plastic glaze—clean bisque, flatten application, or reduce gums.
Cold finishes (acrylics, waxes) work on raku and terracotta but limit food safety; seal planters to avoid seepage. For glass, coldwork edges with diamond laps, then cerium oxide polish; flame-polish acrylic and certain glasses for clarity, watching for stress cracks.
Paper, bookbinding, and print finishes
Edges, squares, and spines
Precision cutting is finishing: sharp knives, backed cuts, and a square that truly is square. In bookbinding, accurate rounding and backing prepare the spine for even swell; apply mull and spine linings tautly to prevent future hinge creep. Headcaps signal craft; shape them crisply with controlled paste moisture.
Surface coatings and edge treatments
- Varnishes and topcoats for prints: gloss enhances saturation, matte diffuses glare; apply thinly to avoid cockling.
- Fixatives pin charcoal and pastel without dark shift; several light passes beat one heavy one.
- Edge decoration: graphite burnish for understated elegance; gilding demands bole, sizing, leaf, and a careful breath to lay.
Use pH-neutral adhesives and sleeves; store in cool, dry conditions. For collections work, prioritize archival materials and reversible methods.
Resin, plastics, and composites
Clarity, flatness, and UV stability
Casting resins want measured ratio, gentle mixing, and warmed molds to reduce viscosity. Pressure pots crush micro-bubbles; torches or heat guns pop surface micro-foam. After cure, level with 400–800 grit, then climb through micro-mesh to 12000 for optical clarity; polish with plastic-safe compounds. For doming, corral edges with surface tension; avoid drafts that tilt meniscus. Incorporate UV inhibitors or topcoat with UV-stable varnish to resist yellowing.
Color, sheen, and perception
Color isn’t a property of the object but the light it reflects. Evaluate under a light source with high color rendering index (CRI 95+) and similar correlated color temperature to the final environment. Sheen is a scale: flat, matte, satin, semi-gloss, gloss—each reveals or hides defects differently. To standardize, maintain a “finish ladder” of swatches that demonstrate each sheen on your common substrates. For subtle control, use glazes and toners to nudge hue without saturating; mist coats prevent banding. Document passes and flash times for repeatability.
Quality control, documentation, and care
- Checklists reduce variance: substrate prep, contamination checks, environment reading, mix ratios, dwell times, and defect inspection at raking light.
- Batch labeling enables traceability: materials, lot numbers, dates, and ambient conditions.
- Measure film build with gauges where relevant; track cure with pencil tests or durometers.
- Customer care cards explain cleaning, reconditioning, and maintenance intervals to extend longevity.
A professional finish expresses workmanship beyond cosmetics: edges meet edges, hardware aligns, fibers lie true, gloss is uniform, and transitions feel intentional. The payoff is tangible durability and a more predictable path from concept to delivery.
Troubleshooting atlas: quick diagnoses across media
- Blotchy absorption on wood: pre-seal with a washcoat, switch to dye-first schedule, or equalize with sanding sealer.
- Bubbles in resin or varnish: reduce viscosity with warmth, slow down application, avoid foam-generating brushes, and time coats for minimal outgassing.
- Dust nibs and lint: close shop doors, let air settle, use tack cloths sparingly, and suit up in clean, low-shed clothing.
- Uneven gloss: over-application or inconsistent film thickness—level-sand and re-coat; mix matte agents thoroughly to prevent drift.
- Leather dye rub-off: buff until no residue transfers, then apply a compatible topcoat; consider spirit vs. water dye behavior.
- Metal orange peel from spray: adjust solvent, increase distance, and refine atomization; pre-warm parts to reduce viscosity contrasts.
- Textile puckering: thread tension imbalance or differential feed mis-set; re-press with steam and adjust machine settings.
- Paper cockling: too much moisture in coatings—reduce load, coat both sides, or pre-stretch.
Tooling and materials reference: building a finishing bench
- Abrasives: quality papers and films from 80 to 3000 grit; micro-mesh pads; diamond plates for edge tools.
- Polishing media: Tripoli, white and green rouge, cerium oxide, diamond paste; separate wheels and clean buffs.
- Applicators: high-density foam brushes, fine badger or synthetic brushes, gravity and HVLP guns, lint-free wipes, French-polish pads.
- Measuring and control: hygrometer, thermometer, viscosity cups, gloss meter, digital scales, timers.
- Cleaners and solvents: water, denatured alcohol, mineral spirits, naptha, citrus cleaners; always test for compatibility.
- Sealers and films: dewaxed shellac, waterborne poly, catalyzed lacquer, oil-varnish blends, waxes, microcrystalline wax.
- Specialty: pore fillers, toners, dyes, glazes, edge paints, fixatives, patina solutions, UV topcoats.
From process to signature
Finishing is both method and fingerprint. Your signature develops as you master the quiet steps: surface calibration, dust discipline, thin coats, honest curing, and perceptive inspection. Use checklists until muscle memory takes over; iterate with test panels; document what works. Over time, you’ll craft a toolkit of reliable moves and subtle flourishes—an economy of technique that produces repeatable excellence without wasted effort. Where necessary, choose reversible approaches for conservation; where performance dictates, build stratified protection tuned to the object’s life. Whether you chase the soft glow of waxed ash, the wet depth of a brushed lacquer, the satiny hand of washed linen, the dark bloom of aged copper, or the mirror of fused glass, your decisions will translate intent into lasting surface. Dial those decisions to your values—clarity, restraint, richness, or bravura—and let the finish speak for them long after the work leaves your bench.