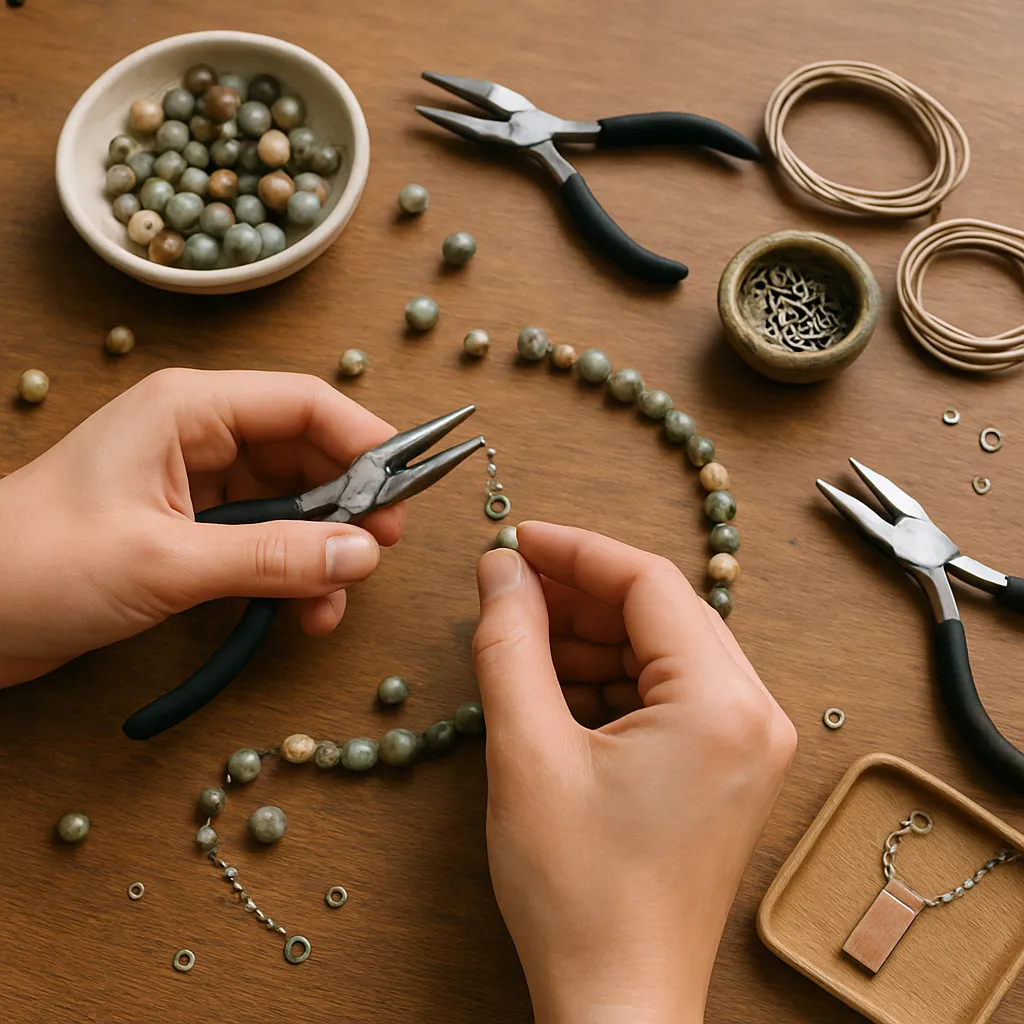
Jewelry that refuses to be boxed into gendered expectations celebrates craft as a language of self. Gender-neutral pieces put comfort, adaptability, and quiet elegance ahead of labels, trading stereotype for intention. They can be crisp and linear or tactile and organic, but they always welcome many bodies and styles at once. For makers, that means focusing on line, scale, and function; for wearers, it means permission to choose what feels right. This guide folds together studio-tested techniques and approachable home methods so you can build pieces that travel smoothly between wardrobes, seasons, and occasions without losing the warmth of the hand that made them.
The meaning of gender-neutral in jewelry craft
In the workshop, gender neutrality is not an erasure of identity; it is a widening of the frame. A ring can be solid, squared, and sturdy without declaring itself masculine; a pendant can be slim and reflective without being coded feminine. Instead of defaulting to size or ornament as a proxy for identity, craft re-centers material choices, function, and emotional resonance. The result is a practice shaped by inclusivity—a commitment to form and feeling over category.
Three practical lenses guide the handcrafter:
- Form: geometric profiles, clean planes, and recurring motifs that feel grounded and open to interpretation.
- Function: closures, sizing systems, and surfaces that accommodate many bodies, sensory preferences, and daily routines.
- Meaning: subtle stories—timeworn finishes, ethical origins, personalized engravings—that invite wearers to locate themselves within the piece.
Consider how a cuff’s internal curve meets a wrist, or how a pendant’s weight centers on a chest. Think about feel as much as sight: satin-smooth edges, gentle matte finishes, and tactile knurls that invite touch. When craft responds to the body thoughtfully, it becomes universal by design.
Core design principles for neutral aesthetics
Balance is the quiet architecture of jewelry. A minimal bar pendant gains presence when proportion, weight, and finish read as intentional. Aim for visual balance: if a shape is bold, keep the finish understated; if a finish is intricate, simplify the silhouette. Repeat motifs—three lines, five beads, two planes—to anchor the eye.
Scale is contextual. A 4 mm chain reads fine on one frame and substantive on another. Offer modular components and adjustable lengths whenever possible to let a piece translate across contexts. This is where versatility becomes a design tool instead of an afterthought.
Texture is powerful and often overlooked. Sandblasting, light hammering, cord braiding, or linen weave imprints can make neutral forms feel inviting rather than stark. Tactile elements support sensory comfort and give jewelry a lived-in presence that sidesteps high-gloss gendered tropes.
Use proportion as a dialogue, not a rule. A wide band can taper where it meets the finger to improve comfort; a large pendant can be pierced or open-worked to reduce weight. Attentive proportion complements many body types and wearing styles without changing the core design language.
Think in systems. A clasp that docks with a ring; a charm that snaps onto a chain; a cuff that stacks under a watch. This spirit of modular design encourages customization and helps one piece become many through reconfiguration.
Materials and tools that support neutrality
Metal offers longevity and clarity. Stainless steel, titanium, and sterling silver read as neutral and durable; brass and bronze introduce warmth without tipping into ornament for ornament’s sake. Recycled silver and conflict-free alloys support sustainability while maintaining integrity at the bench. For non-metal pathways, explore waxed cotton, paracord, Dyneema, linen, and paper yarns for strength and tactile interest.
Natural materials translate calm into form. Wood, bone-substitutes like paper composite, stone, and ceramic beads can be shaped into neutral geometries. Choose closed-grain woods for smooth finishes and stabilized woods for humidity resistance. Stone choices such as basalt, slate, and matte onyx avoid sparkle while providing gravitas.
Found and upcycled hardware—washers, hex nuts, bike chain links—transition cleanly into industrial-modern aesthetics. When incorporating salvage, check edges for burrs and seal reactive metals to protect skin.
Essential tools for a balanced home kit:
- Pliers: flat-nose, chain-nose, and round-nose for forming and closing loops without leaving marks.
- Cutters: flush cutters for wire and sprues; a jeweler’s saw with 2/0–4/0 blades for precise shapes.
- Files and abrasives: needle files and sandpapers from 220 to 2000 grit to contour and refine edges.
- Mandrels and blocks: ring mandrel, bracelet mandrel, and bench block with rawhide or nylon mallet.
- Finishing media: Scotch-Brite pads, steel wool, and tumbling media for satin or pebble-polished surfaces.
- Optional: a micro butane torch for balling wire and low-temp work, plus a third-hand tool for control.
Where skin sensitivity matters, select hypoallergenic findings or fabricate your own in titanium or niobium. Always test finishes on a small patch of skin and avoid nickel-bearing alloys when possible.
Techniques that yield neutral lines and tactile depth
Wire forming and cold connections give clean geometry without soldering. Simple loops, wrapped loops, and rivets create structure that reads architectural. Use mechanical joins—screws, Chicago bolts, snap rivets—when you want disassembly to be part of the design story.
Knotting and braiding add rhythmic texture. Techniques like square knot, half-hitch, and fishtail braid in neutral cords produce tactile bands that suit many wrists. Macramé sliders are low-profile and adjustable, prioritizing comfort and easy on-off wear.
Beadwork can lean neutral with disciplined color and pattern: hematite, matte glass, wood, ceramic cylinders, and seed beads in grayscale or earth palettes. Build repetition through tile beads and bugle beads; choose matte and frosted finishes to resist glare.
Metal texturing through light planishing, stippling, and linen rolls enhances surface without shouting. A brushed finish is timeless; a burnished edge catches light only at the margin. Controlled oxidation and layered patina add depth that feels lived-in, not delicate.
Minimal casting and carving in reclaimed wax or eco-resins enable gentle, pebble-like forms with softened edges. Keep mold lines as intentional seams, or erase them fully—either choice reads as deliberate when echoed elsewhere in the collection.
Project 1: Adjustable cord bracelet with counterweight bead
This project uses one key gesture—a sliding knot—to make a universally adjustable bracelet that stands alone or stacks cleanly.
Materials
- 1.5–2 mm waxed cotton or polyester cord, 60–70 cm
- One center bead in stone or ceramic with a 3–4 mm hole
- Two small stopper beads, optional
- Scissors and lighter for sealing cord ends
Steps
- Cut cord, thread the center bead to the middle, and bring ends together to form a loop.
- Create two opposing sliding knots about 3–4 cm from the bead: wrap the tail around the standing part four times and feed back through the coils; tighten gently.
- Test adjustment range; trim tails to 1 cm and carefully melt or glue tips to prevent fray.
- Add stopper beads to tails if desired for weight and tactile feedback.
Design notes: The restrained silhouette reads as neutral; the adjustable mechanism supports many wrist sizes and ways of wearing. Consider subtle contrasts like matte cord with satin bead to underscore tactile quality.
Project 2: Stackable wire rings without solder
Three rings, two finishes, one system—wear one at a time or all together for built-in compositional play.
Materials
- 1.5–2 mm half-round or round wire in sterling silver, brass, or titanium
- Ring mandrel and rawhide mallet
- Flush cutters, files, and sanding papers up to 1200 grit
Steps
- Measure and cut wire slightly longer than ring size circumference to allow for shaping and trimming.
- Form around mandrel; overlap ends by 2–3 mm and mark the meeting point.
- Cut square ends, then use a small sleeve of slightly larger tube or a prefabricated compression sleeve as a cold joint, or neatly bind with a tight wrap of 0.6 mm wire to create a seamless collar.
- File and sand the band to remove burrs; finish with brushed or matte surface.
Design notes: Alternate edges—one ring with beveled outer edges, one with a flat band, one with a knurled segment. This mix respects clean lines while enriching hand feel.
Project 3: Geometric pendant in matte beads and steel
A triangle, circle, or rectangle pendant assembled from matte beads on rigid wire becomes a neutral focal piece.
Materials
- 1 mm stainless steel wire
- Matte glass or ceramic beads in two complementary tones
- Chain or cord, 60–70 cm adjustable
- Round-nose and flat-nose pliers, cutters
Steps
- Form a geometric frame and close with a tidy wrapped loop.
- Thread beads in a disciplined pattern—two-by-two blocks or alternating cylinders—and secure with a second wrapped loop.
- Attach to chain or an adjustable cord with a sliding knot or extender.
Design notes: Keep palette restrained to foreground form. Matte surfaces prevent glare, favoring quiet confidence over flash.
Project 4: Chainmaille key pendant
Chainmaille weaves translate industrial heritage into contemporary neutrality. As a pendant or key fob, the piece wears well with many looks.
Materials
- Anodized aluminum or stainless steel rings in 16–18 gauge, 1/4 inch ID (Box or Byzantine weave)
- Two pairs of flat-nose pliers
- Split ring or bail
Steps
- Close half the rings perfectly; open the rest slightly.
- Assemble a short Byzantine or Box segment following your pattern; maintain ring orientation for crisp geometry.
- Terminate with a tight binding of smaller rings for a tapered finish and attach a bail.
Design notes: Monochrome metal keeps the look calm; satining with Scotch-Brite softens reflections.
Project 5: Upcycled hardware necklace
Hardware elements offer weight, rhythm, and honesty. This project turns common parts into a statement that is both subtle and resilient.
Materials
- Stainless or plated washers in two sizes
- Small silicone or leather spacers
- 2 mm cord or fine cable with compression clasps
- File, sandpaper, and protective clear coat for reactive parts
Steps
- Deburr and soften the edges of washers; clean thoroughly.
- Alternate washer sizes with spacers on cord to create rhythm and prevent metal click.
- Terminate with a low-profile barrel clasp or a hand-tied sliding mechanism for adjustability.
Design notes: Pair with a long cord to allow different drapes. The industrial vocabulary resists gender coding through honest material presence.
Sizing, fit, and comfort for many bodies
Fit is where neutrality meets daily wear. Rings that taper inside the hand reduce pinch. Cuffs benefit from oval shaping that mirrors the wrist’s natural contour. Necklaces should consider both drop and adjustability—45–60 cm ranges work broadly, but offering extenders or sliding knots invites personalization without remaking the piece.
Closures matter. Low-profile toggles are easy to grip; magnetic clasps are convenient but must be strong and safely encased. For bracelets, macramé sliders minimize dangling ends. When possible, treat the clasp as part of the composition instead of an afterthought.
Comfort comes from surface, edge finishing, and weight. Break all sharp arrises; radius corners lightly. Target a weight that feels present, not heavy—most pendants sit comfortably between 8 and 18 grams on cord, a little more on chain with balance points set close to the neck to prevent swing.
Finishes, color, and subtle meaning
Color in gender-neutral craft is purposeful. Earth tones, charcoal, deep navy, forest, and bone harmonize with many wardrobes. Monochrome palettes focus the eye on silhouette; muted contrasts highlight transitions. Try a brushed silver pendant on a black waxed cord, or matte onyx beads flanking a raw brass bar.
Finishes shape mood. Satin-brushed, bead-blasted, and hand-rubbed oils on wood all communicate poise without bravado. Oxidation and controlled patina hint at time rather than trend; they frame the piece as companion, not statement.
Meaning can be intimate and quiet. Coordinates, dates, or small wayfinding symbols engraved on the reverse side honor story without broadcasting it. Choose icons that belong to many: lines, arcs, knots, waymarks, constellations. This approach foregrounds symbolism while leaving interpretation open.
Sustainability as a design constraint
Working with constrained resources cultivates clarity. Recycled metals, conflict-free stones, plant-dyed cords, and reclaimed wood keep environmental costs low while enriching narrative. When you design with sustainability in mind, you often arrive at neutrality naturally—fewer coatings, simpler assemblies, longer life.
Design for repair. Use screws instead of glue where possible, offer replacement cords, and avoid gimmick closures. Document the assembly logic so wearers or future makers can maintain the piece. Durability is a quiet promise that reaches across styles and years.
Packaging, care, and maintenance
Neutrality extends to the unboxing. Wrap in unbleached paper or a reusable cloth pouch; include a small card with care tips. Suggest gentle soap and water for cords and ceramic, a soft cloth for metals, and periodic waxing for wood. Caution wearers about harsh chemicals and storage with other metals to prevent abrasion.
Finishes age; guide the wearer. Provide a mini Scotch-Brite square for renewing a satin surface and instructions for preserving or resetting oxidation. Embrace the patina of life as part of the piece’s dialogue rather than a flaw.
Photographing and sharing your work
Show jewelry on varied bodies and in still life. Use diffused light to preserve matte finishes and avoid specular glare. Capture scale with hands and everyday objects. Provide clear front, side, and close-up shots of closures and edges so people can imagine touch as well as sight.
When listing or sharing, describe materials plainly and note adjustability, weight, and skin-friendly choices. Language can be an extension of design: avoid gendered tags unless they serve search clarity; lead with form, function, and feel.
Troubleshooting and iterative refinement
- Edges still feel sharp: move up one grit level and finish with a light buff; check inside corners and undercuts, the usual culprits.
- Piece rotates on the neck: shift weight closer to the clasp or widen contact area with a small back bar.
- Cords loosen over time: set sliding knots with a tiny dab of flexible adhesive inside the coil; re-burnish ends.
- Metal finish streaks: clean with alcohol before brushing; finish all strokes in one direction for coherence.
- Allergy reactions appear: swap to titanium or niobium findings; add a barrier coating to non-contact surfaces if replacement is not possible.
- Design reads too minimal: introduce micro-texture or a single asymmetric element to create focal subtlety without altering the silhouette.
Building a cohesive, neutral collection
Start with a small vocabulary: a line, a circle, a plane, a braid. Translate each across formats—bracelet, pendant, ring, earring alternative like ear cuffs or clips—so the family feels coherent. Keep hardware and closures consistent; standardize finishes. Allow limited seasonal shifts in material—linen cord in summer, leather-substitute or recycled rubber in winter—while preserving the core grammar.
Offer customization within boundaries. Length adjustments, finish choices, and swap-in components respect modular intent without overextending craft time. Present mix-and-match options as complete looks to help wearers visualize their own combinations.
Ethics, accessibility, and community
Neutral craft is social as much as aesthetic. Price transparently, pay fairly for materials, and credit inspirations and cultural techniques. Ensure your designs work with mobility aids and sensory needs: low-snag textures near hair and fabrics, easy-to-grip closures, and weight distributions that limit swing and noise. Consider captions and alt text when you share images so more people can participate.
Workshops and community studios are fertile ground for cross-pollination. Share jigs, knot recipes, and finishing samples. Practice critique that centers function and comfort as much as visual form. Build bridges with adjacent crafts—textiles, ceramics, leather alternatives—to expand possibilities and keep the conversation broad.
Advanced directions: from bench to heirloom
For those moving deeper into metalsmithing, consider low-profile settings like bezels for cabochons in basalt or slate, with satin finishes and softened edges. Knife-edge bands, D-profile interiors, and comfort-fit rings can remain neutral while elevating wear. Explore diffusion bonding and clean mechanical inlays—wood or stone framed in metal—to blend material voices without ostentation.
As designs mature, revisit proportion and balance with fresh eyes. What once felt minimal may now feel spare; a single groove or chamfer can transform an object’s attitude. Keep returning to the wrist, the neck, the hand—let the body edit your drawings.
Closing reflections
DIY gender-neutral jewelry is more than a trend; it is a patient, humane way to make. It favors clarity over bravado, presence over pose. With disciplined form, tactile nuance, and ethical intent, your work can accompany many lives well. Craft, at its best, invites belonging. When your pieces meet people where they are—welcoming, adaptable, steady—they become part of the everyday ritual of getting dressed, a quiet note of dignity and care worn close to the skin.
