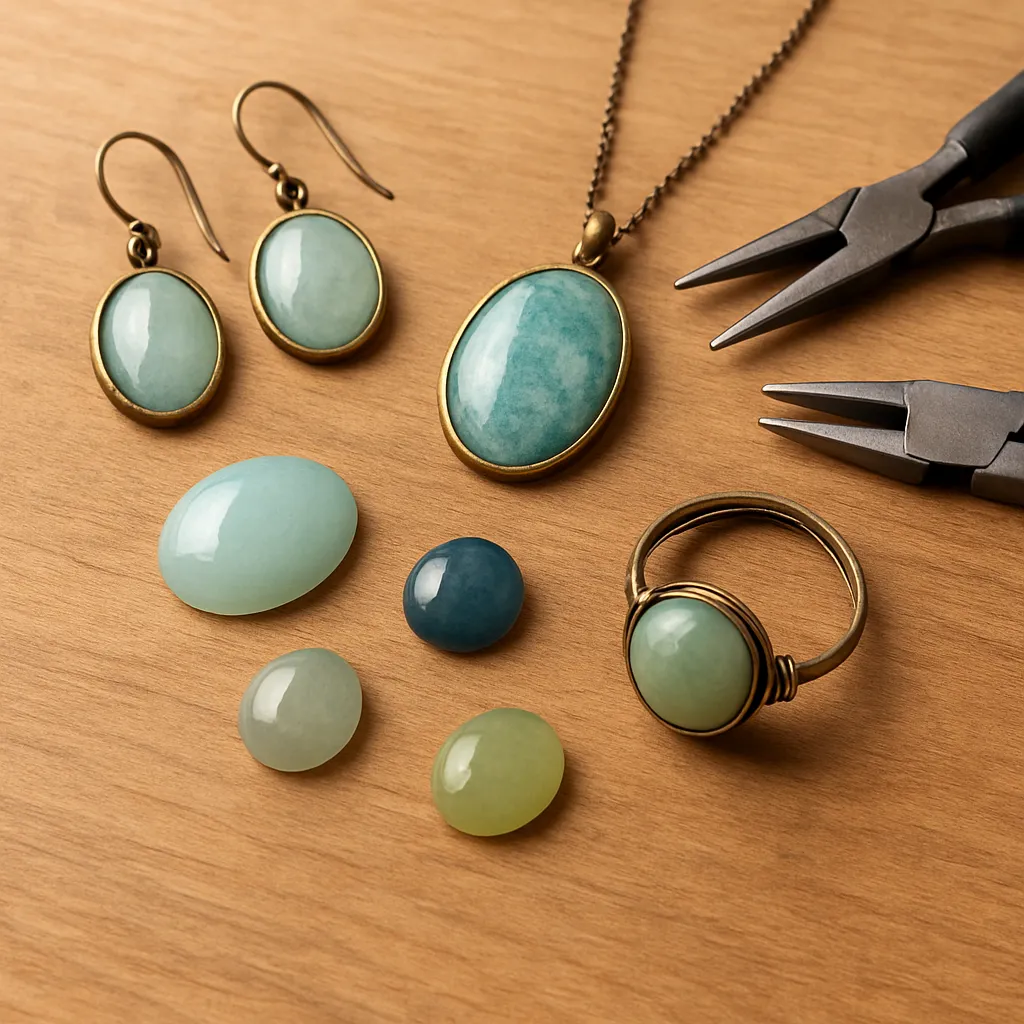
Cabochon stones invite touch. Their smooth curves, lush color fields, and lack of sharp facets make them an approachable, expressive staple in handmade jewelry. Whether you favor rustic, wire-wrapped pendants, finely soldered rings, bead-embroidered brooches, or polymer clay statement cuffs, learning to design with cabochons unlocks a versatile vocabulary of surfaces, silhouettes, and settings. This guide explores how to choose, prepare, and set cabochons across multiple handcraft disciplines—while preserving the personality of each stone and the spirit of slow, intentional making.
What a Cabochon Is—and Why It Belongs in Your Bench Practice
A cabochon (often shortened to cab) is a stone or material with a flat back and a rounded, polished top. Unlike faceted gems that rely on angles and sparkle, cabs emphasize color, pattern, and luster. Agates display bands like topographical maps; turquoise carries desert skies; moonstone shows shifting light; fossil coral, amber, and glass all tell their own stories. The top is commonly domed to catch highlights and create soft reflections, while the base remains flat to rest securely in a setting.
Cabochons are inherently tactile and forgiving. Their generous surface area is ideal for techniques that celebrate texture—soldered metal frames, beaded bezels, stitched soutache, and sculpted clay. Historically, cabs predate faceted stones and appear in Etruscan, Byzantine, and Victorian jewelry. In modern craft, they offer two practical advantages: they are easier to set than traditional faceted gems, and they can be sourced in larger sizes and more diverse materials, including glass, resin, bone, wood, shells, and recycled composites.
Common shapes include ovals, rounds, pears, shields, coffins, marquises, and freeforms. Ovals are the most standard, especially in “calibrated” dimensions—regularized sizes that fit pre-made settings. Typical calibrated ovals include 10×8 mm, 18×13 mm, 25×18 mm, and 30×22 mm. Understanding calibration saves time and expands your options for mounts and cups if you’re not fabricating every setting from scratch.
Usability depends on several physical properties: surface polish, edge cleanliness (the “girdle”), thickness, and material hardness (often measured on the Mohs scale). Softer options like malachite or opal require gentler setting pressure than corundum or quartz. Visual effects also matter. Stones with adularescence, chatoyancy, or internal layers benefit from controlled lighting and thoughtful orientation. Degrees of translucency affect how a cab reads on the body—and whether a metal backing, textured pad, or colored liner will enhance or mute its character.
Selecting Cabochons: Visual, Structural, and Ethical Considerations
A good cabochon should be well-polished, free from chips on the girdle, and proportioned in a way that suits its end use. Pendants and brooches tolerate larger, taller stones; rings and earrings favor slimmer profiles and smaller diameters for comfort. Before purchase or use, examine the stone under raking light to assess scratches and pits. Look for consistent curvature across the top; a lopsided crown creates setting challenges and visual imbalance.
Assess the base. Truly flat backs seat more reliably. Slight convexity can cause rocking; you can correct minor issues by setting over a thin pad (leather, card, epoxy clay) or grinding the base with a lap if you have lapidary tools. When reworking, take care not to undercut edges or change dimensions beyond what your setting allows.
Orientation is key. Line up bands, scenic patterns, or “eye” features (as in tiger’s eye) along an axis that suits your design. If the stone displays sheen, rotate it under a bench lamp to find the brightest direction; pencil a tiny mark on the back to maintain alignment during setting.
Transparency and background strategy play together. Opaque stones work with any metal color. Semitransparent stones can glow or dull depending on what’s behind them. You can place a brushed silver, copper, or gold foil under the cab to brighten it, or even a painted epoxy base to shift warmth or coolness.
Ethical sourcing matters. Ask suppliers about stabilization (common with turquoise), dyeing (often used on agate), and fracture filling (in various stones). Stabilization isn’t inherently bad—just be transparent with clients. For forested or fossil materials, understand legalities and provenance. Recycled or lab-grown options can minimize environmental impact while offering dependable quality and size availability.
Preparation: Clean, Measure, and Plan the Setting
Before setting, remove oils and dust from the stone and from the metal or substrate. Use isopropyl alcohol and non-shedding swabs. If gluing to textiles or porous backings, pre-seal those surfaces to improve adhesion. Lightly abrade hidden metal seats with fine sandpaper (600–1200 grit) to increase mechanical key—never abrade visible stone faces.
Measurements are crucial. Calipers help you confirm width and height, and a paper tape easily wraps the perimeter to estimate bezel strip length. Record the highest point of the crown; this determines the setting wall height. For beadwork bezels, note the stone’s circumference and choose seed bead sizes accordingly.
Gather materials that match the cab’s properties. For softer stones, plan for extra protection: a taller wall, more beads at the rim, or tabs with rounded corners. For thermal sensitivity (opal, turquoise, amber), avoid open-flame setting environments or set after torch work is complete. For highly polished, slick backs, choose cements formulated for smooth, nonporous surfaces.
Metal Bezels: Classic Control and Secure Seats
A metal bezel is a thin metal wall that wraps the cab’s perimeter, gripping it when the wall is pressed inward. Fine silver and 22k gold are popular for burnishing because they’re soft yet strong; sterling or brass can be used with more force. The result is clean, protective, and elegant—ideal for daily-wear pieces.
Choosing Materials and Dimensions
- Bezel strip: 0.2–0.3 mm (28–26 gauge) for small/medium stones; go thicker for very large or tall crowns.
- Wall height: usually 0.5–1.0 mm above the stone’s highest point. Too low won’t hold; too high hides stone.
- Base plate: 0.6–1.0 mm sheet, depending on scale and final backplate design.
- Solder: match metal; medium for the bezel seam, easy for attaching bezel to base to avoid reflowing the seam.
Step-by-Step: Fabricate and Set
- Measure: Wrap paper around the cab’s girdle; mark overlap; transfer to metal strip and cut to length.
- Form: Curve the strip around a mandrel or the stone (wrapped in tape). File ends square; butt join tightly.
- Solder: Flux, heat evenly, and run solder through the seam. Check oval alignment so the seam doesn’t twist.
- True and Fit: Round up on a mandrel; test on the stone. It should slip over snugly without scraping.
- Attach: Place bezel on the backplate; solder with easy solder. Clean, pickle, and neutralize.
- Refine: Saw out the silhouette; file and sand edges. Add any decorative elements now.
- Seat Prep: If the cab rocks, create a bearing—either by beveling the inner lower edge of the wall with a setting bur or adding a thin shim inside.
- Set: Place the cab. Using a pusher, work the wall down at north, south, east, west, then in between. Finish with an agate burnisher to smooth and shine the rim.
Troubleshooting
- Gap at wall: Stretch the bezel slightly with a burnisher, or re-make if too small. Never force the stone.
- Wobble: Add a thin leather or epoxy-clay pad beneath the cab to stabilize.
- Marred stone: Mask vulnerable edges with tape during early fitting; use gentler tools and slower pressure.
Once mastered, the bezel is a gateway technique: it scales from tiny studs to grand statement pendants and plays well with texture, etching, granulation, or pierced backplates that let light through translucent stones.
Cold Connections and Alternative Metal Settings
Not every workshop uses a torch. Cold connections create durable, repairable settings without solder.
Tab Settings
Tabs are cut and lifted from a backplate, then bent over the stone. They work best for large, flat-backed cabs.
- Design at least three tabs (five or more for big stones). Round the tab tips; sharp corners can scratch.
- Pre-bend tabs slightly. Seat the stone on a thin pad if the backplate is textured.
- Fold tabs in sequence around the perimeter using a wooden dowel or nylon pliers to avoid marring.
Prong Settings for Cabs
Prongs are less common for cabs than for faceted stones but can be used with custom seats. Create a shallow shelf on the backplate or a wire frame and bend prongs over the crown. Use more prongs than you would for a faceted stone, as the rounded surface offers less edge for grip.
Wire-Wrapping: Sculpted Frames Without Solder
Wire-wrapping showcases line and movement while cradling the stone. Square wire provides directional grip; half-round wire binds neatly. Choose gauges based on stone size—e.g., 20–22 gauge square for the frame, 22–24 gauge half-round for binders.
- Build a perimeter frame to match the cab’s outline.
- Bind frame layers with half-round wire at top, bottom, and sides.
- Create “claws” or lips that curve over the edge to retain the stone.
- Add a bail or integrated loop at the top; refine with gentle curves and file any snags.
Wire-wrapping excels for asymmetrical stones and dramatic vertical or horizontal orientations. It also adapts easily for mixed metals and textured contrasts. Attention to symmetry (even on freeforms) helps the eye read deliberate design rather than accident.
Beadwork Bezels: Soft Architecture with Seed Beads
Bead-stitched bezels are light, colorful, and comfortable. A peyote bezel cinches a ring of beads around the cab, transitioning from larger to smaller beads to grip the crown.
- Foundation: Trace the cab on bead foundation (Lacy’s Stiff Stuff or felt). Glue the stone; let cure.
- Outline: Stitch a line of size 11/0 seed beads around the edge using backstitch.
- Bezel Up: Switch to peyote stitch around the rim; reduce to 15/0 beads at the outer rounds for a tapered grip.
- Finish: Edge with picots or brick-stitch; add a backing of ultrasuede for a clean feel.
Bead embroidery accommodates irregular shapes and invites color play. For heavy stones, add a hidden brass plate between foundation and backing or stitch through a perforated metal form for extra security.
Textile, Leather, and Soutache Settings
Soutache combines narrow braids coiled and stitched around the cab for a baroque flourish. Use a firm foundation, secure with a strong thread, and seal any cut braid ends to prevent fraying. Leather, tooled or smooth, offers a minimalist seat: cut an aperture just smaller than the cab’s outline, press the stone from the front, and stitch or glue a lining that captures the edge from behind.
Polymer and Epoxy Clay: Sculpted Seats and Surface Play
Polymer clay forms custom bezels in any shape; it cures at low oven temperatures. Many stones (including most glass cabs) tolerate polymer curing, but heat-sensitive materials like opal, turquoise, and amber should be set after baking. Create a seat by pressing the cab (wrapped in plastic or dusted with cornstarch) into unbaked clay to form a recess; remove the stone, bake the clay, then glue the cab in later.
Epoxy clay air-cures and bonds strongly to metal backplates, fabric, and wood. Press the cab into freshly mixed clay; sculpt prongs, textures, or inlays. Embed metal accents, microbeads, or fine chain. Seal porous stones before contact with colored epoxies to avoid staining.
Adhesives: When and How to Use Them Well
While many settings rely on mechanical hold, adhesives are valuable aides for stabilizing seats, bonding to porous substrates, and securing in textile or mixed-media work. Two-part epoxies offer excellent strength and gap-filling; specialty jewelry cements remain flexible and clear. Cyanoacrylates (super glues) cure fast but can fog stones and age poorly. Always test on scrap and follow cure times fully.
- Surface prep: Degrease both surfaces; lightly texture hidden metal seats.
- Apply sparingly: Excess squeeze-out is hard to remove and can stain porous materials.
- Clamp gently: Position with light pressure to keep the cab flush without forcing out adhesive.
- Time: Respect full cure schedules. “Tack dry” is not final strength.
Design Principles: Proportion, Direction, and Light
Cabochons are all about silhouette, color planes, and light flow. A strong design begins with proportion: match stone scale to body placement and to surrounding architecture. A massive cab on a delicate shank looks top-heavy; the same stone in a wide signet frame looks anchored. Directionality guides the eye—align banded agate, scenic dendrite, or chatoyant streaks to emphasize vertical lift or calm horizontals.
Texture contrasts invite touch. Pair a mirror-polished rim with a satin body, or juxtapose hammered halos with smooth frames. Consider chemical coloration on metals: a sulfur-based patina deepens recesses and sets stones aglow. Patina pairs especially well with cabs that have milky sheen or earthy opacity.
Color strategy matters. Cool stones brighten in white metals; warm stones sing in yellow or red alloys. Try mock-ups—lay the cab on copper, brass, and silver scraps under daylight to see how undertones shift. For semitransparents, experiment with backplates pierced for light entry, or place reflective foil under the stone to brighten otherwise moody layers.
Tools and Materials: A Practical Checklist
- Measuring: Digital calipers, flexible paper tape, fine pencil.
- Metalwork: Saw frame and blades, files, sandpaper, bezel pusher, burnisher, ring mandrel, dapping punches, solder, torch, flux, pickle.
- Wire: Square and half-round in 20–24 gauge; nylon-jaw pliers; flush cutters.
- Beadwork: Seed beads (11/0, 15/0), beading thread, foundation, backing, beading needle.
- Clays: Polymer or epoxy clay, texture sheets, blades, oven or work time clock.
- Adhesives and prep: Two-part epoxy, jewelry cement, isopropyl alcohol, lint-free swabs, disposable mixing tools.
- Finishing: Polishing papers, micro-mesh pads, patina solutions, neutralizer, wax or sealant.
- Safety: Eye protection, respirator for dust, ventilation for fumes, heat-resistant surface, first-aid basics.
Project A: Soldered Oval Pendant with Pierced Back
This project highlights a semitransparent cab with backlight drama.
- Design: Sketch an oval backplate slightly larger than the stone. Plan a simple pierced pattern behind the cab.
- Bezel: Measure and solder an oval bezel. Solder to backplate.
- Piercing: Drill pilot holes and saw the design in the backplate area under the stone.
- Bail: Fabricate or solder a jump ring and bail.
- Finish: File, sand, and apply selective patina to emphasize the piercings.
- Set: Seat the cab and burnish the wall down evenly.
Project B: Wire-Wrapped Freeform Statement Pendant
Embrace an irregular stone and expressive lines.
- Frame: Build a contour-matching wire frame with square wire; create crossbars to support the back.
- Bind: Use half-round wire to secure layers at several points.
- Retention: Form small lips or claws that rise over the cab’s edge at strategic spots.
- Bail: Twist or wrap an integrated bail that complements the stone’s flow.
- Refine: Tuck ends, file burrs, and adjust for comfort against the skin.
Project C: Bead-Embroidered Brooch
Soft structure and rich surface patterning.
- Mount: Adhere the cab to bead foundation; let it cure fully.
- Outline: Backstitch size 11/0 beads around the stone’s edge.
- Bezel: Add peyote rows, stepping down to 15/0 at the rim to secure the stone.
- Decorate: Add accent rows, fringe, or contrasting textures.
- Back: Glue on ultrasuede; stitch the edges with brick stitch; add a brooch pin finding.
Common Pitfalls and How to Avoid Them
- Stone rocking in bezel: The back isn’t flat or the seat is uneven. Correct by adding a thin pad or cutting a consistent bearing with a setting bur.
- Girdle chipping: You’re pushing metal too aggressively. Use a pusher at cardinal points, then fill in; switch to a burnisher for final closure.
- Glue squeeze-out: Too much adhesive or too much pressure. Apply sparingly; remove any wet excess immediately with a solvent-safe swab.
- Fogging from cyanoacrylate: Choose epoxies or jewelry cements instead, and keep solvents and fumes away from polished surfaces during cure.
- Uneven bead bezel: Tension or bead size inconsistent. Count your base ring carefully and keep thread pathways consistent.
Advanced Techniques: Doublets, Triplets, and Shadow Boxes
Advanced lapidary composites like doublets (two-layer stones) and triplets (three layers, often with a protective cap) expand creative options. A delicate opal slice can be stabilized under a quartz cap; a thin fossil can be supported with a black backer to intensify color. These require extra care during setting—avoid excessive pressure at edges and never apply direct heat. Shadow-box mounts add depth: set the cab in a recessed frame to create graphic negative space and protect the rim.
Surface Finishes and Metal Color
Finishing choices alter mood dramatically. High-polish silver makes blues vivid; brushed brass warms reds and browns. Matte surfaces emphasize form over glare. Consider alternating finishes—polished bezels against matte backplates, or vice versa—to spotlight the stone’s edge and show handwork. If applying patinas, seal where appropriate to balance longevity with the desired aesthetic.
Care and Client Guidance
Even robust cabochons appreciate mindful wear. The durability of the finished piece depends on stone type, setting method, and lifestyle. Rings endure more knocks than pendants or earrings; for softer stones, steer clients toward protective settings and caution against hard impacts.
- Cleaning: Mild soap and water with a soft brush. Avoid ultrasonic cleaners for porous or fracture-filled stones.
- Storage: Wrap separately to prevent scratches. Keep opal and other sensitive stones away from extreme dryness or heat.
- Repairs: Document adhesives and processes used to guide future maintenance and avoid incompatible solvents.
Responsible Sourcing and Studio Practices
Choose suppliers who provide transparency. Where possible, buy from lapidaries who can discuss mine origin, treatments, and cutting approaches. Reuse offcuts for small accents. Recycle metal scrap, ventilate during soldering and patination, and reduce dust with wet-sanding methods when truing backs or refining seats. Craftsmanship and conscience travel well together—they become part of the story you and your clients wear.
Pricing, Presentation, and Storytelling
Price for sustainability: include material cost, time (including design and finishing), studio overhead, and a profit margin that funds growth. Presentation shapes perception—photograph cabs in diffused daylight or soft-box setups to avoid glare across the crown. Show scale on the body and close-ups of construction. Tell the stone’s story: material, origin, care, and what drew you to its pattern or color. Jewelry is biography in metal and light; a few lines of narrative invite clients to carry that biography forward.
Final Thoughts: Learning the Language of Cabochons
Working with cabochons is a conversation with curve and shadow. The process rewards patience—measuring twice, orienting that perfect stripe, easing metal over an edge one press at a time. Across techniques—soldered frames, wrapped lines, stitched beads, sculpted clays—the cabochon remains a faithful partner, generous with surface and story. As you refine choices in shape, setting, and finish, the silent grammar of weight, light, and touch becomes fluent, and your handmade pieces start to read—clearly, confidently—on the wearer’s skin.
