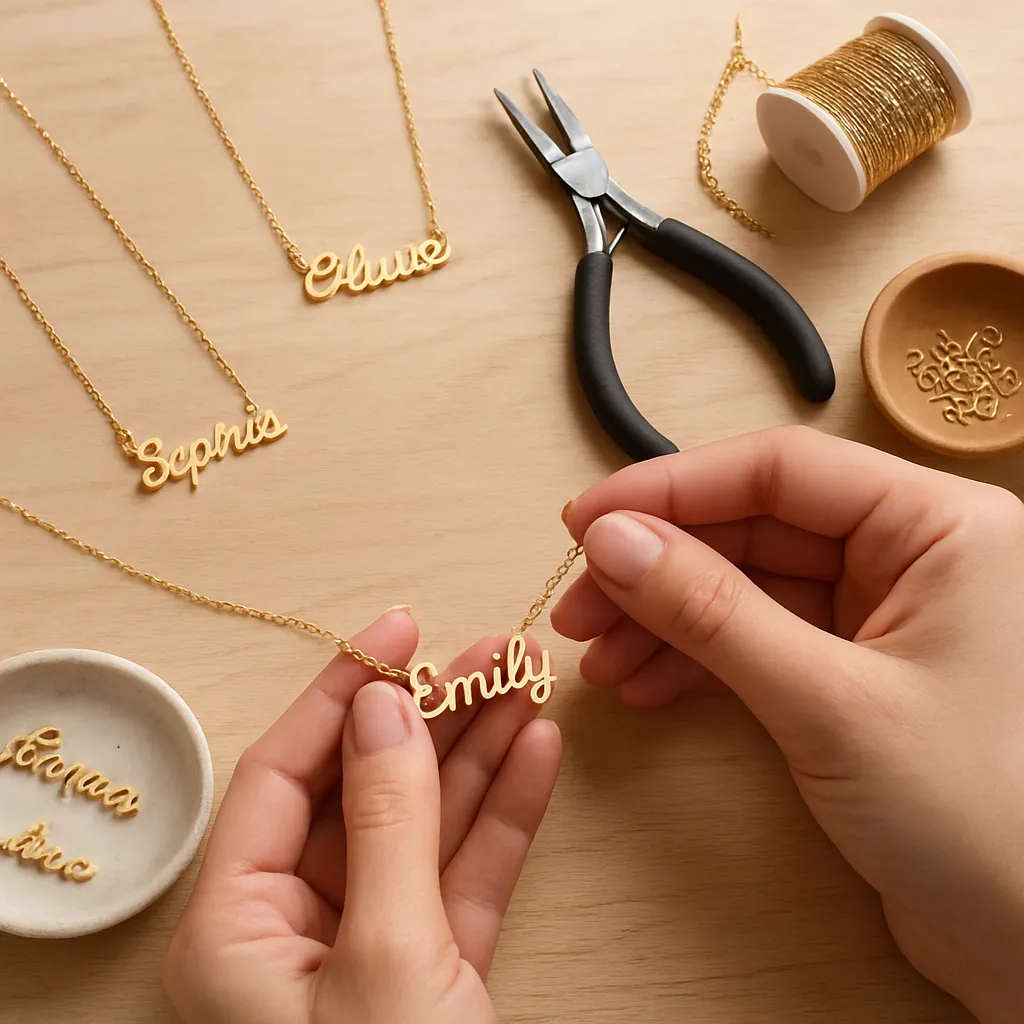
Personalized name necklaces marry identity with ornament in a way few accessories can. They carry stories, celebrate relationships, and transform letters into wearable art. Whether you are shaping a child’s nickname in graceful wire, sawing a surname from shining sheet metal, or stamping a date that anchors a memory, the process invites attentive hands and curious minds. This guide explores the materials, methods, design choices, and finishing touches that turn a simple name into a distinctive keepsake, with techniques ranging from approachable to advanced so you can grow your skills and your confidence.
Meaning, Memory, and a Short History of Wearing Names
People have adorned themselves with personal identifiers for millennia. Ancient Egyptians wore cartouches bearing royal names; medieval Europeans used heraldic badges and signet rings to convey lineage and authority; Victorians cherished name brooches and lockets filled with hair or portraits. The contemporary name necklace is both heir to these traditions and a thoroughly modern gesture of self-expression. It can whisper a private reference known only to a few or broadcast a bold declaration in big, gleaming letters.
In jewelry, letters are more than symbols: their arrangement, spacing, and weight speak a visual language. A script that curls like ivy suggests romance; a monoline sans serif declares clarity; angular, saw-pierced capitals feel strong and deliberate. You can commemorate first milestones, honor multilingual names with diacritics, encode messages in Morse dots and dashes, or merge two names in a single continuous line of wire. Every decision—the metal, the finish, the chain—contributes to a voice the wearer carries close to the heart.
Materials and Tools: Foundations That Shape the Outcome
Every material choice affects look, feel, and lifespan. Balancing cost, ease of working, and skin-friendliness helps you build confidence and reliable quality.
Metals
- Sterling silver (925): Bright, classic, and comparatively easy to saw, stamp, and solder. Tarnish can be managed by storage and polishing, or embraced as a gentle patina.
- Fine silver (999): Softer and highly resistant to tarnish. Excellent for metal clay and delicate bezels, but can deform more easily in thin sections.
- Gold-filled: A thick layer of karat gold mechanically bonded to brass core; far more durable than plating and an excellent balance of luxury and cost.
- Brass and copper: Warm color, economical, welcoming for practice. Seal to reduce skin discoloration. Their softness aids sawing and stamping.
- Stainless steel and titanium: Strong and abrasion-resistant. More challenging to cut and finish with hand tools; choose if extreme wear-resistance is needed.
- Aluminum: Lightweight, won’t rust, easy to stamp. Not as hard as precious metals and can scratch; ideal for casual pieces.
Sheet thickness for nameplates typically ranges from 0.8–1.2 mm for sterling silver; go thicker for bold block letters or when piercing many inner counters (enclosed shapes like A, O, and R). Wire gauges for script names often fall between 16–20 AWG depending on the final scale and flexibility desired.
Chains, Findings, and Small Parts
- Chain styles: Cable for simplicity; curb for classic texture; box for subtle geometry; rolo for round links that balance pendants nicely. Test how each prevents flipping.
- Clasps: Lobster for security; spring ring for lightness; toggle for style; magnetic for easy on/off. Include an extender chain for versatility in layering.
- Findings: Jump rings (soldered closed for strength), end caps, bails, crimp covers, and wire guards. Choosing quality findings elevates perceived value and real-world durability.
Non-Metal Options and Accents
- Resin: Crystal-clear castable medium for domes, inlays, and preserved flowers. Demands careful bubble control and UV protection.
- Polymer clay: Lightweight, sculptable letters and canes; bake in a home oven. Seal with compatible varnish for sheen.
- Wood and bone: Warm tactility and visible grain; laser-cut or hand-carved. Seal against moisture and oils from skin.
- Stones and beads: Birthstones, spacer beads, or letter beads for playful designs.
Essential Tools
- Measuring and marking: Calipers, steel ruler, scribe, center punch, layout fluid, and transfer paper for precise letter placement.
- Cutting and forming: Jeweler’s saw (2/0–4/0 blades), flush cutters, pliers set (chain nose, round nose, flat nose), ring clamps, bench pin.
- Connection and heat: Torch for soldering, third hands, honeycomb boards, pick, flux, binding wire, quench and pickle setup.
- Texturing and shaping: Files (needle set), needle burnishers, chasing tools, stamping block, and letter stamps if doing metal stamping.
- Finishing: Sandpaper (400–3000 grit), polishing wheels/compounds, rotary tool or flex shaft, brass brush, tumble polisher for work-hardening and shine.
- Safety: Eye protection, ventilation, heat-resistant mat, gloves for chemicals, and a dust mask when sanding.
Technique Atlas: Many Paths to a Name
Start with approachable methods and advance as your confidence grows. Each technique yields distinct aesthetics and tactile qualities.
- Wire script forming: Shape a single piece of wire into a continuous cursive name. Quick to prototype, minimal tools, visually light and elegant.
- Metal stamping: Strike letter stamps into soft metals to create indented names on bars, discs, or tags. Align with guides to avoid drifting impressions.
- Saw-piercing: Transfer a printed design to metal sheet and use a jeweler’s saw to cut out letters, including negative spaces. This favors refined edges and crisp silhouettes.
- Hand engraving: Use gravers or a powered handpiece to inscribe names with flowing line quality. Demands practice but rewards with nuance.
- Resin inlay: Carve or etch channels into metal, fill with pigmented resin, cure, and sand flush for color contrast.
- Polymer sculpting: Build letters as relief elements, texture them, and bake. Affix to a metal backing plate or integrate with jump rings.
- Bead weaving: Stitch letter patterns in peyote or loom technique for pixel-like clarity; finish the panel as a pendant.
- Textile appliqué and embroidery: Felt or fabric bases with embroidered names; set in metal bezels or stitch into leather frames.
Project 1: Wire Script Name Necklace (Beginner-Friendly)
What You Need
- 16–20 AWG dead-soft sterling or gold-filled wire
- Round nose, chain nose, and flat nose pliers; nylon-jaw pliers for smoothing
- Flush cutters, bench block, small hammer or mallet
- Fine file or sanding sticks
- Chain, two jump rings, clasp, ruler, marker
Steps
- Sketch the name in cursive with continuous connections. Mark where the chain will attach (often the first and last letters).
- Cut wire 3–5 times the name’s length to allow for bends. Start forming the first letter with round-nose pliers; keep bends smooth and consistent.
- Plan for ascenders and descenders to interlock gracefully. Adjust spacing with gentle pressure, avoiding kinks.
- Harden the finished script by lightly hammering on a bench block, focusing on straight segments. Avoid flattening tight curves.
- File cut ends smooth. Add small loops at start and end if needed for jump ring attachment.
- Attach chain with jump rings; close them fully and, if possible, solder shut for strength. Add clasp and test drape on a neck form.
Pro tip: Practice the name with scrap wire to learn its rhythm. Letterforms improve dramatically when you think in curves, not angles, and when you keep the wire moving under the pliers rather than the pliers doing all the work.
Project 2: Stamped Bar Necklace with Coordinates and Name
What You Need
- Metal bar blank (sterling, brass, aluminum), pre-drilled at ends
- Letter and number stamps, steel bench block, stamp straight jig or tape guide
- Hammer (1–2 lb), masking tape, layout marker
- Blackening solution or enamel crayon for contrast, polishing cloth
- Chain, jump rings, clasp
Steps
- Tape the bar to the bench block; add a parallel tape line as a baseline. Mark center point to balance the text.
- Stamp from center outward to maintain symmetry. Hold stamp vertical; strike once, firmly. Avoid double hits by lifting straight up.
- For small diacritics or punctuation, use dot or dash stamps. Consider stacking a short name over coordinates for a compact design.
- Darken impressions with oxidizing solution or enamel, then polish the surface to leave color only in recessed letters.
- Assemble with chain and clasp. Check letter depth by running a fingernail across; you should feel a definite indentation.
Project 3: Saw-Pierced Nameplate with Soldered Jump Rings (Intermediate)
What You Need
- 0.8–1.2 mm sterling sheet, jeweler’s saw with 3/0 blades
- Spray adhesive or transfer paper, fine-tip marker
- Files, sanding sticks, needle files for inner curves
- Torch, flux, solder chips, third hand, pickle solution
- Two jump rings (same metal), chain, clasp
Steps
- Print the name at final size; mirror if you prefer cutting on the back. Affix the pattern to the sheet with spray adhesive.
- Center-punch interior counters (e.g., O, A) and drill pilot holes. Thread the saw blade through and pierce out negative spaces before exterior cuts.
- Saw the outline slowly; keep steady stroke and gentle feed. Turn the metal, not your wrist, to navigate curves.
- File edges to refine; use needle files to smooth interiors. Sand progressively to remove saw marks and prepare for polishing.
- Position small jump rings at the ends or behind upper strokes of letters; flux and place tiny solder chips. Heat evenly until solder flows. Quench, pickle, rinse.
- Polish to desired finish and assemble on chain.
This path yields crisp letter silhouettes with a professional profile. It takes patience and blade discipline; blades break often at first—accept it as part of the learning curve.
Design Intelligence: From Sketch to Wearable Word
Letterforms are architecture at miniature scale, carrying both legibility and style. A thoughtful design phase prevents production detours and improves comfort.
- Assess typography: Choose a font with clear connections for wire scripts, and adequate stroke weight for saw-piercing. Avoid hairline strokes that might buckle.
- Balance: Keep visual mass close to the centerline to prevent the piece from twisting during wear. Use two attachment points for horizontal balance.
- Kerning and spacing: Test on paper, then in metal. Overlapping strokes add strength and reduce snag points.
- Diacritics and multilingual names: Plan supports for accents. Dots, tildes, and hooks need attachment points or bridges to resist bending.
- Scale and proportion: Aim for readability at 50–60 cm viewing distance. Consider how the name pairs with chain thickness and neckline shapes.
- Negative space: Open counters enliven designs; just ensure thin bridges don’t become failure points.
Surface Finishes and Protective Treatments
A finish can transform the same design into soft vintage or mirror-bright modern. Sequence your abrasives and polishing to minimize backtracking.
- Brushed satin: Even strokes with Scotch-Brite or 600–800 grit for understated sheen.
- Mirror polish: Work through grits up to 2000–3000, then compounds like Tripoli and rouge.
- Intentional oxidation: Sulfur-based solutions on silver create depth in recesses. Seal if desired to stabilize the look.
- Textural contrasts: Matte backgrounds with bright letter rims add legibility and refinement.
- Clear coats: Microcrystalline wax or lacquers slow tarnish and color transfer on copper/brass.
Comfort, Balance, and Everyday Wear
A necklace that sits properly gets worn; one that flips or irritates is forgotten in a drawer. Test wearability as seriously as aesthetics.
- Attachment geometry: Two widely spaced jump rings prevent pendants from rotating. Hidden bails can reduce flipping on curved scripts.
- Chain length: 14–16 inches for collarbone; 18 inches for standard; 20–24 inches for layering or larger pendants. Provide an extender for flexibility.
- Weight and ergonomics: Keep heavy plates for mid-length chains to distribute load. Round all edges and corners; break sharp points.
- Skin sensitivity: Use hypoallergenic options like niobium ear wires (for matching sets) or high-karat gold contacts if customers report nickel sensitivities.
Creative Customization: Layers of Meaning
- Symbols and charms: Pair names with tiny motifs—stars, hearts, constellations, pets, or profession tools.
- Birthstones and color: Add small bezels or bead drops keyed to birth months or favorite palettes.
- Morse code: Translate names into dot/dash sequences using beads or stamped marks for a subtle secret.
- Braille: Raised dots on a plate or bead arrangement create a tactile tribute to inclusive design.
- Dual-language names: Stack scripts (e.g., Latin and Arabic) or interlace Hangul with Roman letters for a global aesthetic.
Care, Maintenance, and Longevity
Offer care cards with every piece. Clear instructions preserve shine, structure, and sentiment.
- Cleaning: Mild soap and soft brush for daily grime. For silver tarnish, use dedicated cloths; avoid dips on intentionally oxidized pieces.
- Storage: Keep in anti-tarnish pouches; separate to prevent scratches. Remove before swimming, sleeping, or vigorous exercise.
- Repairs: Soldered jump rings and robust letter connections reduce failures. Offer a maintenance plan—polish and inspect yearly.
Studio Safety and Workflow
Good habits protect your health and your work. Set up zones: clean bench for assembly and finishing, separate ventilated area for heating and chemicals. Label containers; keep baking tools for polymer and food absolutely separate. Dispose of metal dust and pickle responsibly.
- Ventilation: Torch work, solder flux fumes, and resin curing require airflow. Use a small fume extractor or open window plus fan.
- Eye and hand safety: Always wear eye protection when cutting, filing, or polishing; secure long hair and sleeves.
- Organization: Trays for each project prevent mixing letter sets and findings; small jars capture sawdust and offcuts for recycling.
Ethics, Sourcing, and Sustainable Practice
The most resonant pieces honor both people and planet. Choose suppliers who publish metal content and recycling practices. Reclaim offcuts: melt scrap, trade-in, or send to refiners. Offer repair over replacement. Simple practices amplify workshop sustainability without compromising design dreams.
- Responsible metal: Recycled sterling and gold reduce environmental load. Verify mill certifications.
- Traceable gemstones: Even tiny accent stones benefit from documented provenance.
- Minimal waste design: Nest letter templates to use sheet efficiently; cut test pieces from brass/aluminum before precious metals.
Pricing, Selling, and Custom Orders
Custom work demands clear communication and transparent pricing. Provide design sketches and material options upfront; confirm spelling and diacritics twice. Quote based on materials, time, overhead, and a profit margin that sustains your practice.
- Proofs and approvals: Share digital mockups or paper templates laid on chain for scale confirmation.
- Deposits and timelines: Collect a deposit before sourcing materials; set expectations for revisions and lead time.
- Packaging: Present in a small box with anti-tarnish insert and care card. A wax-sealed note or ribbon adds ceremony.
- Aftercare: Offer re-polishing, chain replacement, or re-sizing policies to build loyalty.
Troubleshooting: When Things (Inevitably) Go Sideways
- Stamp double-hits: If a letter ghosts, file and refinish; consider texturing the entire plate to camouflage. Practice a single confident strike.
- Sawblade breakage: Usually from twisting or pushing too hard. Lubricate the blade; let the teeth cut at their pace. Keep shoulders relaxed.
- Uneven wire letters: Re-anneal work-hardened wire, then re-form curves with nylon-jaw pliers. Lightly hammer to harden only at the end.
- Resin bubbles: Pre-warm resin and pendant; pour in thin layers; pop bubbles with a gentle heat pass or toothpick.
- Uneven oxidation: Clean thoroughly before darkening; oils block chemicals. Use a soft brush for uniform application, then seal if desired.
- Necklace flips: Reposition attachment points farther out, or add a tiny counterweight charm near the clasp.
- Skin reactions: Switch to solid gold or titanium at contact points; verify nickel content in base metals.
Leveling Up: Advanced Finishes and Professional Touches
- Micro-setting: Add pavé accents on initial letters for sparkle without overpowering the name.
- Enamel work: Hard or cold enamel for vivid color fills; perfect for school or team palettes.
- Textured backplates: Stipple, sandblast, or roll-print fabric textures for tactile contrast.
- Hallmarks and stamps: Mark metal purity when local regulations permit; sign your maker’s mark with pride in your craftsmanship.
Beyond the Single Name: Compositions and Narratives
Layer multiple strands—one for each child, a pet name paired with a paw charm, or a trio of initials building a monogram. Interlace two names along a heart-shaped path or create a lariat design where one initial threads through another. For those with longer names, consider abbreviation strategies: first letter large, following letters petite; vertical stacks on multiple bars; or negative-space cutouts floating within a frame.
Why Handmade Matters
A machine can cut letters with clinical precision, but the human hand imparts warmth to curves, intention to spacing, and judgment to the meeting of line and light. Each stroke, tap, and polish is a witness to attention. In-person fittings ensure pieces rest comfortably on varying body shapes, and post-wear adjustments refine how a necklace moves through daily life. The result is not just a label but a talisman of belonging, carrying the quiet gravity of care and the joy of personalization.
Metalworking Micro-Skills That Pay Big Dividends
- File choreography: Use cross-filing to square edges, then draw-filing to refine surfaces; finish with a light stroke to preserve crisp lines.
- Saw posture: Elbows down, frame vertical, gentle up-and-down rhythm. Listen for the pitch of a happy blade.
- Heat control: Even heating prevents slumping or burnt flux; watch for the moment solder flashes and flows, then back off promptly.
- Edge relief: A tiny chamfer softens contact edges without reading as rounded from the front, increasing comfort and perceived refinement.
Aesthetic Ecosystem: Color, Light, and Wardrobe
Consider complexion, garment textures, and how light plays across finishes. High-polish silver sings on deep jewel tones; brushed brass warms neutrals. A matte surface photographs beautifully with less glare—useful for shop listings. Offer a lookbook of chain lengths and plate sizes modeled on different necklines so clients visualize layering and scale.
From First Sketch to Final Shine: A Suggested Workflow
- Consult and concept: Confirm spelling, accents, and style references. Collect neck measurements and preferred chain length.
- Prototype: Cut a paper or thin brass mockup; test balance and attachment points.
- Commit materials: Transfer design, saw or stamp, refine edges.
- Join and strengthen: Solder jump rings, test pull strength, and clean thoroughly.
- Finish: Sand and polish; add intentional oxidation or texture; assemble chain and clasp.
- Quality check: Inspect under magnification; test wear on a form; verify clasp and ring closures.
- Present: Package with care card and soft pouch; document materials and finish chosen.
Alloy Knowledge: Understanding Metal Behavior
Not all silvers behave alike: sterling work-hardens readily and benefits from periodic annealing during intensive forming. Gold-filled tolerates gentle soldering but risks discoloration if overheated; mechanical connections are often preferable. Brass and copper conduct heat more efficiently than silver, so preheat larger surfaces when soldering to avoid partial flows. Knowing these quirks reduces scrap and builds a rhythm in the bench routine.
Scaling Up Without Losing the Spark
If you begin selling, templates, jigs, and standardized blanks streamline production while leaving room for custom flair. Create a library of letterforms and spacing charts; pre-cut chains to popular lengths; stock clasps and jump rings in matched finishes. Batch steps by type—saw all pieces one day, file the next, polish the third—to reduce setup friction. Protect your artistic bandwidth by reserving time for experimental designs so your line evolves organically.
The Beauty of Wear and Time
Even the most careful owner will impart micro-scratches and warm tones to a piece through daily life. Many artisans embrace this, designing surfaces that accept a mellow sheen, small nicks that read as history rather than defects. Offer optional refinishing for those who prefer pristine shine and advice for those who enjoy a lived-in narrative.
Closing Thoughts
Letters are among the first marks we learn to draw, and perhaps that is why shaping them into precious forms feels so natural. A name necklace is small enough to complete in a few evenings yet profound enough to carry decades of meaning. From the first pencil sketch to the final polish, each decision invites care: materials chosen for skin and story, finishes tuned to light and lifestyle, joins built for seasons of wear. As your skills grow, you will find that a steady hand and attentive eye are matched by something less tangible but equally vital—the quiet pursuit of quality, the willingness to revise, and the pride in work that leaves your bench to live, beautifully, in someone else’s world.
