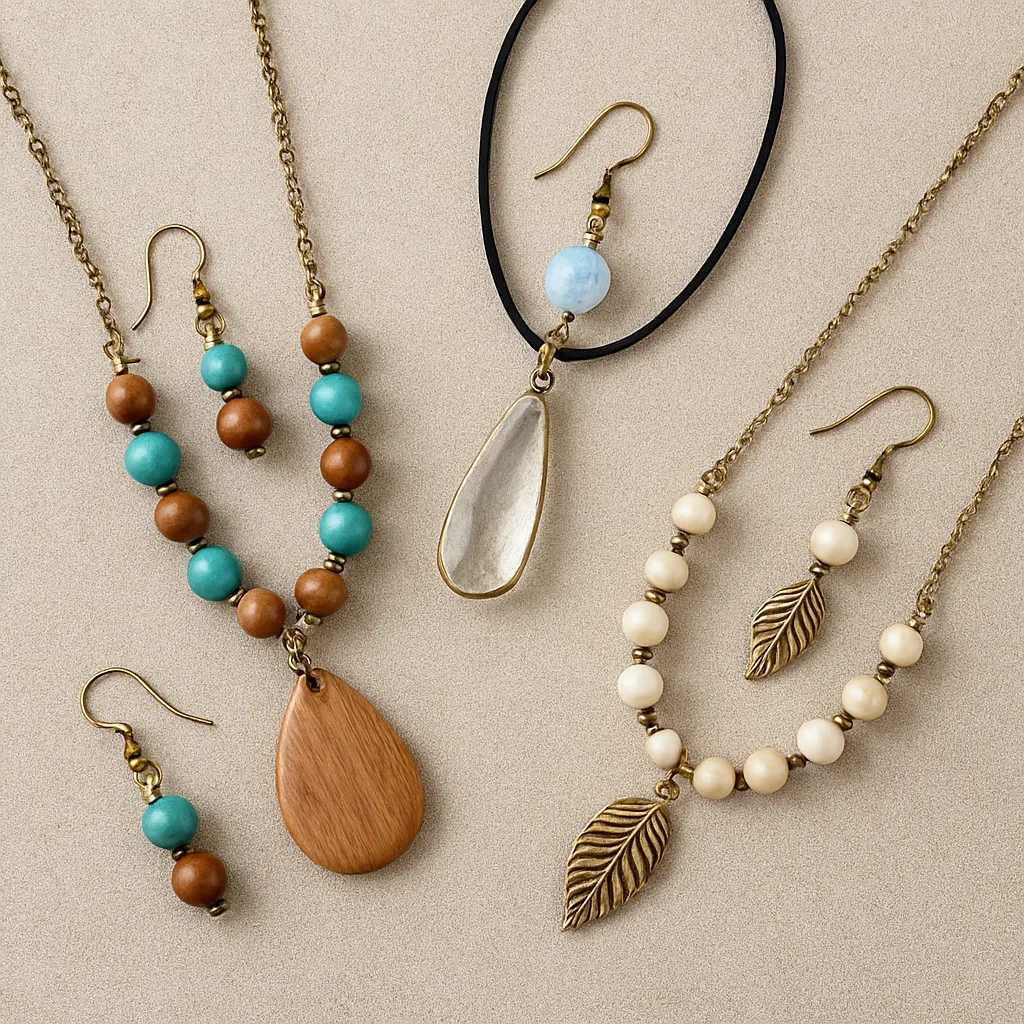
Theme-based jewelry sets give makers a poetic way to tell a story across multiple pieces that belong together. Instead of treating a necklace, bracelet, earrings, and ring as isolated projects, a theme pulls them into a family of forms, colors, and textures. This approach invites narrative, celebrates material knowledge, and honors the patient rhythm of handwork. Whether you lean toward botanical motifs, celestial patterns, maritime textures, or minimalist geometry, the path from idea to finished set rewards attentive hands and steady curiosity. The result is wearable art with intention, a keepsake that feels both personal and shareable, handmade within a tradition of living craftsmanship.
What Makes a Theme Sing
A theme shapes every design decision in a jewelry set: palette, silhouette, surface detail, and even how the pieces move as the wearer walks. It operates like a compass, guiding experimentation without dictating a rigid formula. Good themes are spacious enough to allow variation yet specific enough to anchor visual identity. Think of a theme as a set of poetic constraints: a chosen symbol, a texture, a seasonal mood, or a cultural reference that you handle with care and respect.
Popular Theme Pathways
- Botanical: leaves, vines, petals, seed pods, wood grain, hand-dyed silk cords, and engraved florals.
- Celestial: constellations, hammered starbursts, moon phases, comet tails, oxidized silver and mica powders.
- Coastal: sea glass, shells, knotted cords, rope textures, sand-cast metal charms, wave-like wire forms.
- Folkloric geometry: tessellations, zigzags, repeating lozenges; careful research and mindful attribution are key.
- Minimalist: clean lines, negative space, matte finishes, precise angles, modular components.
- Mythic animals: feathers, scales, spiral horns; stylized rather than literal to avoid costume feel.
- Seasonal palettes: autumn russets and bronze, spring greens and pearl, winter blues and hematite.
Two invisible tools will help any theme: a strong sense of cohesion and working knowledge of color theory. Cohesion ensures motifs converse across the set. Color theory helps you choose hues that harmonize or create purposeful contrast. Add a layer of symbolism to deepen meaning: moonstone for intuition, oak leaf for perseverance, or lapis for wonder. The best themes are felt before they are understood.
Anatomy of a Set
Think of each component as a chapter in a micro-narrative. The necklace is often the hero, carrying the boldest form; earrings echo the central motif at a lighter scale; the bracelet introduces rhythm and repetition; a ring or brooch becomes the intimate detail that rewards close attention. Use principles of repetition, variation, and contrast so that no piece is redundant and none feels out of place.
Materials, Tools, and Responsible Sourcing
Handicraft thrives when materials are chosen with intent. For wirework, copper, brass, sterling silver, and gold-fill are common, each with distinct working properties. For beadwork, seed beads, gemstone chips, freshwater pearls, and Czech glass add color stories. Polymer clay and air-dry clay let you sculpt motifs, while UV resin captures inclusions like crushed shells or gold flakes. Wood, leather, textile cords, and paper beads extend texture variety and tactile warmth. Whenever possible, consider sustainability by repurposing vintage findings, salvaging beads from unworn strands, or buying from small-batch suppliers who share traceability data.
- Core hand tools: round-nose pliers, chain-nose pliers, flush cutters, bail-making pliers, nylon-jaw pliers.
- Shaping and finishing: steel bench block, chasing hammer, needle files, micro-mesh sanding pads, polishing cloths.
- Stringing: beading needles, beading awl, bead board, calipers, beeswax or thread conditioner.
- Adhesives and resins: two-part epoxy, flexible jewelry cement, UV lamp for resin, mixing sticks and silicone mats.
- Surface treatments: liver of sulfur for patina, metal sealants, Renaissance wax, acrylic varnish for clay.
- Safety: dust mask for sanding, gloves when using chemicals, eye protection, good ventilation.
When working for clients who have sensitivities, prioritize hypoallergenic metals: niobium, titanium, surgical stainless steel, or 14k+ gold. These lower the risk of irritation without sacrificing beauty. Keep a labeled drawer of findings in varied finishes so each set can be color-matched from clasps to ear wires.
Planning and Prototyping the Set
Start with sketches on a grid. Draw the hero piece at scale, then extract a miniature variant for earrings and a rhythm element for the bracelet. Use a simple design brief: one sentence that captures mood and core material choices. Create a mood board that includes palette swatches, fabric textures, and motif references. Then prototype with inexpensive materials before committing to final components.
Measurements and Comfort
- Necklace lengths: 16 in choker, 18 in princess, 20–24 in matinee; add extenders for flexibility.
- Bracelet sizing: wrist circumference plus 0.5–1 in for drape if beaded; less if on memory wire.
- Earring comfort: keep single earring weight under 6–8 g for comfortable daily wear; test with paper prototypes.
- Ring fit: measure at day’s end; account for wider bands requiring a half-size increase.
Comfort is part of beauty. Prioritize ergonomics by smoothing edges, reducing weight, and balancing pendants so they do not twist. When planning, explore modularity: charms that detach, necklaces that convert to lariats, and bracelets that connect to form anklets. Modularity increases value without inflating material costs.
Step-by-Step Themed Sets
Botanical Whisper: Wire Leaves and Beaded Petals
Palette: moss green, antique brass, soft cream. Materials: brass or gold-fill wire in 20–26 gauge, translucent green glass beads, freshwater pearls, fine chain, small jump rings, lobster clasp, ear wires, jewelry cement.
- Form leaves: Wrap 24-gauge wire around a marquise mandrel. Cross the wire ends at the bottom and twist twice to set the leaf spine. Use chain-nose pliers to gently pinch the tip. Add light hammer texture on a steel block to give the leaf a springy resilience.
- Veins: Use 26-gauge wire to ladder-stitch across the leaf frame. Keep tension even so the leaf holds a natural curve.
- Petals: String three small glass beads and one pearl; ladder them into a small cluster. Secure with a surgeon’s knot if on cord or a wire-wrapped loop if on wire.
- Necklace: Center a larger leaf flanked by two bead clusters. Space with 3–5 links of fine chain to create a breathing rhythm. Use 4 mm jump rings, opening and closing with a clean pivot so the rings re-align perfectly.
- Earrings: Match smaller leaves with a single bead cluster each. Check mirrored orientation by laying the pair flat before attaching ear wires.
- Bracelet: Alternate micro leaves and pearls on a short chain. Add a 1 in extender finished with a tiny leaf charm.
Finish by polishing with a soft cloth and sealing if you added an oxidized surface. The hammered texture increases durability while catching light in a leaflike shimmer.
Night Sky: Resin Constellations and Crescent Charms
Palette: deep blue, silver, hints of gold. Materials: bezel trays, UV resin, mica pigments, silver leaf, star sequins, crescent moon charms, stainless chain, niobium ear wires, liver of sulfur for darkening silver components if desired.
- Background pour: Mix a small amount of resin with navy mica. Pour a thin layer into bezels and cure just until firm to the touch.
- Constellation map: Place tiny silver dots with a toothpick, then link a few with an ultra-thin line of lighter resin. Avoid overfilling to prevent doming overflow.
- Accents: Add a whisper of gold leaf torn into flecks to evoke nebulae. Cure fully under UV lamp while shielding from dust.
- Assembly: Necklace takes one large bezel plus a dangling crescent charm; earrings use smaller bezels with single star sequins. Bracelet uses three mini bezels spaced evenly with jump rings sized for flexibility.
- Seal and clean: Wipe edges, sand any drips with micro-mesh, and polish. Add a final wax if you want a soft satin gleam.
This set pairs sleek lines with cosmic motifs. The moons and constellations keep the narrative tight, while scale shifts lend variety.
Coastal Knots: Macramé, Shells, and Sea Glass
Palette: seafoam, sand, sun-bleached rope. Materials: waxed cotton cord, small shells, drilled sea glass, crimp covers, cord ends, jump rings, parrot clasp, clip-on earring findings for weight options.
- Core knot: Practice half-square knots for a spiral effect. Keep tension steady; measure often so the spiral reveals evenly.
- Pendant: Trap a piece of sea glass with a wrapped net using thin cord, leaving a top loop for attachment.
- Necklace: Alternate sections of spiral knots with simple overhand spacers. Hang the netted glass as focal. Finish cord ends with caps secured by epoxy.
- Earrings: Create miniature nets around tiny shells, attach to light hoops or clip-ons for sensitive ears.
- Bracelet: A slim spiral with two or three sea-glass chips threaded at intervals. Add an extender chain for tide-like adjustability.
The tactile cords and matte glass surface evoke shoreline calm. For long-term wear, reinforce high-stress knots with a dab of flexible cement, then hide it with crimp covers for a clean look.
Minimal Lines: Geometric Metal Without Solder
Palette: blackened brass and satin silver. Materials: brass and silver wire (18–22 gauge), steel bench block, chasing hammer, oval mandrel, patina solution, seals, stainless ear wires.
- Shapes: Bend wire into circles, ovals, and triangles using mandrels. For perfect pairs, tape two lengths together and bend simultaneously.
- Work hardening: Hammer each shape lightly on a bench block to set form and add resilience.
- Connections: Use tiny wrapped loops and cold-join jump rings. Align ring seams meticulously; poor seams telegraph to the eye.
- Surface: Darken brass with liver of sulfur to create contrasting elements. Neutralize, rinse, and apply microcrystalline wax.
- Set build: Necklace anchors with the largest triangle; earrings use nested small shapes; bracelet repeats circles and ovals for visual cadence.
This set highlights precise lines and negative space. It depends on excellent finishing so the simplicity feels deliberate, never sparse.
Finishing, Assembly, and Quality Control
Finishing transforms parts into heirloom-caliber jewelry. Round every cut end until snag-free. Check every jump ring seam under magnification. Balance earring pairs to within a half gram. Stretch-test bracelets gently and tug on pendants to be certain wraps hold. Develop a checklist: clasp function, wire-end smoothness, stone seating, and thread tail management.
Surface treatment is the last brushstroke. Intentional patina reveals detail and gives depth. Sealing porous materials protects against moisture and sweat. Aim for tactile smoothness that welcomes touch. Consider the sensory experience: the soft clink of beads, the silky glide of chain, the quiet hinge of a clasp snapping closed. Perceived quality travels through fingertips as much as it travels through eyes.
Mastering Cohesion: Motifs, Palette, and Rhythms
Use a motif library: a large focal symbol, a medium echo, and a micro punctuation mark. Design rhythm by alternating sizes or finishes in sequences such as big–small–small. Choose a palette with one dominant hue, one support hue, and a temperature-balancing neutral. Limit metal finishes within a set to one or two so the visual field stays calm. Build a layout diagram for each piece, noting part counts to keep replicability high.
When you need surprise, change texture rather than color, or change silhouette rather than motif. For example, keep the leaf shape but switch from polished to brushed, or keep the triangle but rotate orientation. This creates a living family of pieces without drifting from your north star.
Respectful Referencing and Inclusive Design
When themes draw on cultural forms, do conscientious research. Seek openly shared symbols, collaborate with artists from that culture, or commission elements directly. Credit your sources in packaging or product pages. Avoid sacred motifs if you are not part of the community or lack permission. Ethical design is not a brake on creativity; it is a richer road map.
Design for diverse bodies and sensory needs. Offer clip-on earring options, lighter-weight alternatives, and flexible chain extenders. Smooth out texture on the inside of bracelets to prevent irritation. Choices like titanium ear wires or soft silk cords respect sensitive skin while maintaining form and function. Thoughtful choices support long-term wear and emotional connection.
Care, Repair, and Longevity
Every set should ship with a care card: remove before swimming, avoid perfumes and hairspray, wipe with a soft cloth after wear, store in a dry pouch. Include anti-tarnish tabs for silver and brass. Offer a repair or refresh policy—tightening jump rings, re-stringing beads, replacing ear wires. Repairability is a design value as vital as aesthetics. It aligns with durability and invites pieces to live longer, richer lives.
Packaging, Storytelling, and Gifting
Packaging frames the experience. Use recyclable boxes, tissue, and minimal plastic. Choose a brand color that complements your dominant palette so unboxing feels cohesive. Slip a small card that names the set, shares its symbolism, and lists materials. For gifts, provide a short fill-in line so customers can handwrite a sentiment. A good story makes a set memorable long after the ribbon is tossed.
Costing, Pricing, and Small-Batch Production
Cost precisely: materials with waste factor, tooling wear, bench time, overhead, and packaging. Price for sustainability of your studio, not just market competition. Build in a schedule for small-batch replication: document part counts, cut lengths, and time per step. Keep a drawer labeled by theme with swatches and leftover parts for quick reorders. Photographs should show the set together, then each piece individually, and at least one scale reference on a model or mannequin.
Troubleshooting Guide
- Green skin reaction: plate mix or brass interacting with sweat. Solution: add a clear sealant on inner surfaces, switch to stainless or gold-fill on skin-contact areas.
- Resin bubbles: pre-warm resin bottles, stir slowly, torch lightly at distance, and dome in thin layers.
- Clay cracks: condition clay longer, bake at correct temperature with tenting, sand slowly in stages.
- Wire kinks: straighten with nylon-jaw pliers before bending; avoid overworking the same segment.
- Misaligned jump rings: always twist open sideways, never pull apart. Realign until the seam clicks.
- Loose knots in cord: use a tiny dab of flexible cement and hide with a bead or crimp cover.
- Dull finish: polish with appropriate cloth, apply wax, or buff after sealing for a consistent sheen.
Advanced Explorations
Once you master core techniques, expand into torch soldering for seamless joins, enameling for glass color layers, or keum-boo for gold diffusion on silver. Try bead weaving stitches—peyote, herringbone, right-angle weave—to draw intricate fabric-like patterns. Explore soutache for sculpted ribbon contours, or kumihimo braids for rhythmic cords. Metal clay lets you imprint botanicals directly into fine silver. Milled sheet textures, roller-printed leaves, and photo-etched motifs open fine-line detail. For hybrid processes, laser-cut wood inlays pair beautifully with hammered metal, and 3D-printed wax can be cast into precise geometric charms. Make digital templates for repeatable accuracy, but let hand finishing keep the soul in the surface.
Creative Prompts for New Themes
- Weather diary: interpret a week of skies as gradients and hammered dot patterns.
- Architecture: translate window tracery into openwork pendants and cuff patterns.
- Herb garden: sage leaf silhouettes, rosemary needle textures, thyme blossom beads.
- Poetry line: distill a favorite line into color, shape, and negative space.
- Topographic maps: stacked contour-wire layers and resin tints marking elevation.
A Practical Project Planner
- One-sentence brief: theme, mood, and primary materials.
- Palette: three hues plus one metal finish.
- Motif library: focal, echo, micro.
- Component list: necklace, earrings, bracelet, ring/brooch/anklet.
- Measurements: chain lengths, drop lengths, wrist sizes, ring sizes.
- Technique steps: numbered, with estimated time per step.
- Quality checklist: jump ring seams, weight balance, smooth edges, clasp action.
- Packaging and story: card text, care notes, material credits.
- Costing: material totals, time, overhead, profit margin.
- Photography plan: group shot, individual, model scale, detail macro.
From Bench to Belonging
Theme-based jewelry sets thrive on patience, experimentation, and reflective edits. They reward steady hands and a curious eye that notices how ideas echo across forms. Handmade pieces carry the warmth of their making—the tiny file marks that your fingers learned to smooth, the careful curve you matched by eye. When you commit to clarity of theme, thoughtful material choices, and rigorous process, your sets will carry a quiet confidence. Pack them with a note that shares what compelled you: a winter constellation, a river stone’s polish, a fragment of song. In that exchange, you complete the circle between studio and wearer, crafting durable beauty with purpose, guided by cohesion, enriched by symbolism, and sustained by sustainability. Add measured finishing, a cultivated patina, mindful ergonomics, and resilient durability, and your work becomes not only ornament but also a gentle daily companion—adaptable through smart modularity and grounded in living craftsmanship and sound theory.
