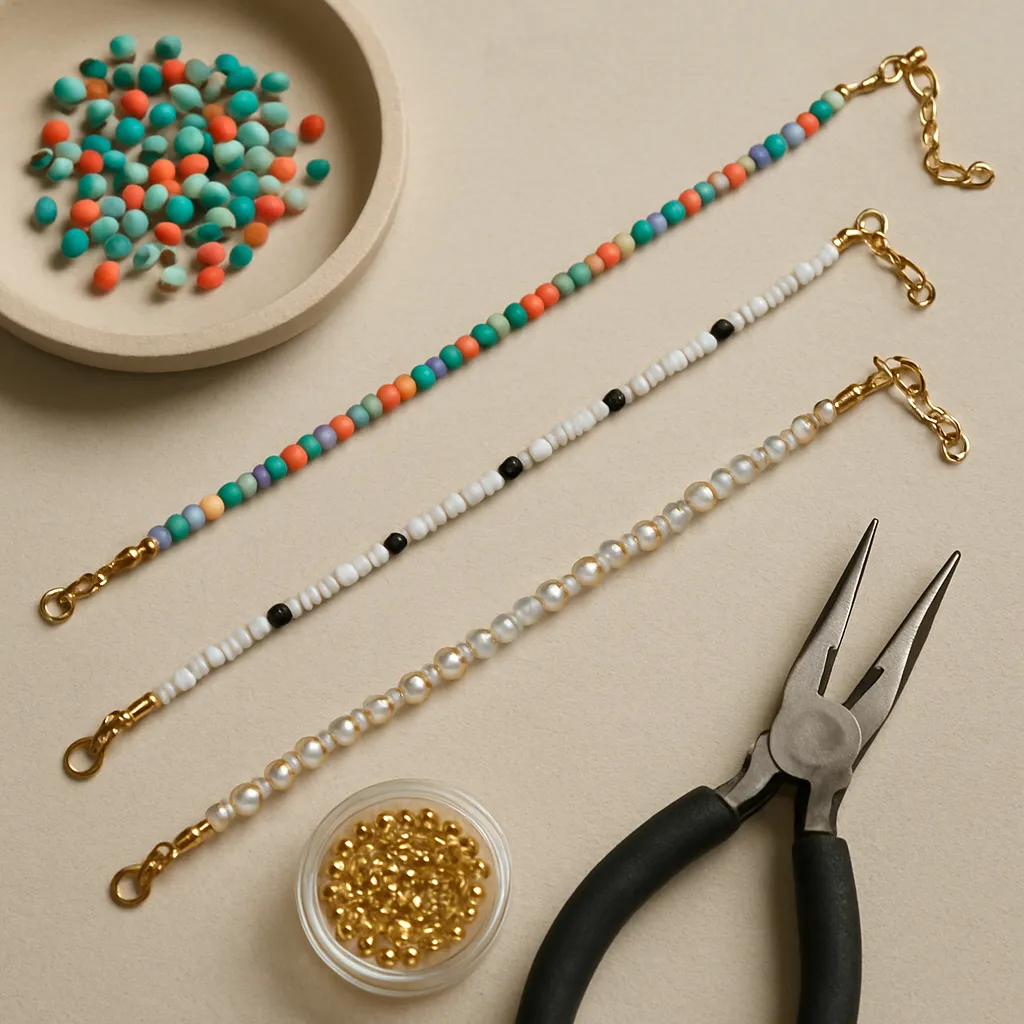
DIY beaded chokers merge the intimacy of handcraft with the immediacy of fashion, delivering miniature works of wearable art that sit close to the pulse point of style. Whether your taste skews minimalist or maximalist, the choker format is a forgiving canvas: short lengths reduce material costs, beads are easy to source, and the payoff is instant. For many makers, these pieces become a diary of techniques and textures—threads, metals, stones, and plastics assembled into stories you can clasp behind your neck. This guide explores the history and construction of beaded chokers, demystifies tools and materials, and walks through techniques and projects so you can build a collection that feels custom, expressive, and delightfully you.
Why Beaded Chokers Capture the Moment
Chokers have cycled through eras—Victorian ribbons and cameos, flapper-era pearls, punk leather collars, and the 1990s tattoo chokers—each time signaling a shift in how we adorn and assert the neck as a focal point. Beaded versions, in particular, thrive in moments when personal style leans tactile and individual. Their scale invites experimentation with texture and negative space; a single row of seed beads can whisper, while a strand of faceted glass proclaims. The short length keeps designs controlled and wearable, and the craft is accessible even to beginners, offering a gentle ramp into the broader world of jewelry-making.
Part of the appeal lies in fine handwork—what many refer to as craftsmanship. Every step encourages intention: selecting materials for luster and weight, aligning beads for visual rhythm, and finishing cleanly so nothing scratches the skin. Beaded chokers also map beautifully onto fashion’s seasonal turns; swap a clasp, update a focal charm, or restring an entire strand, and you’ve breathed new life into pieces you already own.
Materials and Tools: Building a Reliable Kit
Before the first bead slides onto a thread, establish a small toolkit that supports precision. Investing in good basics will save hours and prevent common failures like broken strands or poking wire tails.
Core Stringing Options
- Nylon beading thread: Soft and knot-friendly, ideal for seed beads and traditional knotting. Brands like Nymo or KO are staples, often used with beeswax or thread conditioner to reduce fray.
- Beading wire (flexible stainless-steel cable with nylon coating): Strong, kink-resistant, and excellent for gemstones and glass. Wire diameters around 0.014–0.018 inch handle most choker designs.
- Monofilament or fishing line: Invisible look with memory; can be unforgiving to knots but useful for certain patterns.
- Silk cord: Classic drape for pearls and lightweight beads, commonly paired with French wire or wire guardians at connection points.
Beads and Findings
- Seed beads: From uniform Japanese cylinders to organic Czech rounds, these define texture and precision in small-scale designs.
- Gemstone rounds and chips: Add weight and earthy color; choose stabilized or dyed material carefully to avoid skin transfer.
- Glass: Pressed, lampwork, and faceted beads bring sparkle without the cost of crystal.
- Metal spacers and heishi: Provide visual punctuation; plated options keep costs low, while sterling or gold-filled improve longevity.
- Closures: Lobster clasps, spring rings, barrel screws, and magnetic clasps. For quick on-and-off, small magnets are convenient but require strong grades for secure hold.
- Crimps and covers: Essential for wire terminations; combine with wire guardians to protect stress points.
Tools That Make a Difference
- Chain-nose pliers: Flat inner jaws for opening and closing jump rings without marring.
- Round-nose pliers: Form tidy loops when working with headpins or eyepins for charms.
- Crimping pliers: Create a fold-and-roll finish on crimps, cleaner and stronger than flattening with generic pliers.
- Flush cutters: Leave neat wire ends; cheaper cutters will nick quickly and fray cable.
- Measuring tape and bead board: Control length and sequence at a glance.
- Bead mat or tray: Prevents rolling; choose a neutral surface that won’t distort your perception of color.
Essential Techniques for Clean Results
Master a handful of moves and your chokers will look shop-ready. Technique pays dividends in stability and polish, especially where a short length magnifies every detail.
Crimping and Termination
When using beading wire, thread a crimp tube, a wire guardian, and the clasp, then route the wire back through the crimp and a few adjacent beads. Use crimping pliers to fold and round the tube, test the join with gentle pulls, and conceal with a crimp cover if desired. Trim the tail only after confirming security. This sequence keeps your wire from sawing against metal edges and greatly improves durability.
Knotting for Elegance
Silk or nylon knotting between beads creates a classic drape and reduces abrasion. Use a beading awl to cinch knots snugly against each bead. A dab of flexible jewelry adhesive on terminal knots adds security without stiffening the entire strand.
Wire Loops and Charms
Attach a focal charm with a wrapped loop for extra strength: form a loop with round-nose pliers, wrap the tail two or three times around the neck, and trim flush. This resists tugging and keeps dangles aligned.
Extenders and Adjustability
Because neck sizes vary and outfits demand options, include a short extender chain (2–5 cm). A small drop bead at the end adds finish and prevents the chain from slipping through your fingers during fastening.
Design Strategies: Color, Pattern, and Form
Design is where beaded chokers really sing. A thought-out palette and structure can make modest materials look elevated, while poor planning can bury even precious beads. Lean on a few core design principles to guide your choices.
Palette Building
Gather 3–5 hues and test them under natural and artificial light. Consider temperature (warm/cool), value (light/dark), and saturation (muted/vivid). Use beads with varied finishes—matte, luster, AB coating—to keep surfaces lively. When in doubt, limit the palette and let shape do the talking.
Pattern and Rhythm
Repeating bead sequences establishes pulse, while strategic breaks create emphasis. Counted sequences—like 5 seed beads, 1 spacer, 3 seeds, 1 gemstone—help you repeat motifs across the strand. Asymmetry can look intentional when you balance weight and color on either side of a focal. Treat pattern as the heartbeat of your design.
Negative Space and Focal Points
Small spacers open the design and lighten the weight. A central pendant, a cluster, or a section of larger beads can serve as the focal. Keep focal widths proportional to neck circumference so the choker sits flat rather than twisting.
Geometry and Symmetry
Even on playful pieces, a reliable centerline clarifies structure. Mark the midpoint on your bead board and build outward in mirrored sections; if you embrace improvisation, pause at intervals to check for visual balance. Judicial use of symmetry can make even eclectic materials appear curated.
Texture and Movement
Alternating bead sizes adds tactile interest and influences drape. Tiny drop beads or leaf charms at intervals can create subtle motion that catches light without overwhelming the neck.
Comfort Considerations
Beading wire and smooth beads lie flatter than chunky stones, which can jut at the collarbone. When designing for all-day wear, choose a clasp that won’t pinch hair and distribution that doesn’t concentrate weight at the throat, a nod to good ergonomics.
Step-by-Step Projects to Build Skill
1. Minimalist Glass Seed Choker
- Materials: size 11 glass seed beads, 0.014-inch beading wire, 2 crimp tubes, wire guardians, lobster clasp, 3 cm extender chain, jump rings.
- Steps: Lay out a 35–40 cm strand of a single hue or gentle gradient. String beads, leaving 7–10 cm tails. Add the termination hardware as described above. Finish with a crimp cover and test the join. The result is featherlight and layer-friendly.
- Design note: Matte versus glossy beads subtly shifts mood; matte reads modern, high-gloss feels dressy.
2. Gemstone and Spacer Alternation
- Materials: 4–6 mm gemstone rounds, 2–3 mm metal spacers, beading wire, crimps, wire guardians, magnet clasp for easy fastening.
- Steps: Create a repeating motif—gemstone, spacer, gemstone, spacer—until your target length. Terminate cleanly and ensure the magnet’s pull is sufficient for the weight.
- Design note: Use mixed metals sparingly or commit fully; in-between reads accidental.
3. Pearl-Knotted Classic
- Materials: silk cord with attached needle, 4–5 mm freshwater pearls, French wire, small spring-ring clasp.
- Steps: Thread cord through the clasp with French wire to buffer metal contact. Knot between each pearl; seat knots snug. Finish with a final knot, a tiny drop of adhesive, and trim. This yields heirloom grace in a choker length.
- Design note: Add a single off-center gold bead for a modern wink.
4. Statement Focal with Seed Bead Collar
- Materials: size 8 seed beads, focal pendant on a bail, beading wire, crimps, extender chain.
- Steps: Center the pendant on the board. Build mirrored sections left and right with graduated bead sizes that thicken toward the center and taper toward the clasp.
- Design note: Keep total width proportional to the neck to avoid torque that causes twisting.
Fit, Sizing, and Everyday Wearability
Measure the neck at the base, add 2–3 cm for comfort and clasp clearance, and remember that bead diameter affects internal circumference; bulky beads shrink wearable length. When designing a tight fit, prefer soft stringing materials and smooth beads. A short extender chain adds flexibility for seasonal layering over high necklines or under open collars.
Allergy considerations matter: nickel-sensitive wearers may prefer stainless steel, titanium, sterling, or gold-filled components. Where possible, file or cap burrs on metal parts that might scratch the skin. Selecting closures that suit dexterity—magnets or larger lobster clasps—improves daily usability and extends real-world enjoyment.
From Studio to Street: Styling and Layering
Chokers anchor a look. Pair a fine glass-bead strand with a crisp white shirt to spotlight a collarbone, or layer a gemstone choker with a longer pendant necklace for depth. For evening, strands of faceted black glass or hematite read sleek; for daytime, translucent pastels or pearly neutrals soften a denim jacket. Pay attention to fabric necklines—boatnecks and crewnecks benefit from chokers that echo the curve; V-necks and wrap dresses often prefer chokers with modest dips or centered pendants that riff on the V.
When stacking, vary scale and finish: matte seed beads beside glossy pearls, or hammered metal beside silky silk cord, so each layer retains identity. If you wear earrings, echo one element—finish, shape, or material—rather than duplicating the entire design, which can feel costume-like.
Safety, Strength, and Longevity
The closer a piece sits to the skin, the more it must withstand sweat, cosmetics, and friction. Strength begins with material selection and clean assembly. Use proper crimping technique, test closures before wearing out, and avoid overfilling wire (leave micro-clearance to maintain flexibility). End treatments—like crimp covers or French wire—shield vulnerable joins. For heavier beads, switch to stronger wire or reduce bead diameter near the clasp to minimize leverage on the join. Thoughtful construction enhances lifespan and reduces repairs, aligning with responsible making and long-term versatility.
Color Theory for Confident Choices
Palettes can transform identical layouts. Analogous schemes (neighbors on the wheel) ooze calm; complements (opposites) crackle. If you favor neutrals, explore off-whites, mushroom grays, and soft taupes rather than a single flat tone. A trick for coherence: choose one unifying element—finish, bead shape, or a repeated spacer—and let everything else vary. Small amounts of high-saturation beads brighten low-chroma schemes; use them as accents rather than bulk to preserve balance and polish.
Textural Narratives: Mixing Materials with Intent
Chokers reward minute textures because they’re viewed up close. Combine porous lava rock with smooth glass, punctuate smooth pearls with ridged heishi, or insert etched metal beads among silky seed bead runs. Let the dominant texture set the tone and the secondary one add intrigue. If you deploy 3+ textures, decide their hierarchy and spacing to avoid clutter; the thinner the choker, the more discipline the mix requires. Texture also controls light play, supporting overall aesthetics without overwhelming the neckline.
Ethical Sourcing and Sustainable Practice
Handicraft can model thoughtful consumption. Source beads from vendors who disclose plating standards and nickel content, and consider reclaimed or surplus beads. Re-thread vintage strands to rescue timeless materials from landfill. Packaging for gifts or sales can be minimal and recyclable—paper envelopes, cotton pouches, and uncoated tags with water-based inks. These decisions fold into personal values and modern sustainability, reinforcing that style and stewardship can harmonize.
Upcycling and Repair Culture
Many of the richest chokers begin life as something else: a broken bracelet, a single orphaned earring repurposed as a pendant, a strand of thrifted beads freshly cleaned and restrung. Embrace upcycling as a creative constraint. Limitations—finite bead counts, mixed batches—spark unexpected sequences and inventive solutions like asymmetry or motif-based repeats. Keep a small archive of spare clasps and jump rings; you’ll need them for refreshes and repairs, which extend the story and life of each piece.
Troubleshooting: Common Pitfalls and Smart Fixes
- Bead holes cut thread: Switch to a smoother cord, add seed beads as buffers, or gently ream sharp holes.
- Wire kinks near clasp: Use wire guardians and avoid bending wire sharply during termination.
- Choker twists on neck: Rebalance weight, reduce focal width, or taper bead sizes toward the ends.
- Length feels off: Consider bead diameter’s effect; add an extender or redesign spacing with smaller beads.
- Finish looks “student-grade”: Standardize crimps, cover them neatly, and edit the palette; often removing one element improves cohesion.
Care, Storage, and Maintenance
Wipe chokers after wear with a soft cloth to remove sweat and cosmetics. Store flat or hung to prevent kinks, and keep away from moisture and direct sunlight, which can degrade some cords and coatings. Pearls and plated metals dislike harsh chemicals; perfume and hairspray should go on before the jewelry. Schedule periodic inspections: test clasps, check crimp integrity, and retie or re-crimp at the first sign of wear. Taking these steps aligns craft pride with practical longevity.
Cultural Notes and Design Lineage
Across cultures, neck adornments signal status, ritual, and protection. Bead traditions from the Maasai to the Haida to Eastern European folkwear carry complex visual languages of rank, kinship, and identity. While DIY fashion invites remix, approach with respect: study origins, attribute inspiration, and avoid lifting sacred motifs. Translation—rather than imitation—builds bridges: consider borrowing a color cadence, a spacing logic, or a material ethos and recasting it in your own vocabulary.
Ergonomics and Body Awareness
A choker’s success is felt before it’s seen. A strand that bites or spins detracts from the wearer’s confidence. Balance weight across the arc of the necklace, choose clasp styles suited to dexterity, and watch how the piece behaves when the wearer turns their head or lifts their chin. Testing for comfort is design, not afterthought, and underscores the human-centered nature of jewelry ergonomics.
From Hobby to Micro-Business
If you sell your chokers, describe materials accurately, photograph under consistent light, and standardize sizes while offering extenders. Track material costs, time, and overhead; price for profit, not only recovery. A small brand story—why you design, what you value—builds trust. Offer simple repairs and restringing; standing by your work signals integrity and sustains client relationships. Packaging should protect the piece and foreground the jewelry, not overshadow it.
Creative Prompts to Expand Your Range
- Monochrome study: Use one hue in multiple finishes to explore depth without clutter.
- Negative-space challenge: Insert consistent spacer intervals to test restraint and breathability.
- Found-object focal: Convert a small keepsake into a centerpiece via a tidy wrapped loop.
- Graduated scale: Move from 2 mm to 6 mm beads across the arc for a gentle visual swell.
- Material swap: Recreate a favorite design using wood instead of glass, or acrylic instead of stone, and note changes in drape.
Mindful Making: Process as Pleasure
Working bead by bead invites focus. Many crafters treat stringing as a moving meditation—counting sequences, aligning shapes, and testing tension until a rhythm emerges. Document your experiments, keep a small swatch library of successful sequences, and photograph boards before stringing so you can revisit winning ideas. This habit builds not only skill but also a personal archive to draw from when commissions or gift deadlines loom.
Advanced Detailing for Professional Polish
Small upgrades compound into premium finishes. Swap base-metal jump rings for soldered ones at stress points; add wire guardians on all terminations; standardize crimp sizing to match cable diameter; and pre-stretch threads to minimize future slump. Where possible, hide mechanics: a final seed bead over a knot, a tidy crimp cover, or a matched metal color for all findings. Editing is part of design—remove one element and ask whether the piece breathes easier. Above all, trust hand and eye; make, assess, and iterate.
A Living Accessory Wardrobe
A beaded choker isn’t a one-time statement; it’s a modular part of a wearable system. Over seasons, swap clasps from silver to gold tones, rework palettes for spring or winter, and cannibalize seldom-worn pieces into fresh builds. Each evolution keeps materials in circulation and supports a personal loop of making and remaking that’s as expressive as it is resourceful. In this loop, technique buttresses style, and mindful choices turn experiments into heirlooms—small bands of beads that carry the memory of hands and time.
Glossary: Quick Reference for Confident Making
- Beading wire: Multi-strand steel cable with nylon coating, measured by diameter; flexible and strong.
- Crimp: Soft metal tube or bead compressed to secure wire ends near clasps.
- Wire guardian/French wire: U-shaped protector or coiled wire shielding thread where it meets metal findings.
- Extender chain: Short chain added at the clasp for adjustable length.
- Seed beads: Small, uniformly sized beads; cylinders or rounds common in weaving and stringing.
- Heishi: Thin disc beads, originally shell, now also metal or polymer.
Closing Encouragement
Start with a strand that feels inevitable in your hands: a quiet line of matte glass, a gleaming run of pearls, or a cluster with a talismanic center. Learn one or two techniques deeply, then let your curiosity widen the circle. You’ll build fluency, not just inventory, and with each finished choker, you’ll refine your eye for proportion, balance, and finish. Beads invite play—and within their small circles lie decisions about weight, hue, and touch that sharpen design instincts for everything you’ll make next.
