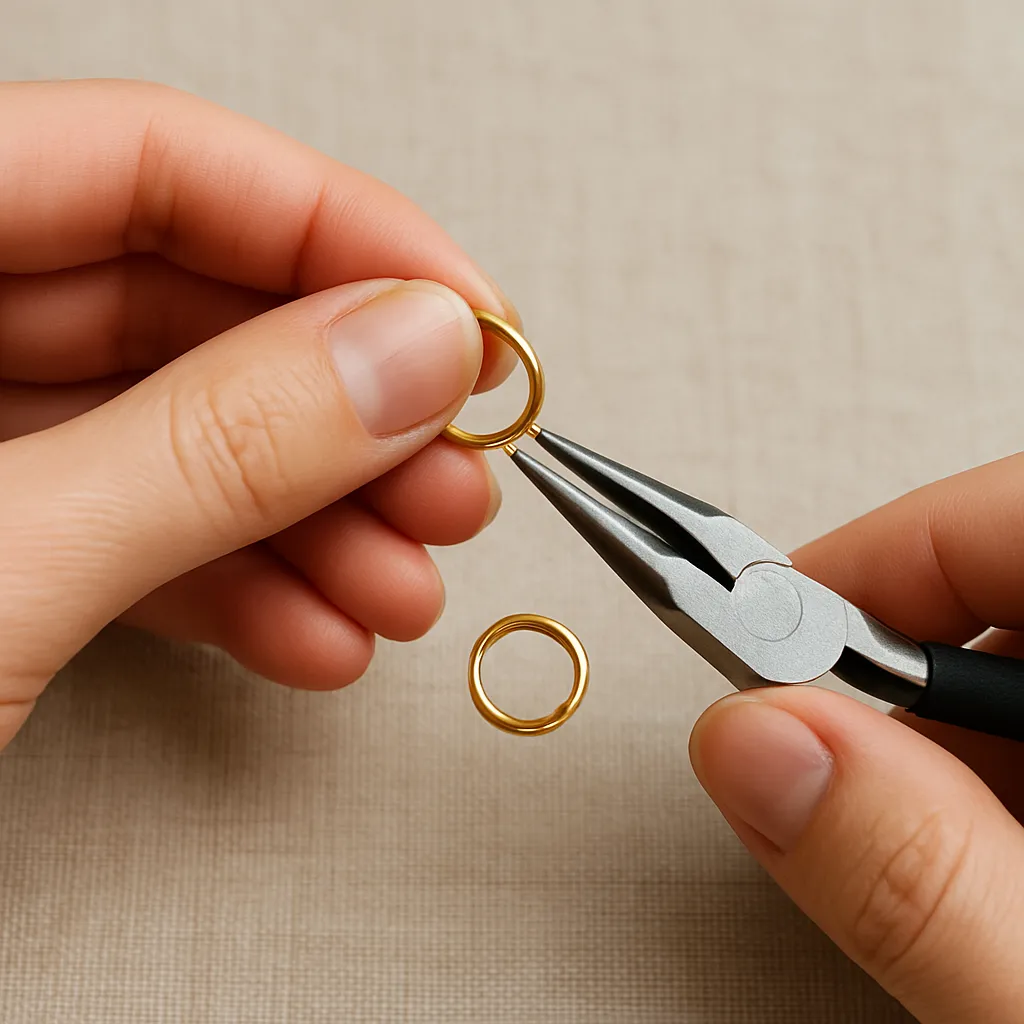
Jump rings are the tiny hinges and connectors that quietly hold much of handmade jewelry together. When they stay perfectly closed, a necklace drapes elegantly, a charm remains secure, and a clasp feels dependable. When they gape even slightly, pieces snag sweaters, fall apart in handbags, or lose their polish to repeated friction. Mastering gap-free closure is therefore one of the most valuable micro-skills in handcraft jewelry. This guide goes deep: from the physics of metal spring-back to step-by-step closing techniques, from sizing strategies to advanced finishing and troubleshooting. With mindful tool choice, correct ring preparation, and controlled motion, your closures will meet cleanly, stay tight, and elevate the overall quality of your work.
The mechanics behind a gap-free closure
Understanding what creates and prevents gaps starts with a basic view of how metal behaves. When you open a jump ring, you want elastic—rather than plastic—movement. Elastic deformation springs back; plastic deformation stays bent. The more you bend beyond the elastic range, the more likely you are to distort the circle and chamfer the ends, creating a visible slit that resists a tight close. This is why we twist rings open along the plane of the cut instead of prying them wide like a book: it keeps the ring round and the end faces parallel.
Two other factors matter: surface quality and end geometry. If the cut faces are slightly angled, serrated, or burred, no amount of force will bring them together seamlessly. A perfectly flat, square cut face meets its mate with uniform contact, which creates frictional locking and reduces the chance of micro-shifts during wear. That frictional lock is supported by correct alignment—the ring ends need to meet on the same plane with no step or twist. Finally, consider spring-back: metals like stainless steel and hardened brass rebound more aggressively than soft sterling or copper. Anticipating that rebound, and slightly over-traveling when closing, helps you land right on a tight seam rather than a hairline gap.
Tools that make clean closures possible
The right tools don’t just make tasks easier; they determine the ceiling of your finish quality. A clean, gap-free closure relies on pliers that grip without marring and on cutting methods that yield square ends. Below are essentials and helpful additions.
- Smooth-jaw chain-nose pliers (two pairs): The cornerstone for controlled twist-and-close moves, with maximal tactile feedback and minimal surface damage.
- Bent-nose pliers: Improve visibility and clearance around pendants or tight assemblies.
- Flat-nose or duckbill pliers: Provide extra stability for thicker rings or stiffer alloys.
- Flush cutters and/or a jeweler’s saw: For making or correcting jump ring ends that meet truly flush.
- Needle files and a cup bur: For precise edge preparation and deburring.
- Ring mandrels (metal or hardwood) and a rawhide/nylon mallet: To round out ovals and maintain concentricity.
- Polished steel burnisher or an agate tool: To compress the seam and blend minute irregularities.
- Tumbler with stainless steel shot: For work finishing and seam consolidation on many metals.
- Magnification: A headband loupe or microscope for quality control at the seam.
If you cut your own coils, prefer a jeweler’s saw over side cutters. Saw-cut rings have parallel, flat faces that close cleanly, while pinch cuts produce wedge-shaped ends that fight tight closure. When you must use side cutters, use high-quality flush cutters, orient the flat face to the ring you’ll keep, and then true the end with a file. Small investments in cutting quality pay major dividends in closure integrity.
Choosing size, metal, and aspect ratio
Many gaps aren’t a technique issue at all—they’re a sizing mismatch. The stiffness of the wire (tempered state) and the ratio of inner diameter to wire diameter, often called the aspect ratio (AR), determine how much a ring resists distortion during opening and re-closing. A very large inner diameter with thin wire yields a floppy ring that twists out of plane easily; a tiny inner diameter with thick wire can be almost impossible to open and close without leaving tool marks.
Here’s a practical approach: decide the task and environment first (static pendant, active bracelet, pet tag, chainmaille unit, earring dangle), then choose wire material and temper. Dead soft sterling is wonderfully cooperative for learning and for pieces that won’t see heavy stress; half-hard brass or bronze offers more springiness; stainless resists wear and deformation but demands firmer technique. As a rule of thumb for general jewelry: target moderate ARs that balance secure closure and ease of handling. Rings for bracelets and key stress points should be thicker and/or smaller in diameter than decorative add-ons. Don’t be afraid to double up rings for high-wear locations (two rings through a clasp) to distribute load and reduce the chance of prying.
Wire gauge is a frequent source of confusion due to differing systems (AWG, SWG, metric). Whichever system you use, keep written references of your successful combinations—e.g., 18 AWG at 4 mm inner diameter for small charms, 16 AWG at 5–6 mm for clasps. Consistency here reduces trial and error, and you’ll quickly develop a personal library of dependable pairings.
Preparing the ring ends for a perfect meet
A tight close begins before you even pick up your pliers. Inspect each ring under magnification. Are the ends square? Are there burrs? Is the circle round? Correct inadequacies proactively:
- Square the ends: If there’s a visible slope, gently true the face with a flat file held perfectly perpendicular to the ring’s tangent.
- Remove burrs: A quick pass with a fine file or cup bur prevents hidden nubs from propping the seam apart.
- Restore roundness: Slip the ring onto a mandrel and nudge with a rawhide mallet to achieve concentricity without stretching the ring out of size.
- Assess face contact: Bring the ends into light touch before fully closing. You want flat-face contact, not two corners kissing.
Time spent on end prep saves far more time in closure wrangling later. The flatter the faces and the better the roundness, the more natural it becomes for the seam to disappear with gentle pressure rather than aggressive squeezing.
The twist, the over-travel, and the settle: closing technique step by step
You’ll often hear “Don’t pull the ring open; twist it.” That guideline is correct but incomplete. Here is a structured process that maximizes control and repeatability:
- 1) Grip: Hold the ring with two smooth-jaw pliers, one in each hand, with the cut at 12 o’clock. The jaws should cover roughly a third of the ring’s circumference for stability.
- 2) Micro-open: Twist one hand toward you and the other away, moving only a few degrees. Do not separate the ends laterally; keep them on the same plane. This respects the ring’s circular integrity.
- 3) Mount components: Add your chain link, clasp, or charm now, ensuring they seat naturally and won’t wedge the ring out of plane.
- 4) Close with over-travel: Bring the ends past each other by a hair—this compensates for spring-back. Then gently oscillate them back so the ends meet. That slight over-travel is what takes up the elastic energy and settles the seam into neutral without residual push-apart forces.
- 5) Seat and align: With very small back-and-forth motions under mild tension, rub the faces together. You’ll feel a subtle “click” as they seat, indicating good face mating and frictional lock.
- 6) Burnish the seam: With the plier jaws still supporting the ring, run a polished burnisher or the corner of a smooth jaw across the seam to compress microscopic high spots and further hide the line.
- 7) Check from multiple angles: Rotate the ring in the pliers and look against a light source. If a hairline remains, repeat the micro-over-travel and settle. Avoid prying or squeezing across the seam, which can chamfer edges and create a permanent sliver of daylight.
Control matters more than force. If you feel yourself white-knuckling the pliers, reassess the ring size, metal, or your hand placement. With practice, the “over-travel and settle” becomes second nature and is often the difference between a nearly-closed and an invisible seam.
Managing forces: direction, grip, and micro-motions
The most common mistake is treating a jump ring like a clamp: squeezing the ends together in a way that warps roundness or scrapes the faces. Instead, think of applying rotational torque around the ring’s center while stabilizing its circumference. Your plier jaws should be parallel to the ring’s tangent at their contact points, giving you a smooth axis to rotate around. Keep the movement small and rhythmic—micro-wiggles that coax the metal, not wrench it.
Another key is grip texture. Smooth jaws reduce marring, but a perfectly polished jaw can slip at critical moments. A very light micro-satin finish (from 2000-grit paper) on the inside of your plier jaws adds purchase without scratching. Wipe the jaws clean of polishing residues that behave like lubricants at the worst time.
Finally, stabilize the hand that does the fine adjustments by resting an elbow or the heel of your palm on the bench. Your dominant hand can then execute tiny, controlled motions that would be hard to repeat in mid-air.
Advanced closure consolidation: compress, harden, and polish
Once a seam appears perfect, you can go a step further to lock it in. Light burnishing across the seam compresses tiny asperities, improves face contact, and slightly flattens microscopic peaks that might otherwise catch. A few minutes of tumbling with stainless shot also tightens seams on many non-ferrous metals by peening the surface uniformly. Some artisans use a polished planishing hammer for a single, feather-light tap across the seam; the ring must be fully supported on a mandrel to avoid ovalizing.
During closing, you perform mild work-hardening simply by moving the metal. Strategic hardening makes the closure more resistant to later spreading, but be careful: too much cycling will fatigue the metal, especially on small AR rings, and create “sprung” behavior or eventual cracking. Aim for minimal, confident motions that settle the seam quickly, then stop.
Heat-assisted options and when to use them
Not every jump ring needs to be permanently joined, but some do—especially those in high-wear locations, supporting valuable elements, or used on heavy bracelets. In these cases, a soldered ring provides peace of mind. If you solder, prep is the same: square faces, perfect contact, neutral tension. A quick sweat of hard or medium solder, followed by pickle and finish, creates a continuous ring that cannot pry apart in normal use.
If you form rings from wire you’ve heavily coiled or otherwise stressed, occasional annealing may be needed to restore ductility before cutting and closing. Keep in mind that annealing erases prior work hardening—you’ll need to compensate with careful technique and post-closure finishing. For makers who avoid torches, consider replacing critical open rings with welded micro-rings or split rings in high-stress zones.
Why gaps happen: a troubleshooting atlas
Gaps tend to have repeatable causes. Use this checklist to diagnose and correct:
- Angled cut faces: Pinch cuts or dull saw blades leave sloped faces that only touch on an edge. Remedy: Re-cut or file square; switch to saw-cut rings or sharpen cutters.
- Burrs or crushed edges: Even a tiny burr props the seam apart. Remedy: Deburr with a fine file or cup bur; avoid jaw pressure near the edge of the cut face.
- Out-of-plane twist: One end rides higher than the other. Remedy: Bring the ring back to level by tiny counter-twists while watching the seam under magnification.
- Over-stretching: Prying open creates an oval, enlarges the ring, and bevels the ends. Remedy: Always twist along the cut; if ovalized, re-round on a mandrel before closing.
- Wrong AR or metal: Too floppy or too stiff rings magnify technique errors. Remedy: Choose a sturdier wire or smaller inner diameter for wear points; practice on cooperative metals.
- Contamination: Polishing compound or skin oils on the faces act like micro-bearings. Remedy: Degrease ends with alcohol before closing; keep fingers clean.
- Spring-back unaccounted: Closing to the meet, then releasing, reveals a hairline. Remedy: Over-travel slightly, then settle the ends together to neutral.
- Component wedging: A thick charm loop or sharp-edged chain plate can force the ring open locally. Remedy: Use a slightly larger ring or bevel the attached component’s edges; consider oval rings to present the seam away from the load.
Design strategies that reduce seam stress
Good closure is half skill, half design. Orient the seam away from the pull direction; for example, place the cut at 3 or 9 o’clock in a pendant bail so gravity doesn’t pry it open. On bracelets where torsion occurs, use two rings at each connection with seams opposed 180 degrees from each other. Oval rings naturally resist spreading along their long axis—useful for clasps. Where aesthetics allow, split rings offer superior security over single jump rings, trading a bit of bulk for reliability.
Material pairing matters too. Soft gold or fine silver connected to hard stainless components can act like a bearing against the soft ring, gradually camming it open. Either match materials in hardness or interpose a harder intermediary ring. And when in doubt, solder critical points or redesign to move the seam away from abrasive interfaces.
Quality control habits of meticulous makers
Establish a simple QC ritual before a piece leaves your bench:
- Visual seam check: Under 5x to 10x magnification, look for daylight or a step at the seam.
- Tactile glide: Run a fingernail across the seam; a smooth pass indicates level faces, a click suggests a lip or micro-gap.
- Light tug and twist: Apply moderate pull and a tiny twist. A good closure feels silent and solid—no creak, no movement.
- Orientation check: Verify the seam sits where stress is lowest in use.
- Finish consistency: After tumbling or polishing, ensure the seam remains closed; some processes can reveal weak closures.
Document your reliable ring recipes and suppliers. Metals and cuts vary across batches; consistent sources reduce surprises and ensure repeatable results. Keep a reference board of ring sizes and wires you trust for specific tasks, attached to sample components for quick modeling.
Ergonomics, speed, and consistency for small-batch production
When making many pieces, arrange a micro-work cell: bins of prepped rings by size and metal, two pliers at the ready, a small mandrel, and a burnishing tool within thumb’s reach. Batch actions—prep a tray of rings (squaring, tolerances check, quick polish), then assemble components, then close, then finish. Muscle memory grows fastest with focused repetition, and you’ll see your seams get cleaner as your hand finds the exact over-travel that each metal prefers.
Protect your hands: alternating pliers reduces strain, and using comfortable handles prevents grip fatigue that leads to over-squeezing. A small silicone bench mat keeps tiny parts from rolling away, preserving your focus across dozens of closures.
Material-specific notes
Sterling silver and fine silver
Sterling responds beautifully to the over-travel technique; it’s forgiving but prone to burrs if cut dull. Fine silver is buttery-soft—great for learning—but can deform easily under ham-fisted closing. Tumbling tightens seams nicely on both.
Brass and bronze
These have satisfying spring. They work harden quickly, which is helpful for closure retention but can crack if cycled excessively. Keep micro-motions small, and burnish rather than hammer for seam blending.
Copper
Very malleable and excellent for practice. It takes a seam beautifully but scuffs easily; use pristine jaws and a light touch. Expect more visible oxidation at the seam if you handle it a lot before finishing.
Stainless steel
Demanding but durable. Requires stronger hands and absolute precision; any misalignment is harder to correct. Use robust pliers, consider slightly larger rings for the same wire size, and anticipate significant spring-back during closing.
Gold-filled and precious alloys
Gold-filled wire needs gentle handling to preserve the surface. Close decisively with minimal back-and-forth to avoid abrading the outer layer. Polished tools and careful burnishing maintain a high-end seam appearance.
Making your own rings for best results
Store-bought rings vary greatly in cut quality. Making your own gives you control over end geometry and ring consistency. Wind wire on a smooth mandrel with even tension, spacing each wrap tightly against the previous coil. Secure the coil and saw-cut along its length using a fine blade lubricated for a clean kerf; the resulting rings will have square faces that close predictably. Label coils and finished rings with wire size, inner diameter, and metal so you can replicate successful formulas without guessing.
If you do need to cut with flush cutters, snip oversized, then true the face on a flat needle file. A minute spent here can swap a stubborn gap for a perfect seam later.
Putting it all together: a mini workflow
Consider this quick routine for a clasp connection on a bracelet:
- Choose a sturdy ring: 16 AWG or similar, moderate inner diameter suitable for the clasp thickness.
- Verify square ends and roundness, correct as needed.
- Open with a small twist, add clasp and bracelet end, confirm nothing wedges the ring.
- Close with planned over-travel; settle the seam under light, controlled tension.
- Burnish the seam; perform magnified check, tactile pass, and gentle pull test.
- Tumble finish if appropriate; re-check the seam post-finish.
Follow the same pattern for charms, pendants, and chain assemblies, adjusting wire size and AR to match the mechanical demands of each connection.
Common myths and clarifications
- Myth: Squeezing the ring tight is the best way to remove gaps. Reality: Squeezing often bevels the faces and worsens the gap. Controlled twist, over-travel, and face seating produce better results.
- Myth: Any ring can be closed perfectly with enough force. Reality: Poor cuts, burrs, or mismatched AR can physically prevent a tight meet. Preparation and sizing matter more than strength.
- Myth: Tumbling alone will close gaps. Reality: Tumbling refines and slightly compresses but won’t fix an obviously open seam. Start with a true close first.
- Myth: Heavier wire always equals stronger. Reality: Heavier wire with too-large a diameter ring can still pry open. Balance wire thickness with inner diameter and use smart orientation.
Final refinements for professional results
At the end of assembly, give each seam a moment. Under magnification, look not just for daylight but for continuity of curvature across the cut—the eye picks up even a tiny step. A smooth pass of a polished burnisher can blend the seam visually without adding tool marks. If you plan to patina, consider how darkening compounds can settle into even microscopic gaps; a perfect seam stays inconspicuous after finishing processes.
Keep notes on how much over-travel each metal requires and which plier pairing you prefer for each ring size. Over time, your hands will remember the exact movement and pressure profile needed, and your closures will improve from consistent to invisible.
Summary: precision, preparation, and gentle control
Gap-free jump ring closures rest on three pillars: careful preparation of square, clean ends; thoughtful selection of ring size, AR, and metal; and a closing technique that pairs slight over-travel with calm, precise micro-movements. Add burnishing or tumbling to consolidate the seam, design your assemblies so the seam avoids load and abrasion, and reserve hard joins for truly critical points. With these habits, your rings meet like puzzle pieces, stay shut through daily wear, and lend your handmade work the quiet excellence that sets it apart.
