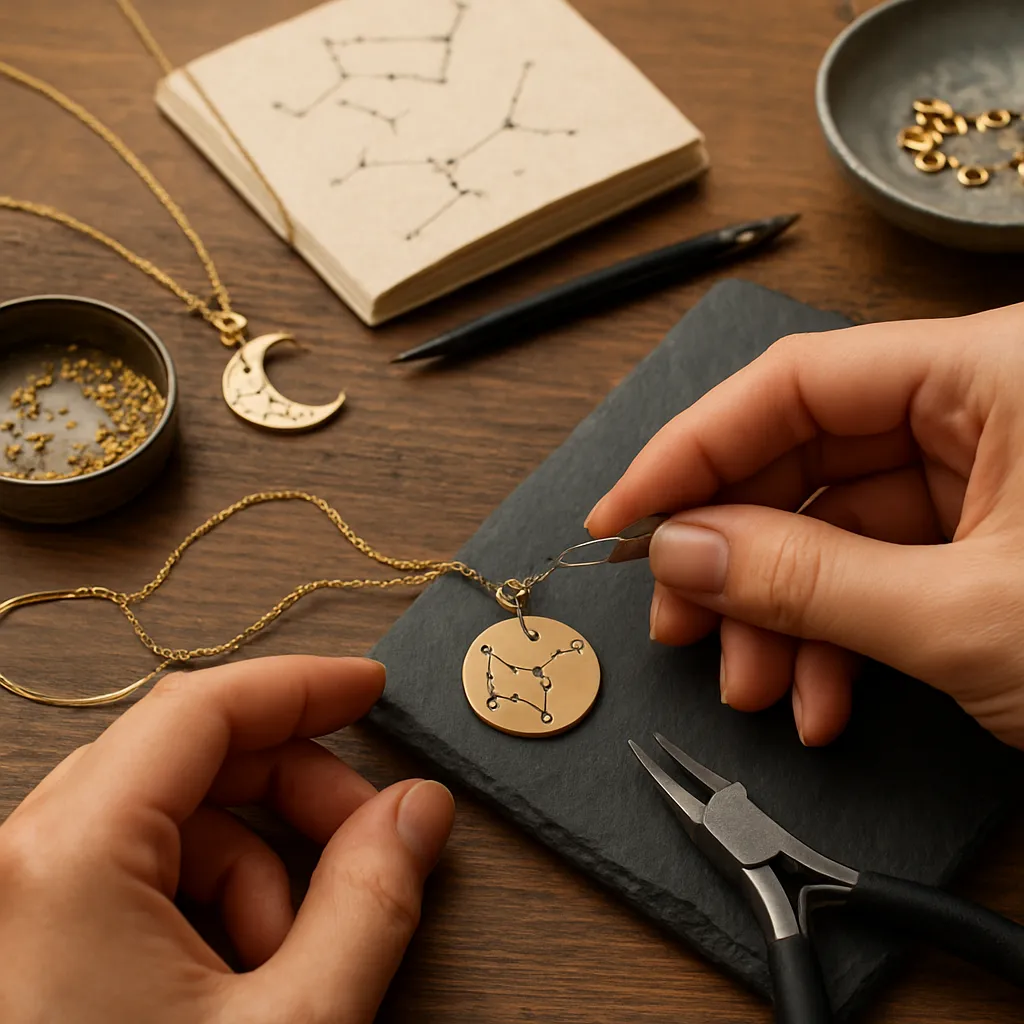
Jewelry that mirrors the night sky carries a quiet pulse of wonder. Each pinprick of light, each graceful line connecting stars, becomes a wearable map of memory: a birthday under a meteor shower, a trip where the constellations seemed to tilt lower, a night when the moon’s edge traced a city skyline. Making constellation jewelry by hand is a meditative encounter with time—astronomical time measured in light-years and human time measured in patient hours at the bench. The craft invites you to transform distant geometry into intimate objects, preserving the gleam of a skyward glance on the warmth of a wrist, collarbone, or finger.
Why the Night Sky Belongs in Handmade Jewelry
Constellation motifs unite precision and poetry. Their patterns are defined enough to be recognizable, yet open enough to invite interpretation. For a maker, this is a perfect intersection: the clarity of an actual star map paired with the interpretive voice of the studio. Unlike purely figurative motifs, star patterns carry a built-in cadence—bright points, quiet spaces, and connective lines—that readily translates to metal, stone, and light. The result can be lyrical or minimal, geometric or gestural. If you enjoy iterative design, constellation jewelry is especially rewarding, because the same sky can be expressed through wire, engraving, enamel, inlay, or gemstone settings, each technique bending light and shadow differently.
There is also a profoundly human aspect. People have always mapped their stories onto the night sky. Across cultures, the same scatter of lights became hunters, queens, sea creatures, heroes, and instruments of navigation. To echo those maps in jewelry is to echo the continuity of looking up: the shared gaze across centuries, the universality of searching for patterns. As gifts, these pieces often become keepsakes that anchor occasions—weddings timed to a certain moon, a child’s first camping trip, a city dweller’s first truly dark sky. The maker’s attentiveness becomes part of the keepsake’s allure; a collector can feel the thought in each star’s placement, the balance of negative space, the measured rhythm of texture. That is the heart of fine craftsmanship.
Because stars are both cartography and story, they lend themselves naturally to meaning. A simple pendant can be a talisman for navigation, courage, or the patience required to cultivate skill. Many wearers connect a zodiac pattern with personal seasons of change. Others choose an entire hemisphere’s map to commemorate a relocation or a journey. In other words, these designs bear rich symbolism without sacrificing elegance or subtlety. When you craft them by hand, you allow that meaning to sit inside a singular, tactile form—one that will gain a soft sheen from years of wear, just as the sky gains depth from years of looking.
From Sky to Sketch: Designing Accurate Star Patterns
Good constellation jewelry begins with a clear map. The simplest approach is to choose a specific constellation or an asterism, such as Orion or the Big Dipper. For deeper work, consider star atlases, planispheres, or reputable astronomy apps that allow you to export grids with right ascension and declination. If you prefer the texture of analog methods, plot the pattern onto tracing paper over a printed atlas, then scale it to your piece. Mark magnitude levels by dot size or by later stone selection: brighter stars will merit larger stones or more pronounced piercings.
Transfer is critical. For pendants, engrave light guidelines or make a pounce pattern: pierce tiny holes along your map, lay it on the metal, rub graphite or powdered charcoal, then lift away to leave a scatter of dots ready to be center-punched. For rings and cuffs, remember curvature; a flat map will distort when wrapped. Create a paper mock-up, tape it around a mandrel or a bottle, and ensure distances hold. The eye is remarkably sensitive to spacing; a misaligned star cannot hide on a minimalist piece. Training your eye to evaluate proportion—bright to faint, dense to sparse—is the designer’s lifelong exercise.
Think also in constellations within constellations: the negative shapes between stars become as meaningful as the dots themselves. Try three variations for any chosen pattern: a literal star map using stones; a line-drawn map using wire arcs; and an abstracted silhouette where piercing removes metal to leave a sky of voids. Each approach suits different wearers and different metals. Over time, your sketchbook will develop a vocabulary: larger gaps echo breath; closely clustered stars form a humming texture; a single off-axis bright spot can feel like a heartbeat.
Materials, Metals, and Ethical Sourcing
Silver, brass, and gold each interpret night differently. Sterling silver, especially when darkened, holds a quiet dusk; its reflective grain takes on a moon-silver glow after tumbling. Fine silver enamels beautifully, making it a prime candidate for midnight blues and deep ultramarines. Brass warms the night toward amber; with careful sealing, it develops a cozy, antique sky. Gold and gold-filled stock can render bright stars with clarity; even small dots of high-karat gold against oxidized silver suggest sparks cutting through fog. Copper glows like a horizon at nautical twilight, especially when heat-colored, though it requires sealing to mitigate skin reactions and tarnish.
Stainless steel and titanium are tougher to work with but rewarding for sleek, modern stars that resist wear. Anodized titanium can produce auroral colors; consider a disk where faint stars are bead-blasted and bright stars are left glossy, with color arcs like high-latitude skies. For chains, prioritize solderable links if you plan to attach customized elements; for charm-heavy bracelets, a slightly thicker wire gauge prevents distortion over time.
Stone choices should echo the sky. White sapphires, moissanite, and lab-grown diamonds deliver crisp brilliance without the ethical complexity sometimes associated with mined stones. Tiny round-cut spinels, topaz, and high-dome cabochons (moonstone, opal) add character and play of light; star sapphires can literalize the theme. Consider black spinel or onyx for voids, and a field of dark enamel or resin to provide contrast. Lapidary scraps—slivers of lapis, goldstone, or even reclaimed watch crystals—can become micro galaxies when set cleverly.
Ethical sourcing is not an afterthought; it is integral to work that celebrates the shared sky. Favor recycled metals from reputable mills, traceable stones, and suppliers who publish their chain of custody. When you accept a commission for a specific date and place in the sky, ask if the client would like a small note on materials origins inside the packaging. Aligning the integrity of your sources with the integrity of your design will deepen the piece’s quiet authority.
Essential Tools and a Thoughtful Bench Setup
A small but well-curated bench supports both creativity and safety. At its core: a jeweler’s saw frame with a range of blades (6/0 to 2/0 for tiny piercings; 2/0 to 1 for thicker backplates), a reliable bench pin, flush cutters, flat and round needle files, a riveting hammer, a rawhide or nylon mallet, and a set of pliers (chain-nose, round-nose, flat-nose). To map stars accurately, keep a sharp scribe and a center punch for clean drill starts. A micro drill with high-quality bits from 0.4 mm to 1.5 mm is essential for creating consistent star holes and tube settings. For setting stones, invest gradually in setting burs, a beading tool set, and a burnisher.
If you work with heat, arrange a firebrick or charcoal block, a third-hand, tweezers, and a small but stable torch. Keep pickle solution in a ceramic or plastic pot, and neutralizing baking soda nearby. Ventilation matters—a desktop fume extractor plus an open window can be enough for a small studio. Keep separate areas for cutting, setting, and finishing; this habit reduces scratches and speeds up your workflow. A magnifying visor or microscope elevates your ability to finesse tiny details, particularly when aligning multiple drill points or carving subtle linework connecting stars.
Organization plays a role in calm making. Small tins or lidded palettes can sort stones by size and brightness. Label your burs and keep a test plate of scrap metal where you record drill diameters next to dot sizes; this becomes your sky ledger. A bench journal will track not only measurements, but also moods and insights: which spacing felt too crowded, how the enamel shade shifted after firing, whether that hammered texture truly evoked starlight or needed a gentler touch.
Core Techniques for Starry Effects
Pierced Voids and Skylines
Piercing tiny holes to represent stars is a straightforward, elegant method. After center punching each point, drill with a fresh bit; back the sheet with hardwood to reduce burrs. Taper holes slightly by reaming from the front only, creating a light funnel that catches reflection. For a meteor or comet trail, saw a shallow, tapering slit and then sand the edges to soften the glow. If you intend to layer two pierced plates—a bright front and a dark back—maintain precise registration with alignment pins. The slight depth between layers creates micro-shadows, shifting as the wearer moves, enhancing perceived luminosity.
Stone Settings as Stars
Stones can mark brighter points with satisfying rhythm. Tube settings are efficient for uniform sizes, while flush settings suit minimal designs. Practice a clean seat: cut with a setting bur just shy of the stone’s girdle diameter, test-fit, then burnish evenly. Even tiny misalignment telegraphs across a simple field, so take time. For lines between stars, either incise with a graver, stamp delicately, or add fine wire as literal connectors. When choosing stones, recall that contrast is your ally; a pale gem against a lightly brushed field may disappear, whereas the same gem in an oiled, darkened recess will sing.
Wire Arcs and Constellation Lines
Form arcs from half-round wire to suggest celestial connections without heavy lines. File their ends to feathered tapers so transitions feel natural. When you must join them permanently, clean joins and controlled soldering will keep the lines crisp. To avoid melting delicate arcs, pre-flow solder onto a tiny pallion, position with flux, and chase the heat along the heavier base plate. Consider tension-set lines: capture a wire between two micro-tubes, allowing the line to flex slightly, introducing lively movement and useful resilience against snags.
Enamel Night Skies
Vitreous enamel yields deep, glassy midnight fields. On fine silver, apply a base coat in a transparent blue or black, sifting in fine layers and firing as you build. Stencil or sgraffito out star dots before the final firing, then add a whisper of transparent flux to soften edges. Cloisonné wire can outline constellations, letting bright enamel inlay form the star points. For enamel beginners, work small and control thickness; overloading leads to edge pull and cracking. Quench gently and clean with acidulated water to restore flash.
Resin and Inclusions
Cold enamel or jeweler’s resin offers a different personality: soft depth and suspended stars. Pour resin into recessed cups or bezels; introduce a dusting of mica, crushed opal, or gold leaf for distant star clouds. Place stones on posts that rise through the resin so they remain mechanically secure. Because resin is softer than enamel, pair it with protective bezels or cavities slightly below the surface plane. Always cure under dust covers and test for bubble release; a quick pass with warm air can coax bubbles out before set.
Textures and Tiny Metals
Surfaces determine how the night behaves. A satin finish diffuses star points, while a mirror polish makes them flare. Stippling with a polished beading tool can mimic nebulae, and directional sanding evokes subtle drift. For bright, staccato stars, ancient techniques remain modern: sprinkle fine gold granules and fuse them to create raised points. Classic granulation is demanding—control heat, reduce oxides, and use eutectic bonding—but the tactile stars it yields are incomparable.
Stones, Metals, and Color Theory in a Celestial Palette
Color is not a literal sky. It is an orchestration that suggests temperature, depth, and distance. On darkened silver, a constellation of white stones surrounded by faintly brushed steel-blue enamel holds a northern chill. On warm brass, champagne diamonds and pale citrine recall desert stargazing. Opal’s play-of-color becomes meteor fragments; moonstone’s adularescence becomes haze. Black diamonds placed sparingly can deepen a field the way silence deepens a melody.
Think relative brightness. Given the same base metal, bright stones shrink space while matte textures expand it. Too many vivid notes flatten into uniform noise; reserve your brightest accents for anchor stars and let the eye complete the pattern. A useful rule is to assign three values: near (stones and polished edges), mid (satin fields), and far (dark recesses or pierced voids). Cycle among them with intention. Metal choice affects this triad: in sterling, near might be mirror polish; in gold, near could be a high domed bead; in brass, near might require a clear-coated highlight to resist oxidation.
Prototyping, Comfort, and Wearable Balance
Constellation jewelry often contains points and lines that, if left unchecked, can snag or scratch. During prototyping, sand all edges to a gentle radius. On studs, ensure posts are centered relative to the star cluster’s center of mass, not its geometric center; this keeps them upright on the ear. For necklaces, test drape lengths with paper dummies weighted with washers approximating metal weight. Large plates should curve slightly to hug the body; a flat disk may tilt and flash light unpleasantly. Attention to durability belongs at every stage: choose thicker jump rings for charm constellations, double-solder chain joins at stress points, and test clasp operation one-handed. A piece designed to survive everyday gestures—coat sleeves, seat belts, tangled hair—will be worn often and loved long.
Back-of-piece finishing is part of comfort. Smooth out solder seams, remove burrs around piercings, and consider a soft matte on the reverse to reduce fingerprinting. Hinge movement (for lockets or multi-plate pendants) should be snug but not stiff. If your design includes dangling star drops, ensure their swing arc stays within the silhouette of the wearer’s shoulder and neck. The best constellation jewels feel quiet on the body, a presence that’s there but never clamorous.
Three Guided Projects to Learn by Doing
Project 1: The Orion Map Pendant
Concept: A sterling silver backplate with a dark sky field, six flush-set stones for main stars, and sawed linework for the belt and sword.
- Design and Scale: Print an Orion star map at 35–45 mm pendant size. Mark star magnitudes, reserving 2.0–2.5 mm stones for Betelgeuse and Rigel, and 1.0–1.5 mm for others.
- Transfer: Tape the pattern onto 1.0 mm sterling sheet. Prick through star positions. Scribe belt and sword lines faintly.
- Drill and Seat: Center punch, then drill pilot holes for each flush setting sized just under stone girdles. Cut seats with setting burs, maintaining perpendicularity.
- Linework: Saw the belt and sword gently. Clean with 400–600 grit sticks and soften corners.
- Oxidize Base: Before setting stones, darken the plate and hand-brush to let high points catch light.
- Set Stones: Place each stone and burnish until tight, ensuring no gaps and an even, circular burnish line.
- Bail and Chain: Fabricate a hidden bail to keep the silhouette clean. Polish, then wax-seal.
Tips: Resist the temptation to over-polish; Orion’s drama arises from contrast. If your belt line feels too literal, break it into short dashes and trust the viewer’s eye to connect them.
Project 2: Cassiopeia Cuff with Negative Space
Concept: A brass cuff with sawed-out stars and faintly hammered radiance lines emanating from the central point.
- Blank: Cut a 16–18 mm wide, 1.2 mm thick brass strip. Deburr edges.
- Layout: Mark five main star points. Drill incremental holes and taper with a conical reamer to create star funnels.
- Texture: Using a polished cross-peen, add gentle radiance hash marks around the central void. Keep spacing loose to evoke air.
- Curving: Anneal, then form around a bracelet mandrel, checking fit. Sand inside edges smooth.
- Finish: Apply a controlled surface treatment to warm the brass and seal with microcrystalline wax.
Tips: Because cuffs encounter friction from sleeves, emphasize edge rounding. Brass rewards a soft, hand-rubbed sheen that suggests candlelit stargazing.
Project 3: Big Dipper Stud Earring Set
Concept: Seven tiny sterling disks, each bearing a single star, arranged on the ear as an asterism. A playful, modular approach to patterning the body with sky.
- Disks: Punch or saw seven 4–5 mm disks from 0.8 mm sterling. Dome lightly for volume.
- Star Marks: Drill central star holes with a 0.6–0.8 mm bit. Slightly countersink on the face to catch light.
- Posts: Attach posts at positions that maintain the desired orientation on the ear. Texture faces with light abrasion.
- Wear Plan: Provide a diagram for the wearer to arrange them up the ear, across both lobes, or scattered.
Tips: Consider oxidation to enhance sparkle. If clients have multiple piercings, offer extra disks to scale the dipper’s handle length.
Finishing, Surface Treatments, and the Poetry of Age
The final look turns technique into atmosphere. Darkening agents on silver can draw the eye inward, while selective polishing pops the brightest stars. Controlled patina on copper or brass delivers history overnight: a sea-green edge can make a constellation feel nautical; a warm brown can suggest desert nights. If you prefer a stable, low-maintenance finish, use clear coats or wax that won’t overly gloss the surface. Tumbled burnishing can close pores and tighten the grain of metal, increasing sheen while softening tool marks, but watch that it doesn’t round crisp geometry you love.
Texture stacking—combining a brushed field, pinpoint stippling, and a few mirror edges—creates depth without clutter. Test finishes on scrap alongside your in-progress piece; finishes are relational, not absolute. As your piece ages with the wearer, it will acquire micro-scratches that act like a vellum filter on starlight. Good design welcomes this life. Invite your customers to enjoy the shift rather than fear it.
Customization, Memory, and Meaning
Commissioned constellation pieces are naturally story-rich. Offer options: exact sky for a date and city, latitudinal star fields for a wedding location, or a child’s initial hidden among points. Carefully rendered personalization builds trust and intimacy with clients: engraved coordinates on the backplate, a tiny gemstone for a birth month tucked beside the main asterism, or a companion charm that marks the moon phase. When you take on such projects, create a proof system—digital mock-ups or paper templates—for client approval before you touch the metal. This prevents rework and strengthens the collaborative bond.
Packaging is part of the experience. Include a small card with the star map and a sentence about why that sky mattered. A swatch of indigo cotton, softly frayed, or a charcoal-gray envelope quietly frames the theme. Consider a QR code linking to a star chart for the exact date and time; even analog lovers enjoy this bridge between ancient sky and modern device.
Care, Repair, and the Long View
Care instructions need not be elaborate, but they should be precise. For silver, recommend a soft cloth and occasional gentle wash. For patinated brass and copper, suggest dry cloths only and periodic wax. For resin, warn against harsh solvents and high heat. If your piece invites seasonal re-darkening, offer a maintenance service. Repairs are a chance to demonstrate integrity; a well-conceived repair policy reassures buyers that your work is intended for a lifetime of wear, not a season of trend. Keep notes for each piece—materials, stones, processes—so that future adjustments preserve the original intention.
In studio practice, cultivate a habit of documentation. Photographs of work-in-progress help you diagnose future issues and teach students or clients what invisible care goes into each subtle decision. They also serve as a personal atlas: a record of how your eye changed, how your hands grew surer.
Selling and Storytelling for Independent Makers
Handcrafted constellation jewelry thrives in niche markets that value narrative and detail. When building listings, write in terms of experience: what does the piece feel like to wear at dusk? How does light move across it near a window? Instead of generic product shots, stage photographs with a star map, a compass, or a simple field notebook. For pricing, tally materials, bench time, finishing time, overhead, and a margin that supports growth. Resist underpricing small works; precision demands time that outsiders cannot see at a glance. Educate gently through captions and short videos; show the scribe’s point placing a star or the saw’s breath moving through narrow arcs. That transparency becomes a signature.
At markets, display at eye level with a calm backdrop. Offer a tray of blank sky disks and a pencil so customers can sketch their own asterisms; this participatory moment converts browsers into collaborators. Keep business cards minimal, with a small star field and your name legible at a distance. If you accept custom commissions, describe your process and timeline clearly. Reliability is a form of beauty.
Advanced Explorations: Movement, Layers, and Unusual Materials
Layered plates create parallax: a front star layer, a mid-level cloud in textured silver, and a back panel in blue-black enamel. Turn a pendant into a locket that flips between hemispheres on a slim hinge. Consider a ring with a rotating bezel where a tiny window scans across a star map, aligning with engraved dates. Add meteorite inlays, stabilized and sealed, for authentic extraterrestrial texture; pair sparingly with warm metal to keep the look balanced.
Mechanical play can be subtle. A constellation bracelet where each star is a riveted dot allows shimmer with motion. A mobile-style necklace with star drops on fine pivots animates the wearer’s breath. For those who love heat-worked metal, keum-boo (fusing high-karat gold to fine silver) is exquisite for bright stars that sit slightly proud on a dark field. Mokume gane—woodgrain metal—can emulate swirling nebulae if patterned with restraint. Foldforming, when hammered into delicate ridges, reflects light like rippled aurora.
Common Mistakes and How to Solve Them
- Overcrowding: Too many stars flatten the pattern. Solution: Remove 20% and test from across the room; the remaining points will breathe.
- Misalignment: Dots that drift ruin minimal designs. Solution: Use center punches religiously and drill presses for critical lines.
- Harsh Connectors: Lines too thick overwhelm stars. Solution: Switch to half-round wire or engraved dashes rather than solid lines.
- Uneven Setting: Stone sits crooked and catches. Solution: Recut the seat, ensure bur is perpendicular, and use a sharp burnisher.
- Tarnish Shock: Clients dislike unexpected color shifts. Solution: Provide finish options and care cards; seal where appropriate.
- Weight Imbalance: Pendants flip or tilt. Solution: Use hidden bails, widen tops, and slightly dome plates to follow the chest.
Safety, Mindset, and the Rhythm of Making
Working small invites tunnel vision; take breaks. Even five minutes of distance recalibrates judgment. Wear eye protection when drilling and setting; tiny burs can shatter. Ventilate when applying chemicals and follow local regulations for disposal. A fire extinguisher near your torch station is not optional. On the mental side, cultivate patient repetition. The sky required aeons; your necklace can require an extra hour of filing. The best results arise when you treat each star point like a vow: the dot is small, but the attention given is not.
Technical Notes for Precision Lovers
For extremely small stars, try a graver to create optic pits instead of through-holes; polish the crater and you’ll gain bright, safe shimmer. When setting adjacent tiny stones, alternate sizes subtly to avoid moiré patterns. Use layout dye to increase scribe visibility on bright metals. A hoop earring becomes a constellation field if you graduate dot sizes along its circumference, anchoring brightness near the face. When making stacks, ensure each ring sits flush; gaps snag and compress the sky’s elegance. Keep a reference of star magnitudes for your favorite constellations; the more faithfully you render relative brightness, the more convincing even abstracted pieces will feel.
Culture, Myths, and the Stories We Carry
While Greco-Roman narratives dominate popular star maps, widen the lens. The Big Dipper is also the Plough, the Drinking Gourd, and a celestial moose in other traditions. Orion’s outline appears in countless stories worldwide, but its meaning changes with geography. Rather than appropriating, you can honor plurality by noting the constellation’s many names in your packaging or by designing a neutral star map that invites the wearer’s own narrative. That respect amplifies the intimacy of your work and reminds us that a shared sky does not mean a single story.
Process as Practice: Keeping the Studio Sky Alive
Some days you will admire the night and feel only stillness; others, the sky will crackle with ideas. Keep a sketchbook near your bedside for midnight notes. Print a small seasonal map and tape it above your bench; when indecision rises, glance at the measured distances and let them teach you. Eventually, you will recognize how pace and pause—how density and openness—create rhythm in a piece just as they do in a star field. In that recognition, you will see why making constellation jewelry is not a trend but an ongoing conversation with light.
Closing Reflections: Wearing a Small Portion of the Infinite
When someone fastens a constellation at their throat or wrist, they enact a humble ceremony: honoring the sky by inviting it closer. In this craft, the ordinary tools of a bench—saw, file, drill, torch—become instruments of mapping. The results can be grand or spare, sparkling or matte, literal or suggestive, but they always remain grounded in the maker’s touch. The product carries more than pattern; it carries the pause between stars, the hush before a meteor, the familiar comfort of a compass point on a quiet night. That is why constellation jewelry endures. It lets the wearer carry a horizon within reach and the maker carry forward a lineage of looking up—all in a form small enough to lose in a pocket, and precious enough never to forget.
Let the next clear night be your studio light. Step outside, breathe the air of the hours when streets quiet and windows dim, and sketch with your eyes first. Return to the bench ready to translate that hush into metal and stone. In doing so, you do not simply copy the heavens; you compose a personal atlas, a little map of wonder, anchored to the living world by intention and care. And with every careful join, each well-placed star, and every subtle curve that meets the body kindly, your work becomes not just adornment, but navigation—guiding the gaze, steadying the heart, and keeping the old habit of wonder alive beneath familiar skies.
Above all, keep learning. In star work, there is always another nuance of spacing, another texture for quiet glow, another method for gentle connections that last. Grow your vocabulary of forms and finishes, hone control and freedom in equal measure, and remember that intimacy is the soul of adornment. With patient hands and a faithful eye, your maps of light will find their way to the people who need them most.
Across seasons and hemispheres, the sky awaits your attention. Constellation jewelry is your invitation to accept it—an art that unites accuracy and awe, humility and ambition, the scientist’s map and the poet’s line. May your bench host both, and may your pieces carry their shared light into many ordinary, extraordinary days.
When you finally lay a finished piece on velvet and see how the small dots converse with the room’s light, you will sense the quiet conversation your work continues every time someone lifts their face at dusk. That is the gift of this practice: a steady thread between earth and sky, made tangible. A map you can fasten. A story you can touch.
Choose your metals with care, your stones with empathy, your finishes with restraint, and your stories with respect. In doing so, you join a long line of makers who knew that patterns above are not rules but invitations—to look, to listen, to connect. And when your hands remember the next design more by feel than by plan, when the bonds you create are as sound as the ones that guide sailors homeward, you will know that your own path through the stars has begun to take shape—one thoughtful dot at a time, in the company of patient constellations.
