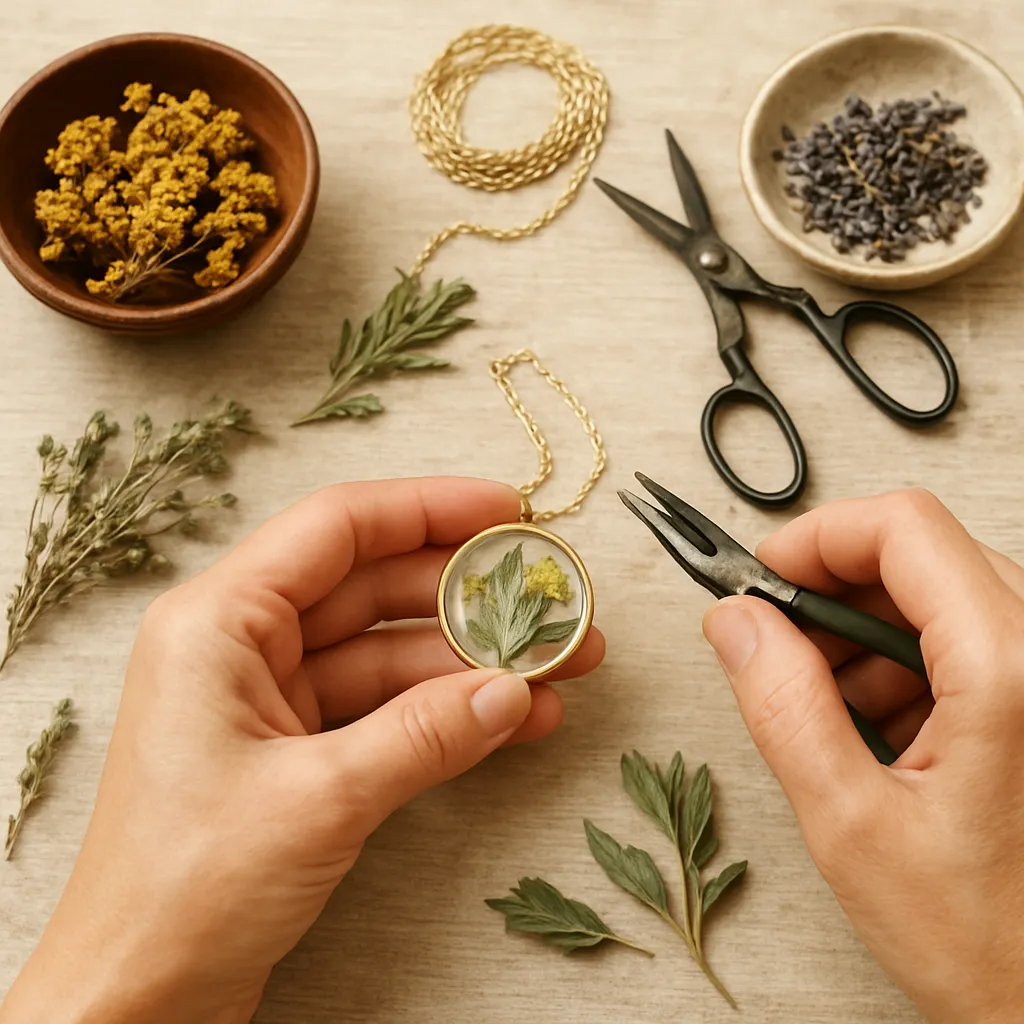
Herb jewelry is a quiet celebration of nature carried on the body: fragrant memories sealed in metal, leaf veins turned to line art, and seed textures made permanent as talismanic keepsakes. Blending the patience of traditional handicraft with the curiosity of naturalists, it invites you to harvest stories from the hedgerow and transform them into personal adornments. Whether you lean toward sleek botanical minimalism or wildflower romance, crafting jewelry from dried herbs opens a path where color chemistry, sensory design, and mindful making converge into wearable micro-landscapes. This guide walks you through understanding suitable plants, drying and preservation, multiple construction methods—from paper lamination to resin encapsulation to copper-sheathed leaves—plus design, safety, and care, so your pieces age with grace and intention.
The allure and heritage of herb jewelry
Across cultures, people have long carried plants as charms: sprigs of rosemary for remembrance, sage for protection, basil for prosperity, and lavender for calm. Medieval amulets wove apothecary lore into everyday dress, while Victorian lovers exchanged posies encoded with meaning. Dried herbs in jewelry bring that lineage forward with a contemporary twist, letting makers preserve color, texture, and sometimes a whisper of scent, in forms that withstand daily wear.
Part of the appeal is tactile. The ridges of a mint leaf or the fine filigree of yarrow stems create striking surfaces once pressed, cast, or plated. Another part is symbolic: culinary herbs evoke the warmth of kitchens and gatherings; wild herbs channel time outdoors and seasonal cycles. Even small fragments become potent when set thoughtfully—like constellations arranged inside a pendant.
Modern techniques broaden what’s possible. UV-stable synthetics preserve brightness; bio-based finishes and careful sustainability practices reduce environmental load; and hybrid metal-botanical processes produce heirloom-quality pieces. Your choices of plant, method, and finish will dictate the mood: rustic, refined, minimal, baroque. The vocabulary is yours to build.
Selecting and harvesting herbs with intent
The best herbs for jewelry have defined structures: robust leaves with visible veins (sage, mint, lemon balm), fine inflorescences (yarrow, dill, fennel), tiny flowers that keep shape (chamomile, heather), and compact sprigs (rosemary, thyme). Petals like calendula or cornflower retain color well under clear media. Fragile, water-heavy blooms (e.g., tulips) are tricky and often lose form; save them for pressed work or as accents.
Harvest on dry days, mid-morning after dew has lifted. Choose unblemished, pesticide-free material. If foraging, follow the ten-percent rule—never take more than a tenth from a stand—and learn to identify protected species. Place cuttings in a breathable bag or paper envelope; avoid sealed plastic in the field, which invites condensation and mold. This is careful, respectful foraging: you’re gathering not just materials, but stories and habitats to honor.
Think in terms of final scale. For earrings, select matched pairs of similar size. For pendants, evaluate negative space and silhouette—open lacy herbs look luminous encapsulated; thicker leaves translate well when impressed into clay or metal. Keep a small sketchbook of silhouettes and seasonal notes to guide future collecting.
Drying, pressing, and preserving color
Successful herb jewelry starts with well-dried material. Moisture trapped in sealed settings causes clouding or fungal bloom. Choose a method based on your planned technique:
- Air-drying bundles: Tie small bundles and hang upside down in a dark, ventilated room. Ideal for sturdy sprigs like rosemary and thyme. Darkness helps retain greens; expect 1–2 weeks.
- Pressing: Place leaves and petals between absorbent sheets (blotting paper, coffee filters) inside heavy books or a flower press. Change papers after 24–48 hours to prevent browning; dry fully within 1–2 weeks. Pressed herbs are perfect for laminations, paper jewelry, and flat resin bezels.
- Silica gel desiccation: Bury delicate flowers or sprigs in silica gel crystals inside a sealed container. This draws moisture quickly (2–5 days), preserving volume and color for encapsulation.
- Dehydrator on lowest setting: Spread herbs between mesh screens; run until crisp. Good for batch work in humid climates. Keep temps low to avoid baked colors.
Pre-sealing thin plant parts helps prevent bleed-through and air-release in resin. A light mist of archival spray varnish (matte or gloss) on both sides, or a dilute shellac, stabilizes pigments and surfaces. Let dry thoroughly before embedding. For leaves that will be impressed into metal clay or polymer, leave them unsealed; natural tooth captures better detail.
Color tips: Blues and purples are prone to shift. Cornflower and statice hold up, as do darker basil and sage; lavender fades unless shielded from UV. Greens fare better with quick drying and low light. Avoid microwave pressing unless you test first; it can cook chlorophyll to olive-brown.
Tools, materials, and safe setup
Set up a clean, organized workspace with these basics:
- Cutting and handling: Fine snips, tweezers, self-healing mat, micro scissors.
- Pressing and drying: Flower press or stacks of books, blotting papers, silica gel, labeled envelopes.
- Encapsulation: Open bezels, cabochon molds, silicone mats, mixing cups, stir sticks, pipettes.
- Finishing: Micromesh pads, microfiles, polishing cloth, UV-blocking varnish.
- Metals and findings: Jump rings, ear wires, bails, chains, wire (sterling, brass, copper), solder-free connectors.
- Alternative media: Paper sealer/varnish, decoupage glue, copper foil tape, glass slides, metal clay or silver clay paste.
- Safety gear: Nitrile gloves, eye protection, apron, and good ventilation. If using two-part resins or solvents, a respirator with organic vapor cartridges is recommended.
Material choices shape both aesthetics and ecology. Bio-based or low-VOC resins reduce odor and impact; recycled silver and brass findings close loops; plant-based sealers and waxes can replace petrochem-heavy finishes in some methods. Keep a notes log for batches—material sources, dates, and conditions—to track results over time.
Resin encapsulation method
Clear casting creates a window around your herbs, protecting shape and color while showcasing depth. Choose UV-curing resin for small, quick pieces, or two-part epoxy for larger pours and domes. Look for formulations with UV stabilizers to limit yellowing, and keep filled pieces out of prolonged sun.
Planning the layout:
- Arrange dried elements on black and white paper to test contrast and silhouette. Consider focal hierarchy—one dominant sprig and smaller accents read better than a scatter.
- Trim to scale, and pre-seal porous parts lightly if prone to air release. Let dry.
- Clean bezels or molds; dust shows glaringly once cured.
Step-by-step for an open-bezel pendant:
- Back the bezel with clear packing tape burnished flat to prevent leaks; place on silicone mat.
- Pour a thin “seal” layer of resin to wet the base; pop bubbles with a pin or brief, cautious heat from a small torch/heat tool. Avoid overheating herbs.
- Place herb pieces with tweezers; anchor them lightly with drops of resin so they don’t float.
- Build depth in thin layers, curing between pours (for UV) or waiting to partial gel (for epoxy). This layering preserves placement and reduces trapped bubbles.
- Finish with a domed meniscus for a lens effect. Cure fully.
- Peel tape, sand any drips with micromesh, then polish. Add a final UV-blocking varnish to the surface if desired.
Troubleshooting:
- Floating botanicals: Add a tack coat first, or weight pieces gently until gel stage.
- Microbubbles from leaves: Pre-seal; warm resin slightly before mixing; work slowly to avoid whipping air.
- Clouding: Indicates moisture—dry herbs longer or desiccate overnight with silica before embedding.
- Sticky cure: Incomplete ratio or UV underexposure. Measure precisely; cure from multiple angles; shield from dust.
Open-backed silicone molds yield cabochons you can bezel-set or wire-wrap. For crisp edges, pour slightly proud and sand to 1000–8000 grit after demolding, then polish. A bevel sanding block helps maintain geometry. Keep scraps for test swatches of new pigments or inclusions like gold leaf or mica—you’ll learn how much is enough without obscuring botanical detail.
Beyond resin: paper, glass, and metal approaches
Pressed herb laminates: Sandwich pressed leaves or petals between two layers of thin handmade paper or translucent kozo, bonded with archival decoupage medium. Dry under weight to avoid warping. Cut to shape, seal edges, punch a clean hole with a micro-punch, and finish with a matte or gloss varnish. These are featherlight and elegant, ideal for earrings that sway.
Glass lockets and slide pendants: Trap flat herbs between microscope slides; edge with copper foil tape and solder using lead-free solder, or crimp into ready-made metal slide frames. The glass protects delicacy while keeping a slim profile. For a no-solder option, use hinged memory lockets with silica micro-packets to deter moisture over time.
Impressions in metal clay: Press a textured leaf into damp silver clay to take a relief print. Remove the leaf, refine edges, dry, then fire per manufacturer instructions. Oxidize and polish to raise vein detail. This captures botanical structure without including organic material in the final piece—excellent for heirlooms.
Electroforming: Seal a dried leaf (two coats of clear acrylic), paint on conductive copper paint where plating is desired, wire it as a cathode, and submerge in copper sulfate solution with a pure copper anode. Under low current over several hours to days, copper builds a metal shell around the leaf. Rinse, patinate if desired, and seal. Electroformed leaves are featherlike but rugged once built to adequate thickness, and they keep astonishing anatomical detail. Safety essentials: stable power supply, eye protection, gloves, and waste disposal per local regs.
Design language: color, texture, and symbolism
Design starts with looking closely. Map where your eye lands first, second, third. Use that to control composition: set a focal sprig off-center; repeat small petal shapes to echo rhythm; contrast coarse rosemary needles with a fine dust of yarrow to create scale play. Negative space is gold—let air exist around your botanicals so each gesture reads.
Color palettes benefit from restraint. Greens with a single accent (saffron marigold, deep cornflower blue) keep clarity. If pieces will be viewed through resin’s optical lens, test saturation under a drop to preview how light amplifies hue. Metals frame the narrative: warm brass flatters autumnal herbs; aged copper suits woodland palettes; bright silver lights up cool greens and blues.
Symbolism deepens connection: rosemary for grief or remembrance, thyme for courage, basil for abundance, sage for wisdom, chamomile for calm, and dill for protection. Pair symbols with recipients’ stories, and include tiny cards explaining species and meaning. Story is a material too.
Assembly, findings, and finishing details
Even the most exquisite botanical centerpiece needs reliable hardware. Use quality jump rings (saw-cut if possible) sized appropriately—too small looks pinched; too thin opens under stress. Open rings by twisting laterally, never pulling apart, to preserve shape. For a clean bail, consider solder-free pinch bails for drilled cabochons, or wrap wire around a mandrel to form custom bails that echo leaf curves.
Drilling tips: Use a pin vise or flex shaft with a water-lubricated micro bit to drill cured resin slowly, backing the piece with scrap wood. Start with a pilot hole. For glass-slide pendants, avoid drilling; use frames. For electroformed leaves, drill before sealing if the copper shell is thick enough; deburr and file smooth.
Connections matter aesthetically. Match metal tones across components. Keep chain weight proportional to pendant mass, and test balance on a stand so pendants hang straight. A final wipe with a polishing cloth removes fingerprints and sets the piece stage-ready.
Scent, skin, and everyday wear
If you want a gentle fragrance, avoid saturating sealed botanicals; instead, add a tiny drop of essential oil to a hidden porous element, such as a lava bead on the chain or the inner back of a glass locket. Replace as it fades. For skin, remember that botanicals can be allergens for some wearers. Encapsulation or glass containment minimizes contact. Always disclose materials, including metal alloys and coatings.
Comfort equals longevity in the jewelry box. Keep earrings under a comfortable weight; round sharp corners; ensure wire ends are tucked. For those sensitive to nickel, choose sterling, gold-fill, titanium, or niobium findings.
Care, storage, and longevity
Even well-made herb jewelry benefits from gentle habits. Store away from direct sun to preserve color; keep in a box or pouch with a silica packet. Avoid long soaks, perfumes, and hairspray directly on pieces. Wipe resin surfaces with a soft damp cloth; polish metal as appropriate. Expect natural mellowing of greens over years—think of it as patina, a quiet record of time.
For maximum durability, choose UV-stable media, apply thin protective topcoats, and design forms that shield vulnerable edges. Offer repairs or refresh services if you sell your work; replacing a chain or re-doming a surface can extend a piece’s life significantly.
Sustainable practice and sourcing ethics
Responsibility starts where making begins. Grow a small herbarium garden to reduce wild impact. When purchasing, support growers using organic methods and fair labor. Upcycle vintage chains and findings when possible, and recycle metal scrap. Minimize single-use plastics in your process; consolidate pours and plan batches to reduce waste. Keep rinse water and plating solutions out of household drains; dispose of them through proper channels. Share your sourcing and care practices with customers—it builds trust and aligns values.
Troubleshooting at a glance
- Browned pressed leaves: Dry too hot or too slowly. Switch to silica gel or refresh blotters more often; press in darkness.
- Bubbles clinging to veins: Pre-seal; gently warm resin; brush a thin resin coat on the leaf first to wet it out.
- Yellowing over time: Use UV-inhibited formulas; apply UV-protective topcoat; advise storage away from sunlight.
- Warped paper laminates: Insufficient pressure while drying. Press between smooth boards with clamps; edge-seal thoroughly.
- Electroforming flake-off: Inadequate sealing or conductive path. Two sealing coats, continuous conductive paint, patient low-current build.
- Metal sensitivity reactions: Swap to hypoallergenic findings; disclose alloys clearly.
Three guided projects to learn by doing
1. Rosemary sprig in an open-bezel pendant
- Dry a small rosemary tip in silica gel for 3 days; dust off crystals.
- Lightly mist with clear sealer; dry.
- Tape the back of a teardrop bezel; pour a thin resin layer.
- Place the sprig slightly off-center; anchor with drops; cure.
- Layer resin to cover; remove bubbles; final dome; full cure.
- Peel tape, sand drips, polish; add a warm brass chain.
Result: Crisp needles suspended in a lens, with a herbal silhouette that reads from across the room.
2. Mint leaf impressions in silver clay earrings
- Roll silver clay to 1.0–1.5 mm on Teflon; lightly oil the surface.
- Press a textured mint leaf vein-side down; lift carefully.
- Cut matching shapes; refine edges; dry completely.
- Fire per instructions; tumble or hand-polish; oxidize to emphasize veins; attach ear wires.
Result: Permanent metal reliefs capturing living geometry, lightweight and heirloom-ready.
3. Copper-electroformed yarrow pendant
- Dry a small yarrow cluster; seal twice with clear acrylic, drying between coats.
- Paint conductive copper paint over surfaces to be plated; leave some gaps for negative space.
- Attach a copper wire hook; submerge in copper sulfate bath with pure copper anode; set low current (e.g., 0.1–0.2 A depending on surface area).
- Plate slowly for 12–24 hours until a sturdy shell forms; rinse; patinate if desired; seal with wax or lacquer.
- Add a bail and chain.
Result: A sculptural branch of metal that retains botanical lacework, tough enough for daily wear yet delicate in appearance.
Documenting, gifting, and selling
Great herb jewelry carries a paper trail. Photograph raw plants, drying stages, and finished work; keep species names and harvest dates. When gifting or selling, include a small card naming the herb, place of origin, and meaning. Pricing should reflect materials, time, and technique complexity; electroformed or metal-clay work commands more than simple laminates. For shipping, pad pieces carefully and include silica packets; in hot climates, advise recipients to cool parcels before opening to avoid condensation shock.
Regulatory notes: Some plant materials are restricted across borders; know your customs rules. For plated pieces, disclose base metals; for resins, mention care and UV sensitivity. Transparency builds community and keeps expectations real.
From seed to signature style
The more you experiment, the more your voice emerges. Keep seasonal cycles: spring’s tender greens and blossoms; summer’s saturated petals; autumn’s seed heads; winter’s evergreens and bark textures. Revisit techniques with fresh eyes—press the same species three ways; combine glass and paper; cast a silhouette in metal and frame it beside its resin twin. Over time you’ll discover subtle preferences for leaf angles, edge finishes, and chain proportions that add up to a recognizable language. In that language, a small world of plant memory is made wearable—quiet but enduring, a botanical archive at the scale of the hand and heart.
