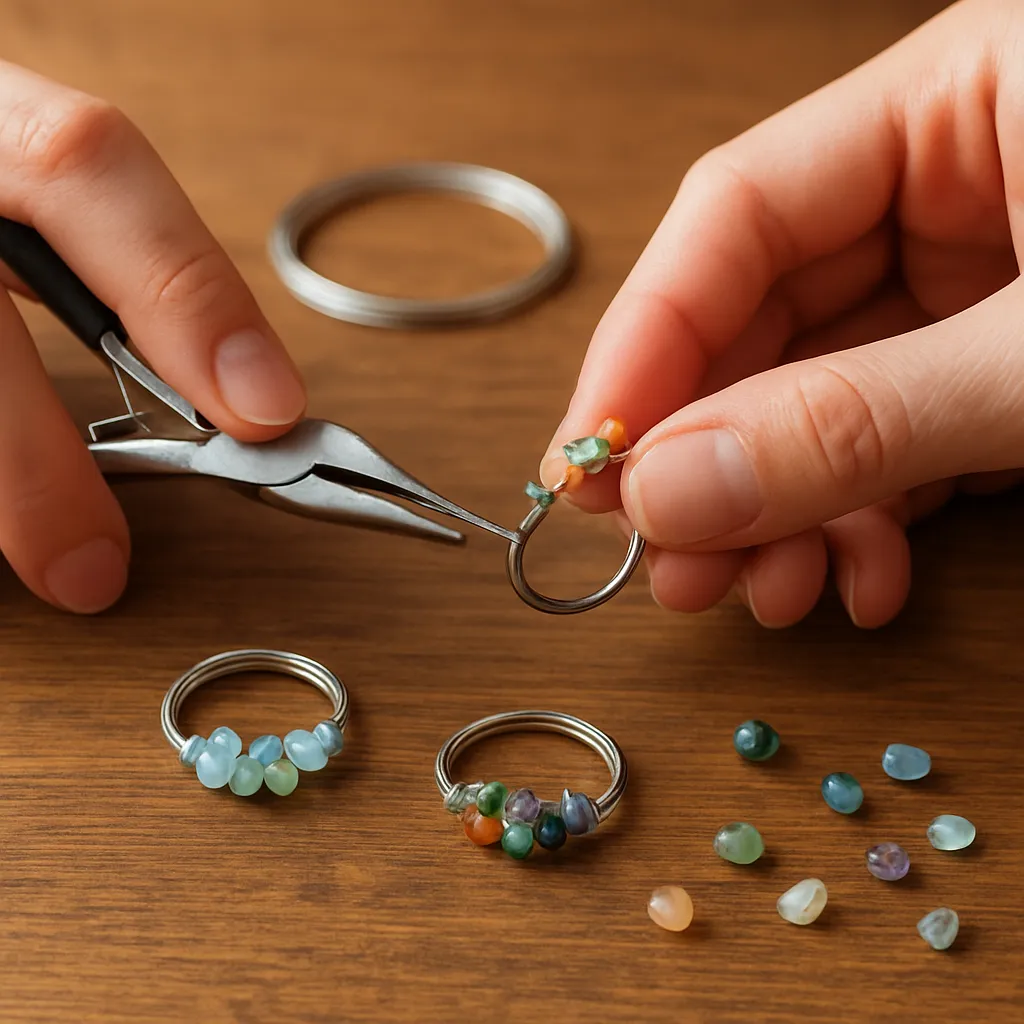
Small stones can turn a handmade ring into a tiny stage where light and texture perform a quiet drama. Working at a miniature scale asks for patience and rewards thoughtful hands with wearable art that feels both intimate and timeless. Whether you are bending a first wire into a circle or soldering a bezel thinner than a fingernail, DIY rings with mini stones invite a balance of imagination and restraint. This guide gathers practical techniques, material choices, and design approaches so you can craft pieces that look delicate yet last through everyday life.
The allure of miniature stones
Mini stones—think 1–3 mm faceted gems, 2–4 mm cabochons, and tiny natural pebbles—offer a unique visual language. They don’t shout; they sparkle in whispers. Their scale encourages negative space, rhythmic repetition, and controlled asymmetry. With mini stones, you can integrate fine granulation, slim bezels, and ultra-light ring bands that maintain elegance without bulk. They are ideal for stacking rings, constellation motifs, and hidden accents under a setting’s shoulder where a larger gem would feel out of place.
Historically, diminutive stones served as punctuation around a primary gemstone. Today they stand on their own, suggesting stars, seed pods, or dew drops. Because they are small, even a modest budget can support high-quality materials—lab-grown diamonds, precision-cut spinels, or richly colored sapphires in sizes that make experimental layouts feasible. Above all, mini stones invite deliberate precision: any unevenness becomes visible, but so does every confident touch of the file or burnisher.
Materials and tools for small-scale success
Begin with metals that behave predictably. Sterling silver (925), fine silver for bezels, and 14k or 18k gold are classics. Recycled metals are widely available and compatible with most traditional joining methods. For wire-wrapped builds, choose dead-soft or half-hard wire in 0.8–1.0 mm (20–18 AWG) for shanks and 0.4–0.5 mm (26–24 AWG) for wrapping details. For soldered rings, sheet at 0.6–1.0 mm thickness keeps a low profile while allowing structural integrity.
Core tools include:
- Ring mandrel (steel) and rawhide or nylon mallet
- Flush cutters, round-nose and chain-nose pliers
- Needle files and abrasive papers (400–2000 grit)
- Calipers for accurate stone and band measurement
- Jeweler’s saw with 2/0–4/0 blades
- Bezel pusher and burnisher for stone setting
- Soldering station: micro torch, third hands, cross-lock tweezers
- Pickle pot and neutralizer, safety glasses, ventilation
- Polishing mops, compounds, and a soft-bristle brush
At miniature scale, measurement is merciless. Digital calipers allow tight calibration of bezel height (typical target: 0.5–0.7 mm above the stone’s girdle for tiny cabochons) and band width (1.2–1.8 mm for delicate rings that still resist deformation). Keep scrap for test soldering and to trial-fit stones before committing to a final assembly.
Choosing mini stones: cut, color, and ethics
For cabochons, consistent domes and clean girdles simplify bezel forming. For faceted stones, look for even pavilion angles so light returns well even in miniature. Round and oval cuts are easiest to set; baguettes and marquises require more meticulous seat geometry. Pale stones (white sapphire, light spinel) often look larger than they are, while intense colors (ruby, tsavorite, mandarin garnet) deliver striking contrast in minimal metal.
Sourcing matters. Seek sellers who document origin and provenance, especially for natural stones. Lab-grown options reduce environmental impact and offer clarity at approachable prices. For organic pebbles or sea glass, ensure edges are stable and free from micro-fractures. When possible, match stones by size within ±0.05 mm for multi-stone designs—micro variation becomes obvious when stones sit side by side.
Ask vendors for exact millimeter sizes, not just carat weights. Request loupe photos for small inclusions that might threaten setting stability. Mini stones tolerate only gentle pressure during setting; internal feathers near the girdle are more vulnerable to breakage.
Design planning: scale, negative space, and modularity
Start with sketches exploring cluster rhythms: three tiny stones suggest a floral bud; five in a curve echo a crescent. Remember the wearer’s hand geometry: knuckles, finger taper, and ring stacking habits. Plan for air; space around a 2 mm gem makes it feel intentional rather than lost. Use paper templates or soft wax to develop proportions and calculate spacing between settings. Consider modular ring sets that interlock or nest; one ring might carry a single mini stone, another bears two or three arranged to form a constellation when worn together.
Prepare two iterations: a “clean” version optimizing manufacturability and a “poetic” variant with subtler angles or textures. The best designs reconcile both. If producing multiples, create jigs for repeatable arcs and seat positions—consistency elevates perceived craftsmanship.
Ring sizing, comfort, and wearability
Mini-stone rings are often stacked, which magnifies comfort issues. Choose a smooth inner profile and de-burr all edges. A 1.5 mm round wire band is a common sweet spot: light, strong, and stack-friendly. If your band is flat, break the edges with a 600–1200 grit sandpaper to improve ergonomics. Account for added thickness when multiple rings are worn together; sometimes one size up ensures circulation and reduces pressure after hands swell in warm weather.
Mark ring size lines on your mandrel and check after soldering; heat and hammering can subtly change diameter. If you plan to add a heavy top element, consider balance—an under-gallery or a slightly ovalized shank can reduce ring spin on the finger.
Technique 1: wire-wrapped minimalist settings
Wire-wrapping shines at this scale because it’s fast, solder-free, and forgiving. For a single mini stone:
- Form a simple ring shank from 0.9–1.0 mm dead-soft wire; size slightly small to allow for work-hardening stretch.
- Bind a short length of 0.4–0.5 mm wrapping wire around the shank to create a platform, three or four turns wide.
- Create a micro basket: two crossing wires form an “X,” secured to the platform. Seat the stone in the center.
- Gently tension the wraps to capture the girdle. A touch with a burnisher compacts the turns. Avoid overtightening; miniature stones can chip.
For clusters, prepare several micro baskets and anchor them along the shank like notes on a staff. The method excels with 2–3 mm faceted rounds and creates a modern, airy look. While adhesive can help stabilize, prioritize mechanical capture; glues age and can yellow, while tight wraps and friction seats endure.
Technique 2: soldered bezels for cabochons
Bezels provide security and a clean line around tiny cabochons. Steps:
- Cut a strip of fine silver bezel wire matching the stone circumference plus 0.5 mm overlap. Height should exceed the cabochon’s girdle by 0.5–0.7 mm.
- Shape into a loop against a mandrel; file ends square; solder closed using hard solder for resilience.
- True the bezel on a steel block with light taps; then sand the base flat.
- Solder the bezel to a backplate of 0.5–0.7 mm sheet. Use minimal solder to avoid flooding.
- Saw and file the backplate to the bezel’s contour; sand edges smooth.
- Solder the completed cup onto the ring shank. Ensure alignment; mini settings magnify crookedness.
- Set the stone: seat with a tiny speck of beeswax on a stick, press the bezel evenly with a pusher, finish with a burnisher to smooth and shine.
Fine silver is favored for bezels because it is softer and less prone to cracking during setting. Keep the cup’s interior clean; stray solder lumps may prevent a flat seat. A mirror-polished seat under light stones increases sparkle via internal reflections.
Technique 3: micro prongs for faceted stones
Prong settings let more light in but demand tighter tolerances. For 1.5–2.5 mm rounds:
- Fabricate a tiny seat on a pedestal or gallery made from 0.8–1.0 mm wire.
- Drill a pilot hole, then use a round bur slightly smaller than the stone’s girdle to create a bearing. Switch to a setting bur to refine angles.
- Add 3–4 micro prongs from 0.5–0.6 mm wire, soldered to the gallery. Keep prongs slightly long; trim after test-fitting.
- Gently push prongs over the girdle with a pusher; round with a cup bur to finish.
Even pressure and magnification (head visor or microscope) are essential. Practice on synthetic stones to build confidence before setting natural gems. The smaller the stone, the more crucial the prong symmetry becomes; misalignment by even 0.1 mm reads as sloppy to the eye.
Soldering fundamentals for miniature assemblies
Micro components heat unevenly. Pre-heat larger masses, keep flame gentle, and use third hands to stabilize. Sequence solders from hard to medium to easy to prevent reflow of earlier joints. After each solder session, quench, pickle, rinse, and inspect under magnification. If firescale appears on sterling, a light abrasive pass and careful polishing limit its progression. Develop a ritual of stone test-fits between steps; this guards against incremental distortions.
When working gold with silver components, note melting-point differences. Maintain clean solder seams; excess solder not only offends the eye but can block a bur or prevent a stone from seating flush. Practice controlled annealing, allowing metal to relax without over-softening prongs or bezels you still need to manipulate.
Surface textures, finishes, and controlled aging
Miniature stones love contrast: a bright gem snuggled into a matte shank, or a satin bezel framing a glossy stone. Create textures with planishing hammers, micro-chisels, or abrasive wheels. After major shaping, graduate abrasives and use a soft mop with fine compound for a crisp luster. Alternatively, introduce a gentle patina—liver of sulfur on sterling darkens recesses and amplifies depth, making small stones visually pop. Seal with microcrystalline wax to slow tarnish while preserving micro-texture.
For gold, subtle brushing with 3M radial discs imparts a soft sheen. If combining metals, consider shadow lines where different colors meet; they guide the eye and define the stone’s “stage.”
Sustainability, sourcing, and mindful making
Working small is inherently resource-efficient: less metal, smaller heat cycles, and minimal waste. Choose recycled stock, document gem origin, and favor makers who publish traceability. Opt for mechanical settings over adhesives to extend ring life and reduce microplastic contamination from decaying glues. Thoughtful sustainability can be a selling point and a studio ethic. Keep sweep to reclaim filings; even miniature scraps add up over a year.
Quality control: tolerances, testing, and longevity
Establish a QC checklist: stone tightness test (gentle tap or toothpick probe), prong tip uniformity, bezel wall continuity, shank roundness, and inside-edge smoothness. Document exact sizes and millimeter spacing in a build log so future sets match. The goal isn’t indestructibility but credible durability for everyday wear—handwashing, pocket friction, and seasonal temperature changes. Test stacking combinations for pinch points and noisy metal-on-metal chatter, then adjust profiles accordingly.
Troubleshooting common issues
- Stone spins in bezel: the seat is too shallow or walls are too high and springy. Deepen the seat slightly with a round bur and shorten the wall tops with a fine file.
- Prong breaks while setting: the wire was work-hardened or overheated. Remedy: anneal and remake the prong, or switch to a slightly thicker wire.
- Solder refuses to flow: joint contamination or insufficient heat. Clean with abrasive, re-flux, and pre-warm the largest mass first.
- Ring out-of-round after soldering: return to the mandrel and tap with a rawhide mallet; re-check size before adding the setting.
- Firescale visible under light stones: pre-finish and keep interior surfaces protected; for severe cases, re-polish seats or switch to fine silver bezels.
Project blueprint A: single-stone satellite ring
Objective: a 2 mm white sapphire in a fine silver bezel, on a 1.4 mm sterling band.
- Form and solder the shank to the target size minus 1/4 size to account for finishing expansion.
- Make a fine silver bezel loop; solder to a 0.6 mm backplate; saw flush.
- Align bezel slightly off-center to create a “satellite” effect; solder with medium solder.
- Pre-finish, set stone, burnish, and polish the band to a satin finish while keeping the bezel glossy.
Result: a delicate ring with a bright focal point that stacks gracefully with textured companions.
Project blueprint B: three-stone crescent
Objective: three 1.5 mm round spinels in shared prongs, gentle arc across the finger.
- Fabricate a curved gallery wire and solder to the shank top.
- Cut three seats with a setting bur, spaced evenly in a shallow arc.
- Add shared micro prongs between stones; test-fit all three before finalizing prong height.
- Set center stone first, then flanking stones; cup-bur prong tips for a bead-like finish.
The repeating sparkle reads as a continuous highlight, especially effective on narrow hands or as a wedding-band alternative.
Project blueprint C: hammered band with scattered pebbles
Objective: organic sterling band with three micro bezels holding beach pebbles or tumbled garnets (2–3 mm).
- Forge a 2 mm wide band with light hammering for texture.
- Prepare three varied-size bezels; solder them randomly along the band’s crown.
- Darken with patina; polish high points to contrast.
- Set stones/pebbles; ensure edges are smooth and stable.
The irregular placements mimic natural scatter, perfect for commemorating a shoreline visit.
Studio safety and workflow
Even at small scale, heat, dust, and chemicals deserve respect. Ventilate when soldering; use pickle with care and neutralize skin contact. Wear eye protection while burring or cutting. Secure hair and sleeves. Store mini stones in labeled containers; a single 2 mm gem lost on the bench can stall a project. Build a habit of tidying between stages: you will move faster and avoid accidental scratches and contamination.
Documenting and presenting your work
Miniature rings benefit from macro photography. Use diffused light, a stable tripod, and focus stacking if available. Show scale with a ruler or a finger shot, but keep images clean. Consider brand elements: a muted backdrop, a consistent angle, and close-ups of settings to showcase your fine precision. For packaging, small doesn’t mean fragile presentation—support rings with archival foam or a fitted slot to prevent motion in transit.
Pricing and selling small-stone rings
Customers often equate size with value, so educate them on labor and accuracy. Break pricing into material cost, bench time, finishing time, and overhead. Highlight ethical sourcing and the benefits of lab-grown stones for sparkle and price stability. Offer modular sets at a price break to encourage stacking purchases. A card explaining care and origin builds trust and differentiates your work from mass-produced items.
Care and maintenance for longevity
Advise wearers to remove rings during heavy lifting, gardening, or abrasive cleaning. Warm water, mild soap, and a soft brush clean most settings; ultrasonic cleaners can be risky for certain stones (emerald, opal, treated gems). Store rings separately to avoid metal-to-metal abrasion. Re-polish satin finishes periodically to refresh their glow. If a ring feels snaggy, have prongs checked; preventative maintenance preserves both stones and settings.
Advanced tips: jigs, magnification, and micro habits
Create a simple jig from hardwood or Delrin with drilled recesses for consistent bezel forming. Use painter’s tape on mandrels to mark layout guides without marring metal. Magnification reveals burr scratches that elude the naked eye; removing them before setting prevents future frustration. Keep a “test ring” with intentionally loose settings to practice tightening and burnishing before touching a client’s ring. Over time, small rituals—cleaning burs, swapping worn sandpaper, logging sizes—compound into exceptional craftsmanship.
Metal choices for skin and lifestyle
Some wearers prefer nickel-free alloys; consider using palladium white gold or argentium silver to improve corrosion resistance and reduce tarnish. Stainless steel can be hard on burs but offers strength for very thin shanks. Titanium and niobium are light and hypoallergenic, yet challenging for traditional soldering; cold connections or specialty solders may be required. State clearly when a ring is hypoallergenic and which alloys you use; transparency builds confidence.
Stone behavior at miniature scale
Not all gemstones excel as minis. Diamond, sapphire, and spinel retain excellent brilliance in tiny cuts. Garnet maintains color saturation but may appear darker in sub-2 mm sizes. Peridot can show windowing; prefer slightly deeper cuts. Opal minis are charming but delicate; a micro-bezel with protective wall height is essential. Consider moissanite for bright white sparkle where budget or philosophy favors lab-grown materials. Whatever you choose, verify hardness and cleavage planes so your setting technique respects the stone’s structural limits.
From prototype to repeatable series
Once a design succeeds, convert it into a small series by standardizing stone sizes and documenting seat depths, prong heights, and band dimensions. Keep a master ring as a physical reference. If you use cast components, ensure sprue placement preserves the integrity of thin walls around seats. Post-cast cleanup for mini elements involves delicate sanding under magnification; avoid over-thinning bezels. Serialize rings discreetly on the inner shank and maintain a simple spreadsheet logging materials and provenance.
Texture libraries and modular surface play
Collect small steel stamps, burrs, and gravers to develop a personal texture vocabulary: staccato dots, linen cross-hatch, or weathered stone effects. Apply textures before final forming to reduce risk of distorting settings. Brushed finishes parallel to the shank length visually elongate the finger; cross-brushing shortens. Micro stippling around a tiny gem can amplify contrast without adding bulk. Keep a swatch ring of textured metal strips to show clients options in person.
Why tiny often reads as luxurious
Humans read accuracy as luxury. In mini-stone rings, that accuracy arrives through deliberate file strokes, steady heat control, and disciplined finishing. The lightness on the finger feels considered, not cheap. High polish inside the bezel, a uniform micro-satin on the shank, and prongs that echo each other’s curve communicate mastery. When you get the details right, the whole ring hums with quiet confidence, and the wearer feels it every time the stone catches the light.
A practical workflow checklist
- Measure finger size and plan stack width.
- Sketch proportions; choose stone sizes with calipers.
- Cut and solder shank; true on mandrel.
- Fabricate setting (bezel or prongs) off the shank for control.
- Pre-finish individual parts; dry-fit the stone.
- Solder setting to shank; quench, pickle, rinse.
- Final pre-polish; clean seat meticulously.
- Set the stone; tighten; burnish.
- Global finish (satin, high polish, or patina).
- QC checks; photograph; package with care card.
Closing thoughts: small scale, big voice
DIY rings with mini stones offer a uniquely intimate canvas. They invite you to refine touch, steadiness, and design clarity. Work slowly; listen to the subtle feedback of metal against tool. Embrace the power of negative space. Let a 2 mm gem become a star that guides the eye along a considered horizon of texture and curve. In the dance of torch flame, file, and burnisher, you will find that the smallest gestures speak the loudest—about your patience, your taste, and your respect for materials. Keep a commitment to durability, mindful sustainability, honest provenance, and consistent calibration. When those values meet clear precision, balanced ergonomics, clean annealing, shimmering patina, and thoughtful craftsmanship, a mini-stone ring stops being merely tiny and becomes quietly monumental on the hand.
