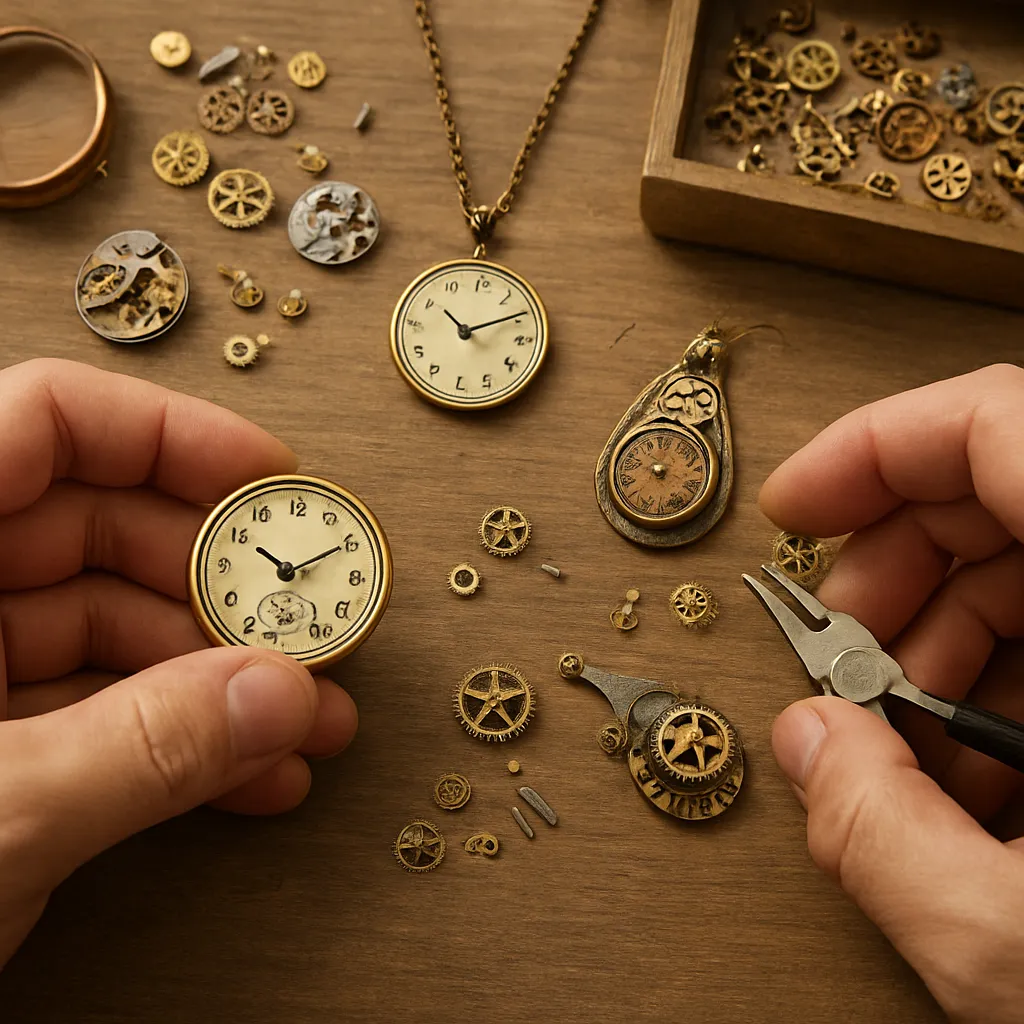
Timepieces that once ticked on a wrist are perfect raw material for expressive, wearable art. Watch cases, dials, gears, hands, bezels, and bracelets carry traces of use—tiny scratches, sun-faded numerals, softened edges—that give handmade jewelry warmth and individuality. Transforming these artifacts into pendants, earrings, bracelets, and rings merges horology with handcraft, turning the language of time into a new vocabulary of form. With a few careful techniques, a thoughtful eye, and respect for both history and the wearer’s comfort, anyone can convert dormant watches into striking, long-lived adornments.
Why Old Watches Make Exceptional Jewelry
Old watches distill technology and ornament into a compact theatre of parts. Bridge plates are sculptural; gears—technically “wheels”—invitingly toothed; blued screws provide flashes of color; and dials narrate style eras in typography and texture. These components were engineered for decades of service, so they are inherently robust. When remade as jewelry, they tolerate daily knocks better than many delicate beads or fragile stones.
There’s also cultural charm. A pocket watch from a long-closed factory, a 1970s diver with a sunburst dial, or a delicate lady’s cocktail model carries stories across generations. Repurposing them honors the skill of past makers and extends objects’ lives with new purpose. In the language of contemporary craft, it’s conscious design: you amplify sustainability while celebrating the sensuality of metal, enamel, and glass.
Critically, the parts are visually legible. Teeth repeat rhythmically; numerals set a pace; hands imply direction; jewels and screws punctuate surfaces. This makes watch-derived jewelry an ideal canvas for teaching or exploring visual principles such as composition, contrast, and hierarchy. Even simple layouts can look sophisticated because the details are inherently refined.
Finding and Choosing Donor Watches
Great projects begin with smart sourcing. Watches come to hand through flea markets, estate sales, repair shop scrap drawers, online listings, and friends’ forgotten drawers. You do not need pristine or collectible examples; indeed, watches that no longer run, have cracked crystals, or water damage are excellent candidates. Avoid gutting serviceable, historically significant pieces—resale or restoration may be a better fate for those.
- Look for mechanical (wind-up) watches: their gear trains and bridges are more interesting than most quartz modules.
- Smaller “ladies” models often yield lightweight, dramatic earrings and ring tops; larger pocket watches produce pendant-scale canvases.
- Gold-filled cases resist tarnish, brass and nickel cases accept patina, and stainless is resilient but harder to cut or drill.
- Bracelets and watchbands are instant materials: folded links become texture elements; solid links produce neat chain and connector parts.
- Seek watches without radium lume (common pre-1960). If in doubt, treat unknown lume carefully, or choose dials without luminous paint.
Buy in mixed-condition lots to build a parts library: stems and crowns, bezels and chapter rings, movement plates, dials, hands, and crystals. Keeping organized trays with labeled compartments pays dividends when you’re matching forms and finishes later.
Tools, Safety, and a Maker’s Bench
Jewelry from watches doesn’t require a fully equipped goldsmith’s studio, but a stable surface, good lighting, and precise hand tools are essential. A watchmaker’s bench mat prevents small parts from bouncing away, and a headband magnifier helps with sub-millimeter assemblies.
- Basic tools: watch case opener, small screwdrivers, fine tweezers, flush cutters, jeweler’s saw, needle files, broaches, round-nose/chain-nose/flat pliers.
- Measuring and layout: calipers, scribe, ruler, center punch, dividers.
- Finishing: micromesh pads, polishing compounds, soft wheels, brass brush.
- Joining: micro screws and nuts, riveting tools, micro drill and bits (0.6–1.5 mm), low-temperature solder setup or a small torch, high-quality epoxy or UV resin.
- Safety: eye protection, dust mask when sanding, ventilation when using adhesives or patina solutions, finger cots for handling small parts.
Safety notes: Old lume can be hazardous. If you suspect radium (grainy, browned lume typical of mid-century military dials), do not scrape or sand. Seal the dial under crystal or resin, or set it aside. Ultrasonic cleaners can lift paint and lume; test small areas first.
Magnets can help capture screws but can also magnetize steel tools and parts; store magnets away from your bench and demagnetize tools periodically. Keep a parts tray with a lipped edge—your future self will thank you.
Disassembly without Damage
Work over a lint-free mat. Open casebacks with the correct tool; pry-type cases need a slim, strong blade; screwbacks require a case wrench. Remove stems and crowns by loosening the detent screw (not the setting lever screw on some calibers). Gently lift movements from cases with finger cots or movement holders, never metal tweezers on sensitive edges.
Hands come off with purpose-made levers or improvised two-pronged tools; protect the dial with thin plastic. Dials lift after loosening tiny foot screws from the side of the movement. Organize removed parts by system: dial furniture, motion works, gear train, escapement, bridges, screws. Photograph each stage for reference. Many bridges and plates are visually gorgeous and become central jewelry elements. Remember that glass or acrylic crystals, once freed, can serve as domes over collages or as cabochons.
Do not oil anything unless you intend to maintain a running movement; oils attract dust in jewelry. If parts are gum-laden, soak in naphtha or isopropyl alcohol (away from flame), then dry thoroughly. Brass benefits from a mild citric bath, steel prefers gentle scrubbing and immediate drying to avoid rust. Seal cleaned steel to prevent future oxidation.
Design Principles for Wearable Success
A unique pendant is delightful; a unique pendant that wears comfortably for years is better. Before gluing or drilling, imagine the piece on the body. Weight distribution, snag points, and the direction of movement matter as much as looks. Consider ergonomics at every decision: where does the piece touch skin, hair, or fabric; does it rotate undesirably; are edges smooth; will it fit under collars or near headphones?
Use asymmetry as a tool, but secure visual balance by repeating colors or textures: a blued screw on one side can echo a navy strap or enamel accent elsewhere. Count “beats” in your design the way a watch counts seconds. Vary scale while keeping a hierarchy—large element, medium support, small accents—to guide the eye.
Color emerges from metals (brass, copper, steel), heat bluing, chemical oxides, enamels, and dials’ typography. Decide whether to preserve original patina—the micro-history of wear—or to polish to a mirror. Often, a blend works: polish bezel edges while leaving brushed plates intact. Texture transitions should be intentional; random scratches read as neglect, not artistry.
Finally, durability trumps novelty. If a thin, fragile hand looks exquisite but snags sweaters, rethink it or mount it under a protective crystal. Make test assemblies with temporary adhesive dots before final joins.
Core Techniques for Joining and Finishing
Cold Connections
Cold connections—no heat required—are reliable and reversible. Micro screws and nuts (M1–M1.4) fit through gear spokes or plate holes; rivets can be made from brass wire peened into mushroom heads. Use washers to protect soft materials. Back surfaces that touch skin should be flush; file rivet tails smooth.
Rivet through natural holes whenever possible (dial feet holes, jewel settings) to avoid weakening parts. If you must drill, back the piece with hardwood and use sharp bits at slow speed. Deburr every hole; burrs catch fabric and cut skin.
Wire Wrapping and Framing
Wire frames turn irregular parts into wearable units. 18–22 gauge wire can nest around movement plates or crystals. Keep wraps minimal; let horological forms lead. Hard-wire your bail (the loop for chains) in line with the pendant’s center of gravity so it hangs properly.
Soldering and Brazing
Solder creates permanent metal bonds but risks damaging nearby finishes. Use heat sinks (damp paper towel, binding wire) and choose low-flow solders for fine control. Soft solder (tin-lead or lead-free) is easier but weaker; silver solder (hard solder) is stronger and can be filed seamlessly. Clean joins to bright metal, flux carefully, and pickle after heating. Mask delicate dials; remove enamel and acrylic components before heat.
Adhesives and Resin
High-quality two-part epoxy excels for dissimilar materials and invisible mounts; roughen contact surfaces lightly for mechanical keying. UV-curing resin doubles as both adhesive and a protective dome over collages. Level pieces during curing to avoid slump. Resist smearing resin across crisp edges; a controlled meniscus looks intentional, a flood looks messy.
Surface Textures and Color
Brushed finishes hide scratches and unify mixed metals. Light heat can blue small steel screws to a royal hue; practice on sacrificial parts. Chemical patinas (liver of sulfur, ammonia fuming) add depth to copper alloys. Always seal desired colors with microcrystalline wax or lacquer to slow oxidation.
Step-by-Step Projects
1) Minimalist Gear Earrings
Select two matching gears of similar diameter. Clean and burnish lightly. Drill a 1 mm hole near a spoke junction; deburr. Cold-rivet or screw a small jump ring through each hole. Attach ear wires. For symmetry, align the spoke patterns to hang consistently. Keep weight light to avoid stretching piercings. Seal with wax if skin reacts to brass; or plate with nickel-free gold to improve skin compatibility.
2) Movement-Under-Glass Pendant
Choose a skeletonized movement plate and a domed crystal that fits over it. Create a thin bezel from strip brass, solder the ends to form a ring, and test-fit crystal height. Seat the movement inside the ring using tiny spacers; affix with a small amount of epoxy. Drop in accent screws or jewels as color points. Place the crystal and secure with a second, slightly larger ring crimped over the first, or glue with UV resin, curing from all sides. Add a sturdy bail aligned with the pendant’s center. The crystal adds physical protection and an elegant lensing effect.
3) Crown-and-Hand Statement Ring
File the base of a watch crown flat and solder to a prefabricated ring blank, or rivet it to a small plate atop the shank. Curve a long minute hand into a gentle arc and mount it as a secondary detail. Ensure that the assembly presents a low profile so it doesn’t snag or jab adjacent fingers. Round interior edges for comfort and finish the shank to a satin sheen. Apply a clear coat to preserve heat-blued accents.
4) Bracelet from Link Fragments
Combine segments from several vintage watchbands into a patchwork bracelet. Use small soldered jump rings or rivets to join links, alternating textures—polished, brushed, engine-turned. Integrate tiny gears as charms between sections. Fit a deployant clasp or a robust lobster clasp; bracelets bear more torque than pendants, so test your joins by twisting and pulling before wear.
5) Brooch with Dial Typography
Choose a dial with striking numerals or guilloché. Back it with a thin brass plate for rigidity, aligning holes for dial feet or creating new ones. Mount a quality pin back on the plate with solder; keep the hinge and catch level for straight wear. Consider orienting the dial playfully—sideways or inverted—to invite conversation. A domed acrylic crystal can be set over the dial for protection without adding weight.
Elevating Aesthetics: From Parts to Poetry
Great pieces fuse intention with restraint. Ask what story you want the piece to tell: a nautical pendant might use a coin-edge bezel and a compass-like hand arrangement; a romantic pair of earrings may echo art deco symmetry with mirrored hands and baguette hour markers. When in doubt, remove one element. Negative space is your friend—it lets detail breathe and highlights workmanship.
Mind transitions between planes; thick parts next to whisper-thin hands need visual mediation—use a spacer ring, a thin frame, or a contrasting washer to bridge thicknesses. Repeat a motif: if you use one blued screw, repeat that blue in a second location. A viewer’s eye seeks rhythm, and watches, after all, are rhythm embodied. Every decision should serve clarity, comfort, and longevity—your triad of craftsmanship, durability, and elegance.
Preservation vs Transformation
Some watches deserve respectful minimal intervention: sealing a beautiful dial under crystal and adding a chain can be enough. Others invite creative overhaul. If a part bears watchmaker’s service marks or rare engravings, consider placing them “face up” as the protagonist. Keep a small archive of noteworthy components that might be too rare to modify until you have the right project.
When you alter faces or markings, document the origin. A simple card noting the original maker, decade, and any visible serials becomes part of the work’s provenance, adding emotional value for clients and future caretakers.
Comfort, Wear Testing, and Quality Control
Wear-test prototypes on clothing similar to your users’ habits: silk blouses, wool sweaters, denim jackets. Look for snag points, weight imbalances, and spinning pendants. File edges until they pass a “stocking test”—lightly rub a stocking over the piece; if it snags, keep refining. Consider allergy risks: many vintage parts contain nickel. Offer hypoallergenic findings or plate contact surfaces with palladium or gold. Use robust bails and split rings on pendants so chains can be switched easily.
For adhesive assemblies, cure at recommended times and temperatures; rush-cured epoxy is weak. For soldered joins, inspect fillets and tug-test with modest force. Keep a log of solders used in each piece; future repairs will be easier if you know which temperatures the item can tolerate.
Cleaning, Sealing, and Long-Term Care
Seal porous patinas with microcrystalline wax: apply sparingly, let haze, buff soft. Lacquers can prevent tarnish on brass but may chip; use thin coats and cure fully. Advise owners to avoid prolonged moisture, perfumes, and lotions near the piece. Provide a small polishing cloth and a storage pouch with each sale.
If a piece includes moving elements—free-spinning gear, hinged locket, deployed clasp—recommend an annual check. Offer refresh services: tighten screws, replace worn jump rings, renew finishes. Thoughtful aftercare creates trust and repeat clients.
Narrative and Presentation
Storytelling completes the craft. Package jewelry with a short note about its origins—“Dial from a mid-century dress watch found at a Paris flea market” or “Bridge plate from a 1930s pocket watch scrap.” Provide macro photos showing intriguing textures. On social platforms, share work-in-progress shots to reveal process and invite dialogue; people love seeing transformations, especially the “before and after.”
When naming pieces, anchor them in time or place: “Platform 4 Pendant,” “Midnight Numeral Earrings,” “Workshop No. 12 Brooch.” Over time, a cohesive vocabulary becomes your signature.
Troubleshooting Common Issues
- Adhesive fogging under crystals: Use fresh UV resin, cure in thin layers, and wipe with isopropyl before doming to remove oils.
- Verdigris (green corrosion) on brass: Soak in a mild vinegar solution briefly, rinse thoroughly, dry, then seal; prevent recurrence by avoiding skin lotions under the piece.
- Drill bit wandering on hard steel: Use a sharp center punch and a small pilot hole; employ cutting fluid and slow speed.
- Uneven resin dome: Level your curing surface; rotate the piece halfway through curing to average gravity effects; use a bubble popper tool or gentle heat.
- Pendants spinning on chains: Widen the bail and flatten its profile; or add a secondary weight near the bottom, such as a small charm or thicker washer.
- Nickel sensitivities: Plate contact surfaces with nickel-free gold or palladium; swap ear wires for titanium or niobium.
Sourcing Ethically and Legally
Avoid dismantling watches of high historical or market value; do quick checks against common reference databases for iconic models. Seek scrap from watchmakers who accumulate unsalvageable movements. When buying online, request clear photos, approximate decades, and materials. Maintain receipts and serial records—transparency builds buyer confidence and supports ethical upcycling.
Be mindful of trademarks. Using a dial with a still-registered logo in a way that implies endorsement can cause issues. As art, transformation typically sits comfortably, but when selling, be clear that your work is independent and handmade from reclaimed parts.
Scaling Up: Collections and Cohesion
Turning a few one-offs into a collection requires limits. Choose a palette—brass and navy, or steel and matte black—and stick to it. Set rules for forms: circles and rectangles; or triangles and arcs. Collections sell better when individual pieces feel related yet distinct. Batch processes: cut all frames one day, drill and deburr the next, then assemble. Keep a parts ledger and reorder staples like jump rings and screws early.
Photograph on consistent backgrounds with soft light. Show scale with a hand or ruler. Include detail shots that reward curiosity—micro text on dials, jewel chatons, or beveled bridge edges. A clean visual identity supports premium pricing and recognition.
Pricing and Value
Price by materials + time + overhead + margin. Track bench hours honestly, including design and finishing. Uncommon skills—micro-riveting, crystal setting, precision soldering—justify higher rates. Communicate value through documentation: highlight original maker, decade, special features, and what you did to stabilize and finish the piece. The combination of story, technique, and wearability constitutes true craftsmanship and should be priced accordingly.
Advanced Ideas and Experiments
- Kinetic pendants: Mount a gear on jeweled bearings so it spins with a breath.
- Resin intarsia: Embed micro text strips, jewels, and hands in layered resin for depth.
- Enamel accents: Torch-fire small copper plates and overlay with transparent enamels that echo dial colors.
- Electroforming: Grow copper around crystals or hands to create organic bezels that clasp vintage parts.
- Hybrid materials: Pair watch steel with wood, leather, or ceramic to soften hard edges and invite touch.
Every experiment should serve the central aim: jewelry that looks intentional, feels comfortable, and lasts. Resist the temptation to add clutter; clarity and restraint often read as confidence.
Glossary for Quick Reference
- Bezel: The ring that holds a crystal; in jewelry, also a metal rim that secures a stone or dome.
- Bridge/Plate: Structural parts of a movement that support wheels and pivots.
- Crown: The knob used to wind and set a watch; sculptural and tactile as a jewelry accent.
- Dial: The face with numerals/markers; often the focal point of pendants and brooches.
- Hands: Indicators for hours, minutes, seconds; elegant line elements in compositions.
- Jewels: Synthetic rubies used as bearings; tiny flashes of color amid metal.
- Lume: Luminous paint; vintage varieties may be hazardous—seal, don’t sand.
- Movement: The heart of a watch—the mechanical mechanism. As jewelry it offers rich textures and layers; the term movement also evokes energy.
The Maker’s Mindset
Adopt an iterative rhythm. Sketch, mock up, test, refine. Keep a “possibility tray” where unrelated parts mingle until a pairing sparks. Train your eye by studying iconic dial layouts and case shapes; learn why certain proportions soothe while others excite. Let restraint, not fear, guide your edits. A simple dial under a crystal on a well-proportioned bail can be more powerful than a bristling mass of gears.
Each piece eventually leaves your bench and enters someone’s life. It brushes cuffs, catches lamplight at dinners, rests quietly in trays. Your responsibility is to ensure it looks good at arm’s length and under a loupe; that it feels good in motion; and that it endures. If you uphold composition, balance, and durability while welcoming graceful wear and evolving patina, your work will age with dignity.
Closing Encouragement
There is a grounded joy in turning a non-running watch into jewelry that lives again. You collaborate with the anonymous hands that cut gears, printed numerals, and polished cases decades ago. Your role is both interpreter and caretaker: retain enough of the object’s past to give resonance, and add enough of your vision to make it sing today. Keep notes on origins to preserve provenance, refine every edge in service of ergonomics, and favor methods that maintain sustainability. Over time you’ll develop a vocabulary—favorite crowns, loved fonts, particular screws—that becomes unmistakably yours. The craft rewards patience, curiosity, and respect; in exchange, it offers objects that keep time differently: not by counting seconds, but by holding memory.
