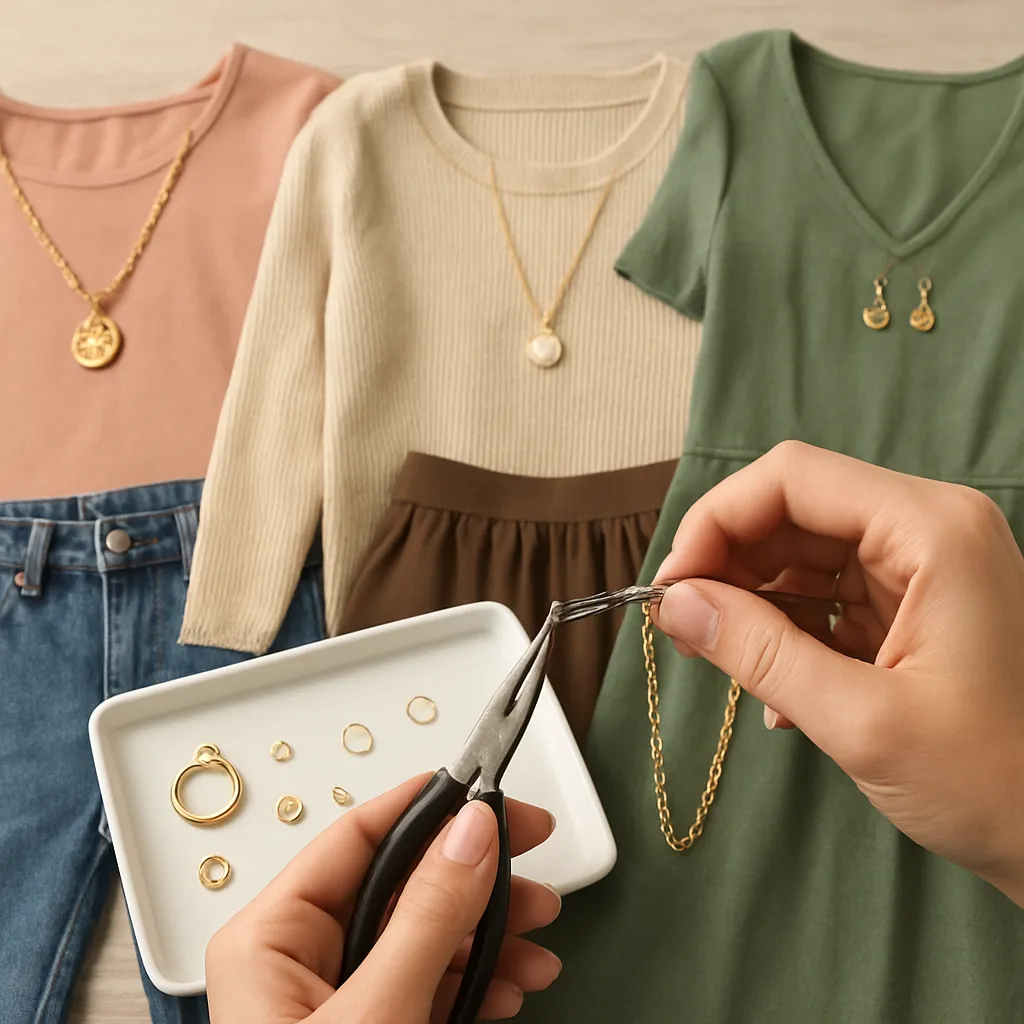
Matching handmade jewelry to specific outfits is both a creative puzzle and a practical craft. It asks you to translate fabrics, cuts, and patterns into metal, bead, clay, and thread, then orchestrate scale, color, and movement so accessories look inevitable—never forced. This guide blends design thinking with workshop know-how to help you plan, sketch, and build pieces that feel custom-tailored to what you actually wear, from office blouses and denim jackets to gowns and cultural dress. Along the way you’ll learn to read garments like design briefs, assemble materials and tools with purpose, and finish pieces that elevate daily looks with studio-grade detail.
Read the Outfit Before You Design
Before you choose beads or reach for your pliers, learn to “listen” to the clothes. Every garment speaks through line, weight, and rhythm. Start by observing three fundamentals: silhouette, proportion, and texture. Then confirm how the garment’s color behaves in different lights.
- Silhouette: Is the garment structured (tailored blazer), fluid (bias-cut slip), boxy (oversized tee), or sculptural (pleated dress)? Angular cuts pair with crisp geometrics and clean chains; soft drape suggests organic forms, tassels, and hammered surfaces.
- Proportion: Consider scale relationships. Petite tops with tiny collars often like fine chains and micro charms; broad lapels welcome chunkier pendants. Oversized knits can carry long lines and negative-space pendants that won’t compete with volume.
- Texture: Fabrics whisper their preferences. Smooth satin and silk reward polished metal and glass. Nubby tweed, boucle, or chunky rib knit call for matte ceramic, wood, leather, or woven cords to echo their tactility without snagging.
- Color and light: Natural vs. artificial light may shift hues, especially blues, greens, and metallic coatings. Hold sample beads or metal finishes against the garment in daylight and lamplight to validate the match.
Notice focal points already present—bold prints, a dramatic sleeve, or an embellished neckline. Jewelry should either reinforce the focal point or provide a counterpoint. If the outfit already shouts, design a piece that listens: slender ear threads, a delicate bracelet, or a ring that adds a dot of brightness. If the clothing is minimal, the jewelry can become the star through architectural form, radiant stones, or movement.
Color Strategy and Palette Building
Successful coordination rarely depends on perfect hue matches. Aim instead for intentional relationships. Develop quick instincts with time-tested harmonies:
- Analogous: Neighboring hues on the wheel (teal, blue, violet). Calming and easy to wear; great for offices and daytime events.
- Complementary: Opposites (blue/orange, red/green). Add energy, ideal for casual looks or standout evening wear. Tone complements down to rust vs. navy or olive vs. burgundy for subtle sophistication.
- Split-complementary: One base hue plus two neighbors of its complement; flexible when prints complicate things.
- Monochromatic: Variations of one hue in different values and saturations; luxurious with mixed finishes (matte, satin, mirror-polish).
Neutrals and metals act as the glue. Black, white, gray, and camel ground vivid stones. Warm wardrobes love gold, bronze, and brass; cool wardrobes tend to favor silver, rhodium, and steel. Rose gold bridges many skin tones and pairs gently with blushes, creams, and olives.
Practical methods for building your palette
- Swatch kit: Keep fabric scraps or printed swatches of your key outfits. Test beads, cords, metal samples, and patinas against them. Photograph the best pairings in daylight for reference.
- Finish map: Lay out finishes—high polish, satin, sandblasted, hammered, brushed—beside the fabrics. Mix two finishes to avoid flatness; avoid more than three on small pieces to keep cohesion.
- Value control: Jewelry with clear light/dark contrast reads from a distance. A dark stone set in a bright bezel, or pale beads separated by dark spacers, often pops nicely against mid-tone garments.
When in doubt, create a portable mini board that contains your core wardrobe hues and a lean selection of metals and accents. This prevents overbuying and ensures repeatable results piece after piece as you develop a personal palette.
Materials and Techniques Matched to Outfit Types
Materials shape mood. Choose them as deliberately as you select silhouettes in clothing. For the artisan, variety is a toolbox, not a hazard.
- Casual denim and tees: Matte wood beads, cotton cords, seed bead fringes, and oxidized brass or patinated copper. Try macramé knotting, leather braids, or bead weaving for friendly, touchable surfaces.
- Office tailoring: Minimal chains in sterling or gold-fill, petite pearls, geometric studs, and thin wrist cuffs. Wire-wrapping with micro-facets, tube-set stones, or soldered bar pendants complement clean lines.
- Evening wear: High sparkle and refined profiles, but let negative space keep elegance. Faceted gemstone drops, channel-set crystals, prong-set CZ accents, and delicately layered lariats pair well with satins and velvets.
- Bohemian prints: Layered necklaces, mixed metals, tassels, and stacked bangles. Combine rattan, horn substitutes, ceramics, and muted metals. Bead embroidery or soutache adds an artisanal flourish to patterned maxis and kimonos.
- Athleisure: Lightweight and snag-safe. Silicone or rubber cord, anodized aluminum jump rings, minimal resin studs, and secure clasps. Avoid long dangles that can catch during movement.
- Summer linens: Shell, mother-of-pearl, cellulose acetate, bamboo, and light brass with soft patinas. Polymer clay in marbled, speckled, or terrazzo effects feels breezy and modern.
- Winter wool and tweed: Statement brooches, long pendants, chunky chains, and leather wraps. Think hammered surfaces and etched metal to echo wool’s visual weight without snagging fibers.
Technique sampler
- Wire-wrapping: Solid for pendants and briolette drops. Choose gauges that balance weight and durability; work-harden by gently tumbling or hammering to retain form.
- Bead stringing and weaving: Steel beading wire for durability with stone/glass; nylon for lightweight or loom work. Consider bead size gradation to echo garment tapering.
- Metal clay and soldering: Sculpt custom bezels or texture plates that mirror fabric motifs, then fire and finish to match polish levels in shoes or belt buckles.
- Polymer clay: Infinite colors and patterns to mirror prints; sand and buff to a silky finish to avoid catching on fine fabrics.
- Resin: Inlay thread snippets, tiny fabric offcuts, or pressed botanicals taken from the outfit’s motif for a precise match. Seal porous inclusions to avoid bubbles.
From Closet to Sketch to Bench
Turn a favorite outfit into a clear jewelry brief. This is where a designer’s discipline meets studio practicality.
- Inventory the outfit: Note neckline, sleeves, lapels, pattern scale, and fabric hand. Photograph the garment on a hanger and on-body to see drape and shadows.
- Define the focal point: Decide if jewelry should lead or support. For prints, locate color accents to amplify; for solids, shape and finish become your language.
- Set constraints: Maximum weight for earrings, snag-free edges for knits, and clasp types you trust.
- Sketch: Draw 3–5 thumbnail variations with different scales. Include necklace lengths (choker 36–40 cm, princess 43–48 cm, matinee 50–60 cm, opera 70–90 cm) that respect necklines.
- Mockup: Use paper cutouts or scrap wire to approximate size on a dress form or on yourself. Adjust until the piece breathes with the garment instead of fighting it.
- Material pull: Lay gemstones, beads, chains, and findings around the sketch; edit until the bench top looks like one clear idea, not a bead shop explosion.
Neckline navigation
- Crew: Choose mid-length pendants that create a visual V, or collar-length beadwork that echoes the round shape without touching the fabric.
- V-neck: Mirror the angle with a pendant or Y-necklace. Avoid wide chokers that flatten the V’s intent.
- Scoop: Shorter pendants and clustered charms center well; asymmetrical compositions add energy to a deep scoop.
- Turtleneck: Long pendants, lariats, and ropes. Ensure surfaces are smooth against the knit.
- Collared shirts: Bar necklaces under the collar, pearls peeking at the collarbone, or slim chains dropping into the placket.
- Off-shoulder/strapless: Chokers, collars, or ear-forward statements; keep necklines free to spotlight bone structure.
Bracelet and ring fit
- Bracelets: Wrist circumference plus 1–2 cm for bead/stringing slack; increase for larger beads. Toggle clasps need enough drape to pass the bar easily.
- Rings: Consider swell from heat/activity; leave comfortable ease if stacking. For resin or polymer clay, seal and sand edges so edges won’t abrade delicate fabrics.
Closures, Findings, and All-Day Comfort
Invisible engineering makes jewelry wearable. Choose findings that secure pieces and respect skin and garment safety.
- Clasps: Lobster and spring rings are discreet; toggles add design interest; box clasps suit elegant strands; magnetic clasps are user-friendly but avoid them near pacemakers and store with a keeper to prevent attaching to metal tools.
- Earrings: Balance weight by distributing mass upward with cones or caps. Use leverbacks for security in active settings. Replace heavy hooks with lightweight titanium or niobium for sensitive ears.
- Backings and posts: Stabilize larger studs with disc backs. Roughen post surfaces slightly before adhesive-setting decorative fronts to improve bond.
- Chains and cords: Check for burrs to prevent snagging. Seal cord ends properly with end caps or wire wraps that fully cover cut fibers.
For clients with sensitive skin, prioritize hypoallergenic metals—titanium, niobium, platinum, or high-karat gold—and avoid nickel-bearing alloys. Seal brass and copper surfaces on skin-contact points with jeweler’s lacquer or renaissance wax if needed, and always disclose finishes to the wearer.
Finishing Details and Quality Standards
Finish separates craft from keepsake. Aim for studio-level surfaces and joints that survive daily life.
- Edge integrity: File and burnish all cut wire. Sand polymer clay through progressive grits and buff to a shy sheen or gloss, depending on the garment’s vibe.
- Join strength: Soldered links where stress concentrates; double-crimp with proper sleeves for stringing wire; add wire guardians at clasp ends for longevity.
- Surface finish: Match garment polish. High-gloss pendants mirror satin; brushed or hammered metal flatters matte knits. Patinas need sealing to protect clothing.
- Movement test: Earrings should sway, not spin wildly; necklaces should drape without flipping components. Adjust balance by adding hidden weights or repositioning loops.
- Snag audit: Run pieces over a nylon stocking or silk scrap; if it snags, you’re not done.
Record your process in a bench log: metal types, wire gauges, chain styles, bead sizes, and finishing media. This supports consistent craftsmanship and easy refinements when you revisit a design to match additional outfits.
Project Recipes for Real Outfits
Minimal black dress: Convertible pearl-on-chain lariat
- Materials: Fine cable chain in gold-fill, tiny freshwater pearls, two slim bars, lobster clasp, and an optional extender.
- Design: Station three pearl trios along the chain; terminate with a polished bar; add a small ring 20–25 cm from the clasp to convert to a lariat.
- Why it works: The line is sleek; pearls add low-volume light. Converts for different necklines and layers under blazers.
Floral summer dress: Resin botanical drop earrings
- Materials: UV resin, bezel cups, pressed petals that echo a print accent, gold or silver ear posts.
- Technique: Seal petals with a thin clear coat; set in bezel; cure in layers to avoid bubbles; sand the back and finish with a final domed coat.
- Why it works: Transfers a print’s smallest note into jewelry without competing with the dress’s larger floral scale.
Business-casual blouse: Layered gemstone station necklaces
- Materials: Two chains of different link styles, tiny faceted stations in desaturated hues, matching clasps.
- Design: Keep one chain shorter; offset the stations so they don’t stack perfectly. Add a removable pendant for Fridays.
- Why it works: Polished but unfussy, sits well under collars, and toggles between subtle and assertive with the pendant.
Chunky sweater: Long wood-and-brass pendant
- Materials: Turned wood bead, hammered brass disk, leather cord, large bail, friction-fit cord ends.
- Technique: Sand and oil-seal the wood; hammer texture the brass; assemble with a large bail to prevent flipping on thick knits.
- Why it works: Big gesture, soft edges, and no snag points—perfect for bulky textures.
Cultural silk sari or kimono: Silk-wrapped bangles
- Materials: Silk ribbon offcuts, slim bangles, seed beads, fine beading thread.
- Technique: Spiral-wrap bangles with silk that echoes secondary garment colors; secure with invisible stitches and bead accents at intervals.
- Why it works: Honors the textile focus and adds gentle shimmer without overwhelming intricate patterns.
Denim jacket: Enamel pins and mixed-metal brooch
- Materials: Pre-made or self-fired enamel shapes, brooch backs, safety clutches.
- Design: Cluster small pins at pocket corners; add a single bold brooch on the lapel. Ensure pin stems are sharp and backs lock firmly.
- Why it works: Denim welcomes playful art and enamel sheen; pin clusters create a curated story.
Versatility by Design
Give pieces multiple lives. Create extender chains to shift a necklace from crew to V-neck. Make removable pendants, interchangeable ear drops, and stackable bangles that split into two looks. Designing for versatility reduces clutter and encourages repeat wear, which is kinder to your budget and planet.
Budgeting, Upcycling, and Sustainability
Great-looking matches don’t require luxury budgets. Source selectively and plan purchases around your most-worn outfits. Thrift old strands for clasps and beads; rescue vintage chains; refresh tired plating by combining warm patinas with new matte finishes. When buying new, prioritize quality: sterling or gold-fill over mystery metals, and glass or natural stones over plastic for durability and feel.
Upcycling respects memory and wardrobe coherence: a grandmother’s broken strand can become three modern bracelets matched to your current neutrals. Document provenance in a small card for each piece; meaning is a design element, too.
Make choices that support sustainability—recycled metals, ethical stones, local suppliers, and durable construction that outlives fast-fashion cycles. Fewer, better pieces built to coordinate widely reduce waste and amplify your signature style.
Storage, Care, and Wardrobe Integration
Matchmaking doesn’t stop at the bench. How you store and plan outfits affects whether great pieces get worn.
- Outfit pairing tags: Hang a small tag on a hanger listing jewelry options that fit that garment’s neckline and mood.
- Anti-tarnish zones: Store silver with strips and silica gel; keep pearls and silk away from high humidity and perfumes.
- Tangle control: Use carded chain boards or straws for travel. For layered looks, pre-clip sets on a single clasp using multi-strand connectors.
- Cleaning: Mild soap and water for metal and glass; never soak porous stones or silk thread. Re-wax bare copper/brass surfaces periodically.
Ethics, Skin Tones, and Personal Expression
Beyond outfits, skin undertones shape how metals and stones read. Warm undertones love golds, bronze, coral, olive, and earthy stones; cool undertones glow in silver, rhodium, amethyst, and sapphire tones; neutral undertones can flex either direction. Mixed metals can bridge wardrobes and avoid hard lines when you’re transitioning seasons.
Respect cultural motifs by learning their contexts, crediting sources, and collaborating when appropriate. Adapt closures and weights for comfort and accessibility—lighter earrings, soft bracelets for sensory needs, and one-handed clasps where helpful. Jewelry that fits the person is as essential as jewelry that fits the outfit.
Troubleshooting Common Issues
- Stringing wire kinks: Use higher strand-count wire; pre-curve it gently to match necklace arc; hide crimps with covers.
- Bead holes too small: Ream carefully; if stones are brittle, switch to finer wire or use bead caps to adapt.
- Heavy earrings: Shorten lever arms, switch to hollow components, or counterweight behind the lobe with larger backs.
- Resin yellowing/clouding: Choose UV-stable formulas, avoid high heat storage, and dome in dust-free enclosures.
- Polymer clay brittleness: Fully cure per manufacturer specs; post-bake anneal; avoid over-thinning at stress points; reinforce with embedded wire armatures.
- Plating wear: Limit friction points; prefer solid or filled metals at high-contact areas like clasp ends and ring shanks.
- Snags on knits: Round every corner; test with silk or nylon before declaring finished.
Inspiration and Continuous Practice
Build a rhythm that feeds both craft and styling instincts. Keep a pocket sketchbook; clip color stories from magazines; photograph outfits in real light and annotate what jewelry worked. Create seasonal mini-collections tied to your wardrobe plan rather than to abstract trends. Assemble a “library” of sample components—links, stones, clay swatches, surface finishes—labeled with source and cost for fast, confident design choices.
Schedule periodic wardrobe reviews. Retire pieces that no longer coordinate; rework them into new favorites. The more you iterate—observing garments, sketching, testing, finishing—the more naturally you’ll translate cloth into metal and bead, until pairing the two becomes second nature.
Bringing It All Together
Matching jewelry to specific outfits is less about imitation than conversation. Fabrics supply cues; you answer with materials and form. Read silhouette and scale, direct attention with value and finish, and emphasize comfort and durability through smart findings and clean engineering. When pieces slip onto an outfit and seem obvious—like they have always belonged—you’ve done more than accessorize. You’ve composed a wearable duet where clothing leads and the jewelry sings in harmony, built with intention and the patient joy of handcraft.
As you practice, keep your eye on a short list of essentials—color harmony, proportion, material feel, finish quality, and wearer comfort. With these as guides, every outfit in your closet becomes a prompt, every workbench session a chance to refine your voice, and every finished piece a confident, personal statement that meets the day beautifully.
