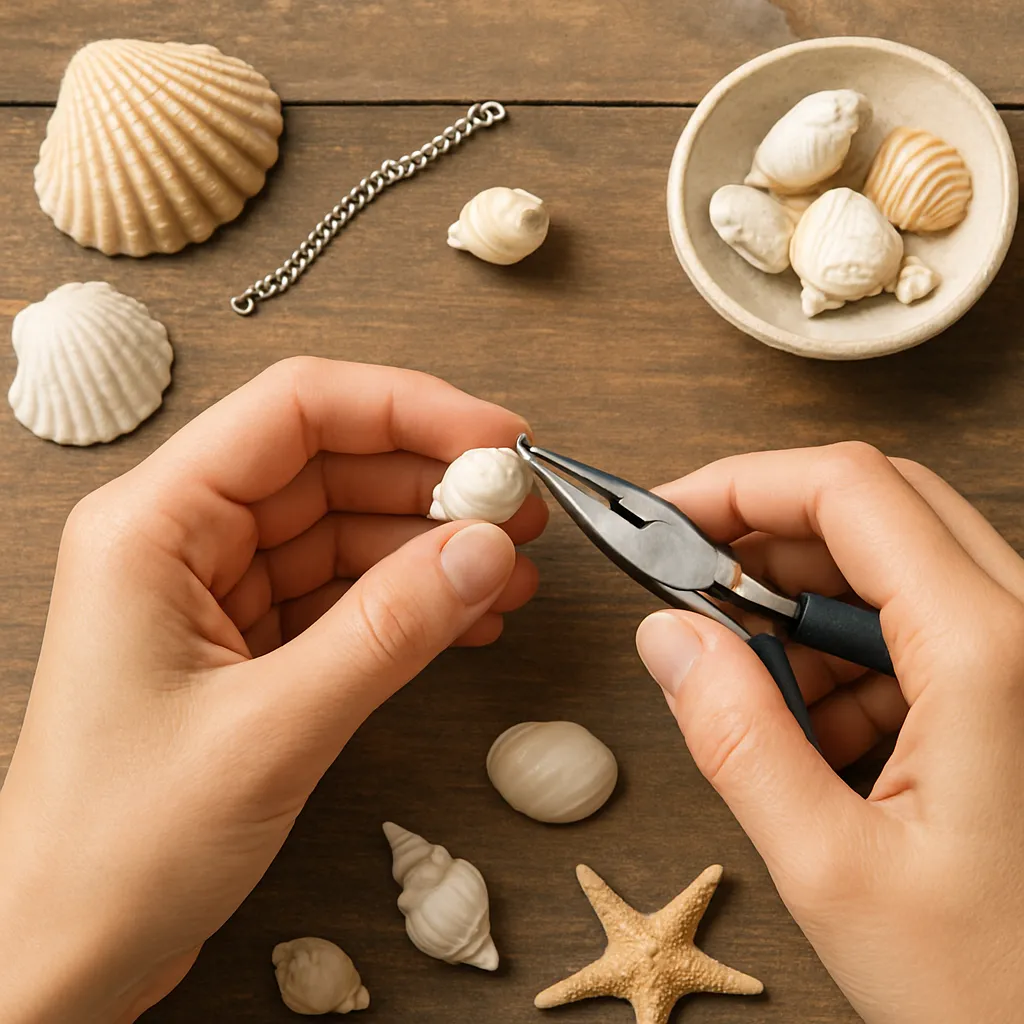
Walk along any shoreline, and you will find small sculptures of time at your feet: ribbed arcs of scallops, spiraled whorls of whelks, nacreous slivers of mother-of-pearl. Turning these fragments into wearable keepsakes is both a meditative hobby and a gateway to expressive making. This guide explores how to transform coastal finds into refined adornments—covering ethics, tools, techniques, creative principles, and practical tips—so your pieces carry the serenity of the sea and the confidence of thoughtful craft.
Why Seashell Jewelry Captivates: History, Culture, and Materials
Humanity has treasured shells for millennia. In many cultures they served as currency, sacred emblems, and markers of status or rite of passage. Their natural palettes—from milky cream and blush to deep charcoal and iridescent blue—fit effortlessly with almost any wardrobe. Texturally, shells can be smooth like porcelain, chalky like limestone, or rippled like wind-drawn dunes, offering a tactile presence that metal or glass alone rarely achieves.
As materials, shells are primarily calcium carbonate in the forms of aragonite or calcite, often layered with proteins that confer toughness. This unique composition means they take a gentle polish and can be shaped with simple tools. It also means they may be brittle at thin points and sensitive to strong acids or prolonged moisture. Understanding these traits lets you craft pieces that honor the shell’s organic character while standing up to everyday wear.
There is also a narrative quality to wearing ocean-forged matter: each piece contains a micro-history of currents, seasons, and ecosystems. Whether you collect shells personally or source them responsibly, the resulting adornment is a conversation between nature’s geometry and the maker’s hand—a synergy at the heart of fine handicraft.
Responsible Sourcing and Preparation of Shells
Ethics, Laws, and Respect for Ecosystems
Before picking up a single shell, check local regulations. Some beaches prohibit collecting; some protect specific species; many restrict the harvest of live organisms. A good rule is to take sparingly, avoid living shells (those with animals or fresh tissue), and leave habitat features—like tidepool stones—undisturbed. When in doubt, buy from reputable suppliers who can verify legal and ethical sourcing.
A mindful maker considers sustainability not as an afterthought but as an aesthetic value: jewelry that tells a story of care tends to resonate more deeply with wearers. Document provenance when possible—beach name, date, conditions—and share it with clients as part of your piece’s narrative.
Thoughtful Selection for Creative and Structural Success
Curate shells the way a lapidary selects rough stone. Look for intact edges, compelling patterns, and thickness that suits the intended technique. For pendants and earrings, favor shells with solid shoulders where holes can be drilled away from thin rims. For inlay or mosaic, choose flatter, thinner fragments that can be trimmed and seated in bezels or settings. Irregular pieces invite sculptural compositions; matched pairs reward patience and an eye for symmetry.
During your selection, also note how the shell’s geometry suggests function: a long spiral might become a pendant; a smooth clam half could be a brooch surface; tiny cowries could accent macramé chokers. Consider whether your design will complement natural hues or require dye stabilization (generally not recommended if you value authenticity and long-term colorfastness).
Cleaning, Desalination, and Pest Control
Ocean residue can attract pests and corrode metal findings over time, so start with a thorough clean. Soak shells in warm freshwater for 24–48 hours, changing the water until it no longer turns cloudy or smells briny. For stubborn deposits, use a soft brush and a paste of baking soda and water. Avoid bleach when possible—it can weaken organic structure and leave a porous, chalky finish. To neutralize odor, a short soak in diluted white vinegar (1:10 ratio) followed by a generous rinse can help, but do not leave shells in vinegar for long, as it reacts with calcium carbonate.
Let shells dry completely in a breezy, shaded area. Sunlight can over-whiten and may embrittle thin surfaces. Once dry, store in breathable containers with silica packets to keep moisture at bay.
Stabilizing Fragile Areas
If a shell shows microcracks or flaking, wick in thin cyanoacrylate or a low-viscosity epoxy consolidant to strengthen it before drilling or cutting. Apply sparingly, clamp gently if needed, and let cure fully. This pre-emptive reinforcement can prevent heartbreak during later operations.
Tools and Workspace Setup
Basic Toolkit
- Rotary tool (e.g., Dremel) with variable speed
- Diamond burrs and spear-tip bits for precise holes
- Carbide cutting discs or diamond cutoff wheels
- Wet/dry sandpaper (400–3000 grit) and micro-mesh pads
- Pin vise for manual hole starts
- Needle files (round, half-round, flat)
- Soft brushes, microfiber cloths
- UV or two-part epoxy resin for inlays (optional)
- Quality glues suitable for porous materials
- Protective gear: safety glasses, dust mask (P100 preferred), and a shallow tray for wet work
Workspace and Safety
Shell dust is fine and can be irritating, so control it at the source. Drill under water in a small tray or use a steady drip to keep the work area damp; this reduces heat, prevents microfractures, and captures particulates. Secure shells on a rubber mat or soft jaw clamp to avoid chatter. Work slowly; let abrasives cut rather than forcing them. Have towels and a lidded container nearby for wet tools between passes. Good lighting reveals fissures before they become breaks.
Techniques: From Hole to Finish
Precisely Controlled Drilling
Mark the hole position with a fine Sharpie or an awl scratch. If the shell has a natural nacre layer, start from the convex side where stress spreads more evenly. Begin with a tiny bit in a pin vise to create a pilot divot; then switch to a diamond spear bit on low speed. Hold the shell partially submerged and advance gently, lifting frequently to clear debris. For very thin rims, drill halfway from one side, then flip and complete from the other to prevent blowout.
For multiple holes (e.g., a link), keep spacing consistent and reinforce the path with thin CA if material seems friable. Any tear-out can be cleaned with a round file and later disguised with a grommet, bead cap, or micro bezel. Mastery of drilling is the single greatest predictor of frustration-free projects.
Cutting, Trimming, and Shaping
To reshape edges or convert fragments into geometric blanks, mount a diamond cutoff wheel and work wet. Make light passes, avoiding heat buildup. For curves, use a small-diameter burr and sculpt slowly. Always leave extra material for sanding; cutting to final size invites chips. If you need repeated shapes, make a cardstock template and scribe the outline, then refine by hand.
Sanding and Subtle Polishing
After rough shaping, move through grits: 400, 600, 800, 1200, 2000, then micro-mesh. Keep the surface damp to float away swarf. Use a flexible backing (like a foam pad) to conform to curves and maintain an even plane. At higher grits, the surface will glow without becoming overly glossy. A felt wheel with a tiny dab of plastic polish can brighten nacre—but avoid chemical polishes with strong solvents. Controlled polishing brings depth to patterns while preserving a natural, tactile feel.
Surface Treatments and Sealers
Depending on the shell and intended wear, consider a protective coat. Microcrystalline wax yields a soft luster and moisture resistance while maintaining breathability. Thin CA can lock in fragile surfaces but may alter color slightly; test on scraps first. Two-part epoxy or UV resin can create a glassy dome for inlays; ensure thorough cure and finish the edges with fine abrasives for a professional look. Avoid heavy lacquers that can discolor with time.
Jewelry Construction Methods
Stringing and Knotting
For necklaces and anklets, string shells with seed beads or metal spacers to distribute weight. Silk or nylon thread offers drape; waxed linen or micro-macramé cord yields a coastal, organic vibe. Use bead tips or wire guardians at clasp points. If shells are heavy, go with beading wire (19–49 strand) and crimp ends; add wire coils (French wire) to protect against abrasion. Knotting between elements prevents clacking and showcases each shell as a discrete note in a visual melody.
Wire-Wrapping and Cold Connections
Wire frames can cradle shells without adhesives. Build a supportive cage that follows the shell’s silhouette, securing with clean wraps and hidden anchor points. Gentle half-hard wire (sterling, bronze, or brass) balances strength with pliability. Spiral motifs echo shell geometry; hammered textures harden and add sparkle. Riveting is a stable cold connection for joining shell to metal backplates—use tubing rivets and back the shell with leather to cushion impact.
Adhesives and Mechanical Reinforcement
When you need a bond, choose wisely. A flexible, shock-absorbing adhesive is better than a brittle one for porous calcium carbonate. Two-part epoxies with medium working time provide gap-filling and durability; cyanoacrylate is great for spot tacking but can be glassy and less impact-friendly. Always roughen mating surfaces lightly for tooth, degrease with isopropyl alcohol, and clamp without starving the joint. Where possible, combine glue with a mechanical aid: pin stems, micro-prongs, or bezel cups that cradle the shell.
Resin Inlays, Micro-Mosaics, and Encapsulation
Flat shell fragments make luminous inlays. Seat them into shallow bezels with epoxy clay or resin, leveling carefully to avoid bubbles. Micro-mosaics—tiny chips arranged like tesserae—let you depict waves, constellations, or abstract fields of color. For encapsulation, pour resin in staged layers, adding sand grains or miniature shells for depth. Cure under a dust cover and finish with progressive sanding and a final polish to reveal a glassy window into a tidal vignette.
Textile Pairings and Macramé
Shells pair beautifully with corded knots. Lark’s head, square, and vertical half-hitch knots frame pendants and distribute stress across multiple cords. Consider using beachcombed fibers—hemp, linen, or cotton—to echo the material story. Finish ends with whip wraps or metal cones for neatness.
Metalwork and Hybrid Settings
For advanced makers, fabricate bezels or backplates that nest shells like cabochons. Saw out a silhouette in sheet metal, solder on a thin wall, and use tabs or prongs to capture the piece without compressing it. Add decorative piercings that mirror shell perforations. Patination can complement shell tones: liver-of-sulfur browns enhance creams; ammonia fuming blues play against nacre. Keep heat away from the shell—set it last, with cold techniques only.
Design Principles for Memorable Pieces
Successful pieces begin with intention. Decide whether the shell is protagonist or ensemble member. Draw quick thumbnails exploring scale, orientation, and negative space. Echo natural rhythms: Fibonacci-like spirals, wave arcs, and dune ridges. Use contrast thoughtfully—glossy nacre next to matte cord, warm bronze beside cool ivory—to create visual tension.
Color theory helps: shells often sit in a neutral palette, so a pop of coral bead or oxidized silver can guide the eye. Repetition breeds harmony, while a single odd element adds interest. Consider weight distribution; heavy focal shells near the collarbone feel balanced, while lighter motifs belong near the ear or wrist. Ultimately, prioritize wearability: smooth contact points, secured joins, and confident closures communicate invisible craftsmanship.
When you think about design, treat constraints as productive: the shell’s fragile rim, a drill angle you must respect, or a color you didn’t expect can all steer you toward distinctive solutions.
Step-by-Step Projects to Build Skill
1. Tide-Polished Pendant
- Choose a small scallop fragment with a sturdy shoulder.
- Clean, desalinate, and dry thoroughly.
- Stabilize any hairline cracks with thin CA.
- Drill a pilot divot, then a 1–1.5 mm hole under water.
- Sand edges to 1200 grit; finish with micro-mesh for a soft glow.
- Set a tiny metal grommet or jump ring through the hole.
- String on a fine chain with a spacer bead; finish with a spring ring clasp.
Skills: safe drilling, edge finishing, minimal hardware elegance.
2. Cluster Earrings with Mixed Shells
- Select 6–10 small shells of similar weight and complementary hues.
- Drill each with a 0.8–1 mm bit; smooth with a round file.
- Wire-wrap on headpins with tidy loops; attach to a central ring below an ear hook.
- Alternate shells with tiny metal or glass beads for rhythm.
- Ensure the pair is balanced by swapping elements until weights match.
Skills: organization, symmetry, noise control (knot or spacer to reduce clack).
3. Cuff with Shell Inlay
- Form a brass or copper cuff blank to wrist curvature.
- Create shallow recesses (by etching or soldering on frames) for inlay.
- Trim flat shell pieces to fit; scuff backs for keying.
- Set with epoxy clay; level surfaces and texture background for contrast.
- After cure, sand flush and seal with microcrystalline wax.
Skills: metalwork planning, inlay leveling, comfortable ergonomics.
4. Resin Locket with Micro-Shells
- Assemble a deep pendant bezel with a clear front panel or open face.
- Arrange micro-shells and a pinch of clean sand; fix with a dot of CA.
- Pour resin in layers, popping bubbles with a gentle heat pass.
- After full cure, sand any meniscus and polish to clarity.
- Finish with a soft leather cord and adjustable slider knot.
Skills: staged pours, dust management, post-cure finishing.
Finishing Touches, Wearability, and Care
The difference between hobby and heirloom is often in finishing. Burnish wire ends; hide knots under beads or inside cones; align jump ring seams at the back. Choose clasps proportional to the piece—too small feels fussy, too large looks clumsy. For earrings, balance length against swing and ensure ear wires are debris-free and hypoallergenic.
For long-term durability, educate wearers: avoid prolonged water exposure (especially chlorinated pools), perfumes applied directly to shells, and extreme heat. Recommend gentle wiping with a damp cloth and periodic rewaxing if used. Provide a soft pouch to reduce abrasion in storage.
Troubleshooting Common Problems
- Cracked while drilling: slow down, switch to a finer bit, support from below with leather, and pre-stabilize with thin CA.
- Chipped edge near hole: chamfer lightly with a round file and add a grommet or bead cap to disguise and reinforce.
- Dull finish after cleaning: step back to 800–1200 grit and polish progressively; consider microcrystalline wax for luster.
- Glue joint failed: degrease both surfaces, roughen lightly, choose a flexible epoxy, and add a mechanical backup like a pin.
- Yellowing resin: choose UV-stable formulas, add UV inhibitors if available, and store finished pieces away from direct sun.
- Metal tarnish adjacent to shell: seal interface with wax, apply clear microcrystalline barrier, and advise periodic wipe-down.
Photography, Packaging, and Storytelling
Shell jewelry benefits from natural light and textured backgrounds: linen, driftwood, or weathered stone. Photograph at multiple angles to show contours and finish. Include a scale reference and a brief origin story. Packaging should cradle without crushing—cotton-filled boxes or molded pulp trays prevent impact. A care card shows professionalism and extends the life of the piece in the client’s hands.
From Hobby to Microbusiness
Begin by pricing transparently: materials (including consumables), hourly rate, overhead, and profit margin. Track time across stages—cleaning, shaping, drilling, assembly, finishing—so your estimates become accurate. Offer limited series with subtle variation to keep production efficient while honoring the uniqueness of natural material. Build trust by highlighting sourcing ethics and providing photographs of the beach or supplier certifications.
Market where the audience already appreciates craft: coastal boutiques, farmers’ markets, online platforms with a focus on artisan goods. Keep brand visuals consistent: a restrained color palette, legible logo, and fonts that echo sea calm. Customer service—fast responses, clear care instructions, and thoughtful packaging—turns first-time buyers into collectors.
Creative Exercises to Expand Your Practice
- Ten Thumbnails: In five minutes, sketch ten pendant layouts using one shell shape; force variation in orientation and negative space.
- Material Contrast: Pair a glossy shell with three different materials—matte wood, oxidized copper, and braided cord—and note how each affects mood.
- Constraint Build: Design a piece using only two operations (e.g., drilling and knotting) to hone clarity.
- Palette Study: Lay out shells by temperature (cool vs warm whites) and choose findings to harmonize or contrast intentionally.
- Wear Test: Make a prototype, wear it for a week, and record any snags, twists, or wear points. Iterate.
Materials and Tool Alternatives for Any Budget
Beginners can substitute a hand pin vise for a rotary tool; it is slower but gives superb control. Nail buffers stand in for micro-mesh; beeswax can replace specialty waxes in a pinch. Cotton cord can be dyed with tea for gentle warmth; stainless findings offer hypoallergenic reliability at modest cost. As you progress, invest in diamond burr assortments, quality flush cutters, and ergonomic pliers—each upgrade reduces fatigue and improves finish.
Care for the Maker: Ergonomics and Rhythm
Craft is a marathon, not a sprint. Set your workstation at a height that keeps shoulders relaxed. Take microbreaks every 20–30 minutes; rotate tasks to vary hand movements. A soft wrist rest, good lighting, and a small fan to vent moisture make sessions comfortable. Keep a notebook of bit types, speeds, and outcomes; your future self will thank you for the data.
A Quiet Conversation with the Shore
Every shell holds a lesson: in patience, pattern, and proportion. When you choose thoughtfully, prepare carefully, and assemble with intention, the result is more than ornament—it is a memory set to form. Whether you’re creating a gift, launching a collection, or seeking a meditative practice at your bench, let the material lead. In that partnership, the techniques—cleaning, shaping, polishing, joining—fade into muscle memory, and the piece begins to speak with its own voice.
As you refine your skills, you will find that the most compelling works balance restraint with flourish: a single luminous focal set on a calm field, a precise wrap that echoes a spiral, a clasp that clicks shut with quiet assurance. May your bench tray fill with promising forms, your hands learn the gentlest pressure, and your eye grow keen to the possibilities hidden in humble seashells. With patient practice, the path from shore to finished jewelry becomes not just a process, but a ritual—one that binds craft, memory, and the slow artistry of the sea.
Collect responsibly, build steadily, and enjoy the craft. Your pieces will carry stories long after the tide has washed your footprints away—and with careful choices in ethics, technique, and materials, those stories will be as resilient as the ocean’s own rhythms.
Key reminders to carry forward: honor provenance; work wet for safer, cleaner cuts; reinforce weak points before stress is applied; blend mechanical and chemical bonds; and let design serve comfort and function as much as beauty. With that compass, the sea’s palette is yours to interpret—shell by shell, clasp by clasp—into durable, graceful adornments that celebrate both maker and material. And when in doubt, return to fundamentals: ethical sourcing for long-term sustainability, mindful selection for structure and style, precise drilling for control, steady polishing for depth, and smart adhesive choices for lasting bonds. Your craft will deepen one thoughtful decision at a time, and your work will carry the quiet confidence of time well spent.
Finally, gift yourself the pleasure of iteration. Make three versions of the same idea, each solving a different problem—weight, movement, or clasping—and compare the outcomes. That simple practice turns good pieces into great ones and builds a personal vocabulary you can draw upon with ease. In the end, every finished piece is a map of choices; the more deliberate and informed those choices, the more eloquent the outcome.
