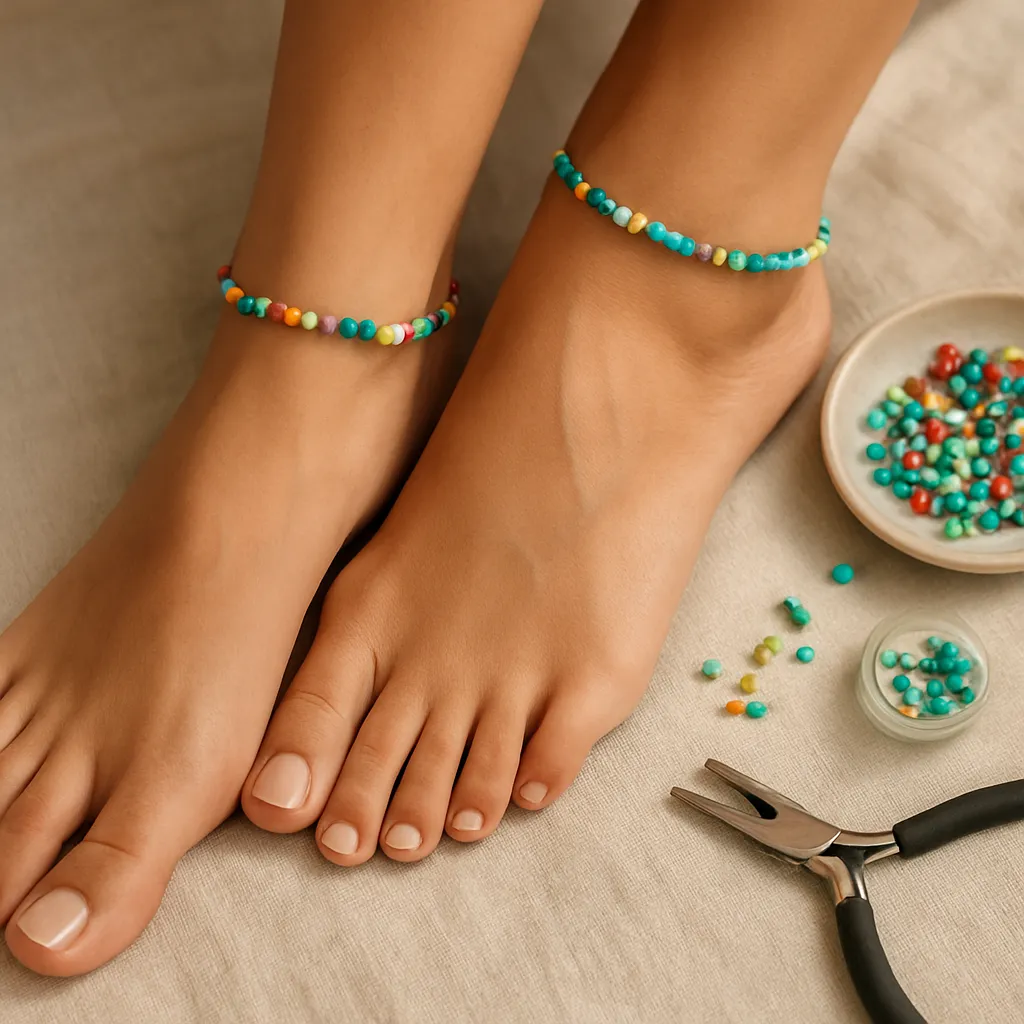
Warm sidewalks, sea-salted breezes, and the soft clink of beads against sun-kissed skin—few accessories capture the spirit of summer as playfully as a handmade anklet. Whether you’re chasing minimalist elegance, boho wanderlust, or a splash of neon for festival days, a DIY beaded anklet is a small project with big personality. It’s quick to make, portable enough for balcony crafting or beach breaks, and rich with the satisfaction that comes from turning a handful of color into something you can wear. This guide blends craft wisdom with practical steps so you can design with intent, construct with care, and step into summer with ankle adornments you’ll be proud to show off.
From Ancient Ornament to Summer Staple
Anklets have circled the globe for millennia. In South Asia, the payal has been both bridal finery and everyday jewelry, often with tiny bells that whisper with each step. Along the Mediterranean, beads and amulets were strung to ward off the evil eye, while coastal cultures worldwide have long tied shells to their ankles as tokens of travel and tide. The 1990s surf revival brought hemp and puka shells to mainstream fashion, resurfacing today with recycled glass and ethically sourced cowrie. In short, the anklet has always had a place where sand meets street—practical enough to endure salt and sun, expressive enough to tell a story. And because it sits low and out of your line of sight, it rewards quiet details: a single bead that catches the light, the soft drape of a chain, or the whisper of fringe as you move.
Tools, Beads, and Smart Selection
The best projects begin with thoughtful materials. Your choices affect comfort, longevity, and style options. Gather essentials and consider where you’ll wear the anklet—beach, city, poolside—so you can match performance with aesthetics.
Core tools
- Flush cutters or sharp scissors
- Chain-nose and round-nose pliers (for opening jump rings and shaping wire)
- Crimping pliers (if using beading wire and crimps)
- Beading needles (sizes 10–12 for seed beads)
- Bead mat or soft towel (to prevent beads from rolling)
- Measuring tape or ruler
- Bead stoppers or binder clips (to prevent accidental spills)
- Optional: thread conditioner, micro lighter for sealing synthetic cords, GS Hypo Cement for selective knot security
Beads and components
- Seed beads (sizes 11/0, 10/0, 8/0): glass seed beads are versatile; choose reputable brands for even sizing
- Gemstone rounds (3–6 mm): add heft and a natural palette—think aventurine, moonstone, or howlite
- Metal spacers: stainless steel, brass, copper, or gold-filled for longer wear
- Shells, pearls, mother-of-pearl chips, wood, or recycled glass for organic texture
- Findings: crimps, wire guardians, crimp covers, jump rings, extender chain
- Clasps: lobster, spring ring, toggle, or magnetic (ensure a strong magnet if used)
Stringing options and when to use them
- Beading wire (0.012–0.015 in, 7–19 strand): strong, kink-resistant, ideal for clasps and everyday wear
- Stretch cord (0.5–0.8 mm): quick, clasp-free; great for casual stacking, less ideal for heavy beads
- Braided nylon/polyester cord (e.g., S-Lon, C-Lon): perfect for macramé and sliding knots
- Monofilament or gel-spun PE (e.g., FireLine): great abrasion resistance for stitched work
- Waxed linen or cotton: earthy look; mind water exposure and colorfastness
Quality notes: Look for smooth bead holes to reduce abrasion; avoid cheaply plated metals for better summer longevity; test colorfastness by rubbing a damp cotton swab over a bead—if dye lifts, keep it away from light fabrics and water.
Design Planning: Color, Balance, and Personality
Design starts with intention: Are you crafting for a beach day, an evening out, or an everyday accent? Choose one visual “driver”—color, texture, or a focal bead—and let other choices support it. In color, triads (three hues evenly spaced on the wheel), analogous schemes (neighbors on the wheel), and monochrome gradients all work beautifully on a small canvas like the ankle. Keep scale in mind: 11/0 or 10/0 beads read delicate; 8/0 or 6/0 beads add presence. For balance and symmetry, consider repeating short patterns so visual rhythm emerges as the anklet drapes. Asymmetry also shines—try a single off-center charm or a short run of contrasting beads to create a “wink” point. Texture matters: matte frosted glass next to mirrored spacers creates lively contrast. Finally, think about negative space—tiny spacer beads or short bare cord segments can give the eye a place to rest, and make a piece feel airier and more summery.
Measuring, Fit, and Comfort
Good fit starts with accurate measurement. Wrap a soft tape snugly around the narrowest point above your ankle bone. Add ease according to style and season:
- Slim fit, minimal drape: add 0.5–0.75 in (1.3–2 cm)
- Classic fit with gentle movement: add 0.75–1 in (2–2.5 cm)
- Loose, boho drape: add 1–1.5 in (2.5–3.8 cm)
Heat and activity can cause slight swelling; err toward comfort. If you plan to layer multiple anklets, size each independently so they sit without tangling. For gifts or shop listings, include an extender chain so the piece is easily adjustable. Positioning matters too: above the ankle bone is comfortable for daily wear; a lower line can skim sandals but may snag more with sneakers.
Foundational Techniques and Finishes
Clean craftsmanship rests on consistent technique, balanced tension, and a secure finish. Here are core methods you’ll use across projects:
Stringing with beading wire and crimps
- Attach one end to a clasp using a crimp tube; slide on a wire guardian to protect against wear if desired.
- Use crimping pliers: first squeeze to create a “C” fold, then rotate and round to lock the crimp.
- Trim the tail and, if you like, add a crimp cover for a smooth bead-like finish.
Stretch cord basics
- Pre-stretch the cord to reduce later sagging.
- String beads; tie a surgeon’s knot (overhand knot with an extra pass-through), snug down slowly.
- Optional tiny dab of glue; hide the knot inside a large-hole bead.
Macramé and sliding knots
- Square knot sinnet (left-over-right, right-over-left) creates a flat, sturdy band.
- Sliding knot: cross cord tails, tie a 3–5 wrap coil around one tail using the other; repeat on the opposite side for adjustability.
- Fuse synthetic cord tails lightly with a micro flame to prevent fray.
Closures and comfort
Select a closure based on use: lobster clasps are secure and compact; toggles are easy to operate but need enough slack to lie flat; magnetic clasps are quick, but choose high-strength versions and avoid for anyone with implantable medical devices. Add a 1–2 in extender chain for flexibility. Always round sharp wire ends and check that jump rings are closed fully so nothing scratches the skin.
Step-by-Step Projects to Build Skill
Project 1: Minimalist Seed Bead Anklet (Beading Wire + Clasp)
Skill level: Beginner. Time: 30–45 minutes.
- Supplies: 18–22 in of fine beading wire; seed beads (11/0 or 10/0); 2 crimp tubes; wire guardians (optional); lobster clasp; 2 jump rings; 1–2 in extender chain; crimping pliers; cutters.
- Plan your pattern: for subtle rhythm, try eight base beads, one spacer, repeat.
- Attach clasp end: thread a crimp and wire guardian, loop through a jump ring or clasp, return through crimp; crimp securely and clip tail after tucking a few beads over it.
- String beads to desired length minus clasp/chain allowance.
- Finish: add crimp and wire guardian to the other end and connect to extender chain; crimp and cover if desired.
- Check drape and smoothness; round any rough edges with pliers.
Variation: pepper in 3–4 gemstone beads off-center for a mini focal; switch to matte frosted glass for a more coastal look.
Project 2: Surfer-Style Macramé with Shell Focal (Sliding Knot)
Skill level: Beginner-Intermediate. Time: 45–60 minutes.
- Supplies: 1 mm braided nylon cord; one cowrie or shell bead; small wood or metal spacers; lighter; tape or clipboard.
- Cut cord: one base strand to fit ankle plus 6–8 in; one long working strand 4–5x the final length.
- Mount focal on the base strand; center it and secure both ends to your board.
- With the long strand, tie square knots evenly on each side of the focal. Aim for consistent knot height to keep the band flat.
- Stop when the band reaches the desired wearable length, leaving 3–4 in tails for the sliding knot.
- Cross tails and tie a 3–5 wrap sliding knot around the opposite tail; repeat on the other side if you prefer a double slider.
- Test glide; trim and carefully fuse ends. Slide on a few tiny beads at the tails for polish.
This style is beach friendly and dries quickly. Keep knots snug but not over-compressed so the band stays pliable on the ankle.
Project 3: Gemstone Stretch Anklet (Clasp-Free)
Skill level: Beginner. Time: 20–30 minutes.
- Supplies: 0.7 mm stretch cord; 4–6 mm gemstone rounds; 2–4 larger-hole beads to hide knot; bead stopper; scissors; optional small amount of flexible adhesive.
- Pre-stretch the cord gently. Measure and cut: ankle circumference plus 4–6 in for knotting.
- String beads, checking the look on your ankle as you go. Aim for lightness: mixing 4 mm rounds with a few 6 mm accents keeps the piece comfortable.
- Tie a surgeon’s knot; snug down evenly. Add a small dab of glue, let it set briefly, and pull the knot into a large-hole bead to conceal.
- Trim excess cord carefully. Let adhesive cure fully before wearing.
Variation: add a trio of hematite discs or a single freshwater pearl off-center for a grown-up twist on a casual band.
Advanced Ideas for Avid Beaders
- Peyote strip: stitch a narrow band in flat even-count peyote; attach to a fine chain to reduce bulk at the back of the ankle.
- Brick stitch fringe: work a crescent of brick stitch around a small ring, then add short fringes that sway with each step.
- Spiral rope: a slender spiral in 11/0 beads gives a sophisticated texture; end it with wire guardians to prevent thread wear.
- Loomed micro-band: weave a 4–6 bead-wide strap; back it with ultrasuede at the tabs for smoother skin contact.
As designs become more elaborate, remember the functional realities of ankle jewelry: avoid bulky backs that rub with shoes, keep dangles short if you’re active, and choose finishes that withstand salt, sunscreen, and sweat.
Durability in Summer Conditions
Sun, sand, and pool chemicals challenge jewelry, so plan for durability. Stainless steel (316L), titanium, and quality brass or bronze hold up well; gold-filled and PVD-coated stainless outlast light plating. Glass seed beads typically outperform painted plastic; gemstones vary—some (e.g., dyed howlite) may fade. When possible, rinse salt and chlorine promptly and pat dry. True waterproof performance is rare for jewelry, but you can maximize resilience with braided synthetics, crimped beading wire rather than open jump-ring-only assemblies, and secure, closed-loop terminations. Keep sunscreens and perfumes off your beads whenever you can; apply first, let dry, then put on your anklets.
Troubleshooting and Repairs
- Gapping or stiffness: lighten your pattern with smaller spacers or softer cord; check that crimps aren’t over-squeezed.
- Color rub-off: switch to reputable glass brands; pre-test with a wet cotton swab; seal porous beads with clear acrylic if necessary.
- Fraying stretch: step up cord diameter or reduce bead weight; always pre-stretch.
- Sharp spots near clasp: add crimp covers; ensure jump rings are fully closed; file or replace rough components.
- Too tight or loose: add/remove a short extender chain segment; for stretch, restring and add two extra beads.
- Broken mid-vacation: carry a tiny travel kit—pre-cut cord, a clip, and 3–5 favorite beads—for quick fixes.
Care, Cleaning, and Seasonal Checkups
Wipe anklets after wear with a soft cloth to remove sweat and sunscreen. For metal and glass, mild soap and cool water work; dry thoroughly before storing. Keep pieces in small pouches to reduce tangles and scratches. Once per season, inspect for wear at high-friction points: near clasps, first and last beads, and any charms. Restring proactively if you see fray; anklets live an active life, and a quick refresh keeps them looking new.
Sustainable Crafting and Thoughtful Sourcing
Crafters have countless ways to honor sustainability without sacrificing style. Upcycle a broken necklace into multiple anklets; mix beachcombed shells responsibly collected from non-living material with recycled-glass beads; choose stainless steel or brass over mystery alloys that peel; buy from small lampworkers and ethical stone cutters when you can. Save offcuts of beading wire for tiny charm connectors. Even packaging can be intentional—reusable muslin bags instead of plastic zip tops, paper tags with plant-based inks, and care cards that encourage repair instead of replacement.
Style Play: Layering, Pairing, and Personalizing
Anklets love company. Stack two or three contrasting textures—one delicate seed-bead strand, one macramé band, one slender chain—for depth. Keep dangles and charms minimal if you’re moving a lot; a single drop at one stack layer adds movement without tangling. Match metals to your sandals’ hardware or your go-to earrings for cohesion. For beach days, pastel frosts and sea-glass greens are effortless; for nights out, hematite and jet with a flash of gold feel grown-up. Personalize with initial charms, birthstones, or tiny travel tokens—a sand-cast pebble, a stamped disc from your favorite place, or a bead the color of local waters. For a unisex take, try matte onyx, wood, or heishi discs with a low-profile clasp.
Safety, Skin, and Everyday Practicalities
- Metal sensitivities: choose hypoallergenic options—stainless 316L, titanium, niobium, or gold-filled over basic plating.
- Activity level: runners and cyclists might prefer slim, non-dangling designs to avoid catching; swimmers should rinse pieces after pools or the ocean.
- Magnets and devices: magnetic clasps are convenient but not recommended for wearers of certain medical implants.
- Travel: pack anklets flat in a soft roll to prevent kinks and bends.
Business and Gifting Notes
If you sell your work or gift to friends, clear sizing and care info matter. Offer size ranges with extender chain options, describe finishes honestly, and include a small card for cleaning tips. Photograph on an ankle form or model for scale. Build simple collections—coastal pastels, gemstone neutrals, sunset brights—so customers can mix and match. For pricing, account for components, time, overhead, and a fair margin; anklets may be small, but thoughtful craft and strong finishes set your work apart.
A Maker’s Checklist Before You Tie Off
- Does the design make sense for the wearer’s lifestyle?
- Are high-friction points protected (wire guardians, secure knots)?
- Is the drape comfortable when flexing the foot and walking?
- Are bead surfaces smooth where they contact skin?
- Is the finish tidy—no sharp ends, no visible glue blobs?
- Is the color palette intentional and season-appropriate?
Why Handmade Anklets Feel Like Summer
Making an anklet invites you to notice detail: the click of a tiny crimp setting, the way a matte bead softens a metallic shine, the rhythm of knots tightening one after another. It’s a gentle practice that rewards patience and an eye for balance, yet it remains delightfully accessible—a pocket project you can finish in a single sitting. Wear the result and it becomes part of your summer story, catching sunlight on the boardwalk or adding a quiet glimmer to bare feet on a cool kitchen tile floor. With a handful of beads, a few simple methods, and a maker’s curiosity, you can craft pieces that stand up to the season, feel good against the skin, and celebrate the playful freedom of warm-weather days.
