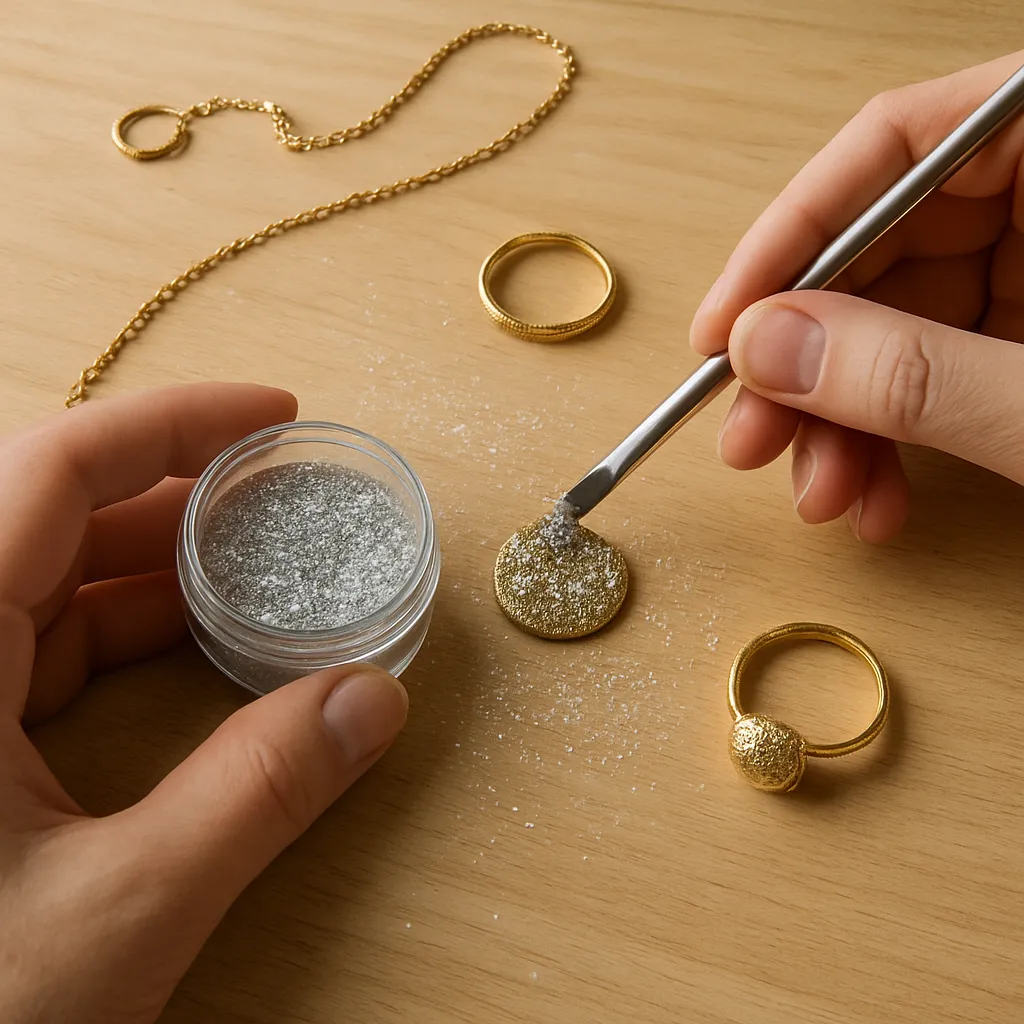
Nothing catches light like tiny reflective facets that move with the wearer. Harnessed thoughtfully, glitter turns simple components into luminous keepsakes, adds energy to restrained metalwork, and transforms small-batch craft into pocket-size spectacles. This guide pulls from bench practice, color theory, and materials science to help you choose, control, and protect sparkle so it elevates your jewelry rather than overwhelming it. Whether you prefer delicate shimmer trapped beneath crystal-clear resin or bold confetti embedded in clay, you’ll find both the why and the how—plus step-by-step projects—to make your pieces gleam with intention.
Understanding Sparkle: What Glitter Is and How It Behaves
Glitter is a family of particulate reflectors—thin flakes or micro-shapes cut from plastic, cellulose, aluminum, glass, or mineralized films. Each particle acts as a tiny mirror, bouncing light back in highly directional ways. The effect depends on particle geometry (hexagon, star, shard), size (from fines under 100 microns to chunky 1–2 mm), and surface coatings (metallic, iridescent, holographic, interference). Together these parameters dictate apparent brightness, color shift, and texture under different viewing angles.
Optically, three phenomena matter in handcrafted jewelry:
- Specular reflection: mirror-like bounce that produces sharp flashes; common in metallized particles and glass microflakes.
- Diffraction and interference: layered thin films split and recombine wavelengths, yielding rainbow shifts in holographic or interference glitters.
- Scattering: fine particles scatter light more diffusely, leading to a silky glow rather than bold spark points.
Translating physics to bench decisions means matching particle size and finish to the scale of your piece. Small studs demand micro-fines or iridescent sheens to avoid visual clutter. Large pendants or statement cuffs can handle chunkier cuts, especially if you want graphic, high-contrast sparkle. Binding medium matters just as much: a water-clear dome will magnify particles and enhance perceived depth; a satin sealer will quiet harsh flashes and create a soft halo.
Materials, Tools, and Studio Setup
Types of Glitter for Jewelry
- PET and metallized plastic: Common, affordable, and available in endless colors and sizes. Verify heat tolerance if using heat guns; some grades curl at modest temperatures.
- Cellulose-based and PLA “eco” variants: Labeled biodegradable; performance varies by brand and environment. For conscientious makers, look for third-party testing and note the planned end-of-life for your pieces.
- Glass and mica flakes: Crisp sparkle with strong abrasion resistance; heavier than plastic, so they may settle faster in liquid binders.
- Cosmetic/skin-safe cuts: Polished edges and solvent-resistant coatings; useful when your binder contains strong solvents or when pieces may brush skin often.
- Specialty films: Holographic, color-shifting, and interference finishes for nuanced optical effects under domes and faceted crystals.
Binders, Sealers, and Inclusions
Your binder holds particles in place and protects the surface. Jewelry makers reach for two main categories: waterborne acrylics (PVA craft sealers, acrylic mediums, clear nail-lacquer alternatives) for surface sparkle, and two-part or UV-setting polymers for deeper, optical clarity. Selecting the right binder governs adhesion, build, flexibility, and finish.
- Water-based sealers and acrylic gels: Great for brushing a thin glitter coat on wood, leather, or painted metal. Multiple layers build density, but remain thinner than domes.
- Two-part epoxies: High clarity and self-leveling domes; allow thick builds and inlays. Sensitive to mix ratios and humidity.
- UV-setting gels: Fast cures under lamp; excellent for spot work, layering, and small bezels. Look for jewelers’ formulations with low shrink and high gloss.
- Polymer clay and cold enamel: Glitter can be mixed into clay or sprinkled onto uncured enamel pastes for bake or air-cure finishes.
Bases and Findings
- Closed-back bezels: Ideal for flood coats and domes; protect substrates and simplify cleanup.
- Open-back frames with tape dams: Create transparent windows that allow light to pass through embedded particles.
- Wood, bone, and horn: Accept inlays well; seal pores before wet media to prevent bubbles.
- Metal blanks: Scuff lightly for tooth; degrease thoroughly for uniform wetting.
Essential Tools for Control
- Precision scale or calibrated cups for two-part systems.
- Silicone mats, cups, and stir sticks for easy release and reuse.
- Soft fans and mop brushes for distributing fines without streaks.
- Pipettes and syringes for targeted placement in bezels and channels.
- Anti-static brush and lint-free wipes to fight dust and particle cling.
- Heat management: low-temp heat gun or alcohol spritz for bubble control; test coatings for heat tolerance first.
Safety and Comfort
- Nitrile gloves, eye protection, and good ventilation when working with reactive polymers.
- Respirators with organic vapor cartridges for prolonged epoxy work; dust mask when sanding cured domes.
- Closed containers and a tidy workflow to limit stray flakes and studio mess.
Designing with Intention: Scale, Color, and Light
Scale and Particle Size
Match particle size to jewelry size. Micro-fines create a “lit from within” glow in slender bezels and delicate rings. Medium hexes pop in resin-filled hairpins and bangles. Large confetti belongs in big statement pieces, shaker pendants, or as sparse accent against a neutral ground. If you plan a thick, glossy topcoat, remember that domes act as lenses; they amplify apparent size and brightness.
Color Relationships
Consider base color, glitter hue, binder tint, and metal tone together. Warm gold bezels intensify red–orange mixes; cool silver frames flatter blues and purples. A tinted binder softens the contrast and can unify multicolor mixes. Interference flakes shift on dark backgrounds; test swatches on black and white to understand behavior. Pigment stability matters: some dyes bleed into solvent systems; prefer mineral or polymer-stable pigments when tinting your binder.
Texture and Layering
Build complexity through layers: a dusting of ultra-fine under a sparse medium-cut field yields depth without crowding. A final clear coat over a lightly sprinkled surface traps air between facets for brilliant sparkle. For minimal looks, try negative space—clear windows next to a narrow glitter line inside a channel setting offer contrast and elegance.
Techniques: From Surface Shimmer to Deep Domes
Brushed Surface Sparkle
Mix a small amount of micro-fine glitter into an acrylic sealer for a whisper sheen. Brush in thin, even coats, allowing each to dry before adding more. This approach suits wood earrings, leather pendants, or painted metal blanks where flexibility and low build are important. Seal with a clear topcoat to prevent flake loss.
Encased Domes and Inlays
Clear domes magnify and protect particles, creating a jewel-like pool of light. Work in thin lifts: anchor a sparse dusting first, then add a clear build to suspend more particles mid-depth. This controlled encapsulation avoids clumping and keeps heavy flakes from sinking. Edge tensions matter; a slightly convex meniscus amplifies depth but should not overspill. Use bezel walls or raised edges to corral the liquid until gelation.
Open-Back Transparency
Apply low-tack tape to the back of an open frame, burnish it tight, then fill with clear medium and selected particles. The result is a window that catches light from both sides. Prefer light, solvent-resistant particles here; heavy flakes may drift to the tape side and telegraph its texture. When fully cured, peel the tape and sand edges for clarity.
Polymer Clay Sparkle
Knead micro-fines into translucent clay for a galaxy effect or roll raw sheets on a bed of glitter for surface inlay. Bake per clay specs, then sand and polish for glassy smoothness. Post-bake sealers boost gloss and lock any exposed particles. For terrazzo looks, mix colored glitter chips into neutral clay and slice cross-sections to reveal specks.
Cold Enamel and Paste Systems
Stir glitter into two-part enamel pastes or lay it onto a tacky color coat, then cap with a clear layer. The paste adds viscosity that prevents settling; the clear cap restores depth and brilliance. Mind cure schedules so inter-coat adhesion remains strong.
Shaker Jewelry
Create tiny kinetic theaters by sealing loose particles between clear windows. Use spacers to set cavity depth and choose lightweight shapes that float freely. Anti-static wipes help reduce cling. Ensure a perimeter seal to prevent leaks, and consider a subtle tint to the window to maximize color contrast.
Marbling and Gradient Effects
Sprinkle fines onto a just-tacky base coat; the partial grab allows a soft gradient. For marbling, drip tinted binder and drag a fine tool through it before dusting glitter; the particles accent velocity lines and swirls. Lock with a clear topcoat to prevent smearing.
Preparation, Control, and Professional Finish
Surface Prep
- Scuff metal and hard plastics with 600–1000 grit to create micro-tooth.
- Degrease with isopropyl alcohol; avoid residues from citrus cleaners or hand lotions.
- Seal porous substrates to block outgassing and bubble formation.
Mixing and Handling Liquid Binders
- Warm components slightly in a water bath to lower viscosity and release bubbles.
- Mix slowly, scraping sides and bottom, to avoid introducing micro-bubbles.
- Let mixed binder rest a couple of minutes before use to encourage bubble rise.
- Introduce particles a little at a time; stop before the mixture looks sludgy—clarity depends on void space between flakes.
Dust, Static, and Cleanliness
A single stray fiber under a clear dome can ruin the illusion of depth. Work in a low-dust zone. Wipe bezels and domes with anti-static cloths. Lightly mist the air (not your piece) to tamp airborne lint. Build a simple curing box from foam board to protect wet pieces. Prevent studio-wide contamination by dedicating a tray to glitter work and sealing leftovers promptly.
Layering Strategy for Depth and Strength
- Anchor coat: a thin, clear film to catch initial particles and lock them flat.
- Build lifts: clear additions that suspend more flakes mid-depth; pop bubbles between lifts.
- Cap coat: a harder, scuff-resistant finish that brings gloss and protects edges.
Staged layers also improve durability. Each lift interlocks mechanically with the previous one if added within the recommended recoating window; full cures between layers may require light sanding for tooth.
Color, Clarity, and Optical Tricks
Tinting the Binder
For smoke, jewel, or tea-colored domes, tint your binder sparingly. Transparent dyes retain clarity; opaque pigments can make the layer milky if overused. Pre-disperse colorants thoroughly to avoid streaks. A barely-there tint often intensifies glitter color without losing sparkle.
Managing Float and Sink
Different particles have different densities. Glass and large metalized shapes sink faster than plastic micro-fines. To keep a mix suspended, pour in cooler temperatures, use a slightly thicker binder, or allow the binder to partially thicken before adding heavier flakes. Alternatively, anchor heavy elements in the first lift and reserve light, flashy pieces for upper layers.
Lensing and Edge Control
A smooth dome acts as a lens. Push the high point of the meniscus slightly toward the center to minimize edge distortion. Surface tension can be manipulated by drop size and timing. For channels and bezels, flood slowly and chase the edge with a fine tool to wet walls; dry edges cause trapped air and fish-eyes.
Environmental and Safety Considerations
Glitter’s dazzle comes with responsibility. Many flakes are tiny plastics that can persist in waterways. Choose cellulose- or PLA-based options where performance allows, or limit particle escape by fully encapsulating within binders. If you prioritize reduced footprint, look for certified bioglitter grades and communicate honestly with customers about care and disposal.
In the studio, capture cleanup waste. Wipe surfaces with damp disposable cloths rather than rinsing into sinks. Use a bench-top filter trap for rinse water; let particulates settle, decant the clear layer, and dispose of settled solids with household trash. Avoid excessive blasting with compressed air, which redistributes fines. Minimize the creation of microplastics by fully sealing surfaces and choosing abrasion-resistant topcoats.
For reactive polymers, ventilation and skin protection are nonnegotiable. Follow mix ratios precisely to limit amine blush and uncured tack. Label cure times and keep food and drink out of the work area. Some UV lamps emit intense light; shield eyes and skin appropriately and validate complete UV-curing for thicker sections.
Troubleshooting Common Issues
- Cloudy finish: Often from moisture, trapped micro-bubbles, or incompatible sealers. Warm your binder, de-gas if possible, and work in a low-humidity window.
- Bubbles and craters: Pour thinner lifts and pause to pop bubbles with a quick pass of warm air or a fine needle. Craters can stem from oil or silicone contamination—degrease thoroughly.
- Particle clumping: Usually too much glitter in one lift or static build-up. Split loads across layers and use an anti-static brush before pouring.
- Yellowing over time: Select UV-stabilized systems, avoid prolonged heat cures for plastic-based flakes, and store unsold stock out of direct sun.
- Poor edge wetting (fish-eyes): Surface oils or waxes repel. Clean edges with alcohol and scuff lightly to restore tooth.
- Floating glitter: Lower pour temperature or thicken the binder slightly before adding light flakes; cap with a clear lift to lock position.
Finishing and Assembly
Leveling, Sanding, and Polishing
If a dome overflows, let it cure fully, then wet-sand the perimeter with 600–2000 grit to restore shape. Progress to micromesh pads or polishing compounds for clarity. When sanding through to particles is possible, cap with a fresh clear coat to seal any exposed edges.
Drilling and Hardware
Use sharp, small-step bits and low RPM to drill cured domes; support from below to prevent chipping. For findings, pre-plan holes, or choose bezels with built-in loops to avoid post-cure drilling. Always test adhesives on cured surfaces before committing a bail or pin-back; some cyanoacrylates frost clear coats.
Care Instructions for Customers
- Wipe gently with a soft, damp cloth; avoid abrasives.
- Store separately to prevent key or chain scratches on glossy domes.
- Avoid solvents, sunscreen-laden handling, and prolonged sunbathing.
Project 1: Clear-Domed Pendant with Suspended Sparkle
Materials
- Closed-back metal bezel, 25–30 mm
- Clear two-part binder or UV gel
- Micro-fine plus medium-cut glitter (two harmonizing hues)
- Soft brush, pipette, toothpick
- Anti-static cloth, alcohol, lint-free wipes
Steps
- Prep: Scuff the bezel interior lightly; degrease. Wipe with anti-static cloth.
- Anchor coat: Pour or brush a whisper-thin clear layer. While tacky, dust a scant pinch of micro-fines. Tap out excess.
- First lift: Add a shallow pour (1–2 mm). Tease a few medium-cut particles into place with a toothpick. Pop bubbles swiftly with warm air held at distance.
- Second lift: When the first lift is gelled but still receptive, add more clear to cover particles by 0.5–1 mm. Drop in a few accent pieces at varying depths.
- Cap: Finish with a glossy dome that sits just proud of the bezel edge. Nudge the meniscus toward center for a jewel-like profile.
- Cure and finish: Protect from dust, cure fully, then inspect. If needed, sand and polish the edge or add a final thin gloss coat.
Design note: Use complementary hues (e.g., teal micro-fines with silver accents) and let negative space carry part of the composition. Fewer particles can look more luxurious than a total flood.
Project 2: Terrazzo-Style Polymer Clay Earrings
Materials
- Translucent and neutral-tone polymer clays
- Assorted glitter chips and micro-fines
- Rolling pin or pasta machine, blade, cutters
- Sandpaper set, gloss sealer
- Posts or hoops, jump rings
Steps
- Mix: Fold a small amount of micro-fines into translucent clay. Create “chips” by blending larger glitter pieces sparsely into neutral clay, then press into small logs.
- Compose slab: Combine the logs and base clay, compress, and roll to 3–4 mm. Slice the surface lightly to reveal embedded sparkle.
- Cut and bake: Use cutters for matching pairs. Bake per manufacturer directions on a flat tile to minimize warping.
- Finish: Wet-sand faces for a smooth terrazzo look. Apply a thin gloss sealer to amplify depth and lock exposed particles.
- Assemble: Attach findings. Consider a contrasting metal tone for drama (rose gold with cool blues, for example).
Design note: Keep chip distribution asymmetric but balanced. A few denser zones draw the eye and create a natural focal path.
Project 3: Open-Back Shaker Pendant
Materials
- Open-back frame pendant
- Clear window sheets or domed cabochons
- Lightweight star and heart glitter shapes
- Spacer tape or thin wire, jewelry-grade adhesive
- Anti-static cloth
Steps
- Create cavity: Adhere a clear window to the back, then line the inner wall with spacer tape/wire to define cavity depth.
- Load: Wipe interior with anti-static cloth; add a modest amount of lightweight pieces. Less is more for lively motion.
- Seal: Adhere the front window. Weight gently and cure per adhesive specs. Inspect seams for gaps; add a thin perimeter bead if needed.
- Finish: Polish windows and attach chain. Observe motion; adjust particle load in the next piece for ideal float.
Design note: A tinted window (smoke gray) can highlight silver or iridescent pieces while hiding minor fingerprints.
Advanced Tips for Repeatable Results
- Swatch boards: Cast droplets with different loads, colors, and doming heights on a silicone mat. Label and keep for client previews.
- Batch timing: Pour multiple pieces at the same gel point to standardize suspension levels and bubble release.
- Edge masking: Use liquid frisket or peelable latex on bezel rims to keep them clean; peel after cure.
- Selective sparkle: For contrast, mask areas and sprinkle glitter only where desired, then seal. Removing the mask leaves crisp, glitter-free borders.
- Heat discipline: Warm just enough to release bubbles; overheated air warps plastic flakes and invites dust.
Quality, Testing, and Long-Term Performance
Before collection launches, run wear tests. Pocket-carry a sample for a week to simulate abrasion. Sun-bathe a swatch in a window to assess color fastness. Dip in soapy water and blot dry to ensure caps do not blush. When issues appear, isolate variables: particle type, binder brand, cure schedule, and topcoat chemistry. Document everything—handicraft thrives on repeatable, teachable processes.
Durability also hinges on edge management. The dome’s thinnest zone is at the rim, so reinforce with one of three strategies: a slightly thicker cap coat, a protective metal lip, or a micro-bevel sanded after cure. Each method reduces scuffing without dulling the face.
Ethics, Story, and Market Readiness
Handmade jewelry succeeds when it pairs technique with a point of view. Consider how you’ll talk about your materials. If you prioritize reduced environmental impact, name your cellulose blends and explain your waste-capture routine. If your focus is archival clarity, discuss your topcoat chemistry and yellowing resistance. Transparent language wins trust and aligns customers with your studio values.
Presentation matters: photograph under diffused light with a small kicker to catch sparkle. Shoot short clips to show motion and angle shifts. Package pieces in lint-free pouches with concise care cards. Offer size and colorway variations, but keep the core technique and finish consistent so your brand looks cohesive.
Glossary Highlights
- Facets: Flat micro-surfaces on particles that reflect light directionally.
- Interference: Color shift created by thin-film coatings that manipulate wavelengths.
- Meniscus: The slight curve of a liquid surface against a boundary; key to doming.
- Blush: Hazy surface from humidity interacting with curing systems; fix with warm, thin recoat or polish.
Putting It All Together
Adding sparkle to jewelry is a dialogue between light and material. The right particle for the right scale, anchored by clean technique and protected by thoughtful finishing, turns shimmer into substance. Start with a small palette of proven materials, test deliberately, and refine your pours and lifts until they feel predictable. Then push into bolder compositions—layered color fields, negative-space frames, and kinetic shakers—always with an eye toward skin comfort, longevity, and a studio process that prevents stray fallout.
Finally, keep notes. Track which mixes suspended well, which brands played nicely together, and which schedules delivered predictable cures. Over time you’ll create a personal handbook of choices that make your sparkle not just eye-catching, but reliable—capturing light beautifully, piece after piece, for years to come.
