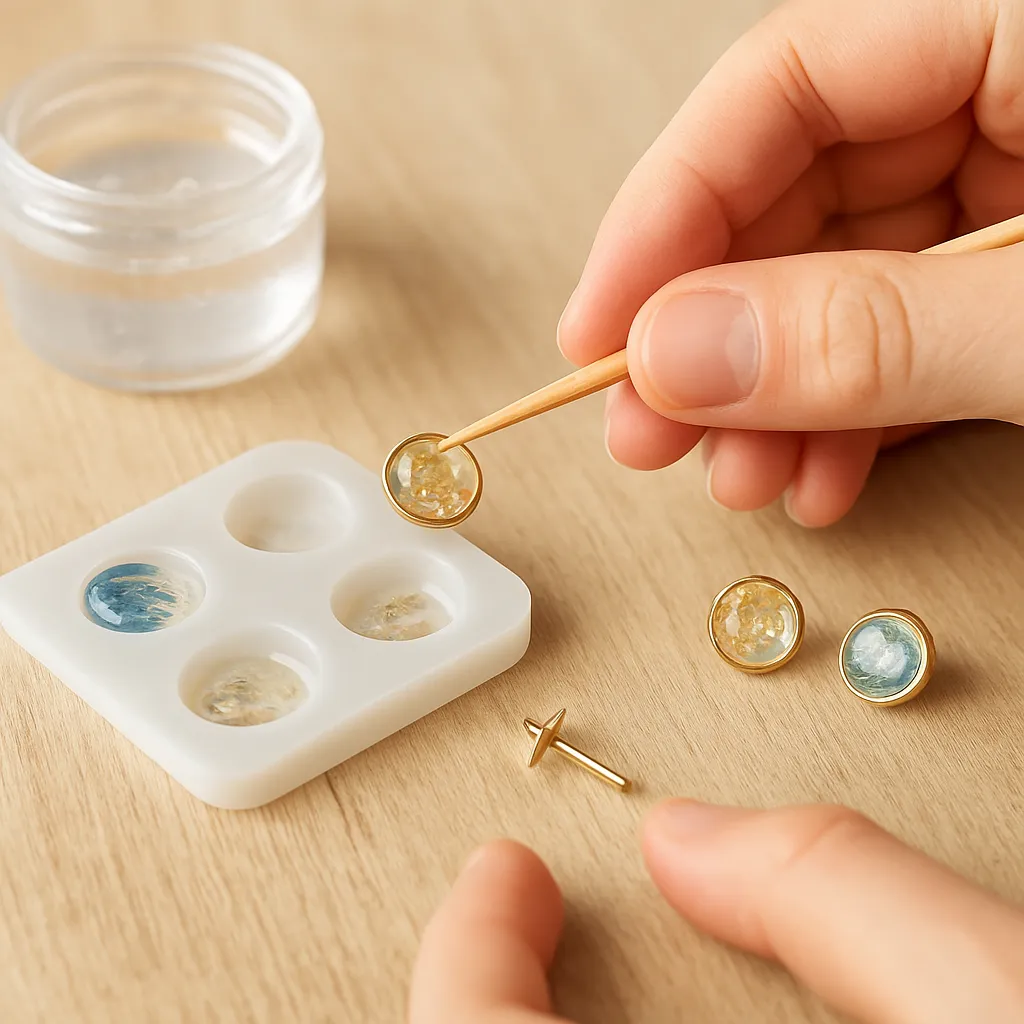
Small, bright, and endlessly customizable, handmade stud earrings are one of the most satisfying ways to turn liquid creativity into tiny wearable art. Working with resin allows crafters to capture color, texture, and light in a form that feels both modern and timeless. Whether you want crystalline domes that look like drops of rain, micro-botanical cabochons with dried petals, terrazzo-inspired chips, or a delicate ombré fade, this project scales beautifully from a single evening experiment to a full-fledged side business. Below you will find an in-depth guide that blends technique, design thinking, workshop setup, and finishing finesse so your studs look refined, durable, and truly personal.
Why Tiny Resin Studs Are So Rewarding
Stud earrings trim away excess and focus attention on pure form. Compared to dangling designs, they are faster to make, easier to finish uniformly, and more comfortable for everyday wear. The small surface area becomes a high-impact design challenge: a well-placed fleck of gold leaf, a carefully balanced two-tone swirl, or a specimen-grade moss fragment can feel jewel-like at a glance. For gift-givers, a pair of studs fits perfectly on a card, mails inexpensively, and carries tremendous sentimental value when you incorporate birth flowers, favorite colors, or even sand from a shared seaside memory. For sellers, studs offer rapid iteration: you can refine colorways in compact batches and present curated collections that look polished on a market table or online shop. And for those who crave skill-building, the workflow—mix, pour, level, cure, finish—teaches foundational lessons that translate to larger castings, inlays, and mixed-media jewelry.
Materials, Tools, and Workspace Setup
A tidy bench and a predictable process keep results consistent. Before your first pour, assemble the essentials so you can work deliberately and without rushing the clock.
- Resin system: choose a clear two-part epoxy casting resin or a high-quality UV-curable gel depending on your timing and project scale (more on that below).
- Molds and settings: shallow hemispherical or cabochon silicone molds make classic domes. Also consider metal bezels (closed- or open-backed), or use clear tape under a flat pad to create custom geometry.
- Color and effects: concentrated liquid dyes, mica pigments, alcohol inks, color-shift powders, iridescent flakes, glitter in micro sizes, and gold/silver/copper leaf. Keep grain size tiny for clarity in small studs.
- Inclusions: pressed botanical fragments, opal film, seashell shards, crushed stone, holographic confetti, and ultra-thin polymer clay “terrazzo” chips.
- Measuring and mixing: digital scale precise to 0.01 g, graduated mixing cups, silicone or wooden stir sticks, and disposable pipettes for controlled fills.
- Surface and heating: non-stick mat, level tile or glass pane for curing, dust cover, and a low-heat source (embossing gun, warm water bath) to reduce viscosity if your system allows.
- Bubble control: fine torch or heat gun used lightly, or a pressure pot for perfectly clear casts (optional but transformative).
- Finishing: wet/dry sanding papers (400 to 7000 grit), micro-abrasive pads, a polishing block, cotton wheels, and plastic-safe polishing compound.
- Jewelry findings: post studs (surgical steel, titanium, niobium), ear nuts, and low-profile flat pads (4–6 mm). For sensitive skin, choose hypoallergenic metals like titanium or niobium.
- Adhesives: two-part gel adhesive or a specialized jewelry glue; UV-set gel is useful with transparent studs and metal pads when you need speed.
- Safety and cleanup: nitrile gloves, safety glasses, apron, lint-free wipes, isopropyl alcohol for tools (check compatibility), and a silicone work mat.
Pro tip: Dedicate a small tray or baking sheet as a mobile workstation; you can slide the entire setup under a dust cover or to a quiet shelf while pieces cure undisturbed.
Safety and Handling Basics
Clarity and strength begin with respect for your materials. Read the manufacturer’s technical sheet for correct mix ratio, working time, recommended temperature, and post-cure. Maintain a clean, ventilated space; wear gloves to avoid skin contact; and protect eyes when using rotary tools. Stable temperature helps self-leveling and reduces bubbles; many resins prefer 21–24°C (70–75°F). For two-part systems, measure by weight if specified, mix slowly scraping sides and bottom, then transfer to a second cup and mix again (the “double-cup” method) for best consistency. Manage exotherm by working in small batches suitable for studs; excessive volume can overheat and cloud the cast. Keep flames away from volatile alcohol inks; if you use a torch, pass it quickly and at a distance to avoid surface rippling. Store chemicals sealed and upright, and dispose of fully cured waste rather than liquids whenever possible.
Choosing Between Epoxy and UV Systems
Both main systems have their place in stud making:
- Two-part casting epoxy: excellent optical clarity, low shrinkage, and longer open time for intricate layering or bubble release. It often needs 12–48 hours for handling and a full post-curing window for maximum hardness. Great for batches and deeper pours.
- UV-curable gel: cures quickly under the correct wavelength lamp, enabling same-session builds and on-the-fly color tests. Ideal for very shallow layers, embedding micro-inclusions, and rapid production. Requires careful control of layer thickness and complete light coverage to avoid soft spots.
Many studios keep both: epoxy for base shapes and volume, UV gel for finishing coats, edge repair, and securing inclusions precisely where needed.
Colorants, Effects, and Optical Strategies
Because studs are small, subtlety pays off. Think in layers and translucency rather than heavy saturation. A transparent tint with a whisper of mica looks like gemstone glass; an opaque pastel reads like enamel. Alcohol inks bloom beautifully but can overtake a tiny cavity—dispense with a micro brush or toothpick. Iridescent flakes must be torn into ultra-fine pieces to avoid protrusions. For natural botanicals, use very thin slices and pre-seal delicate petals in a skim coat so trapped air can escape before the final fill. For terrazzo effects, cure a thin colored slab on a non-stick mat, chop into confetti with a blade, and sprinkle only a few chips per stud; negative space elevates the look.
Step-by-Step: Classic Dome Studs Using a Silicone Mold
This approach creates glossy, self-contained cabochons you will later mount to posts. Use a doming-friendly casting resin with a low viscosity for crisp, bubble-free results.
- Step 1 – Prepare the mold and bench: Wash and dry the mold if new, then inspect under raking light. Dust is the enemy of gloss; use a clean artist’s brush or tape to lift lint. Level your tile or glass; place the mold on it. Pre-fit a dust cover large enough not to touch the surface.
- Step 2 – Mix a small batch: Weigh parts A and B precisely. Stir with intention—slow circles, bottom-to-top folds—for 2–3 minutes. Transfer to a fresh cup and mix 1–2 more minutes. If your resin tolerates gentle warming, let the cup rest a few minutes so bubbles rise.
- Step 3 – Color control: For classic clarity, leave clear; for a tint, add a micro-drop of dye; for sparkle, add a pinpoint of mica powder. Aim lighter than your target—resin deepens color when domed. Avoid overloading colorants, which can inhibit cure.
- Step 4 – The pour: Use a pipette to fill cavities halfway. Pause so bubbles migrate up. Tease stubborn bubbles with a toothpick. If safe for your system, pass a heat source briefly over the mold to break surface tension.
- Step 5 – Inclusions (optional): Place tiny botanicals, foil fragments, or chips with tweezers. Submerge them fully so no air is trapped beneath. For multi-layer looks, thinly pour, partially cure, then add the next element to lock placement.
- Step 6 – Top off and dome: Add resin in tiny additions until a convex lens forms without spilling over the rim. Good doming relies on surface tension; too much and it will crest, too little and you get a flat top.
- Step 7 – Protect and cure: Tent the mold to block dust. Cure per manufacturer guidance. Resist the urge to poke—fingerprints and lint are nearly impossible to remove from glossy tops.
- Step 8 – Demold: Flex the mold gently. If tacky, allow more time or move to a warmer spot. Set cabochons on a non-stick surface to finish hardening before any sanding or mounting.
Alternative Builds: Open-Back Bezels and Tape Dams
If you prefer metal-framed studs or want flat rather than domed surfaces, bezels are a smart route. For open backs, press clear packing tape across the rear of the bezel, burnish firmly to seal, and place tape-side down on a level tile. Fill in controlled layers; this reduces bubbles and preserves fine detail such as micro flowers or tiny photos (seal printed images first with a clear, fully dry barrier). Once fully cured, remove tape cleanly for a glassy back. For geometric studs without molds or bezels, create a tape “pond” on glass, pour a thin slab, cure, then punch or saw shapes to mount later.
Finishing: Flattening, Sanding, and Polishing
Great studs look intentional from every angle. Because small pieces magnify flaws, invest time in finishing backs and edges.
- Flattening: Adhere 400–600 grit wet/dry paper to a glass tile with water. Holding the cabochon face-up, swipe the back in figure-eights with light pressure until it sits perfectly flat on the tile. Rinse often to prevent clogging.
- Edge refinement: If a meniscus lip or overflow exists, bevel with 800–1200 grit. Keep the piece wet; resin sands quickly and heat can smear edges.
- Micro-scratch removal: Progress through 1500–7000 grit and micro-abrasive pads. Finish by hand-buffing with a plastic-safe compound for crisp gloss. This is where final polishing transforms “handmade” into “boutique.”
- Matte finishes: For a frosted gemstone vibe, stop at 2000–3000 grit and avoid buffing—uniformity is key so both studs match exactly.
Mounting Posts with Reliable Adhesion
The join between cabochon and post determines longevity. For maximum adhesion, first scuff the metal pad with 400–600 grit and clean with alcohol. Mark the center on the back of the cabochon using a fine-tip tool or a dot of removable marker. A simple jig—two rulers taped at right angles—helps repeat alignment across pairs.
- Two-part gel adhesives: Mix a pea-size amount; apply a thin, even coat to the pad, then press onto the stud. Remove squeeze-out with a toothpick. Tape upright to cure undisturbed.
- UV gel: Apply a dot, position carefully, and pre-tack with brief light. Check orientation; then fully cure under the lamp from multiple angles so light reaches through the resin and around the pad.
- Mechanical reinforcement: For large domes, use posts with perforated pads so adhesive keys through the holes.
- Backs: Offer both butterfly clutches and comfortable silicone backs; include a spare set with each sale or gift.
Troubleshooting and Quality Control
Even careful makers encounter hiccups. A troubleshooting habit ensures professional results:
- Tacky surface: Under-mixed ratio, cold environment, or colorant overload can inhibit cure. Warm post-cure may help; otherwise cast a thin clear layer to seal if the core has hardened.
- Swirls that separate: Incompatible colorants can repel. Stick to resin-safe dyes and test combos at micro scale.
- Bubbles trapped under inclusions: Pre-wet inclusions with a skim coat; place at an angle; tease out bubbles with a needle before the final pour.
- Edge drips: Overfilled domes creep. Leave a tiny headspace, wait for self-leveling, then add droplets slowly.
- Yellowing: Choose resins with UV stabilizers, store finished pieces out of direct sunlight, and use pale tints to disguise minor warmth over the long term.
- Adhesive failures: Clean and scuff both surfaces. Avoid skin oils. Give full cure time before packaging. Perform a gentle “twist test” on one sacrificial pair per batch.
Design Principles for a Tiny Canvas
At 6–10 mm across, every decision counts. Consider contrast (light vs. dark, matte vs. gloss), proportion (fewer, finer inclusions), and repetition (pairs should echo, not necessarily clone, each other). Embrace negative space; a single flake of opal film in a transparent field looks precious. Use micro-scale geometry—halves, thirds, diagonals—to frame color fields. If you work in series, create mood boards and mix a base “mother batch” of tinted resin, then modify small sub-batches to keep a family resemblance across a collection. When using botanicals, choose paper-thin slices; thicker bits read clumsy at this scale.
Care and Longevity for Everyday Wear
Include simple care notes with each pair: avoid prolonged soaks, harsh chemicals, or storing under pressure that could distort domes in heat. Wipe with a soft, damp cloth; polish lightly with a microfiber if needed. For metal comfort and skin safety, clearly label materials (titanium, surgical steel) so customers with sensitivities can choose confidently. If you sell, use sturdy earring cards and anti-scuff pouches; small boxes with foam inserts prevent postal mishaps.
Upcycling and Sustainable Habits
Studs are ideal for responsible making. Cure leftover drips on your silicone mat into thin films, then punch micro-confetti for terrazzo designs—this both reduces waste and produces cohesive palettes. Salvage clear offcuts as base chips for new speckles. Choose durable findings so earrings last years, not months. Press flowers you grow or forage responsibly (never from protected habitats). And build quality checks into your process so fewer items become seconds.
Advanced Tools and Techniques to Explore
As your practice evolves, a few upgrades elevate results:
- Pressure pot: Eliminates microbubbles during cure, resulting in water-clear domes even with tricky inclusions.
- Vacuum degassing: Useful if mixing introduces persistent bubbles; degas before pouring.
- Digital calipers: Measure diameter and thickness precisely so pairs match in height and visual weight.
- Edge domers: Specialized syringes and needle tips help meet the rim cleanly when topping off.
- Hybrid builds: Cast a clear base in epoxy, then add a UV gloss coat for rapid edge correction and dust-free finishes.
- Photo micro-inlays: Seal mini-prints front and back with clear coat, trim precisely, and embed flat in shallow pours for keepsake studs.
Studio Workflow and Batch Management
Time becomes your ally when you plan batches. Map out colorways and inclusion sets beforehand. Work in threes or fives so each pour step repeats while your hands remember the motion. Label curing trays by collection. Photograph under consistent light as soon as pieces fully cure—resin’s glassy surface loves a softbox or a bright window with a simple reflector. Keep a sample ring that shows finish options (gloss, satin, matte) and sizes; this is useful for markets and custom orders.
Common Aesthetic Directions to Try
- Botanical dew: Whisper of transparent green or blue, with a single micro fern tip suspended mid-dome.
- Opal fleck: Tiny iridescent shards in clear base, placed asymmetrically for interest.
- Terrazzo pastel: Opaque blush base with specks made from cured offcuts in ivory, mint, and gray.
- Metallic line: A clean diagonal of gold leaf between two translucent tints for a sleek, graphic look.
- Galaxy black: Deep ink with sparse micro-glitter; leave negative space so the effect reads “constellation,” not craft glitter.
- Beach memory: A pinched pinch of fine sand at the bottom third, topped with ocean-tinted clear.
Mounting Variations: Bezels, Prongs, and Frames
While glue-on pads are fast, alternative settings can become part of the design. Low-walled bezels provide a metal rim that contrasts with shine. Open-backed frames let light pass through, making translucent tints glow. For a handmade metal touch, solder small cups with drilled pads, then cast into them. If you prefer ready-made, choose cast-brass bezels with plating that matches your other findings to keep branding consistent across pieces.
Texture, Matte, and Mixed Media
Gloss is classic, but matte resin looks like sea glass and photographs beautifully. To create an even satin sheen, sand uniformly with fine grits and finish with a dedicated matte micro-abrasive. For mixed media, seat a sliver of wood or dyed concrete chip into a shallow pour, then overcoat with clear. The interplay between organic grain, mineral matte, and crystalline resin feels sophisticated—and the scale of studs keeps it refined rather than loud.
Adhesives and Metal Choices for Sensitive Ears
Comfort is non-negotiable. Use titanium or niobium posts when possible; surgical steel works for many but not all. State materials clearly. For adhesives, test on your exact resin and metal combination—surface energy varies across alloys and platings. A small panel of test dots, left to cure and then stress-twisted a week later, gives valuable data before you scale production.
Photography and Presentation
Because studs are tiny, macro photography can reveal flaws but also sell your craftsmanship. Use a neutral background and a diffused key light. Show scale: a coin or ruler in one frame helps buyers judge size online. Include an ear model shot (with sanitized, removable ear display or appropriate consent). Packaging can echo your design language—soft grays for minimalism, kraft and botanicals for nature-inspired lines, or pebbled black for luxe sparkle. Keep it consistent across batches so returning customers recognize your brand.
Frequently Overlooked Details That Make a Difference
- Grain size: Anything larger than 0.5–1 mm can look clumsy in studs; cut inclusions smaller than you think you need.
- Symmetry tolerance: Accept a “sister, not twin” philosophy for organic inclusions, but match height and center alignment precisely.
- Weight: Keep each stud light so it sits upright on the lobe. Heavy domes can tilt; flatten backs and choose appropriately sized posts.
- Dust protocol: Wipe down the dust cover interior before each session. A single stray fiber can ruin a perfect dome.
From Hobby to Boutique: Pricing and Production Notes
To price fairly, track resin use per cavity, inclusion cost, adhesive, findings, finishing time, and overhead (tools amortized across batches). Build a buffer for remakes and testing. Offer tiered lines: essentials (single color), signature (limited palettes, botanicals), and premium (complex layering, metal frames). Keep a maintenance calendar for lamp bulbs (if using UV), inventory for posts and backs, and periodic quality checks on adhesives from lot to lot.
Careful Experimentation: The Heart of Handicraft
The most compelling studs come from deliberate play. Pour a micro test in a spare mold with each new dye or effect; record ratios and curing outcomes. Note how different mica loads affect flow lines and how alcohol inks behave in shallow vs. deeper pours. Try partial fills to capture a floating horizon line, or micro inlays of wire to sketch a geometric arc. The miniature scale makes experimentation low-cost yet deeply informative—each pair becomes a study in composition, light, and material behavior.
Maintenance of Molds and Studio Rhythm
Keep molds clean and protected in rigid containers so rims stay crisp. Avoid aggressive solvents; warm water and mild soap usually suffice. If a mold loses gloss, a thin clear coat in-mold can restore shine for another few batches. Rotate between two or three favorite molds to extend lifespan. Sweep your bench between sessions, and refresh sandpapers before they clog; finishing is faster with sharp abrasives, and consistency across pairs improves drastically when your tools are in prime condition.
A Final Note on Mindset and Mastery
Working small is an exercise in restraint and precision. It rewards planning and patience, but it also invites joy—those first perfect domes emerging from the mold feel like gemstones you grew yourself. Over time, the rhythm of mixing, pouring, watching, and waiting becomes meditative, and the discipline you build translates to every other craft in your studio. Whether you make a single sentimental pair for a friend or build a recognizable line for sale, stud earrings are a beautiful, accessible gateway into the world of cast art jewelry—where a few drops of clear material, a whisper of color, and thoughtful finishing turn into wearable magic.
