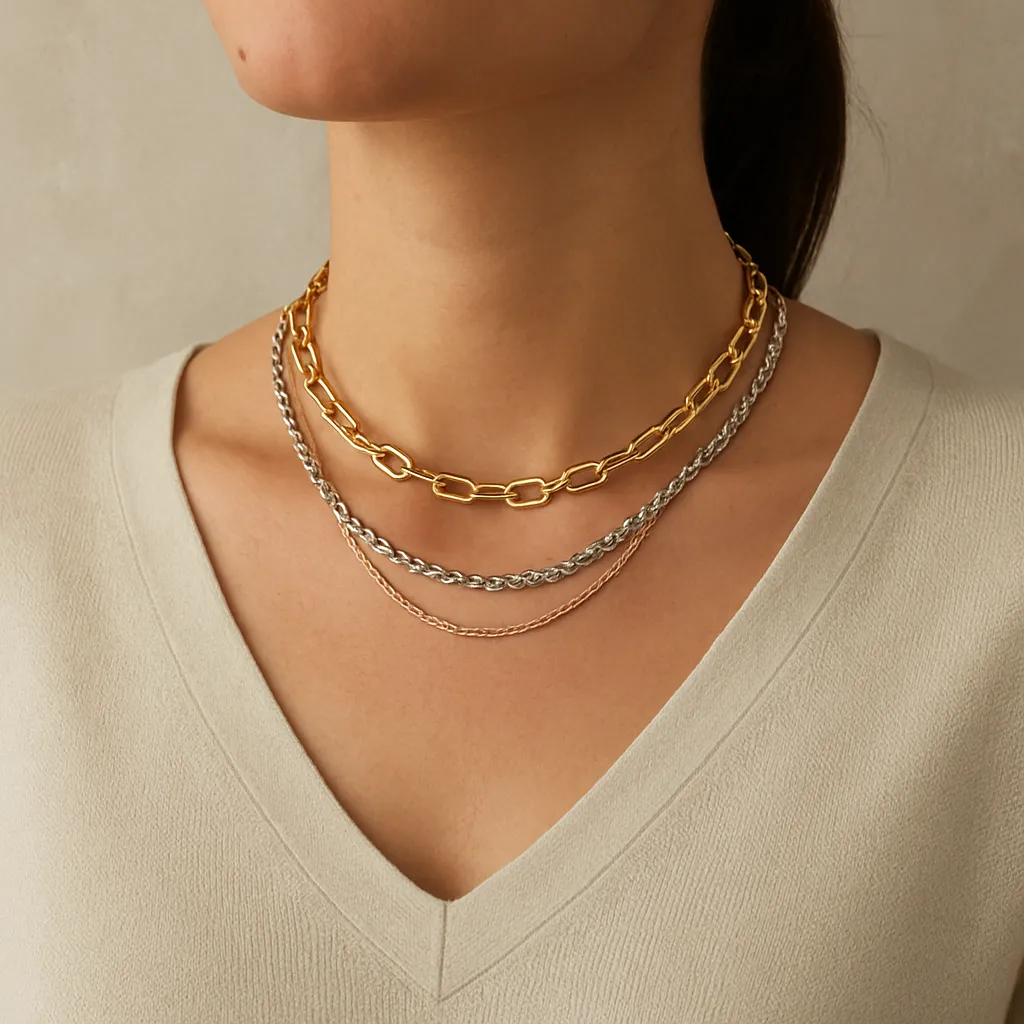
Metal layering marries the precision of the bench with the boldness of contemporary design, offering makers a way to create depth, lightplay, and personality without resorting to ornament overload. Whether you’re stacking bangles, laminating sheet for a pendant, or building a wall-mounted coat rack from contrasting alloys, layered metals deliver a modern look rooted in hand skill. This guide draws from traditional techniques and current studio practices to help you combine alloys, finishes, and forms in ways that feel fresh, intentional, and built to last. It is written for jewelry artists, product makers, and anyone exploring handicraft methods at the workbench.
Why Layer Metals for a Modern Look
Mixing metals pushes beyond matching sets and monochrome finishes. In a single composition, you can orchestrate dark and light, warm and cool, matte and gloss, aged and new. The result is visual richness without clutter—a hallmark of contemporary minimalism and New Craft ideals. Layering lets you do more with less because a small piece can carry multiple reads as it moves with the wearer or the light.
Historically, artisans have juxtaposed metals to signal value and technique: silver inlays on steel blades, gold foils on ritual objects, bronze and iron in architectural details. Today’s modern look leans on the same logic but favors clean edges, deliberate asymmetry, and functional clarity. Instead of hiding joints, we celebrate them; instead of coating, we compose. The human eye loves rhythm and variation, and layered metals supply both through color temperature, reflectivity, and edge hierarchy.
Layering also encourages narrative. Salvaged brass could reference heritage hardware; blued steel might nod to toolmaking; a whisper of gold acts like punctuation. Because every alloy ages differently, the piece evolves over time—a living record of use. That patina journey, guided by maker choices, brings meaning alongside style.
Understanding Metals, Colors, and Light
Alloy families and their personalities
- Gold alloys: Yellow, rose, and white variations change via copper, silver, nickel, palladium, or platinum content. Ideal for thin accents and diffusion bonding because of malleability.
- Silver alloys: Sterling (92.5% Ag) and Argentium (with germanium) are bright and responsive to surface treatments. Excellent base for gold foil techniques.
- Copper and brass: Copper’s red warmth and brass’s golden straw tone add immediate color. Both are forgiving to shape, receptive to patination, and cost-effective for large planes.
- Bronze: Subtle brown-gold that skews red or yellow depending on alloy. Good for sculptural elements and hardware because of hardness and wear resistance.
- Steel: From mild to tool steels, offers structural strength and a deep gray to blue-black palette when heat treated or blued.
- Aluminum and titanium: Lightweight, modern, and colorable by electrochemistry. Great for bold scale with minimal weight.
Color temperature and value
Layering works best when you treat metal like pigment. Brass and copper live on the warm side, steel and rhodium-plated finishes on the cool, with silver as a nearly neutral reflector. Think in terms of value (light versus dark) as much as hue. A low, brushed silver layer can make a bright brass ring appear to float; a blued steel plate beneath a satin bronze cap creates depth through shadow. Controlled differences in contrast help the eye separate layers cleanly, even from a distance.
Finish and reflectivity
From mirror polish to coarse crosshatch, finish dictates how light reads across a surface. Mixing finishes adds nuance without extra materials: a high-polish silver line against a sandblasted copper field can feel like inlay, even if it’s a raised strip. Reflectivity also influences perceived thickness—glossy layers look thinner; matte layers look heavier. To keep a modern profile, restrict your finish palette to two or three distinct textures and repeat them with intention.
Thickness, weight, and comfort
Layering adds mass. For wearables, keep top layers thin (0.2–0.5 mm sheet) and let the base provide strength (0.8–1.2 mm sheet for pendants, 1.2–2 mm for cuffs). For home goods, balance heft with mounting needs: a wall hook might pair 3 mm steel with a 1 mm brass face. The goal is optical density without bulk, guided by ergonomic proportion.
Core Design Principles That Keep Layers Modern
- Hierarchy: One dominant layer, one supporting layer, and one accent beat. If everything is special, nothing is.
- Repetition with variation: Echo a curve, rivet spacing, or brushed direction across different metals to unify the whole.
- Negative space: Use cutouts and shadow gaps so layers breathe. A 0.5–1 mm gap can read as a crisp line.
- Edge discipline: Keep margins deliberate—parallel edges signal intention and modernity.
- Tactable restraint: Limit palette to two or three alloys and two finishes for clarity.
- Functional honesty: Let fasteners show. Visible tabs, rivets, and seams become graphic elements.
Techniques for Layering Metals by Hand
Cold connections that celebrate structure
- Riveting: Wire or tube rivets lock plates without heat. Use brass or silver rivets as dot accents. Stagger spacing for rhythm; align for precision.
- Tabs and prongs: Sheet-metal tabs folded over a top layer create a neat frame. Undercut corners to prevent lifting during wear.
- Screws and Chicago bolts: Ideal for interchangeable parts or leather-metal hybrids. Countersink for flush faces.
- Interlocking slots: Laser or saw-cut keyed slots let layers slide together mechanically, then secure with a single rivet.
Joining with heat
- Soft soldering and silver soldering: Classic approach to laminate dissimilar metals. Stagger seams so they don’t stack in one line, which can print through.
- Brazing: For brass, bronze, and steel assemblies that require more strength. Choose a filler rod close in color or intentionally different for a visible seam.
- Diffusion bonding: Pressure and heat bond clean, flat surfaces without filler—foundational for patterned laminates.
Traditional and hybrid surface bonds
- Keum-boo: Fusing high-karat gold foil to fine silver using heat and burnishing. Minimal thickness, maximum color pop—perfect for crisp accents on a silver base.
- mokume-gane: A forged laminate of non-ferrous metals patterned to reveal woodgrain-like lines. Slice and inlay small panels for dramatic yet refined focal points.
- Bi-metal sheet: Factory-bonded precious metal to base metal. Saw shapes from bi-metal and laminate onto structural substrates.
Forming and texturing for depth
- Dapping and doming: Lift a top layer slightly so it casts a halo shadow on the base—micro-architecture on jewelry scale.
- Fold-forming: Create ridges that double as structural spines, then overlay a contrasting strip along the fold.
- Hammered texture: Directional hammering can pull the eye across a piece; use it to lead to a focal layer.
- Embossing and roll printing: Imprint patterns on only one layer to separate roles—pattern carrier versus stage.
Adhesives as design tools
High-strength epoxies and acrylic adhesives can supplement mechanical connections, especially when heat would alter a finish. For modern aesthetics, undercut a shallow recess in the base layer to receive the top plate—this hides the bond line and adds a clean reveal.
Finishes, Color Treatments, and Edge Work
Patinas and controlled aging
The word patina covers chemical and time-driven color changes. Liver of sulfur cools silver into moody grays, ammonia fumes green-brass in hours, and heat gives copper sunset hues. For modernity, apply patina selectively: keep edges clean and faces smoky, or vice versa. Mask with shellac or vinyl to create crisp transitions.
Heat and electrochemistry
- Heat coloring on steel: Straw to blue-black tones arise between 200–315°C. Stabilize with microcrystalline wax or lacquer.
- Titanium and aluminum anodizing: Voltage controls oxide thickness, producing stable interference colors from pale gold to electric blues and purples—excellent for color accents that won’t rub off.
- Blackening solutions: Commercial sulfide or phosphate treatments deepen steels and bronzes while preserving texture.
Edge discipline and transitions
Modern layering relies on crisp edges. File to a tiny bevel to catch light, or cut a relief groove between layers so the seam reads as an intentional line. Where layers meet at corners, soften just one alloy to prevent a bulky look; asymmetry here reads as considered rather than accidental.
Step-by-Step: Three Projects to Build Skills
1. Two-tone riveted cuff
- Concept: A 1.2 mm bronze base carries three brushed silver plates in a repeating rhythm.
- Cutting: Saw a cuff blank and three silver rectangles. Maintain a 1 mm margin on all sides once placed.
- Finish prep: Brush the bronze lengthwise; crosshatch the silver. This creates legible finish contrast.
- Drilling: Mark and drill paired 1 mm rivet holes per plate. Deburr meticulously.
- Riveting: Use sterling wire rivets. Upset gently to avoid dimples; back the face with a polished stake.
- Edge work: Micro-bevel all edges and burnish.
- Seal: Wax the bronze to slow oxidation while leaving silver bright.
Result: Clean geometry, visible fasteners, and a deliberate rhythm feel both crafted and contemporary.
2. Pendant with keum-boo accent and shadow gap
- Concept: A fine-silver oval floats above a darkened sterling base, with a high-karat gold crescent fused on top.
- Base build: Saw a sterling backplate with two tiny spacers soldered near the edges to create a 0.5 mm air gap.
- Keum-boo: Bring fine silver to a gentle heat on a steel plate, lay the gold foil, and burnish for a permanent bond.
- Assembly: Rivet the fine-silver plate to the spacers, leaving an uninterrupted shadow line around the edge.
- Finish: Oxidize the backplate; leave the top plate bright so the gold sings.
Result: A light, architectural composition that reads modern thanks to the floating plane and restrained sparkle.
3. Wall hook in blued steel and waxed brass
- Concept: Functional object where lamination doubles as decoration.
- Cutting: Waterjet or hand-saw a 3 mm steel backer and a 1 mm brass face with identical profiles.
- Heat treatment: Blue the steel to deep navy; brush and wax the brass to a soft glow.
- Joinery: Use countersunk screws through steel and hidden tabs that fold over the brass from the back.
- Edge reveal: Offset the brass by 1 mm to create a perimeter line of blued steel.
Result: Quiet luxury for the entryway—elevated hardware that showcases hand skills and material intelligence.
Ensuring Longevity: Wear, Care, and Smart Engineering
Managing reactions and mixed-metal challenges
Different metals can interact electrically in moisture. Minimize galvanic coupling by using barrier layers (clear lacquer, wax, or a nylon washer between layers for hardware). For wearables, avoid placing a less noble metal in sustained contact with skin where sweat accelerates reactions. Thoughtful choices improve durability without compromising design.
Protective coatings
- Microcrystalline wax: Invisible feel, easy to renew. Best for low-abrasion surfaces and patinated parts.
- Lacquers: Long-lasting protection for brass and copper; choose jewelry-safe versions and test on samples.
- Rhodium or ruthenium plating: Hard, cool-toned shields for silver and white gold accents in high-wear zones.
Serviceability and modular design
Build with maintenance in mind. Riveted assemblies can be re-peened, screws can be replaced, and patinas can be refreshed. A modern look values function as much as form; invisible service channels, spare rivets, and documented finishes help your work live well beyond the first owner.
Sourcing and Sustainability for the Modern Maker
Layering invites material frugality: small accents, thin foils, and offcut mosaics achieve big effects with little mass. Use recycled silver and gold, reclaim brass from instrument or architectural salvage, and rework shop drops into inlays. Responsible choices enhance visual story and business practice alike—this is where style meets sustainability.
- Traceability: Work with suppliers who certify recycled content or fair-mined sources.
- Smart substitutions: Bronze for brass when you need tougher wear; aluminum for scale without weight.
- Chemical stewardship: Neutralize and dispose of patina baths properly; choose low-VOC lacquers.
Durable design is the greenest design. Build for repair, anticipate patina evolution, and educate clients on care so pieces live gracefully instead of being replaced.
Style Guides: Jewelry, Accessories, and Home Objects
Jewelry layering cues
- Necklaces: Stack pendants at staggered lengths. Keep one bold base (e.g., oxidized silver plate) and one bright accent (e.g., gold foil line).
- Bracelets: Combine a structural cuff with thin bangles in complementary alloys. Repeat a brushed finish across them for unity.
- Rings: Use bi-metal for thin profiles; add a micro-inlay stripe for color break without bulk.
- Earrings: Exploit motion—hang a warm disc in front of a cool crescent so colors flicker as the wearer moves.
Accessories and small goods
- Bags and belts: Pair stainless hardware with brass inlays; let visible screws become graphic dots.
- Stationery: Copper clips over aluminum backers feel both vintage and tech-forward.
- Wearables for tech: Layer titanium accents on polymer frames using micro-fasteners for lightweight contrast.
Home decor and furniture details
- Lighting: Brass collars on blackened steel stems bridge warm bulbs and cool frames.
- Handles and pulls: A thin bronze faceplate on an aluminum core gives warmth without weight.
- Wall art: Patchwork plates with patina gradients read like abstract landscapes.
Tools, Benchcraft, and Safety
- Measuring and layout: Scribe lines lightly and use parallel-jaw pliers to keep edges true.
- Sawing and cutting: Fine blades for soft metals; abrasion or shears for thin non-ferrous sheets.
- Finishing: Scotch-Brite, lap wheels, burnishers, and sandblasting cabinets create controlled finish libraries.
- Heat: Small torches for jewelry, oxy-fuel or induction for heavier stock. Keep quench and pickle protocols metal-specific.
- Ventilation and PPE: Patina fumes, fine dust, and solvents require extraction, gloves, and eye protection.
Label everything and keep test tiles. A reliable finish chart is as valuable as any tool when you aim for clean, repeatable results.
Pattern Play and Advanced Methods
Patterned laminates without a forge
If a full billet isn’t in the cards, emulate patterned metal by stagger-stacking thin sheets of copper and brass, then sawing through at angles to reveal stripes. Solder and compress thoroughly, then dome or roll-print to distort the linework in intentional ways.
Selective inlay and edge reveals
Carve a shallow seat for a thin contrasting strip and secure it with burnished edges or micro-rivets. This creates the impression of massed layers while keeping weight low. A shadow line or micro-chamfer beside the inlay reads crisp and architectural.
Minimalism with a wink
A single gold dot on a field of brushed steel can say more than ornate filigree. Use the language of reduction—clean geometry, honest fasteners, disciplined finishes—to let small elements command presence.
Troubleshooting Common Issues
- Misaligned layers: Dry-fit with tape or clamps; scribe light registration marks; use a drill press for coaxial holes.
- Finish contamination: Keep separate buffs and compounds per metal; clean in ultrasonic between steps.
- Warping during solder: Alternate heat from front to back; use heat sinks and binding wire; design in relief cuts for stress.
- Uneven gaps: Shim with feeler gauges while riveting; pre-set spacers for controlled shadow lines.
- Overbusy palettes: Remove one color or one finish and reassess hierarchy.
The Human Element: Philosophy of Handicraft in Mixed Metals
Metal layering is a collaboration between eye, hand, and time. You plan, the torch persuades, the file refines, and the world finishes the job through wear. The modern ideal values clarity and intention, but it also honors the sign of the hand. A single tool mark left in a hidden seam, a rivet head with a whisper of hammer faceting—these are signatures, not flaws. Pursued with care, layered metalwork becomes an essay in material truth, rooted in craftsmanship.
Client Communication, Pricing, and Presentation
- Explain materials: Share a simple card describing alloys, finishes, and care. Education turns patina into a feature.
- Price by process: Account for sample-making, fixture building, and finishing time; layers multiply labor more than material.
- Photography: Light to skim across surfaces and reveal micro-bevels and finish breaks. A gray background keeps colors honest.
- Packaging: Neutral textiles, corrosion inhibitors for reactive metals, and a tiny wax tin invite good stewardship.
Trends and Futures in Layered Metal Aesthetics
Designers are moving toward leaner stacks with bolder separations—thinner precious layers over robust bases, negative space as a primary design tool, and engineered gaps that read like light lines. Techniques once reserved for specialized studios, like table-top diffusion bonding or small-batch patterned laminates, are migrating into accessible workshop practice. Expect increased cross-pollination: 3D-printed forms serving as mandrels for hand-formed sheet, or CNC-cut spacers defining micrometer-precise shadow reveals while hand finishes maintain warmth.
What will remain constant is an allegiance to material intelligence: the right alloy in the right place, lovingly finished, aging with grace. Keep your palette tight, your edges disciplined, and your layers purposeful. Embrace selective boldness and let every seam, gap, and fastener earn its place.
Quick Reference: Materials and Methods Matrix
- Warm + cool pairing: Brass over blued steel, copper over bright aluminum, rose gold over white silver.
- Finish triads: Matte base + satin layer + polished line; sandblast + crosshatch + mirror edge.
- Joinery highlights: Tube rivets as graphic circles, micro-screws as punctuation, hidden tabs for floating effects.
- Color control: Heat blues on steel, sulfide grays on silver, stable brights via anodizing.
From Bench to Life: Keeping Pieces Honest Over Time
As layered pieces live with their owners, edges soften, colors deepen, and tiny scratches knit the surfaces into a single narrative. Instead of fighting this, design for it. Choose finishes that age toward beauty, metals that complement each other as they oxidize, and structures that can be maintained. Offer refresh services and publish care notes. When a client sees their piece evolve, they’re witnessing a collaboration with oxygen, light, and touch—an ongoing proof of thoughtful making.
Closing Thoughts
Layering metals for a modern look is less about showing everything you can do and more about choosing what matters. Color temperatures, reflectivity, and edge behaviors become your vocabulary. Techniques—from cold connections to mokume-gane—are your grammar. With an economy of means and a clarity of intent, you can build work that feels inevitable, contemporary, and warm-blooded. Keep the materials honest, the geometry calm, and the story precise. Let the metals speak in concert, and they will reward you with pieces that grow richer with wear and time.
Selected power terms to remember: contrast, proportion, patina, texture, sustainability, durability, anodizing, Keum-boo, mokume-gane, craftsmanship.
