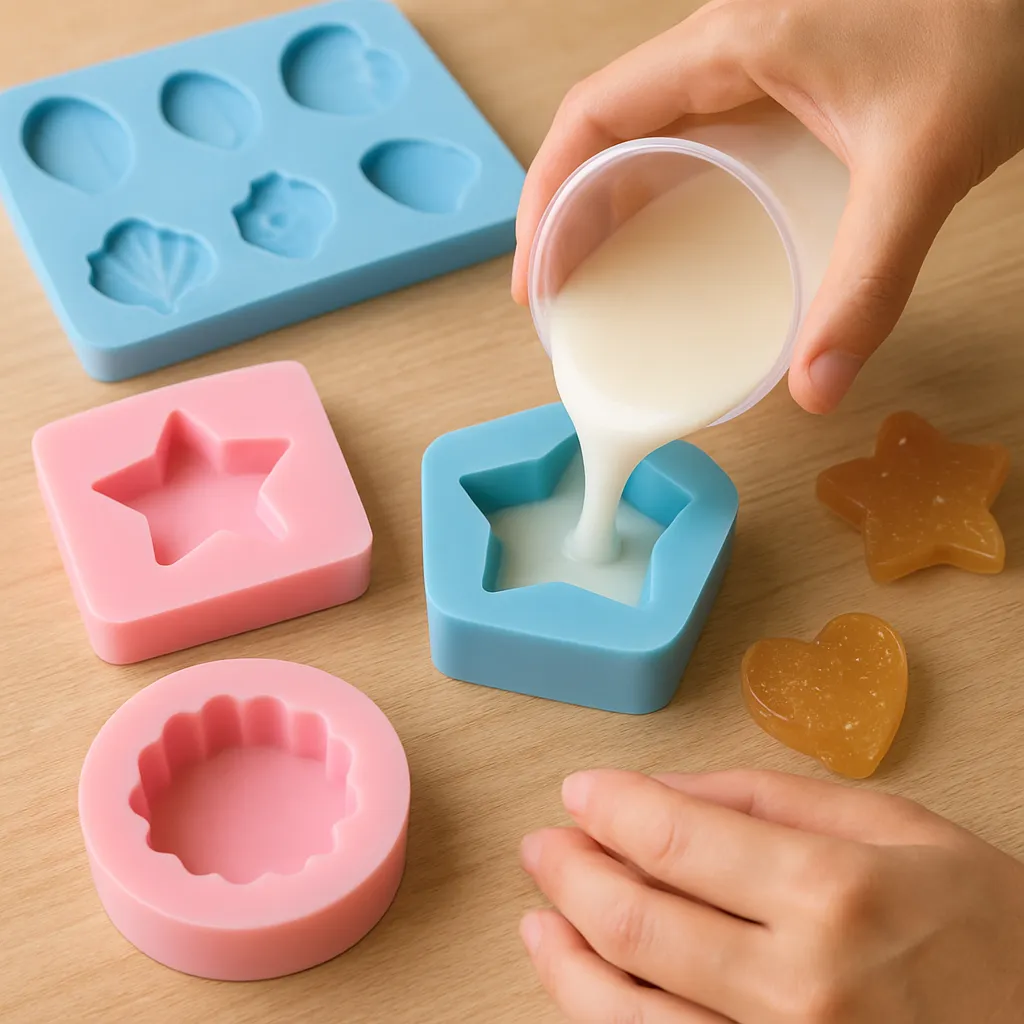
Silicone molds open a world of forms that would be difficult, messy, or impossible to hand-carve. Their flexibility captures fine textures, from lace to leaf veins, while their nonstick surface makes casting feel approachable even for beginners. Whether you pour clear resin around wildflowers, compress terrazzo-style stone chips into gypsum, or bake sculptural chocolates for a dessert centerpiece, silicone molds allow crafters to dream in three dimensions and reproduce those dreams with consistency.
Why Silicone Molds Are a Game-Changer in Handicraft
Unlike rigid plastic or metal forms, silicone molds flex and peel away from complex profiles without cracking or tearing your piece. That stretch grants you the confidence to experiment with undercuts, filigree, and deep relief textures—details that would usually trap a casting in a hard mold. The surface releases cleanly, so you often need no spray at all, and the material tolerates a broad temperature range. Many craft silicones shrug off freezer conditions and can also handle typical oven temperatures for baking or heat-setting wax, which makes them unusually versatile across media.
For artisans selling small-batch goods, silicone becomes a quiet production partner. The repeatability of shapes translates into reliable inventories and predictable finishing times. At the same time, the softness of silicone is forgiving; it protects fragile inclusions like pressed flowers and embedded shells. Proper care rewards you with exceptional durability, so a single mold can accompany you for dozens, even hundreds of pours depending on the casting material.
Choosing the Right Mold and Material
There is no single best silicone mold—only one that suits your project’s geometry and your chosen casting medium. Consider the following dimensions when shopping or making your own:
- Thickness and wall support: Slim-walled molds flex more but can distort under heavy mixes; thicker flanges keep shapes true. Frames and trays prevent bowing on long coasters, trays, and plaques.
- Detail depth: Ultra-fine textures benefit soaps, chocolates, and low-viscosity castings; pebbled or satin textures can hide micro-scratches in concrete or plaster pieces.
- Hardness: Measured as Shore hardness. Softer (lower Shore A) peels off intricate undercuts better; firmer (higher Shore A) holds large flat forms without warping.
- Shape strategy: Choose split or multi-part molds for deep, hollow shapes; single-cavity trays for tiles and coasters; tall cup molds for domes, spheres, and geodes.
- Use category: food-safe molds for edible crafts; craft-only molds for chemicals and pigments that don’t belong near the kitchen.
Match your mold to material behavior:
- Epoxy and UV resins: Capture high gloss and clarity. Most silicones release them effortlessly, though barrier sprays can extend mold life.
- Jesmonite and gypsum plasters: Cast crisp matte decor. Vibrate gently to free bubbles from corners.
- Concrete and cement blends: Heavier mixes require sturdier molds and support frames. Add surfactants for better flow.
- Soap: Both cold process and melt-and-pour work well; ensure saponification heat won’t deform thin molds.
- Wax: Waxes shrink slightly on cooling, which helps release. Choose molds with manageable wall thickness.
- Chocolate, fondant, and candy: Only use molds explicitly rated as food-safe. Temperature control (tempering, bloom) matters more than the mold itself.
Tools, Workspace, and Safety
Set up a clean, flat surface and protect it with a silicone mat or HDPE board. A level is your friend. Organize mixing cups, silicone spatulas, pipettes, tweezers, and a soft brush for pre-wetting corners with your casting material. A digital scale with 0.1 g resolution is essential for accurate mix ratios.
Safety depends on your medium. For epoxies and solvents, use gloves (nitrile), eye protection, and ventilation; a respirator with organic vapor cartridges is wise for frequent pours. For plaster and cement, dust masks prevent inhalation during mixing. For soap making, lye demands careful handling and splash-proof goggles. Keep food projects entirely separate—dedicated tools and molds only, and do not cross-use molds between food and craft.
Keep a small kit of problem-solvers: isopropyl alcohol for cleanup (resin drips before cure), blue painter’s tape for lint control, toothpicks for bubble-popping, and a low-heat gun or hairdryer to tease bubbles without overheating. When needed, a light spritz of a proper release agent protects molds from aggressive materials like polyester resin or urethane foam.
Planning and Calculating Volume
Nothing sours a pour like running short of material at the rim. Estimate volume in three ways:
- Water or rice displacement: Fill the mold with dry rice, then pour it into a measuring cup. For water, only use in waterproof molds and dry them thoroughly afterward.
- Geometry math: Rectangles and circles are easy; for organic shapes, partition into simple forms and sum the volumes. Keep a sketchbook with inner dimensions and default fill heights for each mold you own.
- Weight-based conversion: If your material density is known, multiply the volume by density to get target grams. This allows precise weighing and reduces mixing waste.
Plan your layers and inclusions. If you embed botanicals, seal or dry them thoroughly to prevent trapped moisture from off-gassing. Lay out any findings (earring posts, magnets, eye screws) and decide on their insertion time—early for strong bonds, late for better alignment. Thinner layers cure faster and show better color separation; thick masses can overheat (see exotherm) and yellow.
Color, Additives, and Effects
Colorants can make or break a piece. Resin-compatible dyes produce translucent tones; opaque pastes and micas give depth and shimmer. Start with conservative loadings (1–5% by weight for pastes; a dusting for micas) so you don’t choke cure mechanisms or hide embedded objects. Alcohol inks bloom into tender clouds inside clear castings; water-based inks rarely cooperate with hydrophobic systems.
Dry additives, from crushed glass to granite chips, create terrazzo patterns in gypsum and Jesmonite. Seal porous chips to reduce bubble trails. In soaps and waxes, botanicals offer scent and story; in chocolate, avoid large, sharp inclusions that could fracture detail. For metallic lines and gilding, paint highlights onto the mold surface with mica slurry; the first contact layer will pick up the sparkle cleanly.
Fancy techniques to try:
- Back-painting: Brush a thin, pigmented skim onto textures before the main pour to accent details.
- Dirty pour: Layer several colors in a cup without mixing, then tip gently to create marbling.
- Drop-in petals: For alcohol inks in resin, place white ink after colors to push tonal cells outward.
- Banding and veining: Drag a toothpick through mica lines to form faux stone veins.
- Holographic glitter gradients: Add heavier glitter near edges, lighter toward the center for depth.
Remember that some colorants raise or lower viscosity, changing the way pigments settle or suspend. Stir deliberately but gently to reduce trapped air, scrape cup sides, and give paste pigments time to wet out fully before pouring.
Pouring Techniques for Unique Shapes
Patience and sequencing are half the craft. Pre-coat deep textures with a small brush or syringe; this drives bubbles out of crevices. Tilt and roll the mold to chase air toward the top. For materials prone to foaming, consider degassing in a vacuum chamber or using a pressure pot (for resin) to compress micro-bubbles until they disappear.
For thin-walled or hollow shapes, rotate-cast: pour a small amount, rotate the mold slowly to coat all surfaces, then repeat in layers until you reach desired thickness. For multi-part molds, align registration keys, rubber-band or clamp the exterior, and pour from the lowest point to let air rise and escape through vents. A drizzle-thin stream reduces bubble entrainment. Tap the mold gently or place it on a vibrating pad to dislodge trapped air without disturbing patterns.
Inclusions and inserts need forethought. Pre-drill pilot holes in cured castings if you must, but embedding magnets or hardware during the pour saves time and looks cleaner. Seal paper images with clear acrylic to block bleed-through. When combining dissimilar materials—say, resin with concrete chips—add a compatible coupling agent or plan a mechanical lock (texture or undercut) so parts stay married.
Demolding Without Damage
Release time is ritual. Rushing risks tears in the mold and fingerprints on soft castings. Check cure windows and environmental notes: temperature swings and humidity affect many materials. To ease demolding, start by flexing the mold edges to break surface tension, then peel walls outward while pushing gently from the back. For tall molds, invert and let gravity help. Soapy water assists with cement and plaster; for wax and chocolate, warmth is better than force.
Stubborn corners often signal undercure. If the surface feels tacky, wait; a post-cure in gentle warmth can finish the job. Freezer tricks can help with resin shrinkage on very small jewelry pieces, but repeated extreme temperature cycling shortens mold life, so use sparingly.
Finishing: Sanding, Polishing, Sealing
Even perfect pours deserve finishing. Trim flash with a sharp craft blade, then wet-sand on a flat plate to avoid rounding edges. Step through grits: 320, 600, 1000, 2000, and into micro-mesh for high-gloss. Polishing compounds restore water-clear sheen to epoxy; a buffing wheel speeds work but monitor heat to prevent smears. For satin finishes, stop earlier on the grit ladder and matte-seal.
Concrete and gypsum appreciate sealers: acrylic, polyurethane, or wax finishes repel stains and enrich color. Soapmakers plane edges and stamp logos while bars are still malleable. Candle edges can be warmed lightly and re-formed. Chocolate gets shine from proper temper more than from buffing—if it emerges dull, revisit your temper curve and try again.
Care and Maintenance of Silicone Molds
A few habits extend mold life dramatically. Clean with mild soap and lukewarm water; avoid abrasive pads that scuff surfaces and transfer to future casts. Let molds dry fully to prevent trapped moisture from boiling into bubbles next time you pour. Store flat, supported, and out of direct sun; UV embrittles silicone slowly. Nesting heavy molds together compresses details—use dividers or trays.
Steer clear of sharp tools; wooden sticks outclass metal picks for prying. If you use a release agent, select one labeled for silicone and your casting medium; residues can inhibit future cures unless washed away. A light dusting of cornstarch can help soap and fondant release but wipe it out completely before pouring clear castings where haze would show.
Troubleshooting: From Bubbles to Sticky Casts
- Persistent bubbles: Warm the material to lower viscosity, pre-coat details with a brush, and vibrate the mold. Vacuum or pressure systems are the ultimate fix.
- Tacky resin: Mis-measured ratios or cold rooms are common culprits. Mix by weight when possible, scrape the cup, and maintain cure temps. A thin seal coat can rescue a slightly soft surface.
- Blush or film on resin: Humidity can create amine blush; wash with warm soapy water and recoat.
- Overheating: Thick pours trigger exotherm—cracks, yellowing, or warping. Use deep-pour formulations or layer in stages.
- Concrete edge chipping: Demold later or reinforce edges with fibers; ease interior corners on your master to distribute stress.
- Soap ash and soda lines: Lower water content, insulate evenly, and spritz with alcohol at pour to reduce ash.
- Chocolate bloom: Poor temper or warm storage; re-temper and keep molds immaculate and dry.
- Wax frosting: Cool too quickly and crystals form; warm molds slightly and cool candles more slowly.
Advanced: Custom Molds and Hybrid Builds
When off-the-shelf shapes fall short, craft your own. Sculpt a clay master, 3D-print a prototype, or carve foam sealed with epoxy. Build a box around it, suspend the master to create pour and vent channels, and cast silicone around it. For complicated geometries, create multi-part molds with registration keys so halves realign perfectly. Back them with a rigid mother mold (plaster or fiberglass) to hold their shape.
Hybrid projects expand possibilities. Embed LEDs into clear castings, route channels for incense smoke in gypsum sculptures, or inlay metal wire into shallow grooves made by a first pour, then backfill with contrasting material. Rotational casting yields lightweight helmets, ornaments, and shells; slush-casting flexible urethane inside silicone molds makes bendable props for performance arts.
Project Ideas That Celebrate Unique Shapes
- Geode coasters with druzy clusters: Resin base tinted with deep blues, mica lines for veins, crushed glass for crystal cores.
- Architectural concrete knobs: Pigmented cement cast in faceted molds; seal with matte acrylic.
- Pressed-flower pendants: Clear resin domes over sealed botanicals; embed bails during gel stage.
- Soap stones: Oval silicone molds, gray-greens with white swirls to mimic river rocks.
- Terrazzo trinket trays: Jesmonite base with pre-cast colored chips; sand to reveal speckles.
- Chocolate shells: Two-part food-grade silicone with shine from perfect temper and cocoa butter paint.
- Sketch-stamped tiles: Brush mica into engraving first, pour gypsum, then wash-back for textural contrast.
- Hanging planters: Rotationally cast thin-walled shapes with drainage holes molded in via removable inserts.
Eco and Budget Tips
Plan pours to minimize leftovers—batch multiple small molds to use the last 20 grams in a cup. If you do overmix, cure it flat and saw blanks for future earrings or inlays. Save partial sheets of sandpaper and label them by grit; they last longer when used for wet-sanding. Choose refill pigments to avoid buying redundant sets.
Silicone molds are reusable for ages with care, making them inherently resource-friendly. When a mold nears retirement, repurpose it for non-critical casts or experiment with textures you were afraid to waste on a fresh mold. Clean up with citrus-based hand cleaners and shop towels instead of solvent soaks when possible. Cure sticky spills before disposal—solid waste is safer than liquid chemicals.
Frequently Overlooked Details That Elevate Results
- Warm your mold: Slight warmth reduces chilling at the interface, letting bubbles release and surfaces level.
- Mind the meniscus: Slight overfill then skim flush for crisp, flat backs that need less sanding.
- Stage inclusions: Add heavy items late so they don’t sink; add light botanicals earlier to lock them in place.
- Use contrast intelligently: Dark lines next to translucent color emphasize contours in organic shapes.
- Respect cure schedules: A glossy surface isn’t always fully cured inside; let pieces rest before heavy sanding.
- Keep a logbook: Record ratios, temps, and color amounts; your future self will thank you for repeatable magic.
- Test on offcuts: A 5 g pigment test saves a whole batch when trying a new supplier.
- Build jigs: Simple supports and fences keep molds square and level, especially for long trays and panels.
From Technique to Signature Style
Using silicone molds for unique shapes is less about following a single recipe and more about understanding relationships: how flow meets texture, how cure meets color, how a slight tilt transforms a marbling pattern. As you refine your sense of timing and material behavior, the mold becomes a stage rather than a constraint. You’ll know when to pre-coat a lattice, when to switch from syringe to pour, and when to let gravity paint the sides of a vessel.
Most of all, cultivate curiosity. Try the same design in three materials to learn what each one reveals. Brush mica into a botanical mold one day; next, pour gypsum with embedded fibers for a stone-like counterpart. With smart choices—well-sized molds, compatible pigments, careful degassing and mixing, thoughtful demolding, and respect for your materials’ limits—you’ll turn silicone from a simple tool into an accomplice for sculptural storytelling.
