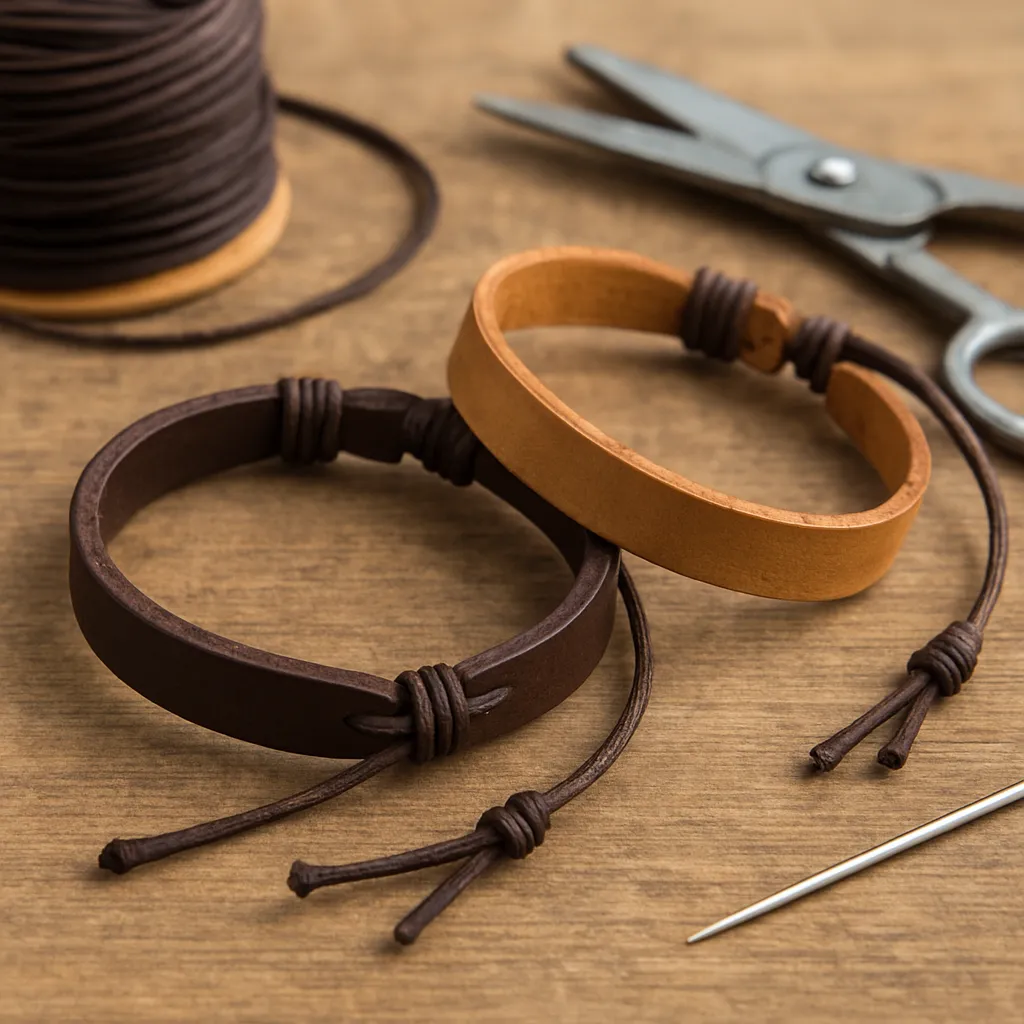
Few handmade accessories deliver the satisfying balance of rugged charm and refined detail quite like an adjustable leather bracelet. Compact, tactile, and easy to wear, these small bands of character let you practice the core skills of leatherwork on a manageable scale while producing something deeply personal. Because the bracelet can be resized on the wrist, it suits gifting, markets, and everyday use without the usual sizing anxiety. In the space of an evening you can cut a strap, shape edges, add texture, set a closure, and leave with a piece that will patina alongside your days—an approachable project that still invites mastery.
The Appeal of an Adjustable Leather Bracelet
Among handmade goods, the adjustable bracelet sits in a sweet spot: simple enough for a first project, rich enough to reward obsession. Its adaptability solves a perennial challenge—fit—while letting you explore materials, textures, and closures. In practice, an adjustable clasp or knot can accommodate seasonal changes (wrists expand and contract), layered outfits, and different wearers. The format also encourages modular thinking: the same strap can be paired with multiple closures, charms, or braids, letting you iterate and learn quickly without waste. Above all, the surface area is small but expressive; every millimeter reflects your choices in cut, edge treatment, and decoration.
Materials and Tools: What You Truly Need (and What You Want)
Start with a clean workspace, a stable cutting surface, and a few reliable tools. While specialty gear speeds things up, you can craft excellent bracelets with a lean kit. The following list is organized by essentials versus nice-to-haves, with notes to help you select appropriate materials.
Leather Selection
- Strap Leather: 2–3.5 mm (5–9 oz) thickness for flat straps; 1.5–2 mm (3–5 oz) for braids or wrapped designs.
- Types: Choose firm temper for crisp straps, medium or soft temper for braids and sliding knots. Full-grain holds up best.
- Tanning: For versatile dyeing, stamping, and clean edges, choose vegetable-tanned hides. Chrome-tanned works for soft wraps but can be trickier to burnish cleanly.
Essential Tools
- Sharp Knife or Rotary Cutter: For consistent, straight edges.
- Metal Ruler and Square: For measuring widths and marking clean perpendicular cuts.
- Hole Punches: 1.5–4 mm punches handle cord pass-throughs, Chicago screws, and buckles.
- Edge Beveler: Rounds sharp strap edges for comfort.
- Slicker or Burnisher: Wood, bone, or resin; helps compress and polish edges.
- Cutting Mat: Saves blades and steadies your hand.
- Awl or Scratch Compass: For marking lines, stitching grooves, and center points.
Helpful Add-ons
- Skiving Knife: Thins ends for folds, knots, or buckles.
- Pricking Irons: Evenly spaced stitch holes for hand-sewn details.
- Contact Adhesive: Tacks layers before stitching or riveting.
- Edge Paint and Dye: For color and finish control.
- Conditioners and Sealants: Beeswax, tallow mix, acrylic finishes, or resin coats.
Hardware and Cordage
- Closures: Roller buckles, center-bar buckles, snaps, toggles, or sliders.
- Fasteners: Chicago screws, double-cap rivets, micro screws for modular parts.
- Cording: Leather lace, waxed cotton, micro paracord for sliding knots.
Understanding Adjustability: Mechanisms That Work
The heart of the project is adjustability. Choose the mechanism that best suits your design and skill level:
- Sliding Knots: Two opposing knots on a cord or lace allow micro-adjustment without metal hardware—excellent for boho or minimalist styles.
- Buckle-and-Hole: Classic look with predictable increments; ideal for thicker straps and rugged aesthetics.
- Chicago-Screw Slider: A movable post rides along a slot; refine fit precisely and replace leather over time.
- Snaps with Multi-Position: Sets of snaps placed along the strap provide discrete fit settings while keeping a clean profile.
- Lanyard Slider Tube: A small metal or wood slider clamps two cords for a smooth cinch; sleek and modern.
Measuring and Sizing: Fit That Feels Effortless
Accurate sizing avoids puckering, skin pinches, and awkward overlap. Measure wrist circumference just above the wrist bone with a tape or string, snug but not tight. Consider:
- Ease: Add 10–15 mm (3/8–5/8 in) for a neat fit; +20–25 mm (3/4–1 in) for a looser drape.
- Closure Allowance: Buckles and knots consume length—plan 40–60 mm (1.5–2.5 in) extra, depending on style.
- Slot and Hole Placement: Center holes for range, keeping end tip at least 12 mm (1/2 in) from the last hole to prevent tear-out.
Rule of thumb for sliding-knot cord bracelets: total cord length ≈ 3 × wrist circumference + 100–150 mm (4–6 in) for tying. For strap bracelets with buckle: strap length ≈ wrist circumference + ease + buckle allowance (usually 40–50 mm/1.5–2 in). Always prototype with scrap first.
Step-by-Step: Classic Flat Strap with Corded Sliding Knots
This hybrid combines a leather strap center with cord ends that cinch elegantly. It’s light, comfortable, and easily customized.
Cut and Prepare the Strap
- Width: 10–16 mm (3/8–5/8 in) is versatile for most wrists.
- Length: Wrist circumference + 40–50 mm (1.5–2 in) for overlap and end shaping.
- Edge Work: Bevel lightly; then pursue meticulous burnishing with water (or gum tragacanth), friction, and a slicker.
- Tip Shape: Round, pointed, or squared. Mark a centerline and ensure symmetry.
Drill or Punch Cord Pass-Throughs
- Two holes, 3–4 mm (1/8 in), placed 8–12 mm (5/16–1/2 in) from each strap end.
- Back the leather with scrap wood to prevent blowout; punch perpendicular for clean edges.
Attach Cord and Tie Sliding Knots
- Thread a 1–1.5 mm waxed cotton or leather lace through each end; tie half-hitches to secure.
- Cross the two free cord ends and tie opposing sliding knots (e.g., double overhand sliding knots) about 25–35 mm (1–1.4 in) apart.
- Test movement; adjust spacing so the bracelet can widen enough to pass over the hand but cinch comfortably.
Finish and Condition
- Dye or seal as desired; even simple oiling with neatsfoot or light conditioner adds depth.
- Melt cord ends if synthetic; trim and tuck tails neatly.
Step-by-Step: Braided Strap with Hidden Core
A three- or four-strand braid over a slim core yields texture and stretch-free stability.
- Core: 5–6 mm (3/16–1/4 in) round leather cord or thin strap.
- Strips: Three 6–8 mm (1/4–5/16 in) strands, 1.5–2 mm thick, long enough for wrist + 30% for braiding take-up.
- Anchor: Wrap and stitch the starting ends around the core; use thin thread and tight knots.
- Braid: Maintain even tension; periodically measure length against the wrist.
- Closure: Use a lanyard slider or small buckle; alternatively, tuck ends through a leather loop and secure with a Chicago screw.
Step-by-Step: Buckle-Adjustable Strap with Micro-Slot
This builds a traditional look with a twist: a short slotted zone allows micro-adjustment beyond discrete holes.
- Cut: 14–18 mm (9/16–11/16 in) wide strap, 2.5–3 mm thick.
- Buckle End: Skive the fold, punch the tongue slot, and fold over 20–25 mm (3/4–1 in). Stitch or rivet.
- Tip End: Instead of multiple holes, punch a long centered slot 20–30 mm (3/4–1.25 in). Add two short starter holes to reduce tear risk.
- Slider: A Chicago screw through the slot serves as a movable anchor. The tongue captures the slider’s post for continuous adjustment.
- Edge and Seal: Smooth, burnish, and finish before final assembly to avoid dye bleed near metal.
Edge Quality, Surface Treatment, and Finishes
Small projects reveal everything. Clean edges and coherent surfaces separate a passable bracelet from a treasured one.
Edge Routine
- Bevel: Light, even passes—avoid chatter. Warm the blade on scrap to feel resistance.
- Sand: Progress 400 → 800 → 1200 grit for a glassy line.
- Burnish: Water or gum, slick vigorously; add a touch of beeswax for a hydrophobic shine.
- Painted Edges: If using edge paint, build thin coats, heat-set lightly with friction, then polish.
Dyeing and Sealing
- Dye Before Hardware: Prevents metal staining.
- Test Swatches: Colors shift as they dry and with topcoats.
- Sealants: Acrylic topcoats add sheen and protection; wax blends yield a natural glow and tactile warmth.
Decorative Techniques that Matter
Even minimal designs benefit from a single thoughtful accent. Consider understated lines or carefully spaced impressions for a refined aesthetic.
Stamping and Tooling
- Moisture Window: Slightly case veg-tan with water; stamp when the surface returns from dark to mid-tone.
- Layout: Use a light scribe line to keep motifs centered.
- Depth: Aim for crisp impressions without crushing fibers.
When you invest time in sensitive tooling, keep adjacent areas supported to avoid unintended stretch, and dry the leather flat before finishing.
Hand Stitching Accents
- Thread: Waxed linen or polyester; match weight to strap thickness.
- Stitch Type: Saddle stitch for strength; decorative cross-stitch for lacing over edges.
- Spacing: 3.0–3.85 mm irons look refined at bracelet scale.
Clean, symmetrical stitching can transform a simple strap into a boutique-grade piece—keep ends backed, tension consistent, and holes perpendicular.
Comfort, Durability, and Wearability
Comfort begins with smooth edges, flexible closures, and breathable surfaces. For active wearers, choose thicker hide at stress points and ensure hardware doesn’t protrude. Reinforce holes with small oval punches instead of round to distribute stress. In humid climates, finish interiors with a light wax rather than heavy sealants to preserve feel. Seek long-term durability not by overbuilding, but by reinforcing only where stress concentrates.
Personalization and Story
Bracelets carry meaning—initials, dates, coordinates, or motifs. Minimal marks often age better than busy patterns. Combine techniques: a single stamped star, a discreet inlay, or a contrasting stitch color. A thoughtful touch of personalization turns a competent project into an heirloom.
Care and Maintenance
- Cleaning: Wipe dust; for grime, damp cloth with mild soap, then dry fully.
- Conditioning: Light application of balm every few months; avoid over-oiling.
- Water: Occasional splashes are fine; avoid soaking. If soaked, shape gently and dry away from heat.
- Metal: Periodically tighten screws and check for green patina (verdigris) near brass; clean gently.
Troubleshooting Common Issues
- Fraying Cord Ends: Switch to waxed cord or singe synthetic ends carefully.
- Stiff Sliding Knots: Dust with talc, or re-tie with smoother cord; avoid overly thick lace.
- Edge Fuzz: Re-sand, re-burnish; consider a thin edge paint to lock fibers.
- Stretching: Use firmer temper or add a stitched lining strip.
- Hole Tear-Out: Increase distance from tip, or use an oblong punch; reinforce with a washer or small patch.
Sustainable Choices and Offcut Alchemy
Bracelets are an excellent use for strap offcuts and small panels. Seek traceable sources, support tanneries with responsible practices, and repurpose hardware. Contrast linings from reclaimed garments make striking interiors. If you value sustainability, design components to be replaceable: screws instead of permanent rivets, modular closures, and repair-friendly construction.
Finishing Touches Professionals Notice
- Even Tint: Buff dye between coats; avoid blotches at edges.
- Edge Continuity: The edge line should read as a single ribbon around the bracelet.
- Hardware Alignment: Holes should track the strap centerline; misalignment is instantly visible at this scale.
- Quiet Branding: A micro maker’s mark on the underside adds provenance without clutter.
A controlled, resilient finishing process isn’t a luxury—it’s the point at which the bracelet graduates from “handmade” to “finely made.”
Design Variations Worth Trying
- Double-Wrap Strap: Twice around the wrist with a small buckle; refined and space-efficient.
- Inlay or Overlay: Contrast a slim colored strip set into a window; glue, stitch, and sand flush.
- Split-Strap Ladder: A single strap split lengthwise into two or three rails, bridged by stitches.
- Bead-Integrated: Thread minimal beads on cord ends for weight and articulation.
- Magnetic Clasp Hybrid: Leather strap with inset rare-earth magnets (encased to avoid pinches), plus safety loop.
Safety, Ergonomics, and Workflow
- Blade Handling: Cut away from yourself; retract or sheath blades immediately.
- Ventilation: Dyes and adhesives can be volatile; ventilate and wear gloves as needed.
- Noise: Punches and mallets can be loud; use a dead-blow mallet and rubber mat to dampen impact.
- Body Mechanics: Work at bench height; keep shoulders relaxed to avoid fatigue in fine operations.
Time and Cost Planning
- Time: A clean strap bracelet takes 45–90 minutes; add 30 minutes for dyeing and drying between coats.
- Cost: Leather offcuts reduce expense; a small hardware assortment amortizes quickly over multiple pieces.
- Batching: Prepare several straps at once—cut, bevel, and burnish assembly-line style for consistency.
Why Vegetable-Tanned Leather Shines in Bracelets
Among materials, few reward patient hands like leather. Veg-tan, in particular, absorbs oils, accepts crisp stamps, and develops a warm, living surface. Over time, hands, sun, and weather etch a quiet record in the finish. The patina tells stories of wear; the bracelet becomes more yours, not less. That aging alchemy is part of the charm.
Edge Science: Beyond the Basics
Edges fail first—so treat them like features, not afterthoughts. The micro-fibers at the edge splay when abraded; friction, moisture, and wax align them. Sanding levels irregularities, and heat from friction bonds the wax. In humid conditions, thin coats cure better than heavy ones. A gentle u-shaped bevel, followed by careful smoothing, turns a rough strip into jewelry-grade work.
Hardware Choices: Function Framed as Detail
- Buckles: Roller buckles reduce friction during tightening; center-bar buckles save space.
- Snaps: Line 20 or 24 for bracelets; consider capped backs for comfort against skin.
- Chicago Screws: Allow disassembly and repair; apply threadlocker or a dot of wax.
- Rivets: Reliable for non-adjustable connections; avoid where frequent movement stresses them.
Leather Types and Feel on Skin
- Full-Grain: Strongest and ages best; initial firmness softens with wear.
- Top-Grain: Slightly corrected surface; consistent finish and dye take.
- Chrome-Tan: Supple and colorful; burnish edges with edge paint rather than friction alone.
- Oil-Tan/Pull-Up: Beautiful tonal shifts; pre-sealed, so stamping depth is limited.
Proportions that Flatter
- Narrow Wrists: 8–12 mm bands; lighter buckles and minimal hardware.
- Average Wrists: 12–16 mm; try double-wraps for visual interest without bulk.
- Broad Wrists: 16–22 mm; bolder textures, edge creasing, or contrasting stitch lines.
Advanced Detailing: Lining and Edge Skives
Line rough-back straps for comfort and structure. Use a 0.8–1.2 mm lining, glued flesh-to-flesh, then stitch. Skive the strap ends to avoid bulky folds near closures, and stagger seams so they don’t align under pressure points. A shallow crease line 2–3 mm in from each edge adds shadow and refinement, framing the bracelet like a picture.
Wear Testing and Iteration
Put prototypes on your wrist and live with them: type, lift, drive, wash dishes. Note where edges catch sleeves or hardware presses bone. Adjust strap widths, hardware profile, and closure spacing. True progress in craft comes from cycles of test, note, and revise.
Minimal Kit, Maximal Result: A One-Afternoon Build
- Cut a 14 mm strap, 2.5 mm thick, to wrist + 45 mm.
- Bevel and sand edges; burnish to a low sheen.
- Punch two 3 mm holes 10 mm from each end; fit a thin cord.
- Tie opposing sliding knots; trim and seal ends.
- Oil lightly and buff; wear immediately.
Common Mistakes to Avoid
- Over-Dyeing: Saturated straps can harden; build color slowly.
- Rushing Edges: A minute saved here is a flaw forever.
- Misaligned Hardware: Once set, errors are loud; mark center, punch straight.
- Skipping Test Fits: A 2 mm error is visible at bracelet scale.
Leather, Heat, and Moisture: Practical Care Notes
Leather breathes and reacts. Warmth softens and shapes it; moisture swells fibers. Use these traits: slightly moisten before creasing; warm gently before molding a tip around a buckle. But respect limits: rapid drying or direct heat can crack finishes. Balance is the craftsperson’s ally.
Handcrafted Identity and Ethical Considerations
Beyond technique, an adjustable bracelet carries a small ethical footprint when mindfully produced. Document your sources, make repairable designs, and offer lifetime tightening or strap refreshes. These simple commitments establish trust and create long-term relationships with wearers.
From Hobby to Micro-Business
- Consistency: Standardize widths and hole spacing; create reusable jigs.
- Photography: Shoot edges close-up; customers buy detail.
- Packaging: Soft kraft wrap, care card, and spare screw set add perceived value.
- Customization: Offer monograms with clear font choices and placement diagrams.
Case Study: The Quiet Minimalist
A 12 mm veg-tan strap, natural finish, creased edges, single hardware element (Chicago screw), and a short slot for micro-adjustment. Interior lightly waxed for comfort. Result: featherweight presence, easy fit all seasons, and a surface that slowly deepens with wear. It illustrates how restraint can produce elegance.
Tool Care and Blade Discipline
- Strop Often: A few passes on a leather strop keep edges keen and safe.
- Square Punch Faces: Lightly sand mushrooms; keep punches perpendicular.
- Clean Dyes: Strain through a coffee filter to remove particulates that mar finishes.
Beyond the Bracelet: Skills that Transfer
Once you master edges, hole alignment, and small-format closures, you’re prepared for belts, watch straps, key fobs, and bag pulls. The scale changes, but the principles remain: measure with intent, cut with confidence, and finish with patience.
Why Details Matter
The bracelet is small; every detail is big. Your bevel angle, stitch spacing, and hardware selection are visible at arm’s length. That intimacy is an invitation—each piece becomes a portfolio of your sensibilities as a maker. In that sense, a simple adjustable bracelet is a classroom, a showroom, and a promise of what’s to come.
Closing Encouragement
Pick a scrap, cut a strip, and follow the most direct path from idea to wrist. Your first attempt may be plain, but it will be honest, and it will teach you what to refine next. Each pass across the slicker, each centered hole, and each thoughtful closure is a line added to your maker’s vocabulary. With practice, you’ll move from competent to poetic, shaping not only an object but also your own rhythm of work. And as your bracelets find their owners, they’ll carry the quiet narrative of your hands—patient, attentive, and alive to the possibilities of humble materials and careful craft.
