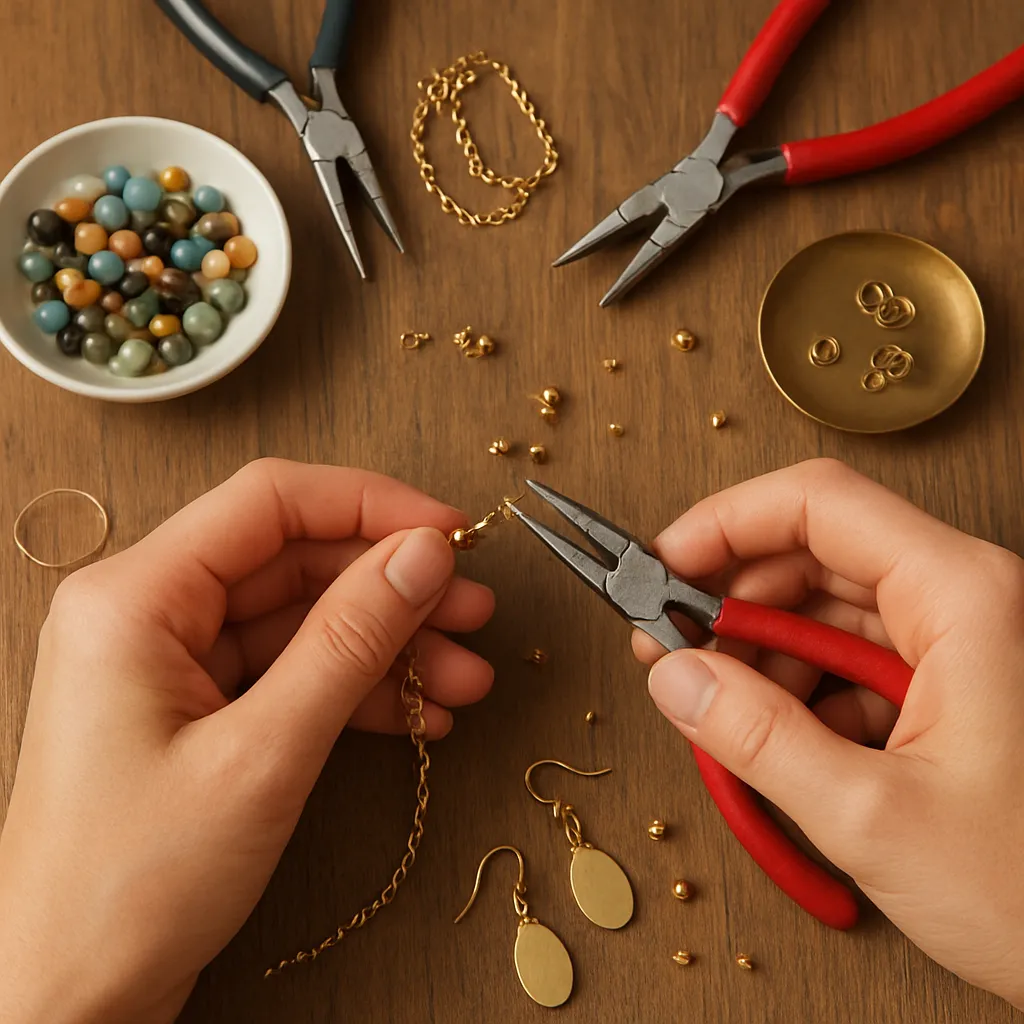
Making jewelry with almost no money is less about deprivation and more about sharpening the senses: noticing overlooked textures in a hardware aisle, recognizing value in a chipped vintage necklace, or finding rhythm in a handful of seed beads. Small constraints encourage big creativity. With a light toolkit, a few clever substitutions, and a keen eye for composition, you can craft pieces that feel intentional, wearable, and durable—without ever overspending. This guide gathers practical methods, project ideas, and business-savvy tips so you can build a satisfying handicraft practice that respects a tiny budget and still delights the wearer.
Mindset and Planning for Tiny Budgets
Start by defining your constraints: How much can you spend this month? How many pieces do you want to complete? Do you prefer experimenting widely or mastering one look? Write down a short plan that balances exploration and repeatability. It may look like this: focus on one bracelet style in three colorways, one earring silhouette in two lengths, and a pendant design that can adapt to different focal beads. This structure keeps you from impulse-buying supplies you won’t use.
Create a simple inventory and cost log. Track unit cost per finding, per inch of chain, and per bead. If a 3-meter roll of copper chain costs a few dollars, note the price per inch so you can estimate every design’s material cost in seconds. Keep offcuts labeled by color and metal type to salvage and reuse; sort by length to speed up production later. Write micro-goals next to your log: sell three pairs, gift two, trade one—goals that encourage movement, not hoarding.
Embrace constraints as design prompts. For one week, use only black cord, brass findings, and one accent color. Next week, restrict yourself to seed beads and knots. The more you limit variables, the more distinct and consistent your collection becomes—and the less you spend chasing novelty.
Essential Low-Cost Tools and Clever Substitutes
You do not need a professional bench to produce clean, wearable pieces. A minimal toolkit can take you far:
- Basic pliers: a pair of chain-nose pliers, round-nose pliers, and small flush cutters. If you can afford only two, choose chain-nose and flush cutters.
- Ruler or measuring tape and a fine-point marker for consistent lengths.
- Needles: beading needles or fine sewing needles for seed beads.
- Files or a nail buffer to smooth wire ends.
- Glue: a strong jewelry-safe adhesive for cord ends and knots.
Low-cost substitutes amplify capabilities:
- Mandrels: wrap masking tape around a pen to create earring hoop forms; use a thick marker for rings or jump rings.
- Bead board alternative: a folded tea towel prevents beads from rolling and keeps layouts visible.
- Polishing: a scrap of denim polishes copper and brass; a soft toothbrush cleans textured beads.
- Third hand: a binder clip attached to a heavy jar holds cords for knotting.
- Storage: egg cartons, muffin tins, or shallow spice jars for sorting small parts.
Maintain your tools. Keep pliers dry and lightly oiled to prevent rust, and store cutters with their tips protected. Sharp tools protect your hands and your components.
Choosing Affordable Materials Without Looking Cheap
The heart of thrift-friendly jewelry is thoughtful selection. Focus on components that age gracefully and look intentional together.
- Metals: Brass and copper offer rich, warm tones and patina beautifully. Stainless steel resists tarnish and is a strong option for ear wires and chains. Aluminum is light and easy to shape for larger statement pieces.
- Beads: Glass seed beads, faceted glass, ceramic, wood, bone, lava rock, and rescued vintage beads. Avoid plastic that scuffs easily unless the color or shape is exceptional.
- Cords: Waxed cotton, nylon, micro-macramé cord, and paracord innards can all stand in for leather. Linen thread imparts a natural, craft-forward look.
- Findings: Jump rings, crimp beads, lobster clasps, shepherd’s-hook ear wires, and ribbon clamps for flat cords. Buy in small bulk packs to lower cost per unit.
- Finishes: Clear nail topcoat or microcrystalline wax can seal raw brass and copper on contact points; beeswax on knots reduces fray.
Mixing media hides price tags. A single special glass focal surrounded by wood spacers and micro seed beads feels curated. Layer different textures—smooth with matte, metallic with fiber. Cohesive color families read as deliberate choices, not cost constraints.
Keep allergies in mind. Opt for stainless steel or brass without nickel for ear wires. If unsure, add a protective barrier like jewelry-grade sealant to the parts touching skin.
Label every container with the metal type and plating to preserve honest communication if you sell or gift your work. Accurate information builds trust in your materials.
Sourcing Strategies and Upcycling
Stretching money is mostly about where and how you acquire parts:
- Thrift stores and flea markets: Buy broken jewelry for pennies, salvage clasps, beads, and chains. Take photos before disassembly to remember good arrangements.
- Garage sales and estate sales: Look for heavy glass and metal pieces, which contain reusable components. Negotiate for bundles.
- Hardware stores: Washer charms, ball chains, heat-shrink tubing for cord ends, micro fasteners as decorative rivets, and O-rings as chunky spacers.
- Nature finds: Beach glass, shells with pre-drilled holes, tiny stones for wire wrapping. Clean and dry thoroughly; test for durability.
- Textile remnants: Leather scraps, denim edges, sari ribbons, and lace inserts offer texture and color at minimal cost.
Practice responsible upcycling. Verify that repurposed metals are skin-safe and that found items are clean. When deconstructing, sort reusable parts immediately and store them by type. A single thrifted necklace can power many new designs if you extract its chain in even lengths, keep jump rings intact, and save focal elements for pendants.
Design Principles That Stretch Every Cent
A brilliant piece often springs from thoughtful composition, not expensive parts. Treat every project as a study in proportion and balance.
- Repetition: Repeat a small, inexpensive element (e.g., seed bead stacks) to create rhythm and volume.
- Focal point: Use one striking bead or component to draw the eye; surround it with simpler accents.
- Negative space: Intentional gaps between beads or along chain segments feel light and modern—and save materials.
- Modularity: Build components that can be rearranged into sets. A pendant on cord today can clip onto a chain tomorrow.
- Scale play: Mix tiny and oversized shapes for drama. Small beads frame, big beads speak.
- Color economy: Limit palettes to three tones: base, accent, neutral. This avoids overbuying and keeps lines consistent.
Sketch before you cut. Even a quick doodle clarifies lengths, connection points, and symmetry. Test layouts on a towel to sense weight and flow. Good design choices make humble parts look elevated.
Core Techniques You Can Master on a Shoestring
Skill replaces spending. Focus on a handful of versatile maneuvers you can use across many styles:
- Simple and wrapped loops: The bedrock of earrings and pendants; wrapped loops add strength for heavier beads.
- Jump ring discipline: Twist to open, never pull apart; close until ends meet with a faint click for strong joints.
- Knotting: Surgeon’s knots and square knots secure cords; add a drop of glue for security.
- Crimping: Use flush cutters to trim excess wire, then cover crimps with crimp covers for a clean look.
- Macramé basics: Half hitch and square knot patterns yield adjustable bracelets with minimal hardware.
- Wire wrapping: 20–24 gauge for wrapping beads, 16–18 gauge for shaping forms. File cut ends smooth.
Document your process. Keep a cheat sheet of wire gauges, cord sizes, and bead hole diameters that play well together. With disciplined techniques, even budget findings feel dependable.
Three Starter Projects Under a Few Dollars Each
1) Adjustable Macramé Bracelet with Focal Bead
Supplies: 2 yards of 1 mm waxed cotton cord; 1 focal bead (10–14 mm); 12 seed beads; clear drying glue.
Steps:
- Cut two 30-inch cords. Thread both through the focal bead and center the bead.
- Cross tails and tie square knots for 1.5–2 inches on each side, slipping a seed bead every five knots.
- Form a sliding closure: overlap tail ends, tie a series of square knots around both standing cords for about 0.5 inches.
- Trim and secure tails with a drop of glue; tuck ends under the knots while the glue is tacky.
Cost calculus: Seed beads from a bulk tube cost pennies; waxed cotton per bracelet is minimal. Aim for under a dollar in materials while achieving an adjustable, unisex look.
2) Stacked Glass Bead Earrings
Supplies: Two eye pins (or wire), 6–8 small glass beads, 2 focal drops, 2 ear hooks.
Steps:
- String three small beads onto each eye pin; add a focal drop.
- Create a wrapped loop above the top bead; attach ear hook before closing.
- Ensure both earrings match length; adjust by swapping bead sizes if needed.
Cost calculus: Glass beads from a mixed strand and basic ear hooks keep this project comfortably under a couple of dollars per pair, especially when buying findings in small bulk.
3) Minimalist Pendant on Mixed Chain
Supplies: Salvaged brass chain, a single statement bead or small found object, two jump rings, one lobster clasp (optional).
Steps:
- Wire-wrap the focal to create a clean top loop.
- Attach to chain with a jump ring; add a clasp if the chain has no inherent closure and the length requires it.
- Use asymmetry: insert a short piece of contrasting chain or a few seed beads on one side for balance.
Cost calculus: Scavenged chain makes this nearly free. The focal sets the tone; choose glass, shell, or an elegant hardware piece.
Durability and Quality on a Budget
A piece feels expensive when it lasts. Small, consistent habits elevate build integrity:
- De-burr everything. File wire ends until smooth; test with a fingertip.
- Reinforce stress points. Use wrapped loops for dangles and crimp correctly on beading wire with a proper squeeze, not a crush.
- Stress test. Tug gently on closures and loops before packaging; if it fails at the bench, it saved you from a later repair.
- Seal and protect. Clear wax or sealant on raw copper/brass near skin contact reduces discoloration.
- Right proportions. Oversized beads on flimsy wire invite breakage; pair heavier elements with thicker gauges.
Track wear feedback. If knots slip, switch to a different cord or knot technique. If ear wires bend, try stainless instead of brass. Incremental improvements add up to stronger durability and visible quality.
Packaging, Presentation, and Small-Scale Selling
Presentation multiplies perceived value. Use cardstock offcuts as earring cards, stamp with a simple logo, or write a short note about the piece’s story. For necklaces, wrap in tissue and tie with a cotton string; add a small tag noting metal type and care tips. Upcycle matchboxes into slide-out jewelry boxes lined with fabric scraps. Photograph pieces on neutral backgrounds (linen, wood, matte paper) with indirect daylight; hold your phone steady on a mug to avoid blur.
Offer simple sets: earrings plus a matching pendant at a slight discount. Display cohesion by grouping items by metal color or motif. A consistent naming scheme (e.g., Tide, Ember, Moss) helps customers remember your line.
Smart Pricing and Micro-Branding
Even on a shoestring, treat your craft like a tiny business to stay sustainable. Use a basic cost-plus method: Materials cost + (Time × hourly rate) + overhead estimate = base price. Many makers double or triple materials cost, then add labor. For ultra-budget pieces, set a minimum viable price that still respects your time. Keep a written rate—even five units of currency per hour—so you measure and improve.
Price strategically across tiers: a low-cost “gateway” earring, a mid-range necklace, and a slightly higher-priced statement piece. The presence of a premium item can anchor perceived value and make your core pieces feel especially accessible. Revisit prices quarterly; as your finishing improves, so should your pricing.
Craft a micro identity. Choose a color palette, a simple icon, and a one-sentence story embodying your approach (e.g., coastal fragments, city salvage, forest minimalism). Consistent voice and visuals are the essence of lean branding—you don’t need expensive assets to feel cohesive. Clarify whom you serve: delicate minimalists, rugged urban wearers, or color-maximalist festival-goers. Knowing your market prevents wasteful experiments.
Common Pitfalls and How to Avoid Them
- Overbuying “bargains”: A mixed grab bag you only use 10% of is not a deal. Buy with a plan and sample first.
- Ignoring metal compatibility: Combining aluminum and steel in tension points can produce kinks or wear. Test combinations.
- Skipping measurements: Write standard lengths for bracelets and necklaces and adjust by audience. Keep a size chart handy.
- Weak closures: Cheap clasps fail under strain; mid-tier findings in small bulk save headaches.
- Rushing finishing: A minute spent filing and closing rings properly prevents returns and repairs.
- Unclear narrative: If your line looks random, buyers hesitate. Curate collections with themes and repeating motifs.
Learning, Community, and Iteration
Become a student of form. Dissect designs you admire: count beads between accents, note wire gauge, observe the distance between dangles. Keep a swatch library—short strings showcasing color combos, knots, and spacings. Join local craft groups or online communities to trade supplies and troubleshoot. Host a micro challenge for yourself: ten pairs of earrings using only three bead types. Document each round, tally what sold or drew compliments, and iterate. The fastest growth comes from cycles of make, show, learn, refine.
Eco and Safety Considerations
- Adhesives: Use in ventilated areas. Cap bottles tightly to avoid waste.
- Metal allergies: Prefer stainless steel for ear wires; seal brass or copper at skin points if needed.
- Lead and nickel: Know local regulations. Many vintage items may contain restricted metals—use for non-contact parts or display items only.
- Cleaning and disposal: Collect wire trimmings in a dedicated container; recycle or upcycle as texture fillers.
- Nature finds: Bake shells and stones at low temperature to dry and reduce odor; don’t harvest protected species.
Responsible making protects your customers and your reputation, and it turns resourcefulness into a value proposition rather than a compromise.
Scaling Up Without Breaking the Budget
As your style tightens, scale through repeatable builds. Standardize components: pick two ear-wire types, one chain finish, three bead sizes, and design around them. Batch work: cut all chains at once, then form all loops, then assemble. Use simple jigs for consistency—masking-tape markings on your ruler, a cardboard template for pendant drops.
Forecast lightly: If a particular earring sells fast, prepare component packs in tens. Track reorder points: when you hit five clasps left, place a small bulk order. Consistency reduces waste and accelerates fulfillment without major cash outlay.
Inspiration Prompts and Variations
- Monochrome challenge: One color across finishes—matte, glossy, metallic.
- Rule of odds: Arrange accents in threes or fives for balance.
- Texture swap: Trade beads for knots and hardware: one washer, two knots, three seed-bead stacks.
- Length study: Make the same pendant at choker, princess, and matinee lengths; note how personality shifts.
- Seasonal capsule: Five items that mix and match into versatile sets.
Use these prompts to build cohesive mini-collections that feel fresh without requiring new supply purchases.
Care Tips Card You Can Copy
Write a brief care message to tuck into packaging:
- Store jewelry dry and separate to avoid scratches.
- Wipe with a soft cloth after wear; polish brass or copper gently if desired.
- Avoid harsh chemicals and saltwater; remove before showering.
- For corded pieces, keep away from open flames and prolonged moisture.
Care instructions lower returns and elevate perceived professionalism.
Why Tiny Budgets Can Produce Big Styles
Constraint trains your eye to prioritize silhouette, rhythm, and tactile experience. When you cannot simply buy novelty, you invent it: a knot that looks like sculpture, a trio of washers that reads like modernist art, a single strand of seed beads that follows the curve of the collarbone just right. With a compact toolbox, a small set of standard components, and a practiced hand, your jewelry becomes less about price and more about presence.
Workflow Template for Efficient Making
Adopt a simple repeatable flow to save time and money:
- Plan: Draft two to three variations of one silhouette; list exact counts of beads and rings.
- Prep: Cut all wires and chains, pre-open and pre-close jump rings, pre-sort beads into mini cups.
- Assemble: Work in small batches of 5–10, checking symmetry as you go.
- Finish: File, test, seal, and photograph immediately to avoid backlog.
- Record: Note timing, material use, and any adjustments for the next batch.
This loop maximizes throughput while minimizing errors and scrap.
From Gift to Side Hustle: Gentle Steps
If you choose to sell, begin softly. Share with friends, try a low-fee local market, or post a few pieces on a social platform. Track what draws comments, favorites, and repeat interest. Package consistently, price confidently, and update designs iteratively. As you refine, use profits to upgrade high-impact components—better ear wires, more comfortable clasps, a sturdier chain—rather than expanding into untested categories.
Conclusion: Craft More, Waste Less
Affordable jewelry making is an art of attention—attention to proportion, to texture, to how small decisions compound into a strong whole. A tiny kit and a thoughtful plan are enough to produce pieces that carry a clear point of view. With intentional sourcing, disciplined builds, and honest storytelling, you can craft jewelry that feels generous, even when funds are lean. Focus your resources on the moves that matter most, and let your hands prove that elegance is a practice, not a price tag.
