There is a distinct pleasure in turning a small, overlooked object into a pendant that sits close to the heart. Beyond saving money, this approach welcomes experimentation and invites a deeper appreciation of handwork and material history. A button from a travel coat, a shard of sea-polished glass, the inner gears of a broken watch—each carries stories and textures that commercial jewelry seldom matches. When you assemble, bind, drill, polish, and finish such finds, you practice patient craftsmanship, and every piece you finish expands your sense of what jewelry can be.
Everyday Objects as Materials: A Taxonomy and a Treasure Map
“Everyday” can mean a great many things. For pendant necklaces, the best sources fall into a few practical categories. Seeing them through the lens of wearable function will help you select with confidence.
- Organic and natural: sea glass, driftwood, shell, seed pods, pressed flowers, small pebbles. These carry a gentle tactility and weathered beauty, and they respond well to light polishing and sealing. Look for surfaces that rest comfortably against the skin and are not excessively porous.
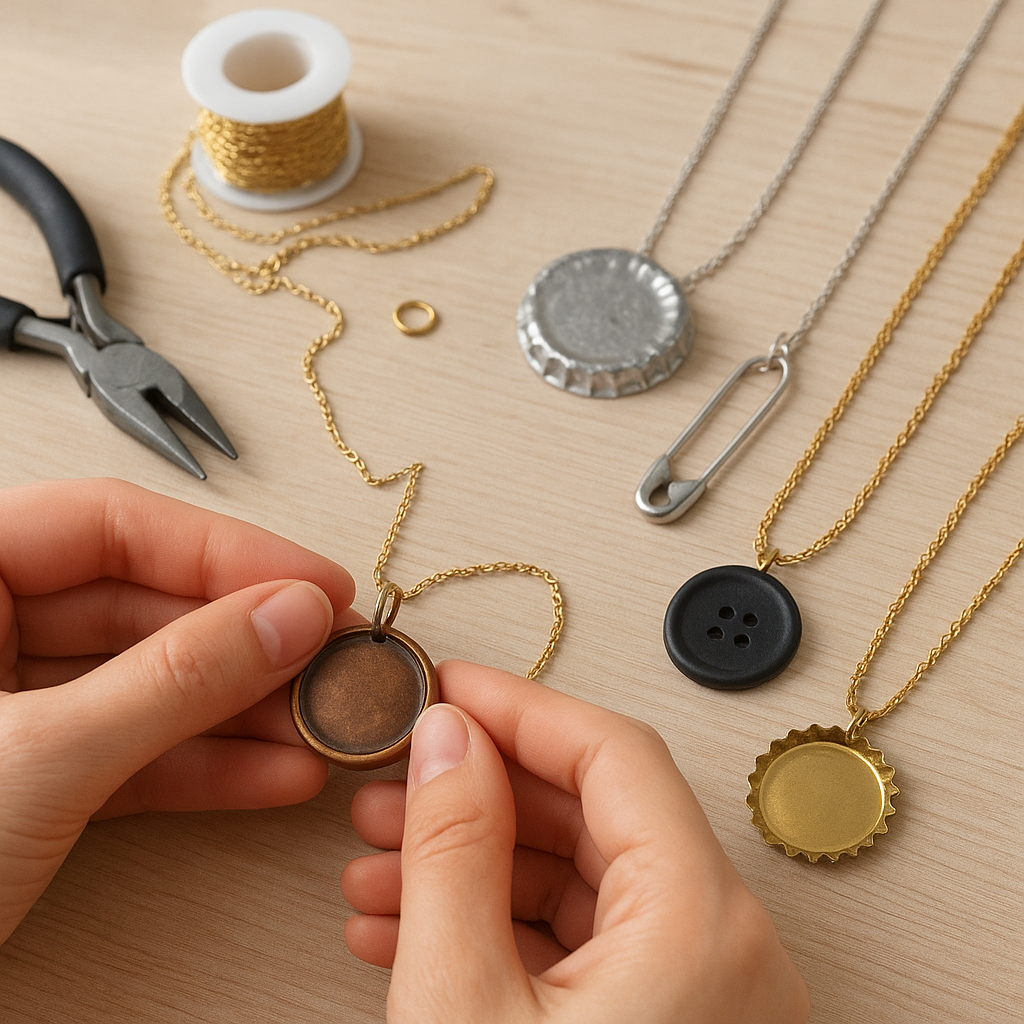
- Domestic and nostalgic: buttons, keys, thimbles, zipper pulls, chess pieces, sewing bobbins, corks, game tokens. These carry memory and are easy to drill or wrap. Their familiar forms make a strong focal point with minimal intervention.
- Industrial and hardware: washers, hex nuts, gears, valve tags, small springs, copper pipe slices. Clean lines and durable metals emphasize structure; they pair well with leather cords or oxidized chains for contrast.
- Graphic and printed: postage stamps, ticket stubs, maps, comic panels, handwritten notes. These need protection from wear and moisture, usually via laminating film, UV resin, or a clear sealant.
- Electronic salvage: circuit board shards, resistors, capacitors, watch movements, SIM trays. Be thoughtful about edges and emissions; old electronics can include hazardous coatings. Once deburred and sealed, their color and texture create striking modern pendants.
Where to find material? Start with drawers and containers you already own; ask family and friends; visit thrift stores for “broken” jewelry lots; walk beaches, riverbanks, and alleys; keep a small box or tin in your bag for found bits. A magnet, a small ruler, and a loupe can help you quickly assess composition and condition. Train your eye to spot interesting silhouettes, negative space, and objects with a convenient hole, notch, or ridge that will simplify attachment.
Safety is a companion to curiosity. Avoid batteries, unknown powders, flaking paints on vintage toys, and any component that smells strongly chemical. If you suspect leaded solder or brass, wash hands after handling and consider sealing the finished surface. For magnets, include a note or tag if gifting, since strong magnets can interfere with pacemakers. Inspect shells and seed pods for pests before bringing them home. Responsible selection keeps your making enjoyable and safe.
Designing for the Body: Principles That Turn Objects into Wearable Pendants
Handicraft thrives on the conversation between eye and hand. Turning a found object into a pendant asks you to translate sculpture into clothing, with attention to scale, movement, and comfort.
Scale, Weight, and Balance
Even a beautiful object fails as jewelry if it swings or jabs. Think in terms of ergonomics: a pendant that weighs 10–20 g often feels substantial but comfortable; heavier pieces need distributed support or a shorter chain. Test hang by tying a temporary string and wearing it for a few minutes. Consider where the pendant will sit on the chest; a broad, flat object tends to behave better than a thick, top-heavy one.
Focal Point and Hierarchy
Ask what the eye sees first and why. If two elements compete, adjust your composition by varying scale (one larger than the other), contrast (matte next to glossy), or spacing (leave air around the focal point). A simple washer becomes decisive when paired with a smaller, brighter accent bead; a line drawing under resin pops against a patinated copper frame.
Surface, Texture, and Aging
Time and wear are part of the story. Metals darken, woods warm, and fabrics fray. You can embrace or manage these changes. Encourage aesthetically pleasing patina on copper or brass with liver-of-sulfur, vinegar fumes, or commercial oxidizers, then stabilize with wax. Control fiber fuzz by singeing synthetic ribbons over a flame or by edge-stitching natural ribbons. For resin-set papers, UV resistance prevents yellowing; for shells or stones, polishing with micro-mesh pads creates a skin-friendly sheen.
Orientation and the Bail
Every pendant needs a point of suspension. The “bail” may be a purchased finding, a loop you create from wire, or a built-in hole. Aim for a top-center attachment or a deliberate off-center hang that feels intentional. Consider torsion: a pendant that constantly flips needs a second point of contact (e.g., two holes at the top) or a stiffer cord. Test before committing adhesive or rivets.
Tools, Findings, and Low-Tech Techniques
You can do a great deal with a modest kit: two pairs of pliers (chain-nose and round-nose), flush cutters, a small file, sandpaper (220–3000 grit), an awl or punch, a pin vise with micro drill bits, a nail set for peening rivets, a small hammer, and a cutting mat. Optional power tools—rotary tool with diamond burrs, bench vise, and a basic soldering iron—expand possibilities but are not required.
- Cold connections: Wire rivets and tube rivets let you join layers without glue. Drill aligned holes, insert a slightly oversized wire or tube, trim nearly flush, and peen gently until domed. Eyelets offer a tidy finish for soft materials like leather or paper laminates.
- Wire wrapping: 20–18 gauge wire forms sturdy bails; 24–26 gauge binds parts together. Dead-soft wire is easiest to shape; work-harden the finished bail by lightly hammering on a steel block or by over-bending and springing back. Square wire grips flat edges well; half-round makes elegant bindings.
- Drilling and shaping: For glass, tile, or shell, use diamond bits at low speed under water to cool and control dust. For wood, bone, or cork, use sharp twist bits and back the piece with scrap wood to prevent blowout. Deburr edges with a file, then sand progressively.
- Adhesives: Cyanoacrylate (CA) offers speed but can bloom (whiten) around the joint; use sparingly. Two-part epoxy forms a strong bond and fills gaps; mix thoroughly and allow a full cure (often 24 hours). UV resin cures in minutes under a UV lamp and creates a domed, glassy finish over paper and tiny objects.
- Finishes: Microcrystalline wax, beeswax, and archival varnishes protect porous materials. Choose a clear sealant compatible with your substrate—acrylic for paper and wood, lacquer for metal, and resin for encapsulation. Always test on a scrap first.
Chains, Cords, Knots, and Closures
The right hanger transforms an object into jewelry. A bright chain refines a rough relic; a matte cord tempers sparkle and adds warmth. Consider the relationship between weight, color, and texture.
- Chains: Cable and curb chains with soldered links resist pull apart. Ball chain is economical and industrial-chic but can tangle near hairlines. Stainless steel is hypoallergenic and strong; brass and copper add color but may mark skin unless sealed or lacquered.
- Cords: Leather (flat or round), cotton, hemp, and waxed linen feel organic and can be knotted to length. Silk ribbon drapes beautifully and softens hard-edged pendants. Paracord suits larger, industrial finds. For beach glass or wood, a knotted linen cord often looks most at home.
- Knots and attachments: Use a lark’s head (girth hitch) to anchor a cord to a built-in hole. A sliding knot creates an adjustable necklace without hardware. Constrictor knots bind bails or wraps securely. Finish raw cord ends with crimp ends or by whipping with fine thread.
- Closures and skin: Lobster clasps are secure; toggles are easy for larger hands; magnetic clasps are convenient but require caution near electronics and medical devices. To improve durability, select jump rings with a heavier gauge and close them with a slight overpass to ensure a tight seam.
Project Walkthroughs: Five Pendants from Ordinary Things
1) The Traveler’s Key Pendant
An old key is almost a pendant already. Add a bail and a small accent to guide the eye, and it becomes a talisman.
- Materials: vintage key, 20–18 gauge wire (brass or copper), a small bead or stone, chain or leather cord, fine file, optional patina solution.
- Steps:
- Clean the key with soapy water, then reduce sharp nibs with a file. If desired, darken with an antiquing solution, rinse, and wax.
- Form a wire bail by creating a small wrap around the key’s top hole; add the bead as an accent. Hammer the front of the loop lightly to harden and flatten for a professional look.
- Hang on your chain or cord. If the key twirls, add a second wrap near the shoulder to stabilize, or choose a shorter chain to limit swing.
2) Cork Medallion with Burned Motif
Wine corks compress, shape, and accept ink or burn drawings. Their lightness makes them ideal for larger silhouettes.
- Materials: natural cork (not synthetic), sharp knife or fine saw, sandpaper, woodburning pen or archival ink stamp, eye screw or wire bail, clear varnish or wax, cord.
- Steps:
- Slice a 6–8 mm disk. Sand both faces smooth and bevel edges slightly for comfort.
- Sketch or burn a motif—compass rose, initials, small map grid. Alternatively, stamp with waterproof ink and let dry thoroughly.
- Twist in a tiny eye screw at the top, or drill a cross-hole and run wire to form a hidden bail. Seal lightly to resist grime while preserving texture.
3) Sea-Glass Window with Paper Collage
Blend translucent glass with a protected paper image for contrast—industrial shine next to a soft illustration.
- Materials: sea or tumbled glass shard with flat face, small graphic cutout (map sliver, stamp, word), UV resin, bezel tape or temporary mold, sandpaper, jump ring, chain.
- Steps:
- Flatten the glass back with sanding if needed. Build a shallow wall around it with bezel tape to hold resin.
- Place the paper on the glass and flood with UV resin, removing bubbles with a quick pass of heat. Cure fully under a lamp. If the back is rough, add a thin resin coat for comfort.
- Drill a small hole near the top with a diamond bit under water, insert a jump ring, and hang. The translucency will glow in daylight.
4) Circuit Board Disc with Riveted Washer Frame
A scrap of printed circuit board (PCB) offers color and geometry. Framing it with a metal washer adds strength and sophistication.
- Materials: thin PCB scrap, steel or brass washer, jeweler’s saw or scissors (for thin board), drill with small bits, wire for rivets (1–1.5 mm), sandpaper, microcrystalline wax, chain.
- Steps:
- Cut a disc from the PCB to fit inside the washer’s inner diameter. Sand edges smooth and break any sharp fibers; wear a dust mask.
- Stack PCB behind the washer. Drill two or three evenly spaced holes through both. Insert wire short pieces, trim, and peen into tiny domes to lock the sandwich.
- Add a top hole if the washer lacks one, or attach a separate bail ring. Wax surfaces to deepen color and reduce skin contact with fiberglass.
5) Pressed Wildflower in a Watch Crystal Capsule
Turn botanical ephemera into a minimalist locket by trapping it between two clear watch crystals or glass cabochons.
- Materials: two identical flat watch crystals or round glass cabs, tiny pressed flower or fern, UV resin or 2-part epoxy, metal bezel or wire frame, chain.
- Steps:
- Clean glass thoroughly. Lay the flower on one crystal, add a minuscule resin bead at the center, and top with the second crystal.
- Clamp or tape gently to maintain alignment and exclude bubbles; cure or allow epoxy to set.
- Seat the capsule into a bezel or wrap a wire rim around the edge to create a bail. The result is airy, durable, and seasonless.
The Story You Wear: Meaning, Memory, and Responsible Making
Handmade pendants often carry more than shape and color; they carry intention. An inherited button becomes a daily reminder of a grandparent; a pebble from a mountain hike anchors a goal you met; a subway token signals a city that changed you. Think about symbolism as you build: What does this object say about place, time, and value? Pairing a rugged, oxidized washer with a delicate silk ribbon can communicate strength softened by care. Choosing a stamp from a formative year locates the piece in history.
Trace and share provenance when you can. Not only does it add richness, it guides care and ethics. If a coin appears rare, look it up before drilling; in many regions it is legal to alter currency for art, but there are exceptions. For shells and flora, respect collecting limits and protected areas. For e-waste, remove hazardous components (never use batteries) and avoid products with unknown coatings. Cultural motifs deserve humility; research symbols that are not yours to ensure respectful use.
Troubleshooting and Long-Term Care
Even careful makers meet snags. These fixes keep your pendants wearable for years.
- Twisting or flipping pendants: Increase contact points by adding a second hole at the top; switch to a stiffer chain; shorten the hang; or place a thin lead-in wrap that acts as a keel.
- Edges that snag clothing: Break the edge with a file at 45 degrees, then sand through finer grits. For fabric-fray, wick thin CA glue into the edge and sand when dry.
- Adhesive failures: Degrease surfaces with isopropyl alcohol before gluing. Roughen glossy areas lightly for mechanical grip. Allow full cure—16–24 hours for epoxy—before stress.
- Metal skin marks: Clear lacquer or wax can reduce transfer. Alternatively, interpose a leather or felt backer cut slightly smaller than the pendant silhouette.
- Resin bubbles or yellowing: Warm the resin bottle to reduce viscosity; apply in thin layers; use UV-safe formulations; store finished pieces out of direct sunlight.
- Chain wear: Inspect jump rings seasonally. Replace with soldered links if a pendant is heavy or sentimental. A closed bail plus split ring increases security.
A good pendant thrives on versatility: swap chains and cords to match outfits, seasons, and occasions. Keep a small tray or board with options—black leather, oxidized brass, bright silver, ribbon—so the same pendant reads casual on Monday and tender on Friday night.
Presentation, Gifting, and Small-Scale Selling
A pendant becomes a gift when you pair it with a card that tells its story. A short note—“river glass from the north shore, framed in brass, sealed for wear”—invites questions and memory. Mounting on recycled cardstock with two small slits secures the chain; stamping or handwriting adds warmth. Simple kraft boxes with tissue protect finishes. If you gift magnets or heavy pieces, include a care card mentioning pacemaker caution and storage tips.
For markets or online shops, photograph on contrasting backgrounds: light stone with dark chain, warm wood with cool metal. Use soft natural light; avoid harsh reflections on resin. Price by adding materials, a reasonable hourly rate, overhead, and a profit margin. Maintain a repair policy to build trust. Transparency about sources and finishes sets expectations and celebrates your making process.
Advanced Variations and Experiments
Once you master basics, broaden your palette. Copper electroforming lets you “grow” metal over organic forms like leaves and twigs, preserving delicate veins in a robust shell. Cold enamel (epoxy enamel) adds color stripes to washers and gears. DIY pinch bails from sheet metal require only tin snips and files, and they grip drilled stones elegantly. Heat-shrink tubing, ordinarily a hardware staple, tidy-wraps wire bundles and can become a sleek, modern bail. Saltwater etching with a 9V battery imprints symbols on steel or brass tags without acids; neutralize and seal afterward. Each technique expands your material vocabulary without abandoning the low-tech spirit.
From Exercise to Personal Signature
Keep a small sketchbook for layouts, knot diagrams, and notes about what draped well or misbehaved. Photograph experiments side by side and annotate why one succeeded: the stiffer cord? the off-center hole? the matte finish? Over time you will notice preferences—certain proportions, textures, or stories you return to. Lean into them. A coherent series may revolve around river finds, printed maps, or mechanical shapes. With intention and repetition, the humble practice of found-object pendants becomes an expression of who you are as a maker and what you notice in the world.
Above all, enjoy the process. The rhythm of filing an edge, the careful push of a drill bit, the click of a jump ring closing—these are quiet satisfactions that get encoded in the finished object. They matter as much as the final shine. Embrace upcycling not just for the environment but for the delighted surprise it sparks in people who recognize an everyday thing reborn. Attend to small details that improve comfort and longevity, and accept the marks of time as collaborators rather than enemies. Whether your pendant cradles a pressed blossom or a gear from a defunct clock, let it carry forward evidence of making, place, and care.