Lace has a way of catching the light and the eye: a web of negative space, a whisper of texture, a hint of story. Working it into handmade adornments invites touch as much as sight, bridging heirloom tradition and contemporary edge. Whether you’re refining a minimalist headband, crafting earrings from a single motif, or framing a clutch with a scalloped border, the goal is to let lace speak while your hands guide it with quiet confidence. The techniques below honor fine craftsmanship, protect the fiber’s integrity, and expand what’s possible in small-scale accessories.
Understanding Lace for Accessory-Making
Before you choose a project, it helps to understand what you’re looking at. Lace is not one thing; it’s a family of constructions. Bobbin and needle laces are hand-formed, often with airy grounds and crisp motifs. Machine laces span from delicate Raschel mesh to dramatic guipure (also called chemical lace), where motifs are connected without a net. Crocheted lace and tatting bring hand-knotting and looping into the picture. Each variety behaves differently when cut, curved, or suspended as a pendant, so learning to “read” its structure is the first step to intelligent making and long-term durability.
Fiber content also drives outcomes. Cotton and linen accept dye readily and block to shape; silk gleams and drapes; rayon and viscose mimic silk’s luster; nylon and polyester resist fraying better but can feel slick. Stretch laces include spandex and excel for cuffs and chokers that need a little give. Pay attention to composition: a mostly synthetic guipure might withstand spot-cleaning that would deform a vintage cotton Chantilly. Weight matters too. Heavy motifs work as stand-alone elements for brooches and earrings; fine Chantilly excels as overlays or layered petals. And of course, pattern scale guides placement: a broad scallop suits headbands and clutch edges, while tiny medallions make charming studs or shoe clips. Many pieces are extraordinarily delicate, so plan supports accordingly.
Choosing the right lace for each accessory
Think about the forces acting on the piece: necklaces and hair accessories can host wider yardage; earrings prefer compact motifs with inherent support; rings and cuffs benefit from stable edges. For movement, pick laces with dense “spines” so jump rings can bite. For a smooth silhouette near skin, consider soft grounds and avoid raised cordonnet where it might rub. For sculptural flowers, choose guipure or crocheted motifs that hold a crease after light stiffening. Matching the lace’s versatility to the role makes construction easier and wear more comfortable.
Sourcing: vintage, remnants, and ethics
Antique trims, bridal offcuts, and deadstock are treasure troves. Search estate sales, tailor’s bins, and theater costume shops for short lengths. When buying new, ask about origin and fiber content. Support small mills and artisans when you can, and keep an eye out for certification on fibers. Beyond aesthetics, this attention cultivates sustainability in a category that often leans on surplus and rescue materials.
Tools, Notions, and Preparation
The difference between frustration and flow often lies in the tools. You don’t need everything at once; assemble as you go and let projects guide investments.
- Cutting and handling: micro-serrated shears, fine embroidery scissors, thread snips, precision tweezers, awl.
- Needles and thread: beading needles, milliner/straw needles for long stitches, sharp size 9–12 sewing needles; fine polyester or silk thread to match or vanish; optional monofilament used sparingly.
- Stabilizers and backings: lightweight tulle, organza, silk habotai, felt, ultrasuede, thin leather, bead-embroidery foundation, fusible web and interfacing.
- Edge management: fray-preventing liquids, diluted pH-neutral PVA, narrow zigzag capability on a sewing machine.
- Adhesives and finishes: flexible fabric glue for porous fibers, jewelry-grade epoxy for metal findings, contact cement for leather, UV resin for encapsulation (use in ventilated areas), fabric stiffener or diluted PVA.
- Hardware and findings: jump rings (4–6 mm), earring hooks or posts, ribbon clamps, fold-over crimps, end caps, lobster clasps, chain extenders, bails, brooch pins, combs, barrettes, snap clips, shoe-clip backs.
- Shaping aids: millinery wires (30–34 ga), nylon fishing line for invisible support, blocking mats and pins, pressing cloth, low-heat iron.
- Finishing touches: ribbon, velvet, bias tape, narrow cords, seed beads, pearls, sequins, micro-chain.
Preparation elevates results. Pre-wash cotton and linen to remove sizing and assess shrinkage; keep vintage or fragile pieces dry and test colorfastness on a clipped thread. If you plan to dye, use fiber-appropriate dyes and rinse until water runs clear. Block lace flat under a pressing cloth at low heat to relax distortions from storage. If cutting motifs from yardage, trace the intended shape with a removable pen and secure a tulle underlay before snipping; this underlay becomes a nearly invisible scaffold that prevents unraveling later.
Pro tip: Photograph the lace before cutting and after arranging motifs. A quick snapshot helps you replicate mirrored pairs and symmetric layouts for earrings, cuffs, or hair combs.
Core Techniques for Attaching and Shaping
Stitching strategies for control and subtlety
Hand stitching remains the most reliable way to join lace to bases or connect motifs. Use tiny whip stitches hidden along dense areas of the pattern; couch over supportive cords rather than open mesh whenever possible. A ladder stitch secures edges invisibly when folding lace over a ribbon or leather core. If you add beads, place them strategically as both decoration and structural “rivets.” For speed, a narrow zigzag on a machine can appliqué lace to tulle or organza; reduce pressure on the presser foot to avoid drag and use a fine needle to minimize snags. Choose thread colors to vanish into shadows; silk thread glides and tangles less, while polyester endures better for pieces that flex.
Adhesives: when and how to use them
Glue is not a cure-all, but it can stabilize edges, secure hardware, and laminate lace to rigid elements. Apply sparingly with a toothpick from the back side; let capillary action pull adhesive into fibers rather than flooding the surface. Test for bleed-through on offcuts. For skin-facing surfaces, favor flexible fabric glues that dry soft; for metal findings like end caps and posts, a jewelry epoxy offers a strong hold. Avoid hot glue for fine work—it bulks and strings—except for rough prototypes or temporary tacking. Allow proper cure times; impatience is the fastest path to stains and misalignments.
Managing cut edges and open areas
Open grounds invite fray. Options include: sealing edges with a fray-preventing liquid (dab lightly), backing with tulle and stitching along the planned cut line, or using a narrow zigzag along a traced shape before cutting outside the stitch. Synthetics may be carefully heat-sealed with a thread burner—but test first to avoid puckering. When trimming motifs from guipure, keep narrow connecting bars intact when possible; they distribute stress and prevent unraveling. When wrapping a lace edge over a base (like a cuff core), fold and miter corners with minimal bulk and secure with a hidden ladder stitch.
Stiffening and sculpting
Creating 3D forms elevates simple motifs into statement pieces. A dilute PVA or fabric stiffener brushed on the back and pinned to shape yields crisp petals, ruffled collars, or dramatic fans. Insert fine millinery wire along a motif’s edge by couching stitches over the wire path; this adds poseable structure without visual clutter. For long-term pieces, keep stiffeners light and flexible so the item moves with the wearer yet returns to form. Block each component on a foam board, let dry fully, then assemble.
Pro tip: To keep delicate motifs comfortable on skin, add an ultrasuede or silk backing cut slightly smaller than the lace element. It feels luxurious and hides knots and anchoring stitches.
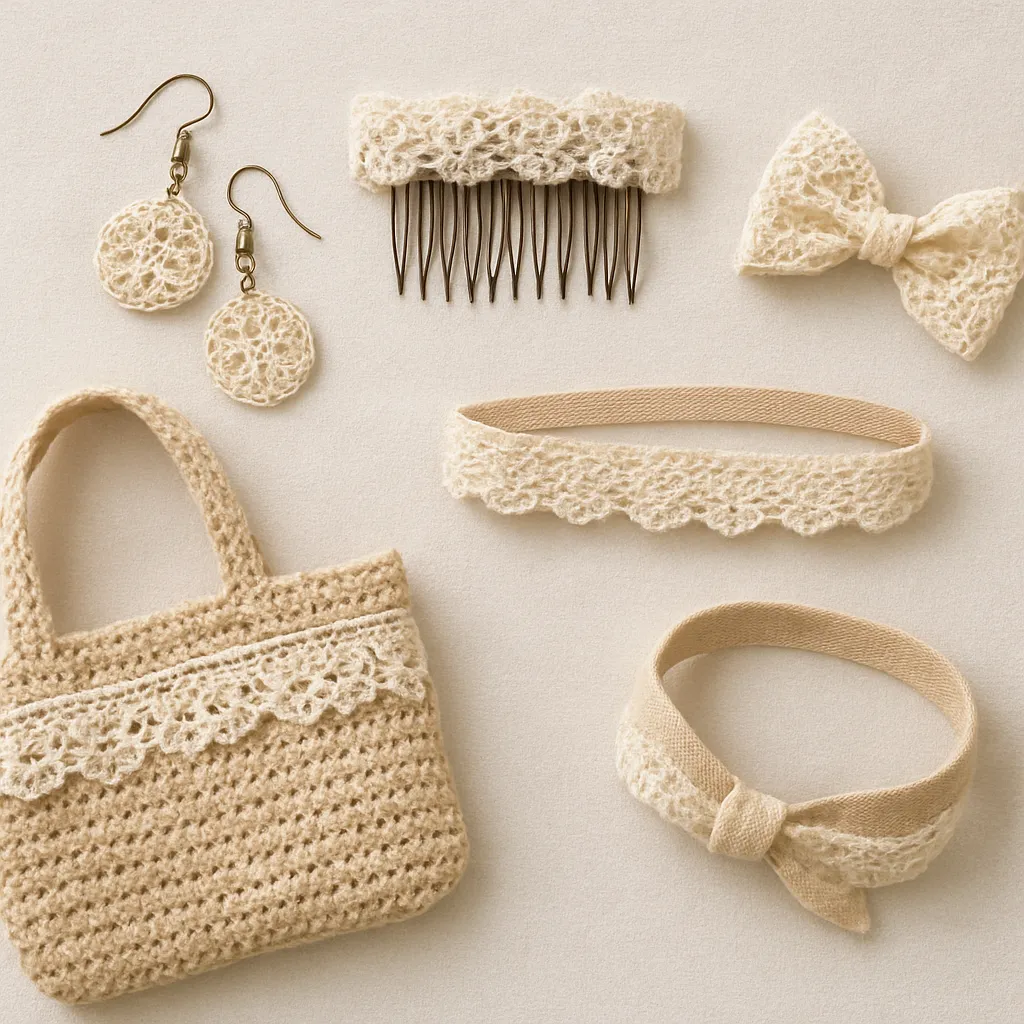
Project Ideas with Step-by-Step Guidance
Guipure motif earrings with bead accents
Choose a pair of small, dense motifs for balance. Lightness is essential for comfortable wear.
- Step 1: Back each motif with a piece of nude tulle and secure with tiny whip stitches around the motif interior. Trim excess tulle close to stitches.
- Step 2: Dab a thin bead of fray-preventer along the outer edge if cutting was required; let dry.
- Step 3: Add seed beads and tiny pearls to strategic points that need weight or visual focus, stitching through dense areas to avoid tearing the mesh.
- Step 4: Attach a jump ring through a sturdy bridge of the motif. If no bridge exists, couch a tiny loop of thread-coated wire onto the back as a hidden bail.
- Step 5: Add earring hooks or posts. For posts, glue and stitch a flat pad post to a backed area; cover the back with ultrasuede to encase the pad and stitches.
Ribbon-backed lace choker with adjustable chain
A lace choker should hug gently without strain. A backing ribbon adds comfort and structure.
- Step 1: Select a lace with a straight edge or a symmetric scallop; measure neck and add 5–7 cm for adjustability.
- Step 2: Center the lace on a double-faced satin or velvet ribbon; hand stitch with a ladder stitch along the inner pattern lines to minimize visible thread.
- Step 3: Insert a narrow strip of lightweight interfacing inside the ribbon if the lace is heavy to prevent rolling.
- Step 4: Finish ends with ribbon clamps; add a lobster clasp and chain extender. For comfort, file any sharp clamp edges and seal the ribbon edge to avoid fray.
- Step 5: Optional embellishment: a single drop bead at the center front for subtle sway.
Lace-on-leather cuff with hidden snaps
Mixing fiber and leather creates satisfying contrast. Keep the inner surface smooth for comfort.
- Step 1: Cut a leather strip to wrist size plus overlap for snaps. Bevel and burnish edges.
- Step 2: Position lace over the leather; if the lace is sheer, back it with organza first to preserve its character.
- Step 3: Use contact cement sparingly to laminate lace to leather, or stitch along dense lines with a leather needle and thimble.
- Step 4: Install low-profile snaps on the leather. Cover snap backs on the inside with ultrasuede patches to prevent rubbing.
- Step 5: Seal lace edges with discreet stitches; finish with a soft brush to lift texture.
Hair comb or barrette with arched lace and floral cluster
Headpieces benefit from a strong foundation. A metal comb or French barrette provides grip; curved lace softens the silhouette.
- Step 1: Bind the spine of the comb with narrow ribbon to increase friction.
- Step 2: Shape a lace arch by lightly stiffening, then pinning over a cylinder (a rolling pin works) until dry.
- Step 3: Whip stitch the arch to a tulle-covered backing that matches hair color; trim excess tulle.
- Step 4: Secure the lace assembly to the comb by stitching through the wrapped spine; add a few hidden stitches around teeth.
- Step 5: Cluster small flowers, beads, or wired pearls at one side for asymmetry; make sure weight remains centered for comfort.
Scalloped lace edge for a clutch or phone pouch
Transform a plain accessory base with careful placement and stitched edges.
- Step 1: Choose a scallop that fits the pouch’s width. Pre-curve the lace if the edge is rounded.
- Step 2: Baste the lace along the opening edge, aligning the apex of scallops with corners for a deliberate finish.
- Step 3: Stitch along dense inner lines, not the outermost thread, to avoid fragility; add a tulle underlay if needed.
- Step 4: Line the pouch to hide stitches and protect contents; add a magnetic snap or zipper guard to prevent snagging.
Shoe clips or sneaker accents
Little statements go a long way. Use sturdy motifs that won’t catch.
- Step 1: Select compact motifs; back with tulle and ultrasuede to build a stable sandwich.
- Step 2: Attach shoe-clip hardware with epoxy and a few anchor stitches through perforations (if available).
- Step 3: Reinforce with a second ultrasuede piece on the back to encase hardware and distribute stress.
Design Principles: Scale, Contrast, and Balance
Lace thrives on tension between lightness and structure. Choose scales that complement their setting: small motifs near the face, larger arcs in the hair, repeating elements for belts or bags. Negative space is a design element—frame it deliberately. Use contrast in texture (matte velvet under glossy cordonnet), temperature (cool silver against warm ecru), and line (straight ribbon with scalloped edge). Maintain balance by echoing a shape or color at least twice; a single pearl drop on earrings and a matching bead at a choker clasp quietly tie the look together.
Color choices shift mood. Ecru feels nostalgic; optic white is bridal and crisp; black pushes graphic modernity. Tea-dyeing softens harsh whites for vintage harmony; dye-lot testing prevents surprises. Metallic threads or tiny crystal accents add sparkle, but a little goes a long way—let embellishment support rather than overshadow. If pairing patterns, vary scale (one bold, one fine) to avoid visual noise.
Pro tip: Map your design on paper first. Sketch the base, pin lace samples, and photograph options. Decision-making on paper saves your fabric from pin holes and time from uncertainty.
Comfort, Wearability, and Engineering
The prettiest accessory must still be pleasant to wear. Back skin-contact areas with soft materials; avoid scratchy beads at pressure points. Keep weight in check: distribute beads evenly, build lightweight cores (foam, buckram, or thin leather), and reserve heavy stones for shorter hangs. Consider movement: earrings shouldn’t twist into odd angles, chokers should flex with neck turns, and hairpieces should ride with the scalp, not pull hair. Engineering is the quiet sibling of style—a thoughtful technique gives elegance staying power.
Hardware choices matter. Hypoallergenic ear wires widen your audience; nickel-safe metals reduce irritations. For bracelets, add extenders; for chokers, include a short chain to fine-tune fit on different days. Always round or file any metal edges that brush the skin or the lace itself.
Troubleshooting and Professional Finishes
Puckering occurs when stitching compresses the lace more than the base. Remedy by easing in small sections, using lighter tension, or stabilizing both layers with tissue while sewing. Glue stains result from over-application—apply from the back with a micro-brush and keep a damp cotton swab ready to lift stray wet glue. If a motif feels floppy, add a hidden tulle or organza backer; if it’s too stiff, rinse in lukewarm water and reshape.
For clean terminations, cover knots with ultrasuede dots, small felt ovals, or matching ribbon tabs. Crimp ends should grip firmly without crushing the lace; add a sliver of folded ribbon inside the clamp for bite, then press with nylon-jawed pliers to prevent marring. When attaching jump rings to lace, select dense points, pre-pierce with an awl, and rotate the ring to find its most stable orientation.
Pro tip: Build mirrored items (like earrings) simultaneously. After each step on one side, perform the same on the other. This keeps symmetry intact and pacing consistent.
Care, Cleaning, and Storage
Gentle handling preserves work. Spot-clean with a barely damp cloth and mild soap; avoid soaking unless the fiber and adhesives are known to tolerate water. Dry flat on a towel; reshape while damp if needed. Keep perfumes, lotions, and hairsprays away from lace—they can discolor fibers and weaken stiffeners. Store in breathable pouches with anti-tarnish tabs if metal is present. For travel, place delicate pieces in small boxes, supporting them with tissue to protect against crushing. Periodically inspect for loose beads or lifted edges and make tiny repairs before they become big ones.
Innovative Directions: Pushing the Medium
Lace and resin: encase a small motif in a bezel with UV resin for a modern pendant, or float lace between acetate layers for lightweight earrings. Lace embossing on polymer clay or air-dry clay yields textured charms; dust with mica for dimension. Cyanotype printing loves lace’s patterned shadows—use it to create companion paper tags or fabric backings. In bead embroidery, couch a motif onto a stiff foundation and build a halo of seed beads to transition to a metal frame. For millinery, wire the edge of a wide lace piece into a brimlet, add tulle for lift, and anchor to a headband.
Mashups are fertile ground: stitch lace to handwoven bands, combine with macramé knots, or layer over denim offcuts for grunge-romance. When introducing technology (like tiny LED seed lights inside a bridal hair vine), route wires along dense lace ribs and conceal with floss couching, keeping battery packs removable.
Eco and Heritage Perspectives
Upcycling honors lace’s past and extends its life. Salvage usable motifs from damaged garments or table linens, rinse gently, and mount them onto modern forms. Deadstock trims, inherited handkerchief borders, and even curtain remnants can become heirloom accessories with fresh context. Document provenance where possible; a small note about a piece’s origin adds meaning for the wearer and encourages mindful care. Repair work—reanchoring loosened cordonnet or reattaching a missing flower—keeps vintage pieces circulating rather than discarded, a quiet victory for the making community and the planet alike.
Packaging, Gifting, and Small-Batch Selling
Presentation amplifies the handmade narrative. Package pieces on sturdy cards covered with cotton paper or linen, cut slits rather than piercing holes so lace won’t snag during removal. Include a tiny care guide that explains fiber content and recommended cleaning—mention if the piece includes starch or resin. For gifts, align palette and style to the recipient’s wardrobe, and add extenders so fit is flexible. If you sell, photograph macro details in soft light, showing scale against a hand or coin. Price to cover materials, time, and a margin for experimentation; your quiet expertise deserves compensation.
Compliance matters: choose lead- and nickel-safe findings and disclose materials to buyers. Offer hypoallergenic options. Keep records of sources, especially for vintage or one-of-a-kind trims, so you can communicate uniqueness without overpromising repeatability.
Glossary-at-a-Glance
Guipure: lace composed of motifs connected without net; strong for cut-outs. Chantilly: fine net with delicate floral designs, often corded. Cordonnet: a heavier outlining thread that defines motifs. Tatting: knotted lace technique with a shuttle or needle. Couching: stitching over a laid thread or wire to anchor it invisibly. Ground: the net or mesh base between motifs. Blocking: shaping while damp and pinning to dry for form retention.
From First Cut to Final Wear
Working with lace is an exercise in intention. Each snip, each stitch, each dab of glue guides filigree into function. Respect the fiber’s origin, notice how it behaves in your hands, and finish the back as beautifully as the front. Keep a box of experiments: tiny edge tests, failed stiffening trials, dye swatches. They become a personal library of problem-solving. The reward is a collection of adornments that feel inevitable—pieces where the maker’s hand disappears and the pattern seems to have always belonged to the ribbon, the comb, the wrist.
As you refine your practice, you’ll find that small changes yield big dividends. Shift a jump ring 2 mm and an earring hangs straighter; choose silk thread and stitching melts from view; swap backing from felt to ultrasuede and skin-contact comfort rises. This iterative attention is what turns method into mastery, and method into delight. Lace, once thought fragile, proves resilient when partnered with considered design and skilled hands. From a single salvaged motif to a suite of bridal pieces, your work can translate history into the present—quietly, elegantly, and with enduring technique.
Ultimately, the art of integrating lace into handmade adornments is about honoring detail without letting it overwhelm. With mindful selection, subtle reinforcement, and thoughtful assembly, the fabric’s voice stays clear. Build from foundations—fiber understanding, scale judgment, discreet stitching—and every new accessory becomes a study in balance. Trust your eye, slow your tempo, and let the thread lead. In that rhythm lies the heart of wearable lace: beauty sustained through intelligent choices, purposeful touch, and a maker’s enduring respect for material and form.