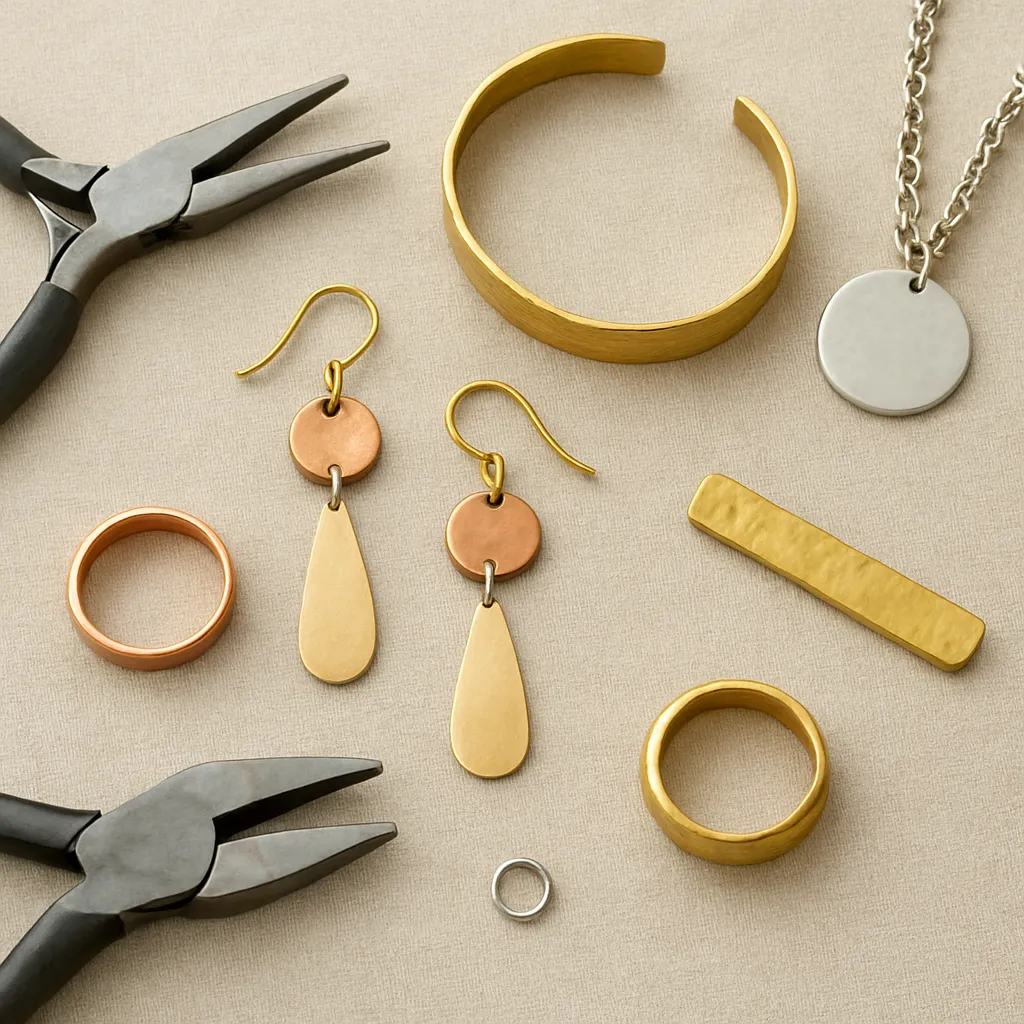
Metals speak different visual dialects, and a craftsperson’s skill lies in turning that conversation into harmony instead of noise. Whether you are fabricating jewelry, assembling home decor, or restoring a vintage object, the alchemy of mixing metals depends on clear design intent, knowledge of material behavior, and deft finishing. This guide brings together studio-tested methods, small-shop science, and visual strategy so that brass, copper, silver, steel, and more can live side by side without fighting for attention.
The language of metals in handicraft
Each metal carries a personality shaped by color, reflectivity, and cultural associations. Brass leans warm and lively; copper glows with earthy fire; sterling and fine silver suggest purity; stainless steel and nickel whisper modern restraint; bronze reads historical and architectural; pewter brings a calm, pewter-blue maturity; aluminum is featherlight and cool; titanium can flash iridescence after anodizing. When handled sensitively, these voices interweave to create rhythm and depth across an object’s surface.
Color temperature is your first tool. Warm alloys (brass, bronze, copper) coexist naturally, while cool metals (stainless steel, aluminum, nickel silver) pair elegantly among themselves. Cross-temperature pairing is where the magic often happens: warm brass against a cool brushed stainless field, or darkened steel lifting a pale silver element. The trick is to manage glare and texture so the eye can rest. Consider what you want the viewer to notice first. If every surface is maximally shiny, your piece risks flattening into visual noise.
Texture is the steadying hand of mixed-metal work. A hammered copper plate will never visually fight a softly brushed steel ring if you stage them wisely. Directional brushing and grain also matter: two metals rubbed in the same linear direction feel unified even when their colors differ. Conversely, crossing brush patterns can be used sparingly to separate layers and prevent muddiness.
Design principles that prevent clashing
A successful mix depends more on visual planning than on luck. A few core ideas will keep you on course: composition, proportion, contrast, hierarchy, and coherence.
Choose an anchor metal
Pick one dominant metal that carries identity and sets the emotional temperature. Let it claim most of the surface area—often 60–75%. This is your anchor. Secondary metals then act as accents and structure. In a cuff bracelet, for example, a brushed bronze body may host thin silver inlays and copper rivets. The viewer reads “bronze” first, with silver and copper playing supporting roles.
Balance by ratio
Use simple ratios to modulate intensity:
- 70/20/10: dominant, secondary, accent. A dependable palette for jewelry and tabletop objects.
- 60/30/10: slightly more assertive secondary, good for architectural hardware.
- 80/15/5: highly restrained accenting, excellent for heirloom pieces where quiet elegance matters.
Keep the accent metal in thin lines, small fasteners, or a single focal shape. Secondary metals should never visually outmuscle the anchor unless you intend a split-focus design.
Control reflection and glare
If you pair two mirror-finishes, expect a fight for the viewer’s attention. Lower the specularity of one surface or both. A soft satin on stainless can set the stage for a small mirror-bright silver bezel. Luster should guide the eye, not blind it.
Repeat to unify
Repetition transforms variety into rhythm. If copper appears once, let it appear again, even in a tiny echo—an inlay line, a rivet head, or a discreet clasp component. The brain recognizes patterns and relaxes, which is why mixed-metal pieces that repeat accents feel intentional rather than chaotic.
Shape language and edges
Keep contours related. Rounded, pill-shaped forms converse smoothly with domed rivets and gentle chamfers. Sharp-edged geometry prefers crisp screws, step details, and hard transitions. Mixed metals become easier when the silhouette speaks one language.
Material science essentials for crafters
Visual logic is only half of the puzzle. Metals also behave in predictable ways you can harness for both beauty and longevity. Understanding atomic structure and surface chemistry—at a working level—will prevent surprises during fabrication and use.
Alloy families and compatibility
- Copper-based alloys (copper, brass, bronze): excellent mutual compatibility; solder readily; accept a wide range of patinas.
- Silver family (sterling, fine silver): solders easily; pairs well with copper alloys; can migrate copper into the surface of sterling when heated repeatedly—plan finishing steps accordingly.
- Ferrous metals (mild steel, stainless steels): require different fluxes and solders; stainless is resistant to acid patinas; steel loves controlled darkening.
- Aluminum: lightweight, oxide layer reforms instantly; mechanical joins are easier than solder; anodizing enables durable color; avoid direct contact with copper in damp settings.
- Titanium and niobium: highly passive; excellent for color via anodizing; typically joined with mechanical methods or specialized welding.
Galvanic awareness
Dissimilar metals in the presence of an electrolyte (sweat, humidity, salted air) can corrode preferentially. A simple mitigation strategy: isolate unlike metals with lacquer, epoxy, nylon washers, fiber gaskets, or wax. Design drainage and airflow rather than trapping moisture under tight joints.
Surface chemistry and aging
Color changes over time are not defects; they are opportunities. Copper browns, silver dulls, bronze mellows, steel deepens. Controlled patina is a craft form in itself, while unplanned oxidation can shorten a piece’s life or spoil your tones. Seal, wax, or oil where stability is needed; leave select areas breathing if you want living color.
Thermal expansion and bimetal stress
Different metals grow at different rates when heated. In a bracelet with silver inlay on steel, temperature swings can loosen or buckle the interface. Use thin inlays with mechanical capture (undercuts, dovetails) or compliant adhesives, and avoid long, uninterrupted strips that magnify stress.
Joining techniques that respect the mix
Cold connections
- Rivets: The workhorse of mixed-metal assemblies. Use domed, flush, or decorative heads. Back up thin metals with washers to resist pull-through. Consider bi-metal rivets for hidden color notes.
- Tabs and slots: Great for sheet-to-sheet bonding without heat. Round internal corners to reduce stress risers.
- Screws and standoffs: Permit disassembly for maintenance. Nylon or fiber washers isolate metals and provide micro-suspension.
- Wire stitching and lashing: Decorative and strong. Copper or brass wire can lace a steel panel to a bronze frame, adding both structure and sparkle.
- Adhesives: Structural epoxies perform well when joints are clean, keyed, and clamped. Roughen surfaces (120–220 grit), degrease with acetone or alcohol, and observe cure times. Use as primary bonds or as vibration-damping helpers beneath mechanical fasteners.
Soldering and brazing
- Silver soldering: Bridges copper to silver or brass easily; choose hard/medium/easy grades to sequence operations without remelting earlier joints.
- Brazing: High-strength joints for bronze or steel; use appropriate fluxes and high-heat torches. Practice heat control to prevent alloy segregation at edges.
- Interlayers: Insert a compatible shim (e.g., copper between silver and steel) to promote wetting and reduce stress.
- Heat sinks and sequence: Protect thin accents with binding wire, clips, or wet paper towels. Solder the largest, highest-temp joints first and move toward cooler operations.
Specialty methods
- Mokume-gane: Diffusion bonding of patterned stacks of copper alloys and precious metals. Demands temperature precision but yields woodgrain effects that unify multiple metals into one poetic surface.
- Keum-boo: Fusing high-karat gold foil to silver using heat and pressure. A controlled way to introduce rich warmth without full solder joints.
- Bi-metal sheet: Commercially bonded layers (e.g., silver/copper). Sawing and forming reveal color edges and stripes without juggling multiple loose sheets.
Surface finishes and texture control
Finish is as powerful as color. Use it to sculpt light across your object. The hierarchy of texture often determines whether metals quarrel or cooperate.
Finish vocabulary
- Mirror polish: High drama, but prone to fingerprints; reserve for focal accents.
- Satin/brushed: Versatile, hides wear, easily maintained; the unifying hero of mixed-metal projects.
- Matte bead-blast: Diffuse glow; ideal background that lets small bright spots sing.
- Hammered/dappled: Breaks reflections into lively facets; great for warm alloys.
- Engine turning/linear grain: Directional cues that can visually lock different metals together.
Patination and color chemistry
- Copper and brass: Liver of sulfur, ammonia fuming, vinegar-salt-peroxide for verdigris (neutralize and seal). Sculpt layers by rubbing back high points.
- Bronze: Brown to near-black with commercial solutions; heat patina for golden browns.
- Steel: Heat blueing, gun-bluing solutions, or controlled rust converted and sealed with tannic products or wax.
- Silver: Sulfur-based darkening, or keep bright for contrast against darker neighbors.
- Aluminum and titanium: Anodizing for durable color shifts; pair anodized accents against calm, brushed neighbors.
Sealers and barriers
Microcrystalline wax leaves a natural sheen and is repairable; lacquers freeze a finish in time but can chip; oil blends bring tactile warmth to steel and bronze. Seal only what you must; too much sealing can make a piece feel plastic rather than metal.
Reliable palettes and what they communicate
Brass + silver + oxidized steel
Brass brings warmth, silver offers a clean highlight, and darkened steel frames it all. Use ratios around 60/25/15. Keep silver small and bright, steel matte or gun-blued, brass satin. Perfect for belt buckles and cabinet hardware.
Copper + bronze + patina green
A harmonious warm trio. Let bronze dominate as a sturdier base, copper for accents, and a controlled green on recessed textures. Seal the green to contain it. Best for bowls, vases, and plaques.
Stainless + pewter + blackened silver
Cool, urbane, and understated. Brushed stainless as the field, pewter as soft forms, and selectively blackened silver as linework. Works well in contemporary jewelry and desk objects.
Aluminum + brass
Lightness meets warmth. Keep aluminum bead-blasted or finely brushed, brass in tight accents. Excellent for wearable pieces that must remain featherlight.
Titanium (anodized) + bronze
Bronze grounds the color with historical gravitas while titanium shimmers with controlled iridescence. Use anodized titanium in small, precise elements: pins, bezels, or overlays.
From idea to finished object: a workflow
- Define intent: What do you want the object to say? Cozy heirloom, industrial modern, playful color?
- Choose the anchor: Pick the dominant metal first; write down a target ratio (e.g., 70/20/10).
- Create a test board: Small coupons finished exactly as intended—same brushes, patinas, and sealers. Arrange them under both warm and cool light.
- Sketch the silhouette: Decide shape language; repeat curves or angles across elements.
- Plan joints: Select cold connections or solder/braze sequence; add isolation washers where needed.
- Prototype: Mock up with scrap or cardboard plus metal samples to test scale and balance.
- Fabricate in sequence: Largest, hottest operations first; finish surfaces progressively; keep notes on grits and compounds.
- Patinate and seal: Apply color intentionally; stop early and creep up on darkness; seal as required.
- Final assembly: Use threadlocker on screws where vibration may occur; burnish highlights to pull the eye.
- Evaluate: Photograph under different light; check wear points; adjust ratios or finishes on the next iteration.
Case studies in mixed-metal harmony
Everyday cuff: bronze body, silver line, copper rivets
Start with a 1.5 mm bronze strip as the anchor. Saw a shallow channel and inlay a 0.5 mm silver wire; mechanically capture it with gentle undercuts before burnishing. Rivet the overlapped ends with two 2 mm copper rivets. Finish the bronze to a satin, polish the silver to near-mirror, and matte the copper heads. The eye reads bronze first, silver second, copper last—quiet and confident.
Minimalist pendant: brushed stainless plate with gold keum-boo dot
Fabricate a small stainless plate, corners slightly radiused. Apply a fine linear brush in one direction. Fuse high-karat gold foil onto a fine silver tab with keum-boo, then mechanically fasten the tab to the plate with a single stainless screw and fiber washer. The gold dot commands attention without overwhelming the cool field.
Wall hook trio: patinated copper backer, blackened steel hook, brass cap
The copper backplate sets warmth and texture; the steel hook is the working muscle; a small turned brass cap at the hook tip catches light and ties to nearby brass hardware in the room. Repeat across three hooks for rhythm. Seal copper and steel; leave brass bright.
Troubleshooting and maintenance
When tones fight
- Reduce specularity: Knock one surface to satin.
- Adjust ratios: Shrink the accent metal or spread it as repeated micro-accents.
- Unify texture: Give different metals the same brush direction to knit them visually.
Patina creep and unwanted stains
- Neutralize thoroughly after chemicals (baking soda in water for sulfur-based patinas, ammonia-neutralizing rinses where appropriate).
- Apply a barrier: Microcrystalline wax over edges of patinated zones keeps color from migrating.
- Test sealers: Some lacquers warm the hue; confirm before committing.
Galvanic surprises
- Add insulators: Nylon washers under screws, thin epoxy films inside sockets.
- Design for dryness: Drain holes, breathable joints, and avoid felt pads that trap moisture.
- Material swaps: If copper must meet steel, insert a brass or bronze intermediary or switch to stainless fasteners.
Wear and repair
- Touch-up kits: Keep the same abrasive pads, wax, and polishing compound used originally.
- Selective brightening: Repolish only the intended highlight zones so the hierarchy stays intact.
- Replaceable parts: Screwed components let you renew sacrificial elements without disturbing the whole.
Sustainability and sourcing with intent
Mixed-metal projects can be materially responsible. Recycled copper and silver are widely available; many bronze and brass mills publish recycled content data. Upcycle: old plumbing brass, retired cymbals (B20 bronze), or scrapped stainless can be reborn as art. Avoid toxic legacies by steering clear of unknown plated junk where base metals may crumble or flake. When patinating, collect spent solutions and neutralize; never pour heavy-metal residues down drains. The most sustainable object is the one cherished for generations—design for repair and refinishing rather than one-time use.
Essential toolkit and safe shop practice
- Saws and shears: Jeweler’s saw frames with sharp blades; quality snips for soft sheet.
- Files and abrasives: Coarse to fine; keep dedicated tools for ferrous vs nonferrous to avoid contamination.
- Riveting gear: Assorted rivets, heading tools, backing blocks, and snap sets.
- Torches and heat tools: Dual-fuel (oxy/propane or oxy/acetylene) for brazing, air-fuel for silver soldering; fire bricks and heat shields.
- Finishing: Scotch-Brite pads, sanding sticks, buffing wheels, compounds, tumblers for small parts.
- Patina station: Non-reactive trays, fume control, neutralizers, dedicated brushes.
- Measuring and layout: Calipers, dividers, machinist squares; accurate layout prevents misaligned mixes.
- Safety: Eye and ear protection, respirators rated for metal dust and fumes, gloves suited to the task, ventilation, and fire safety gear.
Advanced harmony: rhythm, spacing, and edges
Once you can reliably avoid clashes, push toward nuance. Establish rhythm by repeating accents at measured intervals: rivets along a curve, dot inlays spaced by golden-ratio or integer multiples. Control edge treatments so that metals meet cleanly: a tiny bevel on both sides can create a shadow line that clarifies boundaries. Use negative space to prevent overcrowding; a quiet pocket of background metal gives the eye a moment to breathe before the next sparkle.
Think in layers. A dark underlayer reads as depth; a mid-tone layer supplies body; a bright top note delivers punctuation. When all three exist in clear steps, color disagreements disappear. If your piece feels muddled, remove one layer or separate them by texture or micro-bevels.
Practical patterns you can trust
- Dark base, warm mid, bright spark: Blackened steel plate, satin brass bezel, polished silver pin. Understate the bright area.
- Warm field with cool linework: Brushed bronze cuff, stainless inlay line, matte copper rivets echoing the bronze warmth.
- Monochrome by texture: All stainless in three finishes—bead-blast, satin, mirror—reads like three metals without chemical risk.
- Living finish suite: Copper body left to age, sealed bronze hardware, unsealed brass accent that will mellow with touch.
Maintaining integrity over time
Mixed metals age at different speeds. Embrace the story but keep control by scheduling gentle maintenance. For jewelry, a quick monthly wipe with waxed cloth maintains sheen and slows tarnish. For decor, seasonal checks catch galvanic damp spots early. Store pieces separately to avoid abrasion; silica gel in cases moderates humidity. When repairs arise, match the original abrasives and compounds to avoid introducing a new glare level that upsets the balance.
Why mixed metals reward the maker and the user
Combining metals is an invitation to exercise judgment at every step. It rewards meticulous craftsmanship and teaches patience. With mindful technique, your pieces gain not just color layers but also authentic durability. A well-mixed object becomes adaptable across interiors and wardrobes, proving its versatility year after year. Viewers may first notice the gleam, but what keeps them engaged is the subtle dance between temperatures, textures, and edges—the sense that every choice has a reason.
Begin with a modest project—a pendant or a set of cabinet pulls—using an anchor metal you love and one supporting metal that offers temperature contrast. Finish deliberately, repeat accents, and take notes. Your next piece can stretch into a third tone, a new patina, or an unusual joint. Over time, the mixed-metal conversation that once felt daunting will become your signature voice, confident and clear.
