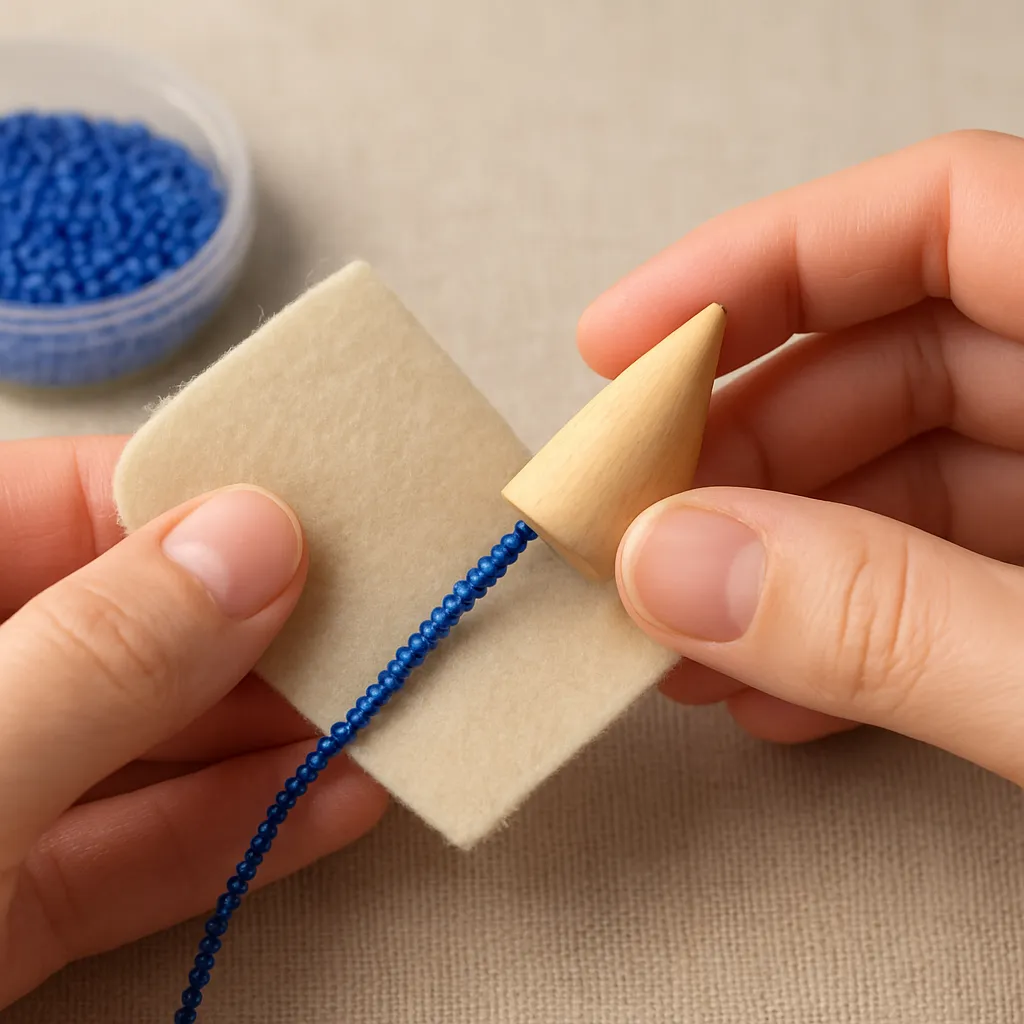
Jewelry finishes make the difference between something that looks homemade and something that looks studio-made. Few small components offer as much impact, versatility, and polish as bead cones. Whether you’re corralling multiple strands into a single clasp, disguising a knot, or tapering a cord bundle into an elegant point, bead cones transform loose ends into a cohesive, boutique-level presentation. This guide walks you through materials, sizing strategies, core techniques, and design applications so your pieces gain the clean lines, lasting strength, and unmistakably professional presence that clients and gift recipients notice immediately. You will learn when to glue and when to wrap, how to choose the right profile for the job, and what small checks add up to big gains in durability and comfort.
What Bead Cones Are and Why They Matter
Bead cones are hollow, tapered findings, open at one end and narrowed at the other. Their form gathers, hides, and transitions. A cone might conceal the clustered ends of beading wire, silk, leather, chain, or thread; it can also tidy the fan-out of tassels and fringe, or create a strong anchor for clasps and ear wires. Think of them as miniature funnels that compress volume into a precise exit point. That transition not only looks refined, it also adds structural integrity by keeping knots and crimps protected inside a metal shell, away from abrasion and snagging.
At a glance they resemble bead caps, but bead caps usually sit on top of a single bead to frame or emphasize it, while cones enclose a space. Larger glue-in end caps are sometimes grouped with cones, yet cones tend to taper more dramatically, which makes them especially effective for visual flow. Variations include dapped, filigree, fluted, smooth, and hammered textures; openwork cones are light and lacy, while solid cones offer maximum concealment and protection for internal hardware.
Cones clean up visual noise. Multi-strand necklaces often look busy near the clasp end, where wires and crimps congregate. A properly sized cone swallows those mechanics so the eye sees a graceful taper into a single loop or clasp ring. The result is neater lines, fewer snag points, and a comfort boost where the piece rests against the neck or wrist.
Materials, Finishes, and Fit
Common cone materials include brass (raw or plated), copper, sterling silver, gold-filled, stainless steel, bronze, pewter alloys, and artisan media like resin, clay, or carved horn. Each behaves differently. Sterling and copper can be work-hardened and patinated; brass is versatile and affordable; stainless is strong but less malleable; plated findings deliver a luxe look on a budget but need gentle care to prevent premature wear. Surface finishes range from high-polish and satin to antiqued and brushed. Patinated or antiqued cones camouflage minor scuffs better than mirror-polish cones, which show fingerprints but provide sharp contrast with matte cord or fabric elements.
Consider environmental factors. Salt air and skin chemistry can accelerate tarnish on bare metals. In mixed-media pieces, the glue you use, the sweating rate of the wearer, and storage conditions all interact. A jewelry-care note helps clients protect finish and luster, especially when a piece includes copper or silver that naturally reacts via oxidation. Choose metals and finishes that complement bead palettes while aligning with the care level the wearer is likely to provide.
Fit begins with inner space. The cone must comfortably house your internal mechanics: knots, crimps, beads as stoppers or spacers, and sometimes the shoulder of a wrapped loop. The exit hole size and angle influence how loops sit and how cords splay or stack. When you need the cone to seat flush against a clasp, check the thickness of split rings or jump rings so the exit doesn’t pinch or saw into them. For leather cords, note the cord’s nominal size can vary; test a cutoff to confirm actual diameter.
Selecting the Right Cone for the Job
Function leads form. Decide whether you’ll finish with a wrapped loop, a simple loop, or a glue-in method. For crimped beading wire and multi-strand designs, a cone deep enough to cover crimps and a small internal spacer bead is ideal. For cords and ribbon, a cone with an internal ledge or a nearly cylindrical “end cap” profile may provide better surface contact for adhesive. For fringe or tassel earrings, lightweight filigree helps keep the swing lively without tugging on earlobes.
Style follows. Sleek cones echo modern minimalism; ribbed or floral cones enhance boho and vintage styles; oxidized textures add a timeworn richness that flatters gemstone rondelles and seed bead weaves. Overly petite cones may appear pinched at the transition, while oversized cones can dominate finer strands. Aim for pleasing proportions that respect the scale of the beads and the visual weight of the clasp or pendant.
Usability counts. Large, smooth cones feel better against skin; textured cones provide tactile interest but can catch on delicate knits. Earrings benefit from lighter cones to reduce fatigue; bracelets appreciate low-profile ends that won’t snag on sleeves. Design for wearer comfort—consider ergonomics as much as aesthetics, particularly in pieces meant for daily wear.
Tools and Materials You’ll Use
Most cone-finishing workflows rely on a modest bench kit. Round-nose pliers form loops; chain- or bent-nose pliers hold and manipulate wire; flush cutters produce clean cut ends; nylon-jaw pliers straighten kinks without marring finish. A beading awl helps snug knots and tease thread through tight spots; a bead reamer can open or smooth the cone’s exit hole if needed. Small files or polishing papers refine cut wire ends before they disappear inside the cone.
Wire is typically 22–24 gauge for wrapped loops on beading wire tails, and 20–22 gauge for heavier cord transitions. For stringing, 7-, 19-, or 49-strand steel beading wire is standard; silk or nylon suit pearls and light gemstones; microcords support bead crochet or kumihimo; leather and faux-leather add structure. Crimp tubes, crimp covers, and wire guardians or protectors interface well with cones, preventing kink and chafe at stress points. For glue-in finishes, a high-quality adhesive matched to your materials—two-part epoxy for porous substrates, specialized jewelry cement for flexible bonds, or industrial flexible glues for leather—is essential. Test on scrap for cure time, flexibility, and aging behavior.
Measuring tools save rework. A small ruler and a gauge card help with diameter and length checks. Precision users love calipers to gauge inner/outer cone diameters, cord width, jump ring wire thickness, and loop clearances. Keep alcohol wipes and cotton swabs nearby to tidy accidental glue smears before they set.
Core Techniques: Step-by-Step
Technique 1: Crimp-and-Cone Finish for Multi-Strand Beading Wire
- Plan the termination. Slide all strands through a single crimp tube, then through a small spacer bead (optional) that will seat neatly inside the cone and prevent the crimp from slipping through. If you use a wire guardian, thread the strands up and around the guardian before returning through the crimp.
- Crimp securely. Use a quality crimping tool; avoid over-crushing. Trim excess tails short enough to fit inside the cone without bunching.
- Dry-fit the cone. Test whether the crimped bundle and spacer bead nest inside without forcing. If too tight, downsize the spacer bead or select a deeper or wider cone.
- Add the connector. Thread an eye pin or short length of wire through the spacer/crimp area, then feed the cone over the internal cluster so the pin emerges from the tip.
- Form the loop. Make a wrapped loop or simple loop on the exposed pin to connect a clasp component. If using a wrapped loop, ensure the wrap shoulders sit just outside the cone’s tip to avoid wobble.
- Stabilize the interior. If the inside rattles, add a tiny rubber or silicone stopper, a snug bead, or a micro dab of glue on the spacer bead—not on the metal walls—to prevent adhesive squeeze-out at the tip.
Technique 2: Wire-Wrapped Loop Transition for Single-Strand or Chain
- Anchor the inner end. For chain, connect the last link to a short wire segment with a secure wrapped loop; for beading wire, crimp to a small closed ring, then attach your wire to that ring.
- Build the stack. Slide a small, firm bead (metal or glass) on the wire to act as a shoulder inside the cone; then slide on the cone itself.
- Create a neat exit. At the cone’s tip, form a wrapped loop, leaving room so the wraps seat snugly against the cone without biting into it. Two to three turns are usually sufficient.
- Dress the wrap. Tuck the cut end flush with chain-nose pliers. If necessary, burnish lightly with a polishing pad to remove burrs.
Technique 3: Glue-In Cone Finish for Leather, Cord, and Ribbon
- Prepare surfaces. Lightly scuff the inside of the cone with a needle file for better grip, and deglaze or roughen leather ends. Dry-fit to confirm space.
- Bundle cleanly. Bind the cord ends with thread or a fine wire wrap about 3–5 mm from the end, then trim the bundle to a crisp cylinder that will insert cleanly.
- Apply adhesive sparingly. Deposit a small amount inside the cone wall, not at the tip. Insert the bundle with a gentle twist to spread the glue evenly. Hold until initial grab; let cure fully per manufacturer’s instructions, ideally overnight.
- Attach hardware. If the cone has a built-in loop, connect directly to your clasp with a jump ring. If not, use an eye pin inserted before gluing to create a sturdy connection point.
Technique 4: Building tassels and Fringe with Cones
- Create the fringe. Assemble strands of chain, silk tassel threads, seed bead fringes, or a mix. Bind their tops with a tight thread whip or tiny wire wrap to keep volume even.
- Cap with a cone. Choose a lighter cone for earrings; weight adds swing but can fatigue ears. Feed an eye pin through the bound bundle, then through the cone.
- Finish the top. Form a neat wrapped loop above the cone and connect to an ear wire or bail. Fan out the fringe evenly and trim for identical lengths on mate pairs.
Sizing, Measuring, and Alignment
Pro fit is predictable fit. Before assembly, measure the total diameter of your bundle at the widest point, including binding and any internal spacer bead. Compare that to the cone’s inner diameter where the bundle will sit, not just the entry. Cones taper; a roomy entry does not guarantee mid-body clearance. Measuring tools—especially calipers—let you check multiple points along the cone’s interior, which prevents surprises when the bundle stops halfway in.
Check angle of taper. A steep taper compresses quickly, ideal for dramatic transitions and airy fringe; a shallow taper treats bulkier cords more kindly. If the cone tip is very narrow, confirm the loop you intend to attach can articulate without scraping the edges. Add a tiny soldered jump ring or wire guardian if you want smooth movement at the exit point that reduces wear.
Alignment ensures balanced hang and visual symmetry. When forming two ends for a necklace or a pair of earrings, mark reference points on a bead board. Build both sides simultaneously through equivalent steps—crimp, spacer, cone, loop—so minor variations cancel out. For wrapped loops, count identical turns and match coil spacing. For glue-ins, seat both bundles at the same depth before cure. Consistency at the exit point keeps clasps centered and earrings level.
Design Applications and Aesthetic Strategies
Bead cones elevate a wide range of projects:
- Multi-strand statement necklaces: Gather beading wire strands into a sleek taper that meets a decorative toggle. Using two matching cones defines the collar’s architecture and keeps weight distributed.
- Delicate chokers: Slim cones let you hide micro crimps and silk knots, maintaining an uninterrupted silhouette from focal bead to clasp.
- Bracelets: Low-profile cones keep cuffs from catching sleeves, and they protect terminations from desk-edge abrasion.
- Kumihimo and bead crochet: Cones are the natural transition from braided bulk to clasp hardware, especially when the braid core includes fibers that would fray if left exposed.
- Leather lariats: Cones detail cord ends and unify mixed leather diameters into a single, crisp finish.
- Fringe and chandelier earrings: Cones act like miniature stages that launch chain drapes, bugle bead skirts, or silk tassels with a precise apex.
Color and texture choices influence the mood. Brushed brass warms desert palettes, oxidized copper pairs beautifully with turquoise, high-polish stainless complements icy quartz and frosted glass, and antiqued silver sits comfortably against cool-toned gemstones. Repeat textures where possible: if your focal bead is hammered, selecting hammered cones can echo that rhythm. If your strand is busy, a smooth cone provides a visual rest.
Metal-mixing is fair game. For instance, matte black cones with gold or bronze accents create modern tension; rose gold with warm naturals feels romantic. As long as clasp and cones align in finish quality and scale, the look reads intentional.
Quality Control, Comfort, and Longevity
Small checks add big value. Tug-test your crimp assemblies before they disappear inside a cone. If a crimp slips or wire cuts at the edge of a wire guardian, rebuild now rather than after assembly. For glued finishes, wait the full cure time before stressing the joint. A premature pull can create microfractures in the adhesive film that later manifest as failure.
Comfort matters. Feel for any wire burrs at the cone’s tip and burnish away sharpness. Test the necklace or bracelet on a form or your wrist to ensure the cone doesn’t poke or lever outward. In earrings, verify swing and noise; chain tassels should swish, not scrape.
Surface protection keeps pieces crisp. Wipe fingerprints before delivery, apply a microcrystalline wax to raw brass or copper if desired, and include a small anti-tarnish tab in presentation boxes. Educate clients: avoid lotions and sprays while wearing, store in a pouch, and wipe down after use.
Troubleshooting: Common Pitfalls and Practical Fixes
- Bundle won’t fit: Replace the interior spacer bead with a smaller diameter, bind cord ends more tightly, or choose a deeper cone. If only the crimp is too wide, change to a thinner-wall crimp tube sized for your wire.
- Rattle inside cone: Add a silicone stopper bead just above the crimp or bind a wrap of thread that creates a custom shoulder. Avoid flooding with glue; targeted micro support is cleaner and reversible.
- Loop misalignment: Rebuild the loop with correct wire length so the wrap nestles against the tip. If the cone’s angle pushes the loop off-center, add a small soldered jump ring as a swivel.
- Glue squeeze-out: Apply less and place it on the cone interior walls, not the tip. Insert with a twisting motion and hold the piece tip-down to discourage excess migrating.
- Plating wear at high-friction points: Add a wire guardian or soldered ring at the exit to reduce rub, or switch to a solid metal cone for pieces intended for heavy use.
- Uneven earring pair: Trim fringe while the pair hangs on a stand; measure loop turns and cone depth to match. Build mirror-image components at the same time.
Advanced Approaches and Creative Customization
Bead cones can be canvases. Sculpt polymer clay over a mandrel to form custom cones that color-match an intricate beadwork palette; bake, sand, and seal. Metal cones accept light hammer texturing over a steel mandrel; protect plating by using a nylon or rawhide mallet. If you enjoy patina, liver of sulfur on silver or brass gives moody dimension—seal with wax to stabilize color. Cut-out filigree cones welcome wire “stitching”: lace in micro pearls or seed beads through the openwork for a couture touch.
Mechanical creativity helps. For heavy multi-strand pieces, build an internal “skeleton”: a closed ring or soldered link inside the cone to which all structural wires attach, distributing load rather than compressing it all at the crimp. For leather ends, insert a short, ribbed inner sleeve (heat-shrink tubing or textured metal) to increase surface area for glue without visible bulk.
Planning for Wear, Repair, and Lifecycle
Great craftsmanship anticipates reality: skin oils, humidity changes, tugs from sweaters, travel jostle. Provide a simple care card and design with serviceability in mind. Use closed jump rings or soldered links at the highest-stress junctions so a failure, if it occurs, happens at an easier-to-repair segment rather than at the cone exit where access is limited. On commissions, record metal types, wire gauges, and cone SKUs so you can match replacements or create consistent future pieces.
Repairs are less daunting if interior space isn’t packed to the millimeter. Leave just enough room around crimps to allow tool tips to enter if you must re-crimp. For glue-in cords, plan for trim-and-reglue by leaving a few extra millimeters of cord length tucked inside the cone during original assembly.
Ethics, Sourcing, and Sustainability
Responsible making builds trust. Source cones from suppliers who disclose metal content; lead- and nickel-free findings help sensitive wearers. Recycled sterling and brass reduce footprint and often carry documentation you can share with customers. Upcycle: reclaim cones from broken vintage jewelry, refinish, and pair them with contemporary beads for heirloom-meets-modern stories. Package with minimal plastic, and encourage repairs over replacement.
Workflow Tips for Efficiency and Consistency
- Batch your steps: cut all wires, pre-form starter bends, and sort cones by pair before assembly to minimize tool switching.
- Use a sizing board: mark depth lines for different cone styles so you can seat bundles consistently across a production run.
- Standardize components: pick go-to crimps, wire diameters, and cone families that interoperate; reduce the number of “oddball” parts in your bins.
- Document recipes: for each design, note cone SKU, crimp size, spacer bead size, and loop wrap count. Future you will thank present you.
Case Studies: Matching Cones to Real Projects
Statement quartz collar: Seven strands of 0.018″ beading wire with gemstone chips demanded a deep, smooth sterling cone to cover twin crimps and a 3 mm spacer bead. Wire guardians protected the exit loop, and a heavy toggle balanced the visual mass. The cones delivered a tapered throat that prevented chip edges from scratching skin near the clasp.
Leather lariat: Two 4 mm round leather cords finished into brushed brass cones using two-part epoxy. The maker roughed the leather ends and bound them with linen thread before gluing, creating a keyed surface that locked into the cone interior. A simple ring-and-bar closure gave enough play to tie, wrap, or wear loose.
Filigree fringe earrings: Lightweight, openwork copper cones crowned chains in multiple lengths. Each chain bundle was gathered on an eye pin, cone added, then finished with a modest wrapped loop. The light cones preserved swing without overloading the ear; patina deepened contrast around the chain drape.
Testing, Documentation, and Client Education
Adopt a small test protocol. Before a new adhesive or wire combination goes into inventory pieces, assemble a sample and subject it to gentle but repeated pulls, heat/cool cycles, and exposure to lotion or saltwater mist, then log results. Over time you’ll build a knowledge base for which cones and methods excel under what conditions.
Provide concise care notes: avoid showering with the piece, wipe after wear, store individually, and keep away from chemicals. Share metal details and any plating caveats. Customers who understand how and why cones protect weak points often treat jewelry with extra care, reducing returns and repairs.
A Quick Visual Checklist Before You Sign Off
- Cones sized correctly: no bulge at entry, no voids that let internals clatter.
- Loops matched: same diameter and wrap counts across both sides or both earrings.
- Edges safe: no burrs at tips; cut ends tucked and smoothed.
- Motion smooth: connectors articulate without grinding or sticking.
- Finish clean: no visible glue, fingerprints, or stray thread fibers.
- Wear test passed: lay against skin or a display form; check comfort and hang.
From Component to Signature Detail
Bead cones start as humble hardware, but in skilled hands they become a signature flourish. They compress complexity into elegance, hide mechanics, and sharpen the silhouette of your work. Whether you are anchoring braids, converging multi-strands, or corralling unruly fringe, choose cones with intention, measure carefully, and build with repeatable practices. With attention to fit, finish, and the small choices that uplift comfort and strength, your pieces will wear beautifully and last—quiet proof that foresight in tiny transitions transforms a design from good to exceptional.
