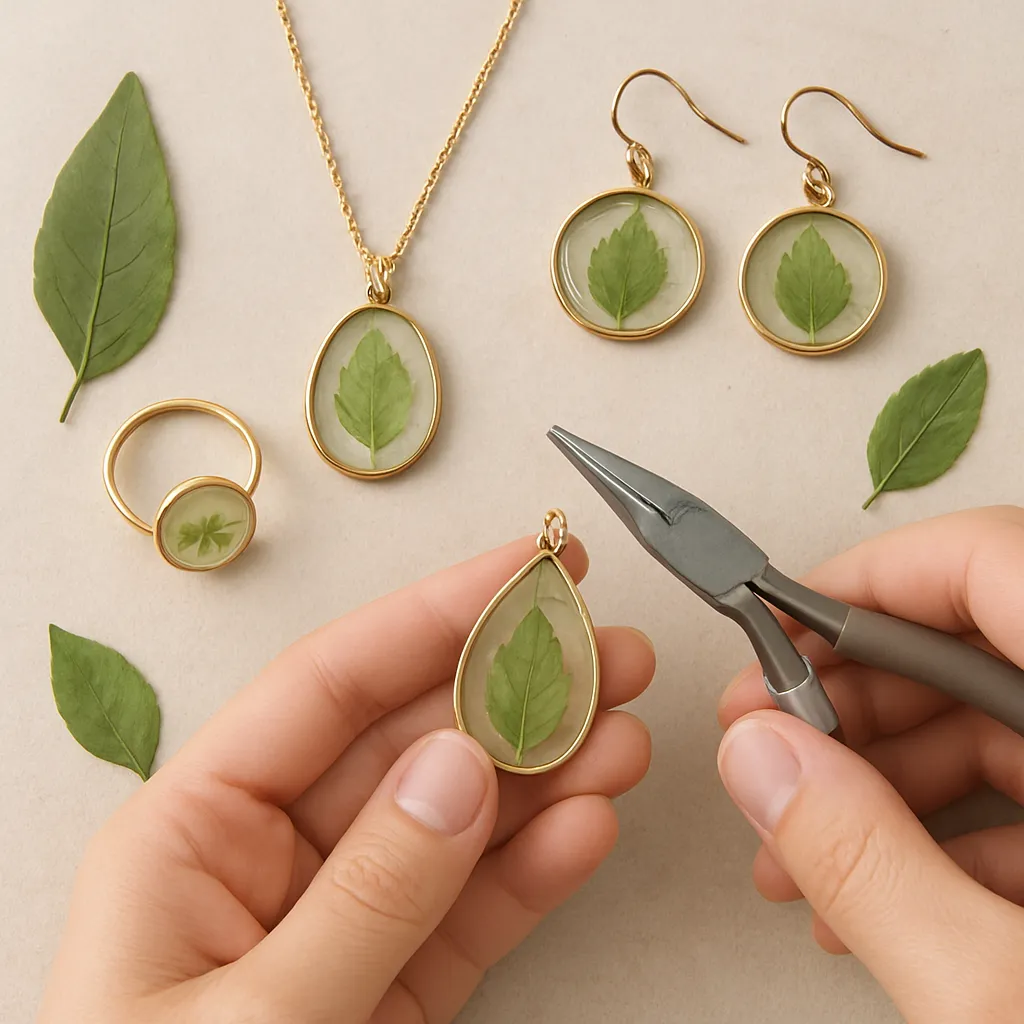
Pressed leaves turn the fleeting beauty of a walk in the park into something you can wear, touch, and keep close. DIY jewelry made with real foliage invites the outdoors into everyday life while celebrating the quiet details of veins, edges, and seasonal color shifts. Whether you prefer minimal pendants, layered resin cuffs, or antique-style lockets, the craft rewards patience and curiosity as much as technical skill. This guide walks you through gathering, pressing, preserving, setting, and styling leaves so your pieces look refined, last for years, and tell a story with every tint and texture.
The allure of wearable nature
Pressed-leaf jewelry captures that moment when a specimen is at its most alive-looking—just before time drains its vibrancy. In a world of plastics and mass production, wearing a fragment of the forest feels intimate and grounding. The practice also dovetails with mindful making: slow steps, gentle tools, and a focus on detail. For some, the draw is purely aesthetic; for others, it’s a form of place-keeping—the oak from a childhood street, a fern from a favorite trail, the first gingko of autumn. Attaching memory to material turns an accessory into a keepsake, and every piece becomes a tiny field guide to your surroundings.
Choosing leaves: species, season, and story
Good jewelry begins with good foraging habits. Seek thin, flat leaves with strong vein patterns: skeleton fern, maidenhair, birch, aspen, gingko, Japanese maple, ivy, and tiny rose leaves are standouts. Broad, thick leaves can work but demand more pressing time and careful sealing. Avoid moisture-soaked or bug-damaged specimens, and never collect from protected habitats. Early morning after the dew lifts offers crisp specimens; late afternoon in dry weather is ideal. Spring yields tender greens; summer gives saturated tones; autumn adds russets and golds; winter offers evergreen sprigs and lichen-adorned twigs. Don’t ignore weeds—plantain and clover press beautifully and hold their character.
Think narratively as you gather. A matched set of slightly different oaklets makes for graceful earrings; a single dramatic gingko fan can anchor a pendant. Tiny compound leaflets become charms; a single ivy tip becomes a ring focal. For color variation, pair chartreuse leaves with deep copper metals or deep green fern with cool silver. If you plan to sell, harvest consistency matters: return to the same tree or patch across weeks to keep size and hue standard.
Pressing and preserving for longevity
Pressing is where the alchemy begins—removing moisture while preserving shape and color. Classic methods use blotting paper and a weighted press or a heavy book stack. Place leaves between sheets of absorbent paper, add cardboard for airflow, then clamp or weight evenly. Change papers after the first 24–48 hours to prevent staining. Total time ranges from three days to two weeks depending on leaf thickness and humidity.
For faster results, microwave flower presses with ceramic plates and vented bands cut drying to minutes; proceed in short bursts and let cool between rounds to avoid scorching. Silica gel is unmatched for 3D flowers but can also help leaves keep shape and bright tones. Bury leaves gently in a container filled with silica crystals, seal, and check after a day or two. Here, the moisture-control medium acts as a desiccant, locking in form with less color darkening.
Color retention improves if you start with vivid, healthy specimens and dry quickly. Airflow matters: use corrugated cardboard layers to keep surfaces from sealing to each other. To minimize brown shift, avoid direct sun while drying. When fully dry, seal both sides with a light arch of clear acrylic spray or brush-on varnish made for paper botanicals; pH-neutral products provide more archival stability. Some makers pre-seal before resin; others set, then seal edges to prevent wicking. Test your system on duplicates before using a prized leaf.
For a distinct effect, consider skeletonizing: simmer sturdy leaves (magnolia, oak, hydrangea) in washing soda solution to loosen pulp, gently brush away soft tissue, and reveal the lacework of veins. Rinse thoroughly, press flat again, and seal. Skeleton leaves look ethereal under domed glass or resin and highlight the natural geometry of growth.
Essential tools and materials
At a minimum you’ll need: pressed leaves; sealant; jewelry bases (frames, lockets, or molds); adhesive; findings (ear wires, jump rings, chains, clasps); and tools (tweezers, precision scissors, craft knife, files, sandpapers, mandrel, pliers, and a small torch or lighter for annealing wire if you metalwork). If you cast in resin, gather mixing cups, sticks, a torch or heat gun for bubbles, and PPE. Two-part and UV-curable resins both work, but two-part epoxy excels for thicker pours and deeper encapsulation while UV cures fast for thin layers. Silicone molds create pendants and charms; metal frames and bezels provide ready-made borders. Choose ear wires and chains in stainless, surgical steel, niobium, or gold-fill for hypoallergenic comfort.
Paper crafters may already own a flower press, bone folder, and archival glues; metalsmiths might add saws, solder, and dapping blocks for shaping frames. If you plan to do a lot of leaf-in-frame work, stock a variety of open-backed settings so color shows from both sides. A well-fitting bezel or pre-made locket speeds production and protects fragile edges.
Techniques to set and showcase leaves
There are four primary approaches to wearable pressed leaves. Each yields different aesthetics and durability.
- Encapsulation in resin: A classic choice for clarity and protection. Layer thin pours to suspend the leaf, letting each layer gel before the next. Doming gives depth and magnifies details. Mix resin slowly to minimize bubbles; warm components slightly; and degas with a heat gun. UV glues shine for fast earrings; two-part systems handle thicker pendants and cuffs.
- Glass lockets and cabochons: Sandwich leaves between watch crystals or inside double-glass lockets for a museum-specimen look. Add a whisper of adhesive at the edges so nothing shifts. Glass adds weight, a cool touch, and elegant optics.
- Lamination films and heat presses: Fuse leaf between clear films for ultra-light pendants and earrings. Finish edges with foil tape or hand-cut frames; this method excels for large, airy shapes that would be heavy in resin.
- Cold connections and frames: Wrap leaves in wire cages, rivet them onto metal backplates beneath mica windows, or trap them under prong settings with protective acetate. These methods feel more artisanal and avoid plastics entirely—an advantage for makers prioritizing sustainability.
Design vocabulary: scale, balance, and light
Design begins long before you pour resin or close a frame. Decide on a focal point, then support it with accents or negative space. Study leaf silhouette and vein direction as you plan composition: curves pair well with teardrop frames, radial vein fans want centered mounts, and narrow leaflets often sing in triptychs. Keep pairs consistent but not clones; slight asymmetry adds liveliness.
Color theory guides metal choices. Warm copper and brass flatter autumn reds and golds; silver complements blue-greens and pale spring growth. A dark backing intensifies mid-tones, while translucent settings let light pour through, increasing translucency and drama. Experiment with opaques, transparent tints, and metallic foils; a sliver of gold leaf at the edge can lift a flat green into luxury.
Scale influences wearability. Long leaves suit necklaces; tiny leaflets read better as studs or rings. Multiple small charms dance and catch light, while a single large disc feels serene. Always consider how the piece moves: dangle earrings benefit from secure but flexible joints; pendants need bail placement that prevents flipping.
Project: a minimal fern pendant in a framed setting
1) Select a small fern tip with delicate symmetry. 2) Seal both faces lightly. 3) Trim to fit an open-backed oval frame. 4) Fix a first thin resin layer inside the frame and let it gel. 5) Set the leaf with tweezers; nudge it gently until centered; remove bubbles with a pin. 6) Add successive thin pours, pausing to vent bubbles. 7) Finish with a gentle dome. 8) Cure fully, then sand and polish the edge. 9) Attach a jump ring and slide onto a chain. The result feels airy, with light glowing through the fronds.
Project: layered autumn earrings
Cut two small maple leaflets per side. Seal, then arrange on a tinted background layer—think smoky gray or tea-stain amber. Trap with a second clear layer. Use marquise frames for a flame-like silhouette. Finish with delicate French hooks or lever-backs for security. The layers create a sense of depth, like leaves tucked under frost.
Project: botanical signet-style ring
Under a domed cabochon, a single ivy tip or clover takes on heraldic presence. Cut a small oval leaf piece, seal well, tack it to the ring pad with micro-dots of glue, and cap with glass or resin. Dome slightly to magnify. This compact format works well with initials or a thin outline of metallic foil, turning the ring into a crest from the woods.
Advanced details: edges, textures, and subtle metalwork
Edges frame everything. Thin, even domes look refined; uneven rims look amateur. Practice doming on blanks. Wet-sand cured resin with grits 400–3000, then polish for gloss. For metal frames, light hammering on a chasing block adds facets that catch light. Intentionally aged metal can create a gentle patina; seal with wax to keep hands clean while preserving the tonal shifts that flatter organic materials.
Wire-wrapped cages can echo leaf veins. Use half-hard wire for structure, then anneal to soften where needed. If soldering, keep heat away from pressed material; set after finishing metalwork, using rivets or prongs and protective windows rather than bonding the leaf directly to metal surfaces that can trap moisture.
Surface enhancement: paints, powders, and foils
Minimal interventions often work best, but small flourishes can refine a piece. A hairline of metallic foil along an edge highlights contours. Mica powders add shimmer to background layers; alcohol inks tint resin for stained-glass effects. Avoid heavy opaque paints that obscure the veins—the veins are the star. When in doubt, step back and remove an element; subtraction often improves botanical pieces.
Durability, care, and wear
Wearable leaves require protection from abrasion, moisture, and UV. Quality sealants and resins resist clouding; add UV stabilizers or choose formulas with them built in to slow yellowing. Store pieces away from direct sunlight and extreme heat. Clean with a soft cloth; avoid solvents and ultrasonics. For settings using glues, ensure adhesives are acid-free and compatible with your sealant so they don’t bleed halos through the leaf.
When pairing with chains and ear wires, prioritize comfort and skin safety. Nickel-sensitive wearers appreciate precious metals or coated steels. Components labeled hypoallergenic reduce returns if you sell and increase daily wear pleasure if you keep.
Safety and environmental considerations
Resin work demands respect: wear gloves, eye protection, and ensure ventilation. Avoid skin contact and keep food and drink away from the bench. Measure precisely; off-ratio mixes may never cure and can cause irritation. Cure under dust covers. Dispose of waste responsibly, letting mixed leftovers harden fully before discarding. Prefer reusable silicone tools and minimal single-use plastics.
Harvest mindfully. Take small quantities, avoid rare or protected species, and consider garden clippings or storm-fallen leaves. Finish shop practices with an eye to resource use: consolidate cure sessions, store chemicals properly, and choose suppliers committed to cleaner formulations. Every step can move toward sustainability without sacrificing beauty.
Troubleshooting common issues
- Bubbles: Warm resin parts, mix gently, and rest before pouring. Use a heat gun lightly; avoid overheating which can warp frames or scald leaves.
- Floating leaves: Tack with a micro-dot of clear-drying glue or partial-cure a base layer to grip.
- Color shift to brown: Dry faster, start with fresher specimens, and use UV-protective sealants. Some species simply mellow; lean into autumnal palettes if consistent green is elusive.
- Silvering or clouding: Moisture trapped under sealant or incompatible adhesives can haze. Let leaves acclimate and dry 24 hours after pressing before sealing, and test product combos.
- Soft or sticky surface: Off-ratio resin or cold curing. Warm the space, use precise scales or syringes, and extend cure time before sanding.
- Edge leaks from frames: Pre-seal seams with a thin bead of glue, let cure, then pour in thin lifts. Tension clamps help keep frames flat on the work surface.
Styles and aesthetics to explore
Minimalist: single small leaf in a circle frame, no color, clean chain. Bohemian: layered charms, mixed metals, and varied leaf sizes. Vintage apothecary: double-glass lockets with hand-lettered labels, aged brass, and linen cords. Botanical romantic: soft tints, rose-gold findings, and teardrop silhouettes. Modernist: stark black backings, geometric frames, and high-gloss domes. Regional identity: oak in the Midwest, olive in the Mediterranean, eucalyptus in Australia—let local flora direct the palette.
Consider sets that echo ecosystems: fern pendant, moss-tinted resin studs, and a bark-textured cuff. Or trace seasons in a line—spring pale greens, summer saturated leaves, autumn russets, winter evergreen sprigs. Jewelry that maps time can become a signature collection.
From hobby to micro-business
If you decide to sell, develop a sourcing and finishing routine that delivers consistent quality. Photograph against neutral backgrounds with a sprig or two for context but keep the focus on the product. Include a care card and a tiny note about the leaf type and where it was gathered; that small story increases perceived value and connects the buyer to place. Price for time, materials, and skill—don’t forget consumables and the labor of pressing, sealing, and QA. Offer custom work using client-supplied leaves from weddings or travels; these heirlooms command premium pricing and forge emotional bonds with your brand.
Mind regulations around metal allergies and labeling. When possible, specify chain and ear wire materials and plating thickness. If you ship long distances, package to resist crushing and temperature swings: rigid boxes, nested padding, and desiccant sachets for humidity control.
Expanding techniques: beyond the basics
Gilding: Brush adhesive onto edges or veins and add fine metal leaf for a luminous outline. The metallized highlight reads like sunlight caught on dew. Contrast a gilded skeleton leaf with matte dark backers.
Inlays and mosaics: Cut micro-shapes from different species and reassemble into geometric pendants. Use a light tack glue to draft layouts, then seal. This approach is time-consuming but unforgettable when executed with precision.
Textile hybrids: Stitch leaves into netted wire forms or embroider around frames with silk floss dyed to match the foliage. The softness of thread tempers the gloss of resin and metal.
Mica windows: Natural mica sheets can substitute for glass—lightweight, warm-toned, and easily cut with scissors. Sandwich a leaf between two mica panes and rivet through a metal frame for a Victorian field-study mood.
Practical tips that change everything
- Batch work: Press multiples and cast several pieces at once to maximize curing sessions and ensure earring pairs match.
- Templates: Keep a box of frames and paper cutouts to test fit before committing to a pour.
- Tweezers and breath: Exhale gently across a surface to coax tiny bubbles to the edge before heat.
- Test boards: Maintain a catalog of cured resin swatches labeled with formula, tint, and cure time. Your future self will thank you.
- Light discipline: Keep UV-curables away from windows; even ambient light can start a cure mid-placement.
Why it works: the science behind the charm
Leaf tissue contains pigments—chlorophylls, carotenoids, anthocyanins—that shift as they dry. Pressing halts enzyme activity and limits oxidation by removing water; sealing reduces oxygen exchange and surface abrasion. Resin or glass enhances refractive contrast, making veins and cell patterns pop. The jewelry’s appeal blends optics (magnification, specular highlights) and memory (place, season, person). Craft sits at the intersection of chemistry and sentiment.
Ethics and meaning
A sprig of rosemary for remembrance, ivy for fidelity, oak for strength—the language of plants runs deep. When you embed a leaf into a pendant for a friend, you stitch symbolism into object. Acknowledge sources and seasons; share the story in product notes or gift cards. If you teach workshops, encourage students to gather locally and mindfully. The result is not only pretty but culturally and ecologically attentive, a truly botanical practice in the best sense of the word.
Maintenance over the years
Even well-made pieces benefit from periodic checkups. Tighten jump rings, inspect surfaces for micro-scratches, and polish lightly. If a finish dulls, a thin refresh coat or a pass with polishing compound can restore depth. Store in soft pouches with silica packs during humid months. Avoid perfumes and lotions just before wearing; apply them first, then accessorize.
Frequently asked maker questions
- Can I skip sealing? Not recommended. Unsealed leaves can off-gas or absorb resin unevenly, causing bubbles and blotches.
- Which resin is clearest? Many premium brands are water-clear; clarity depends more on mix accuracy, dust control, and cure technique than label claims.
- Will the green stay green? Some plants hold color nicely; others mellow. UV blockers and quick, dry pressing help. Embrace seasonality as part of the charm.
- How thin is too thin? Ultra-thin leaves can disappear visually; back them with a faint tint or pearl to define shape without overwhelming delicacy.
- Are there non-resin options? Yes—glass, mica, lamination, and prong-captured leaves under acetate or rock crystal slivers all work.
From bench to body: finishing touches that matter
A beautiful pendant still needs a thoughtful chain length; earrings need comfortable balance. Offer extenders or add counterweights to keep pieces facing forward. Choose clasps that match the design language—sleek lobster for modern, toggles for artisanal, magnetic for accessibility. Consider stamping a tiny maker’s mark on metal elements; it communicates pride and accountability.
Quality control and documentation
Keep a simple log: species, source location, press date, sealant brand, resin formula, cure time. Photographs of the raw specimen beside the finished piece educate buyers and help you repeat successes. Over time you’ll develop a personal library of techniques tailored to specific plants. You may discover that birch likes thin domes while ivy prefers flat lamination, or that gingko shines best in open-backed frames.
Embracing the handmade signature
Handicraft thrives on tiny variations: a whisper of trapped air that looks like morning mist, a slightly uneven edge that reveals the human behind the tool. Strive for quality, yes, but don’t erase the trace of touch. Let a brush stroke or hammer facet remain visible, and invite the wearer to notice. The point is not to mimic factory perfection but to achieve refined, intentional uniqueness that honors both maker and material.
A final thought on time and patience
Pressed-leaf jewelry is slow work at heart. Leaves don’t rush; resins cure when they’re ready; color settles as days pass. That slowness is a gift. It makes room for observation, revision, and care—habits that expand from bench to life. With each piece, you learn the personality of a plant, the rhythm of a process, and the craft of translating something fragile into something lasting. Invest in that practice, and your jewelry will not only look beautiful; it will carry a quiet, enduring presence that people feel the moment they put it on.
Quick reference checklist
- Harvest healthy, thin leaves; avoid protected areas.
- Press fast and flat; change blotters early.
- Seal both sides with pH-neutral products for archival reliability.
- Test epoxy or UV systems on scraps before hero pieces.
- Choose frames that fit: open-backed for light, sealed for protection; a snug bezel looks professional.
- Mind optics: plan composition, exploit translucency, and coordinate metal color.
- Finish edges meticulously; embrace or manage patina on metals.
- Use hypoallergenic findings for comfort and reliability.
- Work toward sustainability in sourcing and shop habits.
- Control humidity with a desiccant in storage and shipping.
