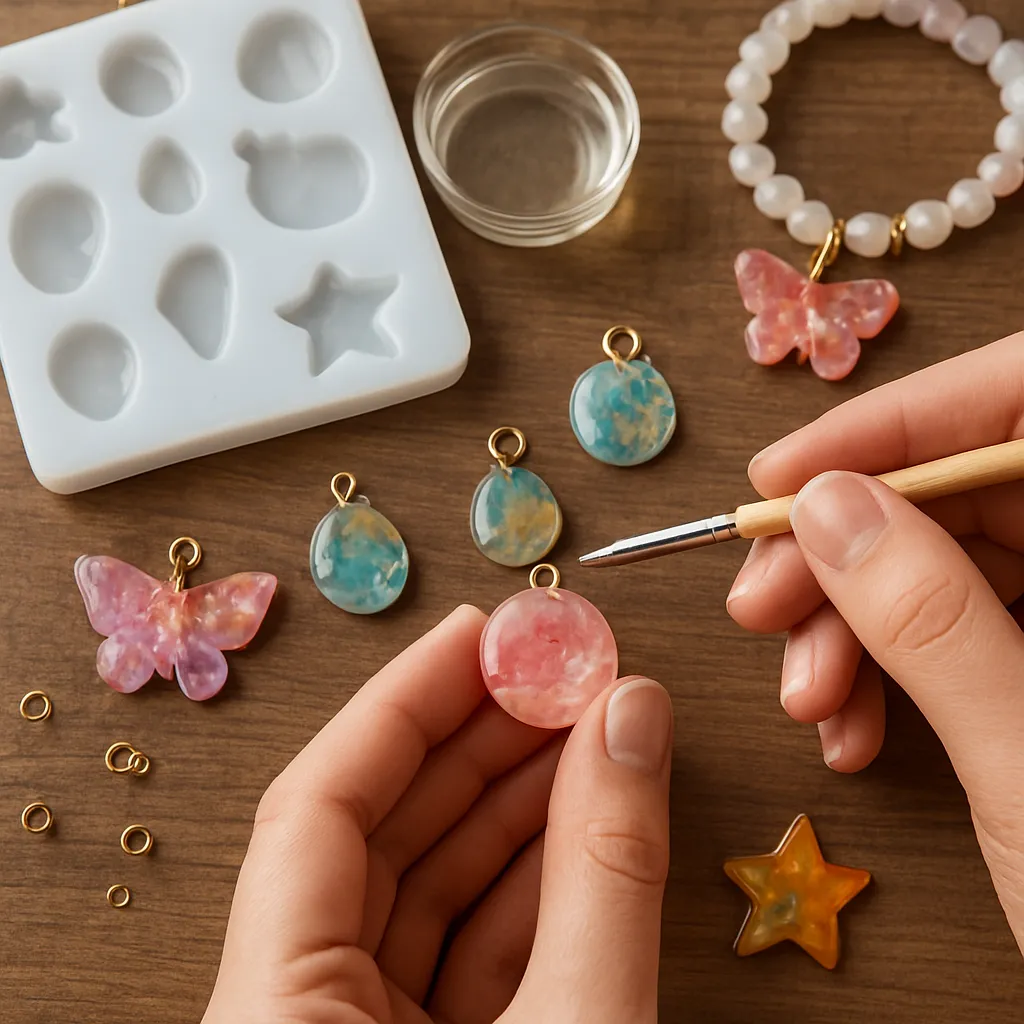
Hands that make become hands that see. Few crafts illustrate this better than casting tiny pendants that swing and sparkle from a bracelet. DIY resin charms reward patience with depth, clarity, and a sense of wonder: a droplet of color that freezes time, a pressed wildflower that will never wilt, a memory captured in a pocket-sized keepsake. This guide gathers traditional handicraft wisdom and contemporary techniques to help you plan, pour, and finish charms that look professionally made yet remain unmistakably yours.
Why Resin Charms Are Perfect for Handicraft Lovers
Resin charms are the sweet spot between art and engineering. They require a sensitive eye for composition and color but also respect for measurements, timing, and environment. Handicraft shines here: the cadence of careful preparation, the stillness as you wait for a pour to level, and the slow reveal when you peel a charm from its mold. Every piece records a tiny narrative—what you chose to include, the hue you mixed, the finish you achieved—so no two bracelets are ever the same.
Because charms are small, they are budget-friendly and low-risk. You can test new pigments and textures in teaspoons, not cups. You can create seasonal batches, experiment with shapes, or design coordinated sets for friends. And unlike larger resin projects, charms cure quickly and need less sanding and polishing, which is a blessing if your crafting time fits around family and work.
Materials and Tools You’ll Appreciate Over Time
Start simple and scale up as your confidence grows. The following list covers essentials plus a few upgrades.
- Resin system: choose UV-curing resin (fast, small batches) or a two-part epoxy system (stronger, more time to work, often clearer depth). Read your resin’s mixing ratio, working time, and full-cure specs.
- Silicone molds or metal bezels: match your bracelet style—circles and ovals for classic charm bracelets, stars and hearts for playful designs, rectangles for tiny collages.
- Pigments and effects: alcohol inks, resin-safe dyes, mica powders, neon pigments, glitter, metallic flakes, pearlescents, chameleon powders, and tiny sequins.
- Botanical and found inclusions: pressed flowers and leaves, flakes of real shell, snippets of maps, tiny photos sealed with clear tape or laminator pouches, seed beads, confetti, and micro charms.
- Disposable mixing tools: silicone mat, silicone or plastic cups, stirring sticks, pipettes/syringes for precision, toothpicks for fine control.
- Jewelry findings: jump rings, lobster clasps, chain or cord, split rings, glue-on bails, open bezels, head pins, crimp covers, and spacers.
- Finishing kit: micro-files, wet/dry papers (400–5000 grit), micro-mesh pads, polishing compound, lint-free cloth, and a handheld rotary tool (optional).
- Safety and setup: nitrile gloves, eye protection, apron, adequate ventilation, and a dust cover (a clean food container or cake dome works well).
If you are starting from scratch, a beginner’s kit with UV lamp, small bottles of pigment, and a couple of molds is a gentle on-ramp. If you already work with epoxies in other crafts, your existing gear (mixing cups, scale, silicone tools) will cross over nicely.
Safety, Setup, and Craft-Smart Habits
Resin is a joy to use when your space supports it. Work on a level surface covered by a silicone mat. Keep pets and dust at bay—stray hairs will find sticky surfaces. Ventilate well and wear gloves to avoid skin contact. Many resins warm as they cure, so place your cups and molds on heat-safe surfaces and never leave them in direct sun or near heaters.
Plan your session: lay out the mold, test-fit inclusions, set tools within reach, and pre-open lids. Keep baby wipes or isopropyl alcohol nearby to clean drips before they set. Assign one small trash cup for used sticks and pipettes. These small rituals let you work calmly, a signature of good handicraft practice.
Fundamentals: Mixing, Color Control, and Bubble Management
Measuring: Follow the manufacturer’s ratio strictly—by volume for most craft epoxies, by weight for some professional systems. If it says 1:1, make it 1:1. Temper the liquids to room temperature; cold resin traps more bubbles and thickens.
Mixing: Pour part A and B into a clear cup. Stir slowly, scraping the sides and bottom for 2–3 minutes. Slow stirring prevents aeration. If you see striations, keep going until the mixture turns uniformly clear or uniformly tinted.
Color: A little pigment goes a long way. For translucent tints, use a drop of alcohol ink or dye per tablespoon. For opaque color, add mica or paste sparingly; overload can inhibit curing. Create mini test chips on a silicone scrap to preview opacity.
Bubbles: Warm the mixed resin by setting the cup in a warm (not hot) water bath for 2 minutes, then dry the cup exterior before pouring. After filling the mold halfway, let bubbles rise, then coax them with a toothpick. A quick pass of a heat gun or a warm breath through a straw pops surface bubbles. For perfectionists, a small pressure pot eliminates micro-bubbles but is optional for charms.
Make Your First Flat-Back Charm
This beginner project yields a glossy, simple charm perfect for dangling from a chain bracelet.
- Seal porous inclusions. Brush a very thin coat of resin or clear-drying glue on paper and dried blooms. Let dry fully to prevent trapped air later.
- Pour a shallow base layer, about 1–2 mm thick. Pop bubbles and let the layer gel slightly if your resin allows (10–20 minutes with UV, 1–2 hours with slow epoxies).
- Arrange the feature: a single pressed daisy, a constellation of micro-glitter, a trimmed photo circle. Nudge into place with tweezers; avoid pushing to the mold wall to preserve the domed optical edge later.
- Top off with a final pour to just below the rim. Surface-tension can help you achieve a soft lens shape in a later step, but for now keep it safe and flat.
- Cover and cure fully per product instructions. Patience here equals clarity later.
- Demold gently. If edges feel sharp, move to finishing. If you want a glassy convex top, you’ll add a thin doming coat next.
Open Bezels and Negative Space
Open bezels are metal frames without a back. Tape the underside with clear packing tape, burnish the tape firmly, and sit the bezel tape-side down. Fill just enough to close gaps, then add effects: floating glitter fades, metallic foil shards, or a tiny pressed fern frond. Because the back is clear, these charms look luminous on the wrist, especially when sunlight slips through.
When removing the tape after cure, trim flash with a craft blade and sand minimally. A final dome coat restores optical clarity and hides micro-scratches.
Layering for Depth: Micro Dioramas
Think of your charm as a miniature shadow box. Build in layers:
- Layer 1: Background color wash or a sprinkle of color-shifting mica.
- Layer 2: Mid-ground elements—tiny shells, a paper boat, or confetti stars.
- Layer 3: Foreground highlight—a small charm, a focal bead, or a glitter cluster.
Let each layer partially cure to tacky before adding the next. This staging avoids drift and creates parallax, a satisfying illusion when the bracelet moves.
Botanical Keepsakes Without the Guesswork
Pressed flowers, grasses, and herbs pair beautifully with clear resin. Dry thoroughly between book pages or use a flower press for a week or two. Before embedding, seal both sides with a quick swipe of resin or archival adhesive to prevent trapped moisture from fogging. Arrange with tweezers, then top with a thin coat. White blooms glow nicely over a pastel base; darker petals shine against clear or glittering fields.
For keepsakes, consider map snippets marking a city, a bit of concert ticket, or a tiny printed date. Laminate paper elements or sandwich them between clear tape to keep edges crisp. The charm becomes an heirloom-level memory on a bracelet chain you wear daily.
Marbling, Lacing, and Galaxy Effects
For marbling, mix three tiny cups: a base tint, a contrasting tint, and clear. Pour the base, then drip lines of contrast and clear. Drag a toothpick in figure-eights; stop before colors muddy. For lacing (the delicate cell-like pattern), use a small amount of alcohol ink over an opaque base and lightly mist with isopropyl alcohol from a distance. For galaxy charms, scatter micro-glitter on a navy base, then add a few dots of white ink and pull them into miniature comets.
Shaker Charms and Encapsulated Motion
Shaker charms have a tiny cavity with moving bits. Use a deep mold or a bezel with a clear film backer. Fill the well halfway, cure, add sequins/micro-beads, then seal with a thin clear window. For bezels, a sheet of acetate or UV-hardened clear layer becomes the window. Test for leaks with a drop of diluted dish soap before final cure. The result is tactile and cheerful—perfect for playful bracelet clusters.
Demolding, Edge Work, and High-Gloss Finish
Clean demolding starts back at the pour: avoid overfilling and you’ll avoid large flash. To refine edges:
- Wet sanding: move through 600 → 1000 → 2000 → 5000 grits under a trickle of water. Keep strokes even and light; check often.
- Micro-mesh and buffing: polish with a tiny amount of compound until reflections sharpen.
- Final polishing or a micro dome: A whisper-thin resin coat self-levels into a glassy window and hides hairline scratches. Allow dust-free cure.
To drill a hole, use a rotary tool at low speed with a 1 mm bit. Mark the spot, secure the charm on a wood block, and mist with water for heat control. Let the bit do the work—no forcing. Deburr with a larger bit by hand.
Attaching Hardware and Building the Bracelet
For glue-on bails, scuff the contact point with 400-grit paper, clean with alcohol, then apply a thin layer of industrial jewelry adhesive. Press, align, and clamp gently with a binder clip; cure per glue specs. For drilled charms, open a jump ring sideways, slip it through, and close flush so there’s no snag.
Bracelet bases to try:
- Classic chain with evenly spaced jump rings for charm placement.
- Adjustable slider cords for a casual fit.
- Memory wire for a structured, modern look.
- Beaded elastic: add metal spacers between resin charms for rhythm and sparkle.
Balance weight across the bracelet. Mix small accents between statement charms. Leave 10–15 mm of empty chain near the clasp for comfortable closure.
Design Principles for Small-Scale Impact
Scale: The standard charm diameter ranges from 10 to 20 mm. On delicate wrists, aim for 10–14 mm for daily wear; larger charms become focal points in smaller numbers.
Color: Keep a palette—two dominant hues plus one accent—to avoid visual noise. Metallic accents (gold leaf, silver foil) act as neutrals that tie sets together.
Theme: A set feels intentional when bound by a single idea: seaside shells and aqua swirls, night sky with constellations, herb garden with soft greens and cream petals. Repetition with variation is the secret to cohesion.
Troubleshooting: Clear Answers to Cloudy Problems
- Sticky surface: Under-mixed or under-cured resin. Lightly wipe with isopropyl alcohol to remove inhibition layer (if your brand allows), or add a thin, properly mixed seal coat and cure again.
- Cloudiness or bloom: Moisture in inclusions or cold environment. Dry and seal inclusions; warm your workspace slightly and avoid humid days.
- Micro-bubbles along edges: Pour in thin streams down a stick, not directly into corners. Pause halfway to release trapped air, then continue.
- Yellowing over time: Choose a high-quality formula with UV stabilizers; store finished charms away from direct sun and heat.
- Warping in thin charms: Demold only after full cure and lay flat under a book for an hour if needed. Slight warps often settle during a dome coat.
- Color bleed from alcohol inks: Seal layers between pours and avoid overloading with inks, especially reds and blues.
Care, Wear, and Longevity
Resin dislikes harsh chemicals and high heat. Remove bracelets before swimming, cleaning, or applying perfume. Store flat in a pouch to prevent scratches. Wipe with a soft cloth; stubborn marks lift with a dab of mild soap and water. If surface gloss dulls after months of wear, a hand-buff with fine compound or a fresh micro dome coat revives the shine.
Budgeting and Batch Crafting
Charms are thrifty when planned in batches. Mix small amounts to avoid waste—resin that never leaves the cup is money lost. Work in sets of six to twelve charms to use a single mixture efficiently. Leftover resin near the end of its pot life can fill micro-molds that become future accents.
Cost-saving tips:
- Buy findings in multipacks; consistent jump-ring sizes simplify assembly.
- Use pigment powders sparingly; a gram goes a long way.
- Press your own flowers with a DIY press made from scrap wood and cardboard.
- Upcycle: confetti from paper punches, foil from chocolate wraps (cleaned), and tiny shells from vacation pockets.
Project Recipes You Can Start Tonight
Seaside Oval
Pour a clear base in an oval mold. Place a grain of sand, a sliver of shell, and a smidge of gold foil. Top with a pale aqua tint. After cure, add a soft dome coat for magnification. Attach to a polished rose-gold chain with two small spacers on either side.
Midnight Constellation
Tint resin navy; pour thinly. Flick micro-silver glitter for star fields. With a toothpick, dot three white ink points in a triangle and gently drag short tails. Finish with a thin clear layer to sharpen depth. Looks stunning between matte black onyx beads.
Mini Herbarium
Seal a tiny pressed sprig of thyme. Pour clear base, set the sprig off-center, and top with one drop of sage-green tint swirled through clear for a botanical haze. Finish with a brass bail and linen cord for an earthy, tactile bracelet.
Level-Up Techniques When You’re Ready
- Inclusions in suspension: Use a slightly thicker mix (wait 5–8 minutes after mixing) to keep glitter clouds from sinking.
- Edge gilding: After sanding, paint the charm’s perimeter with metallic leafing paint. Seal with a thin clear coat.
- Two-tone domes: Pour a clear dome, then place a micro droplet of contrasting tint and tease it into a petal motif.
- Photo micro-charms: Print at high resolution on glossy paper, seal both sides, punch to shape, and seat on a tinted base before covering with clear.
Sustainability and Waste-Savvy Crafting
Resin is a plastic, so thoughtful usage matters. Plan pours, cure fully (unreacted resin is harder to dispose of), and keep a “scrap mold” tray for leftovers—these bits become accent beads or drillable cabochons. Reuse silicone cups and sticks by letting drips cure, then peeling them off. Save protective film from packages as bezel backers. Choose quality components that last; a charm worn for years is kinder than a dozen that break or dull quickly.
Bracelet Assembly: Comfort, Flow, and Movement
When arranging charms, consider the choreography on the wrist. Cluster 3–5 focal charms across the top third, with lighter accents toward the sides. Check that adjacent charms don’t tangle; vary lengths slightly with short extenders. For stretch bracelets, distribute weight evenly to prevent rolling. For chain styles, alternate resin pieces with metal or stone to create a pleasant rhythm of textures.
Common-Sense Notes for Best Results
- Weather watch: High humidity can haze surfaces. If possible, pour on drier days or run a dehumidifier near your workspace.
- Test first: Every brand behaves a little differently. Make one test charm whenever you change a pigment or sealing method.
- Label cures: Put a sticky note with time and date beside batches to prevent premature demolding.
- Keep a craft journal: Record ratios, pigments, and surprises. Your future self will thank your present self.
Beyond Bracelets: Coordinated Sets
Once you dial in your style, expand into matching earrings, pendant necklaces, or bag charms. The bracelet becomes the nucleus of a broader collection—same palette, different silhouettes. If you enjoy small-batch markets or gift-giving seasons, a bracelet anchored by a hero charm plus two supporting motifs makes a memorable set.
Closing Inspiration
Every charm starts as a clear pool and becomes a story the moment you drop in that first petal or flake of shimmer. This is the magic of resin craft: humble supplies, careful attention, and an outcome that feels like treasure. Gather a handful of shapes, pick a palette that stirs you, and pour with intention. Your bracelet will jingle softly with proof that small doesn’t mean simple—it means distilled. And in the language of handmade, distilled is often where beauty lives.
