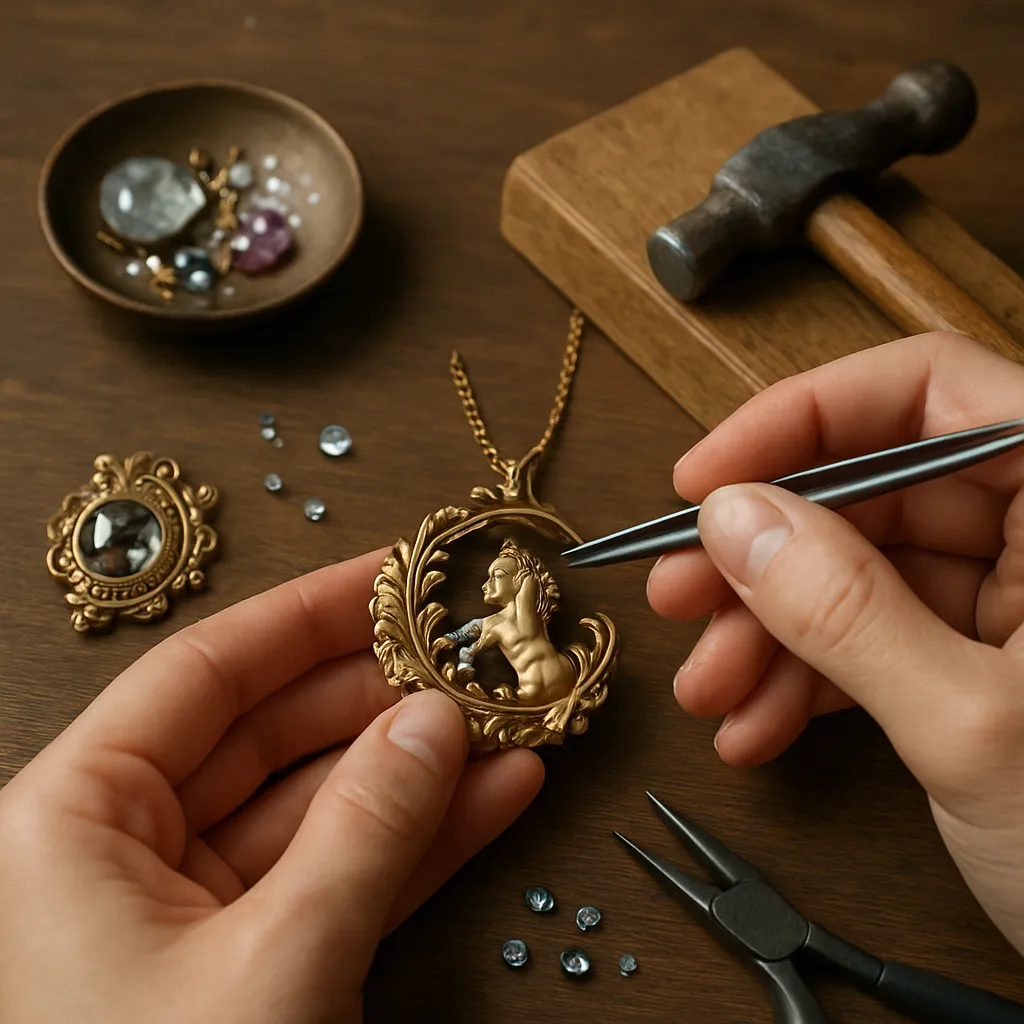
A jewel can be a door to a forest of stories, a keepsake that carries the hush of pine needles, the glint of moonlit rivers, or the hush of a castle corridor. When jewelry borrows its language from fairytales, it becomes more than ornament; it becomes a pocket-sized narrative you can clasp shut, open in the palm, and pass on. This guide explores how to translate legends and folk motifs into tangible pieces using patient hand skills, ethical materials, and a design approach that honors both fantasy and function. Whether you are a seasoned maker or newly curious, you will find ways to build a practice where wonder, research, and dedicated craftsmanship meet at the bench.
Why fairytales make powerful jewelry muses
Fairytales carry a deep reservoir of images that are instantly legible across cultures: a rose behind a thorny wall, a ring that binds a promise, a feather that points north, a comb that hides the sea. These symbols are adaptable, modular, and endlessly reinterpretable. Jewelry, being small-scale and intimate, thrives on suggestion rather than exposition, which makes tales a natural wellspring for wearable ideas.
From a maker’s perspective, adapting motifs from stories gives a cohesive framework for a collection. Consider a path through the woods: repeated leaf silhouettes become ear climbers; a winding trail becomes a spiral ring; a wolf’s negative-space profile forms a pendant window. As each motif reappears with slight variations, your line tells a longer story while staying visually unified. This is the handmade advantage—no two strokes or solder seams are identical, so narrative and texture grow together.
Equally important is symbolism. A fairytale motif can serve as shorthand for courage, memory, transformation, or caution. A spindle can be a warning or a threshold; an acorn stands for patience; a shoe becomes a test of belonging. When customers select a piece anchored in metaphor, they are also choosing a personal emblem. That bond between meaning and metal is part of what makes heirloom craft endure.
Emotional palettes and color storytelling
Fairytales often hinge on mood shifts: dusk to dawn, curse to blessing, famine to feast. Translate those shifts into color schemes and textures. Think of the gradient from forest shadow to clearing: smoky grey metals with frosted surfaces moving into high-polish highlights; moss-green stones set beside dew-like pearls. Or the transformation sequence in a ballroom scene: pale, opalescent blushes layered with star-sharp facets that catch light during movement. Even without literal imagery, a calibrated color journey can suggest a narrative arc.
From story to sketch: building a design language
Begin by selecting a single tale or a cluster of related tales. Underline their motifs, rules, and tensions. For instance, Cinderella emphasizes time limits and metamorphosis; Sleeping Beauty pivots around thorns and time-suspended breath; Hansel and Gretel teases duality—temptation versus caution. Note the objects present in each scene and the textures they imply: ash, lattice, bramble, sugar glaze, bark, velvet.
Research paths that feed the bench
- Source material: Compare regional variants, such as French, German, Russian, or Japanese retellings. Each version subtly tweaks symbols, offering fresh forms and patterns.
- Historical ornament: Study period jewelry from eras that align with the tale’s atmosphere. Gothic tracery can inform thorn designs; Baroque ribbonwork can suggest ballroom scrolls.
- Natural references: Gather leaves, feathers, seed pods, and shells to trace silhouettes or press into metal or clay for texture.
- Textiles and architecture: Laces, brocades, and window grilles yield repetitive geometries that translate beautifully to pierced metal and stone settings.
Sketching and motif mapping
Translate your notes into thumbnail sketches that explore scale and proportion. Instead of drawing isolated pendants, cluster them in sets: pendants with matching ear studs, charm bracelets with alternating leaf and thorn, stackable rings carrying tiny narrative markers. Draft a symbol map—a visual vocabulary—so you can mix and match motifs consistently across pieces. This maintains coherence and helps you manage complexity when multiple stories share a collection.
Balancing fantasy with wearability
A fairytale crown may be ten inches high in illustrations, but a headpiece must sit securely, distribute weight, and avoid snagging hair. Early in the design phase, treat fit and ergonomics as creative constraints rather than obstacles. Whisper-light ear wires, curved backings, chamfered edges, and thoughtful articulation keep pieces magical without being fussy. Good hinges and clasps act like plot devices: reliable, nuanced, and nearly invisible to the audience.
Materials and techniques for enchanted effects
Material choice is a narrative decision. Silver invokes moonlight; yellow gold suggests candlelit halls; red brass echoes autumn woodlands; bronze reminds one of hearth and cauldron. Pair metals with stones and organics that strengthen the tale: moonstone for veils and spells, garnet for pomegranate seeds, sapphire for night skies, labradorite for shifting illusions. Wood inlays, bone, antler, and shell can ground a piece in the forest or the shore, while recycled glass nods to enchanted mirrors.
Metalsmithing textures that tell stories
- Delicate filigree vines for brambles or palace balcony scrollwork.
- Raised relief through chasing and repoussé for wolves’ fur, rose petals, or topographic maps of a winding path.
- Brushed, frosted, and hammered finishes to stage contrasts between rough wilderness and refined court.
- Selective darkening via controlled oxidation to deepen shadows in engraved lines and recesses.
Color and light with glass and enamel
When you need translucent magic, consider low-temperature glasswork or vitreous enameling. A shallow cloisonné cell shaped like a leaf can hold layered greens that pool into veins; a champlevé panel within a locket door can glow like a stained-glass window. Because enamel demands clean metal and precise firing, it forces a disciplined workflow—perfect for makers who like ritual and repeatable processes. Torch-fired options are approachable for small studios; kiln firing yields the most control.
Stone selection and cutting
Fairytales love stones with personality—sleepy glows, labradorescent flashes, inclusions that look like wisps of fog. Partners who handle lapidary work can cut custom shapes to echo motifs: leaf marquises, crescent cabochons, or shield forms for valiant themes. For an enchanted-mirror effect, experiment with mirrored backings behind rock crystal or doublets that magnify engraved patterns in the metal beneath.
Surface age, memory, and finish
Many stories belong to the passage of time—forgotten rooms and rediscovered names. A genuine, time-softened patina whispers of age without compromising integrity. Layer finishes: darken a texture, then polish the peaks so pattern pops. Consider keum-boo for moonlit gold-on-silver glints or fumed liver of sulfur for twilight blues. Finishes should not be an afterthought; they are the final lines of your tale.
Handcrafting process: a step-by-step workshop guide
An orderly bench invites better work. Keep a system where each tool has a place and each step has a protected work surface. A methodical approach turns messy magic into practiced ritual.
Tools and setup
- Jeweler’s saw with a range of blades for piercing silhouettes like leaves and wolves.
- Files and abrasives for shaping and softening edges.
- Hammers, dapping blocks, and stakes for doming and texturing.
- Chasing tools for furrows and vein lines; pitch bowl for support.
- Torch for annealing and soldering; safe ventilation, tweezers, and third hands.
- Pickle pot and neutralizing bath; safety glasses, gloves, and respirator where needed.
- Polishing motor with interchangeable buffs; sensitive hands for final finishing.
From template to metal
Transfer your cleanest sketch to metal using paper glue or scribed outlines. Saw slowly; fairytale curves reward patience. Deburr as you go to preserve crisp inside corners. If building layers—like a locket forest above a moon-disc—test the stack frequently to ensure hinges clear and magnets (if used) do not disturb stone settings.
Joinery and structure
Before decorative work, solve the engineering puzzle: hinges, clasps, jump rings, and bails. Soldering early helps you avoid scorching textures later. Once the skeleton is sound, add surface carving, bead accents, or tiny granules that read like dew. If combining metal with wood or leather, account for expansion and secure with mechanical fasteners rather than relying on adhesive alone.
Stone setting and final assembly
Choose settings that echo the narrative. Bezel cups for keepsake calm; prongs for brightness and breath; flush settings like hidden sparks in bark. Work systematically: set stones after all high-heat steps are complete; clean and dry thoroughly; protect reflective surfaces with tape during polishing; and check each moving part for smooth, silent function.
Iteration and tests
Rushing a debut piece is a common trap. Practice iterative prototyping with scrap metal or base metals. Test hinge tolerances; wear earrings for a full day to evaluate balance; let a friend with a different wrist size try a bracelet. Each trial accumulates practical knowledge that refines future designs.
Signature motifs and collection ideas
Organize your motifs into micro-worlds. This helps clients navigate styles and helps you maintain creative focus.
The forest path
Leaf-pierced disc earrings, twig cuffs with bark textures, and pendants shaped like small doors. A secret locket could hide a pressed-fern enamel panel. Sprinkle subtle animal tracks across a ring band using punch marks.
The ocean of glass
Mermaid-scale textures achieved with domed punch repeats, seafoam chalcedony, and shell inlays. Use cutout silhouettes to frame negative space like waves. Pair silver with pale aquas and foggy whites, then anchor with a dark blue sapphire for depth.
The night sky
Constellation necklaces with tiny drilled starfields, meteorite or hematite accents, and mirror-polished domes that reflect the wearer’s face like a scrying pool. Add a locket with a rotating star disk and a birthstone pointer as a guide star.
The hidden court
Ribbon-scroll rings, filigreed tiara combs, and gemstone drops in warm, candlelit tones. Think pearls cradled in gold granulation, ready for a masked ball.
The shadow tale
Silhouettes of wolves and towers, thorn-lashed chokers with safe, soft edges, and reversible pendants that show a bright face by day and a dark engraving by night. Controlled darkening emphasizes depth and duality without sacrificing comfort.
Ethics, sourcing, and sustainable magic
Stories teach consequence; so should our making. Prioritize recycled metals and traceable gems. Seek small-scale miners and cutters who practice fair wages and safe methods. Upcycle heirloom stones into new settings that honor family history while bringing structural integrity up to present standards. Packaging can be compostable and beautiful—a cotton ribbon, a letterpressed card with the tale’s motif, and a simple box that can be reused as a keepsake chest.
Durability and care
Enchanted objects must survive real life. Reinforce thin points, thicken ring shanks subject to daily wear, and test clasps under gentle stress. Provide care instructions: avoid harsh chemicals, store pieces separately to prevent scratches, and revisit the studio for occasional cleaning and checkups. A well-maintained piece keeps its magic alive across seasons of use.
Personalization and heirloom potential
Fairytales shape-shift through tellers; your jewelry should, too. Offer engraving that references the tale—a line of briars inside a band, a tiny shoe under a locket lid, coordinates of a meaningful place. Modular designs let clients add charms as their story grows: a first leaf for a milestone, a star for an anniversary, a key for a goal unlocked. Handwork makes each variation feel personal rather than mass-produced, inviting the object to become a companion rather than a product.
Photographing and presenting your fairytale jewelry
Presentation seals the story. Photographs benefit from gentle theatricality—backdrops of moss, linen, smoke-blued paper, or carved wood. Use side light to rake textures and reveal relief. For collections, style flat-lays as story maps: place a locket as the castle, leaf earrings as the surrounding forest, a ring as the moon. Keep props minimal so the jewelry remains the focus. In captions, share a few sentences of context: which motif, which moment in the tale, and a hint of process to bring viewers closer to the bench.
Language choices that resonate
Write product notes like marginalia to a beloved book. Avoid grandiose claims; let materials and workmanship speak. A short, vivid phrase—ash-burnished silver, thorn-brushed brass, dawn-limned opal—can carry more atmosphere than a paragraph of generic adjectives. Invite clients to imagine the scene your piece refers to without dictating a single correct interpretation.
Common pitfalls and how to avoid them
- Overcrowding motifs: Too many symbols in one small piece blur the message. Choose one main motif and a supporting texture.
- Ignoring scale: Details that look perfect on paper may clog at jewelry size. Test designs as paper cutouts pinned to a mannequin before committing to metal.
- Neglecting comfort: Sharp points, overlong ear wires, and heavy pendants turn wonder into a burden. Round every edge and balance weight.
- Unstable finishes: Some patinas rub off quickly in daily wear. Prefer sealed or naturally durable finishes and communicate expectations clearly.
- Allergy oversights: Nickel can haunt sensitive skin like a curse. Use hypoallergenic alloys or barrier layers and specify metal content in your listings.
Project walk-through: the Little Red Riding Hood locket
This project blends silhouette, relief, and gentle color to tell a compact story of the path and the encounter. It is designed to be approachable in a small studio while offering room for mastery.
Concept
Front: a cutout of a small cloaked figure crossing a clearing, with a distant tower of trees. Inside left: a shallow relief of a basket and a sprig of berries. Inside right: an enamel wash suggesting dusk through trees. Back: a map-like trail engraving with a single tiny star-set stone. The chain includes a single branch charm near the clasp.
Materials
- Sterling silver sheet and wire for body, hinge, and bail.
- Copper insert panel for warm-toned interior relief.
- Transparent enamel in smoke blue and green for the dusk panel.
- A small white sapphire or moissanite for the star.
- Optional: a sliver of reclaimed wood veneer for a basket handle inlay.
Steps
- Sketch and templates: Draw the front silhouette and interior motifs. Create paper templates for the locket halves, ensuring a slight lip for a satisfying close.
- Piercing: Transfer the cloaked figure and trees to the front plate and pierce carefully. File to sharpen edges while keeping them hand-safe.
- Hinge and frame: Fabricate a three-knuckle hinge, aligning carefully so the lid closes true. Solder the hinge to the body with heat sinks protecting delicate areas.
- Interior relief: On the copper insert, chase the basket weave and berry sprig. Slight doming will cast gentle shadows when the locket opens.
- Enamel panel: Carve shallow cells in silver for a champlevé dusk gradient. Clean, wash, and fire multiple thin layers to reach the desired glow with enameling discipline.
- Star setting: Drill and burr a seat in the back panel; set the small stone flush so the back acts like a tiny night map.
- Assembly and finishing: Rivet the copper insert, attach the enamel panel, tune the hinge tension, and polish only the highlight planes, leaving recessed textures softened. Apply selective oxidation inside engravings to deepen contrast.
Meaningful details
The interior contrast—warm copper relief beside cool enamel dusk—echoes the hearth and the woods, safety and beyond. The single star is a subtle guide, aligning with the locket bail when worn so it points toward the wearer’s heart. A tiny branch charm near the clasp is a touch only the wearer may notice, inviting a private relationship with the object.
Expanding your workshop vocabulary
As your practice grows, experiment with advanced techniques that open new narrative doors. Granulation can shimmer like frost on briars; fusing lap joints can create seamless transitions between metals; micro-pavé can read as starfields. Learn to raise forms from sheet, to foldform leaves with veins alive under your fingers, and to carve wax models for casting when motifs call for sculptural depth. Traditional methods like repoussé coexist beautifully with laser welding for delicate repairs or mixed-media joins; the goal is not to chase novelty, but to add tools that enrich storytelling.
Careful finishing and honest aging
Fairytales are often about transformation, and finishing is transformation in metal. Move through abrasives in thoughtful steps; do not jump grits. Keep separate buffs for compounds to prevent muddy surfaces. Use matte planes to frame high-polish accents; let shadows live where meaning needs to deepen. Accept that honest wear will add chapters: solder seams soften, brushed finishes mellow, edges burnish. Instead of fighting time, design pieces to gather beauty with years.
Teaching the tale: workshops and community
Handicraft grows stronger in company. Share methods through open studios, short classes, and process videos that demystify the bench. Invite students to bring a personal tale—family lore, regional myth, or a modern fable—and help them distill it to two or three motifs. Encourage sketchbooks as field journals and tool marks as signatures. Community critique can be gentle and useful when framed around clarity of story and integrity of build.
Archiving your process and protecting your voice
Maintain a living archive of sketches, templates, test swatches of finishes, and stone cards with notes. Document each collection with a short text that defines motifs and methods so future you can revisit a world without reinventing it from memory alone. Photographs of in-process stages also help establish provenance and make repair or reproduction easier later. As you publish, credit regional sources and collaborators, and acknowledge mentors whose tools or wisdom shaped your hand. The lineage of the craft is part of the tale you tell.
A closing path through the woods
Magic in jewelry does not require spectacle; it requires attention. A steady flame, a clean file stroke, a choice to leave one surface whisper-matte so another can sing—these are the spells. Fairytales give you metaphors and maps; your hands give them weight and warmth. Let a ring promise a safe return from the forest. Let a pendant hold a door that opens to a remembered garden. With patient tools, selective color, and respect for the wearer’s daily life, you can craft pieces that feel discovered rather than manufactured, as if they had always been waiting in a story, and you were simply the first to listen.
Quick reference: a fairytale maker’s checklist
- Motif clarity: Can someone name the central symbol at arm’s length?
- Scale test: Does the design read at jewelry size without crowding?
- Structural soundness: Are hinges, joints, and settings secure?
- Comfort pass: Are edges softened and weight balanced?
- Finish plan: Do contrasts and patina support the theme?
- Material ethics: Are metals and stones responsibly sourced or recycled?
- Story note: One sentence that states the scene or emotion you captured.
- Care card: Clear instructions to preserve enchantment through wear.
Glossary touchstones for the bench poet
- Filigree: Fine wire scrollwork suggesting vines, lace, or palace ornament.
- Chasing and repoussé: Surface shaping from front and back for living relief.
- Enamel: Fused glass color for windows of light and durable hues.
- Oxidation: Controlled darkening to build shadow and contrast.
- Lapidary: Stone cutting and polishing to custom shapes and finishes.
- Prototyping: Iterative trials that refine design, fit, and longevity.
- Ergonomics: Wearer-centered design for comfort and balance.
