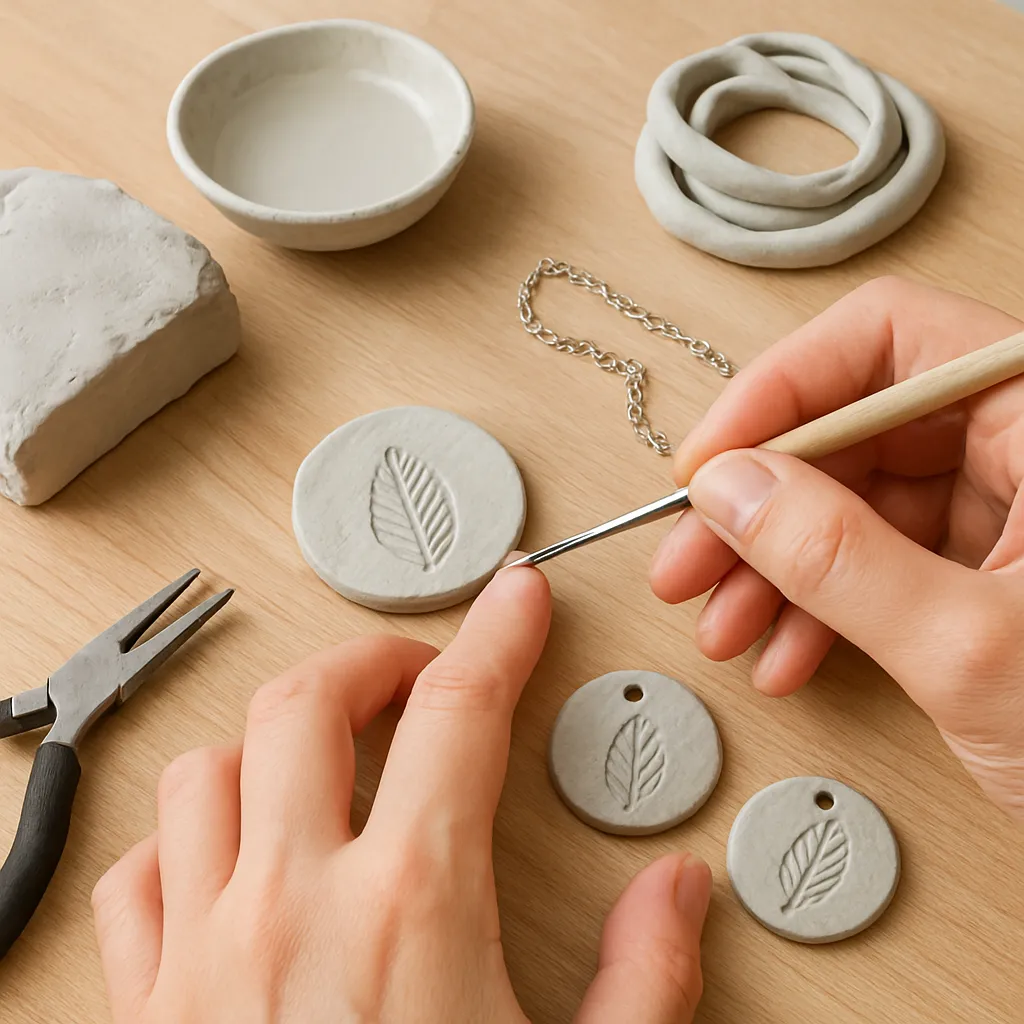
Air-dry clay opens a generous doorway into jewelry making for crafters who love tactile materials, painterly surfaces, and low-tech processes. It asks for no kiln, little more than a flat surface and patience, and rewards experimentation with forms that feel personal, organic, and often playfully refined. Whether you’re shaping featherweight earrings, sculpting botanical pendants, or texturing beads that look like carved stone, this material invites both spontaneity and precision. The guide below walks you through choosing clays, preparing and shaping components, managing drying, refining surfaces, finishing with color and sealers, and assembling durable pieces that stand up to wear without losing their handmade charm.
Understanding Air-Dry Clay for Jewelry
Air-dry clay is a moisture-evaporation system: it firms as water leaves, creating a hardened matrix without external heat. Different formulations influence both workability and finished strength. The most common for jewelry are paper clays (cellulose fiber added to a clay or mineral base) and resin/mineral hybrid clays. Paper clays are forgiving, sand beautifully, accept paint well, and are relatively lightweight—a prime asset for earrings that won’t pull on earlobes. Mineral-based clays, sometimes marketed as stone or ceramic-like, can feel denser and may yield a more refined carve. Foam clays or ultra-light clays are useful for oversized pieces that still feel airy, though some remain slightly spongy and may not sand as crisply.
Compared with polymer clay, air-dry formulations can’t be re-softened once surface drying begins, so timing, moisture management, and handling matter. Compared with metal clay (which sinters), air-dry options require far less equipment and cost, but they won’t achieve the cold weight, luster, or lasting hardness of metal. The upside: a broad surface-design vocabulary—painting, staining, gilding, carving, and mixed media—lets you emulate ceramic, stone, wood, leather, or enamel effects without firing.
Key properties to consider before you begin:
- Shrinkage: often 5–15%. Plan hole sizes and settings accordingly.
- Flexibility vs. brittleness: some clays remain slightly resilient; others chip if too thin or stressed.
- Surface density: tightly compacted clay resists chips better and takes finer detail.
- Finish compatibility: water-based sealers usually bond well; certain solvent formulas can remain tacky or yellow.
Tools, Workspace, and Safety
A minimal toolkit is all you need at first, and you can add specialty tools as your designs evolve. Keep tools for clay separate from food use.
- Work surface: a smooth tile, glass, or acrylic board to roll and lift thin components cleanly.
- Rolling tools: acrylic roller; optional thickness guides or spacers for consistent slabs.
- Cutting/trimming: craft blade, tissue blade, precision knife, micro-scissors for tiny cuts.
- Sculpting/marking: needle tool, ball stylus, silicone shapers, toothpicks for subtle marks.
- Texture: rubber stamps, lace, linens, seed pods, leaves, and sculpted texture plates; designate them for non-food crafting.
- Moisture control: mist bottle, small water cup, and plastic wrap to pause drying between steps.
- Sanding and polishing: sanding sticks or papers (grits 400–2000+), micro-mesh pads, nail buffers.
- Drilling: hand drill/pin vise with fine bits (0.8–2 mm) for holes after drying.
- Adhesives and sealers: PVA for slip, cyanoacrylate, two-part epoxy, acrylic varnish, polyurethane, or UV epoxy resin doming for high-wear zones.
- Jewelry hardware: jump rings, eye pins, earring posts and backs, bails, wire, and clasp findings.
Safety is simple but important: work in a clean, ventilated space; use a mask when sanding to avoid inhaling fine dust; keep beverages away from the bench; and wipe dust with a damp cloth rather than blowing it into the air.
Conditioning and Preparing Clay
Good preparation yields stronger parts and cleaner edges. Start with a sealed package to preserve moisture. If your clay feels stiff, knead in tiny spritzes of water or a drop of glycerin until pliable. If it’s overly sticky, leach moisture by pressing a flattened sheet between two layers of plain paper for 5–15 minutes; the paper will wick away water and reduce stickiness without over-drying the surface.
To align particles and prime the clay for detail, wedge it: press, fold, and rotate repeatedly, expelling bubbles. Overly wet clay traps air and slumps; overly dry clay crumbles at edges. Aim for a smooth, satin-like feel that takes a fingerprint without clinging to your finger.
Create a small batch of slip (clay mixed with water to yogurt consistency) to serve as your joinery glue. Score (lightly scratch) both contact surfaces, brush on slip, press, wiggle to seat, then compress. This scoring-and-slip ritual dramatically improves joint adhesion, especially for layered motifs or attached bails.
Forming Components: Slabs, Coils, and Beads
For jewelry, weight and balance are everything. Keep most earring and pendant components between 2–5 mm thick depending on the clay’s strength, with thinner edges gently beveled to reduce chipping.
- Slabs: Roll between spacers for uniform thickness. Use cutters or templates for pairs; mirror pieces by flipping your template to keep symmetry. Lift with a blade to avoid stretching.
- Pinch and sculpt: For organic pendants or rings, pinch small forms, compressing thoroughly to compact fibers. Smooth with a damp brush or finger.
- Coils and beads: Roll even coils for tube beads or hoops; for round beads, pre-measure pea-sized pellets. Pierce beads while leather-hard to reduce distortion and clean out holes after drying.
- Molding: Press clay into silicone molds rubbed very lightly with water. Demold once the surface firms; refine with a brush.
Think about motion: earrings should hang without spinning or tilting awkwardly. Test orientation with a mock jump ring while clay is still moist; adjust hole placement or balance by subtly shifting mass. Consider shrinkage: a 2 mm hole may close slightly as clay dries; either pierce larger initially or plan to drill later.
Integrating Hardware and Structural Details
Embedding vs. post-assembly is a perennial choice. Embedded metal loops and pins can be strong, but metal can corrode in damp clay if left unprotected. A middle path is often best: create keyed sockets to accept hardware after drying, combined with mechanical bonds and adhesive.
- Eye pins and loops: If embedding, roughen the metal with a file, form a closed loop, and seat it into a scored, slipped channel. Cover with a thin cap of clay and compress well.
- Earring posts: For maximum hold, attach after curing with a small dimpled recess that matches the pad, scored and glued with epoxy. Back-plate with a thin clay disk during forming if you want a custom base.
- Bails and rings: Carve a recess to receive a glue-on bail after finishing; avoid placing stress at thin edges.
- Articulation: For multi-part earrings or pendants, design increments of movement. Use stacked links, wire connectors, or beaded bridges to distribute weight and avoid torque on a single joint.
Drying and Curing Without Warps or Cracks
Patience during drying transforms good pieces into great ones. Rapid moisture loss can warp flats and crack joins. Dry on a porous surface—unglazed tile, MDF, or plaster batts—so moisture leaves both sides evenly. Flip thin slabs several times during the first few hours. Support curved forms (cuffs, domes) with soft foam or crumpled paper to maintain shape.
Humidity governs timing: small components can feel dry in 12–24 hours but remain cool inside. For structural reliability, wait 48–72 hours before aggressive sanding or drilling. If you must accelerate, use gentle airflow or a food dehydrator at the lowest setting with the door ajar; avoid high heat, which can case-harden the outside while trapping moisture within, leading to internal stress cracks.
To mend hairline cracks that appear during drying, rehydrate the line with a damp brush, work in thick slip, and compress. Let rest wrapped for an hour, then continue drying slowly. Most paper clays accept reworking even at leather-hard stage, which is a gift in jewelry scale where small defects matter.
Refining: Sanding, Carving, and Edge Work
Surface refinement starts at the leather-hard stage for ease and continues after full dry for precision. Be gentle; removing too much material can thin critical areas. Break sharp corners and gently round edges—this reduces chipping and feels better against skin.
- Dry vs. wet: Dry sanding cuts faster but creates dust; wet sanding with a small dish of water keeps dust down and yields a porcelain-smooth surface. Use a progression (e.g., 400, 600, 800, 1200, 2000) to erase scratches.
- Micro-carving: V-gouges, fine burrs in a pin vise, or needle files refine inlays and set lines for later patinas.
- Burnishing: Smooth with a polished spoon or agate to compress fibers and subtly strengthen edges before sealing.
Surface Design and Color Strategies
Air-dry clay is an exceptional canvas. Its micro-porous face accepts paints, inks, and dry media that sink and lock in place, often creating velvety depth. Test combinations on offcuts; the order of operations matters.
- Grounds: Brush on gesso for an even paint tooth, or leave raw clay for an earthy absorbency. A diluted acrylic wash can stain like watercolor.
- Paints: Artist acrylics offer flex and colorfastness. Gouache gives matte, velvet color but benefits from a protective topcoat. Alcohol inks bloom into veins; corral them with masking or score lines for capillary boundaries.
- Dry media: Pan pastels and powdered pigments brush on gracefully; fix with a light spray of acrylic before varnishing to avoid smudges.
- Metallics: Apply leaf or foil over sizing for radiant highlights. Rub mica for a satin glow on high points; seal lightly to maintain sparkle.
- Print and pattern: Stamp with solvent-based ink pads that dry permanent; for repeat motifs, make a flexible stamp from silicone putty molds.
- Inlays and marbling: Laminate thin sheets of differently tinted clay; score, compress, and slice to reveal lines. Work quickly to avoid premature drying between layers.
Depth comes from contrast: matte against gloss, smooth against toothy textures, light next to dark. Use controlled glazing—thin translucent color over raised textures—to sink tone into recesses and leave highlights brighter. Sgraffito (scratching through a colored layer) works beautifully on leather-hard clay primed with a thin acrylic wash.
Sealing and Protective Coatings
Because air-dry clay is micro-porous, proper sealing guards against stains, oils, and moisture. Choose your finish for the piece’s end-use and handling intensity.
- Acrylic varnish (matte/satin/gloss): Easy, fast, water-based, and broadly compatible. Multiple thin coats beat one thick coat; allow at least 20–30 minutes between layers.
- Polyurethane (water-based): Tougher than acrylic varnish and often more scratch-resistant; can deepen color slightly. Avoid oil-based formulas, which may yellow on light pieces.
- Wax: Soft luster, pleasant hand feel, and quick to apply. Best for low-wear surfaces like earrings rather than rings.
- Epoxy or UV resin doming: Creates a glassy, ultra-durable cap on pendants or studs. Excellent for faux enamel effects, embedded glitter, or protecting delicate leafing. Seal porous clay with a thin acrylic layer first to avoid resin air bubbles.
None of these make the piece truly waterproof, but good topcoats plus sensible care resist incidental splashes and skin oils. Let pieces cure fully—24 to 72 hours depending on product—before packaging or wear. Test a small swatch when trying a new sealer; some interact with dyes or metallic powders.
Drilling, Assembly, and Metalwork Basics
Once surfaces are sealed and hard, lay out connection points. Use a pin vise to drill clean holes; twist steadily without forcing. Deburr with a countersink or a larger bit by hand for a neat rim that reduces chafing of jump rings.
- Jump rings: Choose thicker gauges for load-bearing connections, and close them with a gentle twist, not a pull, to preserve roundness.
- Wire wrapping: Fine wire (24–20 gauge) can create custom bails and frames; hammer lightly on a bench block to harden critical areas.
- Adhesive joins: For earring posts or pad bails, scuff metal, use epoxy for a high-strength bond, and let it cure clamped or weighted. Cyanoacrylate is fast but more brittle; reserve it for low-stress joins.
Keep metal away from unsealed clay edges where sweat and motion rub; a tiny bead of sealer around holes can reduce grime and improve long-term cleanliness.
Project 1: Marbled Drop Earrings with Gold Leaf
Roll two thin sheets of neutral clay and two of a colored clay. Stack them alternately, compress with a roller, then fold and lightly twist to create marbling. Roll flat to 2–3 mm and cut two mirrored teardrops with a template. Pierce hanging holes 2–3 mm from the top edge. Smooth edges with a damp brush, then dry slowly on a porous board, flipping after two hours.
After full dry, wet-sand up to 800 grit. Paint a whisper-thin acrylic glaze in a complementary hue, wipe raised areas back while wet. Apply size selectively, add leaf, and burnish. Seal with satin polyurethane. Drill cleanly if holes narrowed, attach 6–8 mm jump rings and ear wires. The result: airy, balanced earrings with shimmering accents that catch light without weight.
Project 2: Botanical Pendant with Pressed Texture
Condition clay and roll to 4 mm. Place a fresh or silicone replica leaf onto the clay and roll gently to press veins. Peel away and cut a pleasing organic outline around the texture. Add a carved groove up top for a glue-on bail or pierce a centered hole for a wire-wrapped bail later. Dry on a soft foam to maintain a subtle curve against the chest.
Refine edges and use a V-tool to deepen a few key veins. Wash the surface with diluted umber acrylic; let pigment settle in recesses, then wipe the high points with a damp cloth. Add a soft green or patinated bronze hint on ridges with mica powder. Seal matte to keep the botanical realism, or gloss just the high points for a dew-kissed effect. Mount on a bail with epoxy and string on a cord with metal accents.
Project 3: Hand-Rolled Beads with Antiqued Patina
Weigh equal pea-sized pellets for consistency. Roll beads between palms, then against the work surface for crisp spheroids. Pierce on a needle tool and gently rotate to enlarge the tunnel without tearing. For texture, press each bead lightly on a wire mesh or carve shallow lines. Dry on a skewer laid across two supports to avoid flat spots.
Sand lightly, then brush on a base coat of acrylic in a mid-tone. Once dry, apply a darker glaze and quickly buff the high points. A final kiss of metallic wax on ridges suggests worn bronze. Seal satin. String with spacer beads on beading wire, add a clasp, and crimp securely.
Troubleshooting and Quality Control
Even careful makers encounter the occasional hiccup. A short diagnostic checklist speeds recovery:
- Cracks at joins: Likely insufficient scoring and slip or movement during early drying. Rehydrate, add slip, compress, and slow the dry. For dry pieces, V-groove the crack, pack with clay paste, and refinish.
- Warped flats: Dried on one side or in drafts. Dry on porous boards, flip early, and add light weights (paper stacks) for stubborn slabs.
- Chalky paint or sticky varnish: Product incompatibility or over-application. Strip gently with alcohol (test first), re-prime with gesso, and apply ultra-thin coats.
- Loose posts or bails: Smooth metal resists glue. Scuff and key the metal, use epoxy, and design sockets or ledges that create mechanical lock-in.
- Rough holes: Ream slowly with graduated bits; chamfer lightly and reseal rims to reduce wear on rings.
Before shipping or wearing, perform gentle stress tests: tug on hardware, tap edges for chips, and wipe surfaces with a slightly damp cloth to check sealer integrity. Document your process so you can replicate what works and fix what doesn’t.
Weight, Balance, and Wearability
Successful jewelry vanishes in feel while appearing boldly present. Distribute mass close to the ear post in earrings to reduce swing torque. Align pendant bails with the center of gravity so pieces lie flat. Test movement by suspending components on temporary rings and gently walking; if they kick out or rotate, adjust hole placement or geometry before final assembly. Air-dry clay’s lightweight nature helps here, but design still rules comfort.
Care, Packaging, and Customer Guidance
Offer care cards with a few clear points: avoid immersing pieces in water or wearing during workouts; store separately to prevent abrasion; clean with a soft, slightly damp cloth; and keep away from perfumes or lotions before the sealer has fully cured. Package on cards inside small boxes or pouches; cushion delicate protrusions and protect metallic leaf from scuffs with tissue.
Sustainability, Waste Minimization, and Studio Habits
Air-dry clay aligns easily with low-impact making. It cleans up with water, cures at room temperature, and encourages re-use: offcuts and trimmings can be rehydrated under plastic wrap with a few spritzes. Repurpose found texture tools—textiles, carved corks, pressed botanicals—and conserve materials by batching pieces that share color palettes or finishes. Choose water-based finishes when possible, recycle sanding water by letting sediment settle and decanting the clear top, and dispose of leftover coatings according to local guidelines.
Scaling Up: From Hobby to Micro-Brand
Batch production benefits from templates, jigs, and consistent thickness control. Standardize sizes for replacement parts and sets. Keep a finish log—brand, sheen, number of coats, cure time—so customer reorders match. Photograph pieces in diffused light to honor surface subtleties, and share process snippets that highlight hand touch: scoring lines, brushwork, and bevels speak volumes about craftsmanship.
Pricing should include design time, consumables (abrasives, sealers, adhesives), and finishing labor—often the largest slice. Quality checkpoints—flatness, hole alignment, sealer clarity, strong adhesion at joins—save returns later. When sourcing metal findings, offer hypoallergenic options (titanium, niobium, surgical steel) to broaden accessibility.
Frequently Asked Questions
- How thin is too thin for earrings? Aim for 2–3 mm at the thinnest, with gently rounded edges to reduce chipping.
- Can I bake air-dry clay to speed things up? Gentle warming helps, but high heat can crack or warp. Prioritize airflow and patience.
- What paints work best? Artist-grade acrylics bond well and flex slightly; seal afterward for stain resistance.
- Is there a truly waterproof finish? Not perfectly; epoxy domes and high-quality polyurethanes resist moisture best but still need sensible care.
- Can I mix colors into the clay? Yes—knead in acrylic paint or powdered pigments sparingly to tint; adjust moisture accordingly.
- How do I avoid resin bubbles on porous clay? Pre-seal with a thin acrylic coat, warm the resin gently, and dome in dust-free conditions.
Design Playgrounds: Ideas to Spark Your Next Collection
Explore families of forms: a core motif—say, rippled water—can become studs (micro ripples), drops (elongated waves), and pendants (broad, layered undulations). Consider faux materials: make “stone” with granite specks, “porcelain” with milk-glazed translucency, or “aged bronze” with green-blue patina. Combine media: stitch through pre-drilled clay plates with waxed linen, or rivet thin clay shields over hammered brass for layered stories.
Texture curation is powerful: assemble a library of stamps and natural imprints, from citrus peels to textiles, and pair them with controlled color fields. A matte clay face next to a gloss resin cabochon reads like silk against glass. Frame small painted vignettes under resin for miniature wearable paintings, or carve amphora silhouettes and wrap them with wire to echo ancient pottery, updated for modern wear.
Durability Through Design Choices
While air-dry clay will never be as hard as fired porcelain or metal, smart design choices nudge performance upward. Keep stress concentrators—tiny interior corners, sharp drill exits—rounded. Back flat pendants with a subtle dome to stiffen the span. Lay fiber directions in paper clay by firm compressing strokes; a compact matrix resists micro-chipping. Use sealers appropriate to contact zones: rings and bracelets benefit from tougher topcoats; earrings can stay lighter to preserve tactile charm. Thoughtful durability arises from material understanding as much as from products applied afterward.
Closing Notes on Creative Flow
The most reliable way to refine your craft is iterative play: make a prototype, wear-test it, record what you notice, and adjust. Document clay thicknesses, drying times, grit progressions, and sealer stacks that please the eye and survive a week of real-life wear. Over time, the vocabulary of curves, imprints, and finishes that feel uniquely yours will crystallize. With patience for curing, attention to edges and sanding, and judicious sealing, air-dry clay becomes a capable, expressive ally—able to translate sketches and textures from your world into intimate objects that travel with the wearer and gather stories of their own.
