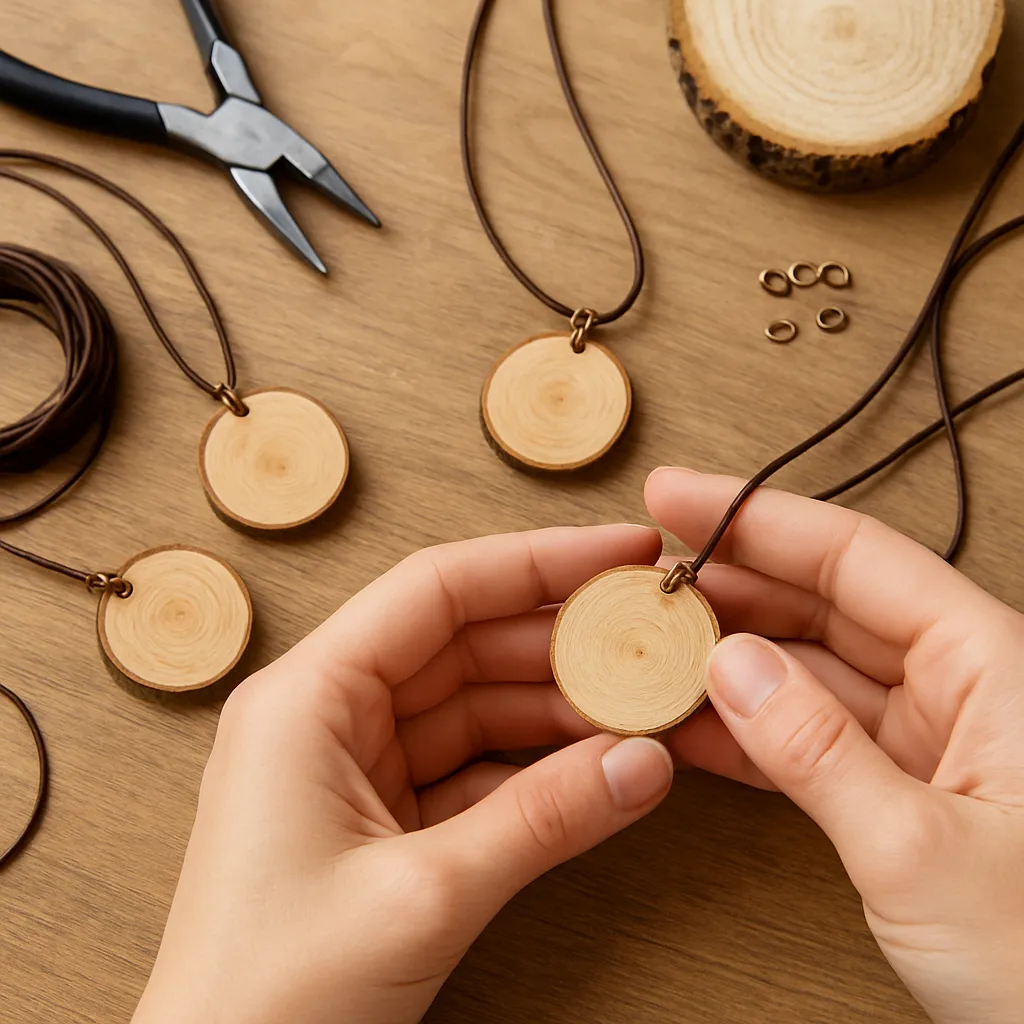
Turning small slices of wood into pendant necklaces is an inviting blend of nature and artistry. Each disc holds a story in its rings, a unique pattern that becomes wearable memory when shaped, finished, and strung. Whether you’re a jewelry beginner exploring your first handmade line or a seasoned maker chasing new textures and techniques, wooden-slice pendants deliver tactile warmth, visual interest, and a satisfying, low-cost path from raw material to refined adornment. The process rewards patience and curiosity: choosing the right branch or board, learning how wood moves as it dries, and discovering finishes that highlight depth and color. What emerges is jewelry that feels grounded yet expressive—casual enough for daily wear, distinctive enough to gift, and versatile enough to match almost any style.
Choosing Wood: Species, Sourcing, and Character
Material choice sets the tone for your necklace long before you introduce color or metal. Hardwoods such as walnut, cherry, olive, maple, oak, and fruitwoods offer tight, appealing figure and stand up well to daily wear. Softwoods like pine and cedar charm with their scent and warmth but may dent more easily; they can still be excellent choices for larger, rustic pendants or designs that embrace an organic look. Bark-on slices visually tie the pendant to the tree’s origin, while debarked edges read cleaner and more modern.
Appearance starts with the wood’s grain. Straight grain delivers a calm, linear pattern; curly, quilted, or bird’s-eye figure adds drama that needs only the gentlest finishing to shine. Pale woods (maple, birch) make colorwork pop; darker woods (walnut, wenge) elevate metal leaf and subtle engravings.
Ethical sourcing matters. Forage storm-fallen branches from your yard (respecting local rules), ask arborists for pruned limbs, or buy offcuts from woodworkers and sawmills. You can also seek FSC-certified suppliers for documented sustainability. Using branches and trimmings keeps material costs low and adds provenance you can share with wearers—“This walnut grew on my street; it fell in last winter’s wind.”
Moisture content is critical. Fresh-cut (“green”) wood continues to lose water, shrinking and moving as it dries. Slices taken from green limbs are prone to checking (cracking) unless dried thoughtfully. Air-dry for weeks to months, or kiln/oven-dry small pieces with care. The Japanese concept of wabi-sabi can soften the disappointment of a small split, but structural cracks at the pendant’s top can compromise longevity.
Preparing Slices: Cutting, Drying, and Stabilizing
Cutting consistent discs between 3–6 mm thick lets you balance lightness, strength, and detail space. A fine-tooth backsaw, a small miter box, or a thin-kerf band saw blade helps reduce tear-out. If you’re harvesting from a branch, trim away any pith-centered cores when possible; the pith is unstable and increases the risk of radial cracks. Cut more slices than you need—some will move or split as they dry.
Drying strategies range from slow and patient to carefully accelerated. The simplest route: sticker your slices (separate them with spacers) and store in a cardboard box at room temperature, rotating weekly. Faster routes include a low oven (90–95°C) for one to two hours with the door cracked, or short microwave bursts sandwiched between paper towels and silica gel packs; monitor constantly to prevent scorching. Once dry, allow slices to equilibrate for a day before finishing.
Stabilization starts at the edges. Bark often peels as slices dry. If you want to keep bark-on character, wick thin CA (cyanoacrylate) glue around the perimeter to bond bark and cambium. To prevent cupping, apply finish evenly to both faces and the edge. Consider a dewaxed shellac wash as a sanding sealer before your primary finish—it can reduce blotching and improve topcoat clarity.
A clean surface is essential for crisp art and resilient topcoats. Sand both faces through grits 120, 180, 240, 320, and 400, moving with the grain where possible to minimize scratches. After 240 grit, lightly dampen with water to raise the fibers; once dry, sand again at 320–400. This cycle reduces fuzzing under water-based mediums and improves final luster.
When you’re satisfied, drill before decorating if you plan a top hole. Use a small brad-point bit or a pin vise to guide straight and reduce blowout. Back the slice with scrap wood and clamp gently. For a side-mounted bail with screws, pre-drill a pilot hole to prevent splitting. If drilling after finishing, cover the area with painter’s tape to avoid chipping.
Design Approaches: From Rustic to Refined
Wood welcomes a broad range of surface treatments. Start with simple contrasts—oil-finished walnut with a polished brass bail—or push into technical territory with inlays or resin domes. Below are popular directions and how they interact with the material.
- Burn drawing: pyrography lets you etch lines that sit shy of the surface, resisting scuffs better than ink. Use a temperature-controlled pen and fine tips to draw botanicals, constellations, or micro-landscapes. Burn slowly to avoid scorching beyond the line; light sanding and a clear coat will boost contrast.
- Painting: Acrylics provide bold opaque color; watercolors yield gentle stains that preserve figure. Seal the wood first to prevent color bleed, especially on open-pored species like oak and ash. Masking tape allows crisp geometric fields and two-tone effects.
- Metal leaf and foils: Gold, silver, or copper leaf adds a luxurious glint. Use an adhesive size, lay the leaf, then burnish. A clear topcoat protects against wear and tarnish. Leaf shines particularly well against dark woods.
- Inlays: Route or carve shallow recesses and fill with crushed stone, brass filings, mother-of-pearl, or tinted epoxy for intricate accents. Let the filler cure, then sand flush and seal.
- Image transfer: Laser-printed images can be transferred with gel medium. Burnish, let cure, and rub away paper; seal afterward. Monograms, maps, and vintage motifs translate beautifully this way.
- Texture and edge treatments: Chamfer or round the slice edge with 320–400 grit for comfort. A gentle char (inspired by shou sugi ban) brushed and oiled yields a dramatic black frame. Liming wax on open grain imparts a coastal, weathered feel.
- Resin features: UV or two-part epoxy can dome a miniature collage—pressed flowers, tiny fern fronds, mica shimmer, or a single bead set like a cabochon. Mind bubbles and cure times to avoid cloudiness.
Lean into themes that harmonize with wood’s warmth. A minimalist walnut circle with a single off-center hole feels quietly sculptural. Mandalas, zodiac symbols, or birth flowers in fine lines make personal gifts without overwhelming the material. If you prefer moody character, encourage subtle patina by pairing darkened brass or bronze findings with oiled oak.
Hardware and Assembly: Holes, Bails, and Cords
Connection choices influence how the pendant moves and where it rests on the chest. A drilled top hole accepts a pinch bail or a jump ring directly through the wood; a surface bail glued to the back preserves a clean face but requires strong adhesive. Screw-eye bails feel secure but need careful pilot drilling and, ideally, epoxy for reinforcement.
Adhesives and metals matter. Two-part epoxy excels for gluing flat-pad bails; cyanoacrylate is faster but more brittle. Metal options include stainless steel, sterling silver, surgical steel, brass, and bronze. For sensitive skin, select findings marketed as hypoallergenic; plating eventually wears, so solid or thickly plated components hold up better over time.
Cord choices guide style and comfort. Leather and faux leather feel earthy and supple; waxed cotton or hemp underscores an outdoorsy vibe; fine chain refines the look for dressier wear. Adjustable slip knots keep sizing flexible for gifts; lobster clasps and extenders offer precision. Typical chain lengths span 16–30 inches; pendants often hang most naturally on 18–22 inches for everyday wear.
Jump-ring technique is small but important. Always twist rings open side-to-side, never pull ends apart, and use two pliers to realign snugly. For balance, consider a bail position slightly above centerline to keep the pendant from tipping forward, especially on thicker slices.
Finishing: Clarity, Protection, and Feel
Finish is the last voice of your design—how it looks, feels, and resists the real world. Oils such as linseed (polymerized), tung, or walnut penetrate and deepen figure with a satin glow, while beeswax-carnauba blends add a soft-touch sheen. Shellac provides warmth and speed, though it is sensitive to alcohol; waterborne polyurethanes offer clarity and scuff resistance without yellowing, and traditional solvent-based varnishes deliver a classic amber tone.
Sequence matters. Many makers apply a light dewaxed shellac coat as the first layer, sand back to 400, then topcoat with oil or waterborne finishes. This hybrid approach can lock down fibers, limit blotch, and improve uniformity across sapwood and heartwood. A quality sealant on edges—where moisture exchange is fastest—helps the pendant maintain shape through seasonal humidity changes.
Think about tactile qualities. A burnished oil-and-wax finish invites touch and ages gracefully; a higher-build polyurethane creates a harder shell with higher durability. For resin domes, choose a compatible finish underlayer or seal bare wood first so trapped air doesn’t outgas and form bubbles during cure.
Three Guided Projects to Build Skill
1. Bark-On Rustic Pendant
- Select a 4–5 mm thick slice of birch or cherry with intact bark.
- Stabilize the bark edge by wicking thin CA glue around the perimeter; let cure.
- Sand faces to 400 grit, raise grain once, and re-sand.
- Drill a 1.5–2 mm top hole with backing scrap to avoid blowout.
- Apply two coats of polymerized tung oil, wiping off excess; add a beeswax-carnauba top buff.
- Install a small brass pinch bail or jump ring and string on waxed cotton with adjustable slip knots.
2. Botanical Resin Cameo
- Choose light maple for contrast. Seal with a thin shellac coat.
- Arrange a pressed flower or fern; tack with a dot of clear-drying glue.
- Create a shallow lip with a clear tape dam if the surface is flat; pour UV or two-part epoxy to a gentle dome.
- Pop bubbles with a heat gun on low or a warm breath through a straw; cure dust-free.
- Sand drips if needed, polish edges, and finish the back with oil-and-wax.
- Mount a stainless bail and hang on a fine cable chain for a gallery look.
3. Geometric Inlay Accent
- Mark a diagonal band; route a 1–2 mm recess with a Dremel and fence guide.
- Fill with crushed turquoise or brass filings mixed into clear epoxy; level slightly proud.
- After cure, sand flush; raise grain and refine to 400 grit.
- Top with a water-clear polyurethane or oil for contrast; choose findings in matching metal tone.
Troubleshooting: Common Pitfalls and Practical Fixes
- Cracking after drying: You likely included pith or dried too fast. Trim away pith in future cuts, slow the dry, and finish both faces early. Small cracks can be embraced as design—fill with tinted epoxy or brass powder for a “gold seam” look.
- Bark separation: Stabilize early with thin CA, and avoid flexing the slice during sanding. If bark falls off, clean the edge and lean into a clean, beveled profile.
- Tear-out at drilling: Use a brad-point bit, painter’s tape, and backing scrap; drill from both sides to meet in the middle if the wood is prone to chipping.
- Blotchy stain or paint bleed: Pre-seal with dewaxed shellac; sand lightly before color coats. Masking lines benefit from burnishing tape edges.
- Resin bubbles or cloudiness: Warm resin bottles, seal the wood first, pour in thin layers, and protect from humidity. Doming resins need level surfaces; rotate your board to chase a perfect meniscus.
- Finish tackiness: Some oils cure slowly. Wipe off all excess, allow proper oxidation time, and ensure adequate airflow and temperature.
Aesthetic Directions and Storytelling
Part of the delight is how easily wood pendants slip between moods. Keep them earthy by pairing bark-on slices with hemp cords, or dress them up with high-polish metal leaf and refined chains. Think in collections: lunar phases on ebonized oak; tiny topographic lines on maple; garden herbs etched into cherry; vintage postage fragments under resin on birch. Color palettes can be seasonal—deep greens and brass in winter, blush tones and copper in spring—or tied to local woods for regional stories.
Personalization elevates gifts and small-batch sales: initials inlaid with mother-of-pearl, coordinates burned into the back, or a short note woodburned near the edge. For sets, vary diameter and chain length to layer two pendants: a small, dark disc over a lighter, larger disc creates depth without clutter.
Comfort, Weight, and Wearability
Necklaces should feel effortless. Most slices between 25–40 mm in diameter balance presence and weight; thickness around 3–5 mm keeps them light. Round or chamfered edges avoid collar snagging; back-side finish smoothness matters as much as the front, especially with higher necklines. If a pendant flips while wearing, shift the bail or move the hole up to raise the center of gravity. On soft cords, adding two small crimps near the bail can stabilize orientation.
Care and Maintenance for Long Life
Advise wearers to treat wood like fine leather: avoid extended soaking, remove before swimming or showering, and keep away from harsh solvents and perfumes. Wipe occasionally with a soft cloth; refresh oiled finishes with a drop of compatible oil buffed into the surface. Store in a small pouch with a silica gel pack to buffer humidity. Metals paired with wood can tarnish; a quick polish cloth pass restores shine without harming the finish.
Sustainability and Responsibility
Thoughtful habits align with nature’s pace. Use locally salvaged wood where possible, minimize waste by nesting shapes on boards, and keep offcuts for earrings or keyfobs. Choose low-VOC finishes in a ventilated space and dispose of oily rags safely in a sealed metal container to prevent spontaneous combustion. Small parts pose choking hazards; label appropriately for children’s safety. When selling, share tree species and origin—it invites connection and underscores your craftsmanship.
From Hobby to Microbusiness
If you fall in love with the process, simple systems make repeatability and quality control easier. Create jigs for consistent drilling and edge sanding. Batch steps—cut and dry in one session, sand and seal in another, decorate and topcoat later. Track timing so you can price fairly, factoring materials, shop costs, and your labor. Photographs matter: shoot on neutral backdrops with a coin or ruler for scale and a close-up to show figure. Offer cord length choices and note metal composition so customers can make informed decisions.
Advanced Techniques to Explore
- Ebonizing oak: A steel-wool-and-vinegar solution reacts with tannins to darken oak dramatically; finish with oil for depth.
- Ammonia fuming: Carefully executed on oak or chestnut, it deepens color without pigment; requires strict ventilation and safety.
- Kintsugi-inspired fills: Highlight natural checks by packing cracks with tinted epoxy, then level and polish.
- Carved relief: Shallow bas-relief adds shadow play; finish with liming wax to accentuate cuts.
- Mixed materials: Stack a thin brass or silver disc over wood, or rivet a small forged element through the slice for dimension.
A Simple Workflow Checklist
- Select stable, attractive wood; rough cut extra slices to allow for losses.
- Dry thoroughly; stabilize bark if desired.
- Sand both faces through 400 grit; raise grain once.
- Pre-seal if using color or resin.
- Decorate: paint, leaf, burn, inlay, or transfer.
- Drill and fit hardware; test balance and orientation.
- Topcoat with your chosen finish; cure fully.
- Assemble cord or chain; check clasp and jump-ring security.
- Photograph, package, and include care notes.
Why Wood Works as Jewelry
Unlike metal or stone alone, wood carries tactile warmth, a quiet invitation to touch. It absorbs light differently at different angles, animating subtle figure as you move. It also serves as a bridge between rough and refined: a pendulum of poetry that can swing rustic, urban, or elegant with small tweaks to edge, color, and findings. When a pendant’s face captures a leaf vein, a contour burned into the surface, or a fraction of a tree’s lifetime in growth rings, you’re not just making an accessory—you’re preserving a small, living geometry for someone to wear.
Quick Reference: Tools and Materials
- Saws: fine-tooth hand saw, miter box, or band saw.
- Drilling: pin vise or rotary tool with brad-point bits; backing scrap and clamps.
- Abrasives: 120–400 grit sandpapers; micro-mesh for high polish.
- Stabilizers: thin CA glue for bark edges.
- Finishes: dewaxed shellac, polymerized linseed or tung oil, beeswax-carnauba, waterborne polyurethane.
- Adhesives: two-part epoxy, cyanoacrylate.
- Decor: acrylics, alcohol inks, metal leaf, gel medium for transfers, inlay materials.
- Hardware: bails (glue-on, pinch, screw-eye), jump rings, clasps, cords, chains.
- Safety: dust mask or respirator, eye protection, gloves for finishes.
Final Notes on Process and Patience
Working with wood teaches timing and nuance. Respect its seasoning, and it will reward you with stability; listen to its figure, and your design choices will feel inevitable rather than forced. There’s pleasure in each small victory: a perfectly centered hole, a crisp masked edge, a resin dome that sets like clear water. Over time your hands learn the pressure each step needs, and your eye grows fluent in subtle contrast. Out of simple slices, remarkable pendants emerge—each one different, each one quietly human, small circles that carry the living memory of the tree into daily life.
