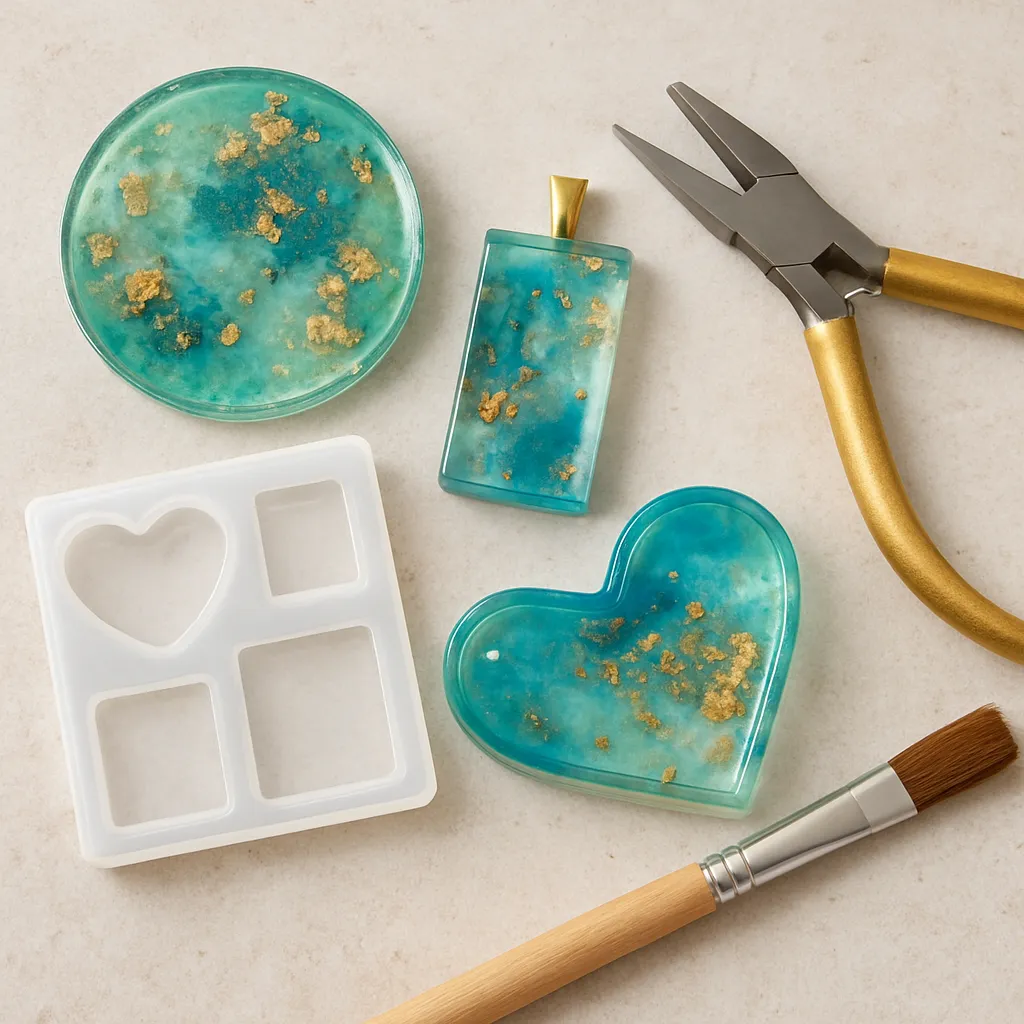
Every maker knows the pang that arrives the moment you realize you mixed more resin than a project needs. The cup warms, the clock ticks, and you feel torn between rushing to pour something—anything—or watching precious material cure into useless mass. But leftover batches are not a miscalculation; they’re a micro-studio of possibilities. Small quantities invite experimentation, quick wins, color tests, and miniature functional objects that often become your most-loved daily tools. With a bit of forethought and a stash of tiny forms, you can turn drips into discoveries and scraps into heirlooms.
Why Leftover Resin Is a Gift, Not a Burden
Large pours can be intimidating. Small ones are liberating. When only a few milliliters remain, perfectionism loosens its grip and curiosity takes over. Leftover portions are ideal for proof-of-concept explorations: checking color saturation, observing bubble behavior, trialing new pigments, and sampling surface finishes. If a tiny pour fails, you’ve lost very little; if it succeeds, you’ve gained a repeatable technique you can scale up later.
From a design standpoint, constraints drive creativity. Limited volume nudges you toward modular thinking: components that can be combined later, layered effects built in stages, or families of matching accents. Many artisans plan their sessions around this reality: a primary pour first, then a “rescue tray” where every last drop becomes a bead, magnet, button, inlay chip, or sample tile for future reference.
Safety, Setup, and Smart Storage
Even tiny pours deserve the same care as big ones. Gloves, eye protection, and good ventilation protect your skin and lungs. Keep a silicone mat under your work area to catch drips for effortless cleanup. Pre-stage at least three landing zones for surprise leftovers: a micro-mold lineup, a flat doming surface for spot repairs, and a disposable palette for color tests.
Label everything. Write the date, brand, and ratio on painter’s tape stuck to the mixing cup. Place a small digital thermometer nearby to monitor room temperature, and note curing times in a notebook. These records transform orphaned experiments into teachable notes you can rely on for larger commissions or repeatable product lines.
Know your chemistry. Not all formulations behave the same:
- epoxy is typically low-odor, great for clear coats, jewelry, and thin pours, with longer working times.
- polyester cures fast and hard but is smellier; it’s good for casting parts when ventilation is excellent.
- UV resin cures on demand under light, perfect for quick fixes, doming, and setting small findings.
Understanding pot life, exotherm, and recommended thickness will determine how you deploy tiny leftovers. Faster mixes are best for petite parts. Slower mixes suit gradient experiments or thin overlays that benefit from the extended open time.
Project Ideas: Tiny Molds and Modular Pieces
Maintain a dedicated station of small molds—silicone ice-cube trays, jewelry blanks, button forms, geometric shapes, and miniature alphabet cavities for monograms. Keep them clean and lightly dusted with mold release if the manufacturer recommends it. This prepped tray turns every leftover into a bonus part rather than a panic pour.
High-value micro-casts include:
- Button blanks: Customize garments, knitwear, or bags with colors matched to your projects.
- Cabochons: Flat-backed ovals or rounds become ring toppers, brooch centers, and mosaic tiles.
- Beads and spacer disks: String them into necklaces or use as accent markers on handmade journals.
- Magnets: Fashion fridge art, needle minder bases, or pattern-holding helpers for sewing.
- Cord ends and zipper pulls: Dip the tips of paracord or leather laces in a tiny tube mold to create durable finishes.
- Plant markers: Cast slim sticks and engrave plant names with a fine paint pen.
- Dice and game tokens: Keep a novelty gaming set in development as your scrap pours accumulate.
- Thread keepers and bobbin holders: Slim U-shapes or rings prevent tangling in the sewing basket.
Assemble your micro-casts into larger projects: mosaic frames, trinket boxes, shadowbox art, or wall medallions. When you develop a color family, cast small hexagons or squares every session; later, arrange them like tessellated tiles on trays or picture frames.
Surface Magic: Coatings, Domes, and Repairs
One of the most economical uses for leftovers is surface enhancement. A few drops can dome the face of a coin pendant, refresh a scratched charm, or gloss a wood inlay. Thin smears level out brush strokes on small art panels or seal fragile paper edges. Micro-domes also transform printed stickers or labels into durable, glassy emblems for toolboxes and cases.
Keep an assortment of flat, non-porous items near your bench: ceramic test tiles, glass cab blanks, and sealed wood discs. When leftover mix is ready, add a bead and let surface tension do the rest. A toothpick or silicone-tipped tool guides the perimeter. Torch or pass a heat gun briefly to vanquish tiny bubbles—just avoid overheating thin pours, which can slump over edges.
Repairs thrive on leftovers. Fill hairline cracks in wood, rebuild chipped corners of decorative tiles, or lock wobbly chair glides in place with a tiny dab. For craft tools, a micro-pour can reinforce a loose brush ferrule or stabilize a mixed-media handle. A small silicone brush makes it easy to place adhesive-like amounts without mess.
Wearables: Micro-Jewelry and Functional Charms
Little batches are tailor-made for jewelry. Create gradient studs by dropping tint into a small cavity and swirling with a pin. Combine metallic flakes and a single glitter color for cohesive sparkle that doesn’t overwhelm tiny pieces. If you have open metal bezels, seal the back with tape and pour a paper-thin layer to set the stage for a miniature scene.
Try layered pours across sessions: a clear base with botanicals, then a tinted haze, finally a color-pop cap. This depth reads as sophistication in even the smallest pendant. Use offcuts of foils, decals, or transfer sheets for pattern without bulk. Punch a hole while the piece is leather-hard or drill carefully after cure. Make sure to finish with a coat of micro-wax for fingerprint resistance.
Functional charms are excellent travel companions for crafters: needle threaders embedded in small shapes, stitch markers with bright colors for easy counting, or mini tassel caps cast around thread bundles. Use leftover mix to cap knot ends inside a charm, locking everything permanently in place.
Home and Studio Helpers
Leftover material can up your studio’s organization game. Make cable clips: tiny C-shapes that snap onto shelf edges, guiding charging cords where you want them. Craft pen rests with shallow grooves. Cast drawer pulls that match your workbench colorway. Create color-coded knobs for storage bins so inventory is legible at a glance.
Another favorite: tiny feet for trays and electronics. A small pour into hemispherical cavities creates grippy shocks that elevate surfaces, protect tabletops, and reduce vibration during sanding or polishing. If you keep translucent and opaque accent chips on hand, you can match or contrast furniture finishes with precision.
Mixed Media With Wood, Metal, and Fabric
Resin loves partnerships. In wood, use shallow channels to inlay thin ribbons of color. Jewelers can test micro-riveted plates that carry resin accents as enamel substitutes. Stitchers can harden thread ends to create self-threading tips, then cast button centers featuring tiny fabric scraps behind a protective lens.
Paper-craft aficionados can embed postage stamps, pressed petals, or calligraphy. Before pouring, seal porous items to avoid outgassing bubbles. Once cured, cut and bevel the panel edges, then wax for a satin gleam. Consider adding metal leaf slivers to catch light and provide contrast to organic inclusions.
Color Alchemy With Small Quantities
Leftovers are perfect for building a personal color atlas. Swatch chips—small, flat casts labeled with ratios—become a portable color library. Maintain a grid of micro-tiles noting brand, pigment type, and load percentage. Testing interference powders, alcohol inks, or neon concentrates at tiny scales reveals their behavior in layers and under different lighting.
Try controlled gradients by loading one cup with clear and another with a strong tint. With a pipette, trade small amounts back and forth to generate a series of nuanced steps. Stack these chips later to plan large compositions. Metallic powder “dusting” inside a mold creates pearlescent veils that appear to float once cured.
Finish each session by blending a “mystery mix” from tints left on your palette—this becomes your signature hue for edging, grout-like gap fills, or a recurring accent that unites collections across seasons.
Miniature Art and Collectibles
Small isn’t second-tier; it’s a different stage for storytelling. Use leftover portions to create micro-landscapes trapped in droplet forms: a painted mountaintop sliver on the back layer, a clear middle for parallax, and a glossy front dome. Make tiny terrarium toppers with pebbles and moss sealed beneath. Cast fridge-gallery art featuring abstract color fields—each a bite-sized canvas.
For collectors, keep a series alive by dedicating molds to recurring themes: oceanic swirls, celestial constellations, or botanical cross-sections. Number the backs with archival ink before doming to protect the mark. Trade them with friends or bundle sets for craft-fair surprises.
Process: From Pour to Polish
Systematizing your micro-projects ensures nothing goes to waste. Consider this sequence:
- When your main piece is poured, assess remaining volume and working time.
- Prioritize quick-set tasks first: tiny cabochons, domes, or adhesive-style fixes.
- Next, fill parts that benefit from thin layers, like two-step color builds.
- Finally, create sample chips or color tests that can cure unattended.
Keep tools small: pipettes, toothpicks, silicone micro-spatulas, and syringe tips. A rotating tray or lazy Susan prevents reaching over fresh pieces. Use a dust cover—an inverted plastic bin or cake dome—to prevent airborne lint from settling while curing.
Techniques to Try With Tiny Batches
Marbling: Introduce two close colors and feather gently with a pin for a stone-like effect. Pinstripe veins with mica paste to sell the illusion.
Negative space: Place vinyl dots or stencils in cavities so cured pieces have crisp windows for light play.
Gilded edges: After cure, brush the perimeter with paint or metallic paste, then seal with a micro-dome for durability.
Micro-transfers: Apply waterslide decals to pre-cured layers, then seal thinly for an enamel-like finish.
Prismatic layering: Alternate transparent tints with clear layers so colors blend optically rather than physically, yielding depth in minimal thickness.
Encapsulation and Memory-Keeping
Leftover pours excel at delicate encapsulation. Trap a lock of hair, a pressed petal, or a snippet of a cherished map behind a clear lens. Build in stages to avoid floating. Use tweezers and a soft brush to position items. For photographs or paper, pre-seal with a compatible varnish to prevent bleeds and to stabilize fibers. Even a tiny droplet can protect a meaningful artifact you carry daily—on a keychain, as a zipper pull, or mounted to a bookmark.
Hardware and Findings: Making It Functional
Turn parts into products with findings: earring posts, pin backs, key rings, and bail mounts. Press metal hardware into a soft cure for a mechanical bond or glue post-cure with a compatible adhesive. Test-fit jump rings and chain thicknesses on sample pieces so you can scale production without surprises.
For shop efficiency, keep pre-measured baggies: five pairs of posts, five backs, ten o-rings. When leftovers appear, you can complete entire sets instead of one-offs, growing inventory in steady, low-stress increments.
Jigs, Guides, and Custom Tools
Use small pours to build shop aids. Cast a right-angle corner block for clamping small frames. Make sanding grips that match the contour of common edges you finish frequently. Create a bench stop that keeps tiles from sliding during cutting. These incremental upgrades save time during every future project and transform leftover material into durable studio infrastructure.
Advanced Mini Methods: Pressure, Heat, and Texture
If you work with visible bubbles or intricate details, a small pressure pot or vacuum chamber is overkill for some studios, but miniature pours are fast to cycle. If you have access, tiny parts degas and cure quickly, consuming little energy and revealing how your formulation behaves under pressure.
Experiment with texturing films, lace, or embossed papers pressed against curing surfaces for tactile finishes. Gentle heat can accelerate gel phases; use sparingly and track the timing so you don’t overshoot the point where material flows. Save these timings in your project journal.
Finishing: Demolding, Trimming, and Polish
Small parts deserve big finishes. After demolding, inspect edges and flash. Trim with a sharp blade while the piece is fresh if your formulation allows, or move straight to micro-abrasives. Work through grits wet to reduce dust, graduating carefully to remove scratches. Pay attention to corners; they reveal craftsmanship at a glance.
Buff with flannel or felt wheels, use plastic polishes designed for clarity, and finish with a breathable microcrystalline wax for a tactile, smudge-resistant surface. For matte aesthetics, end at a mid-grit and stop before glazes. The goal is intentionality, not default shininess.
A word on sanding dust: Collect with a damp cloth, and avoid dry-air blasts that send particles aloft. Even tiny work should respect your lungs and workspace cleanliness.
Troubleshooting Leftover Batches
Sticky surface? You may have under-mixed or faced temperature swings. Gently scrape off the tack, then apply a thin, correctly measured top coat. Milky haze? Likely moisture contamination or microscopic bubble scatter—warm the next mix slightly and ensure your additives are dry. Soft corners? Over-pigmentation or ratio drift; keep a swatch with minimal tint load to compare hardness.
If something seems off, label the piece “test” and keep it. Your future self will be grateful for physical examples documenting what not to repeat. These become your personal encyclopedia of cause and effect.
Sustainability and Responsible Waste
Thoughtful use of leftovers reduces material and cost, but sustainability includes disposal. Let fully mixed remnants cure before discarding. Wipe tools with a paper towel before washing so minimal residue enters wastewater. Consider reusable silicone mixing sticks, and switch to graduated silicone cups for decreased loss. Save cured offcuts for later as spacer shims, color chips, or inlay fragments.
A voided batch doesn’t have to be trash. Chop fully cured pieces into terrazzo chips and sprinkle them into a new pour. This confetti look sings in coasters, trays, and pen blanks, while transforming accidents into art.
Workflow Rituals for Zero-Waste Casting
Build habits that anticipate leftovers:
- Keep a “micro-mold” tray within arm’s reach.
- Stage a handful of items ready for doming or spot-coating.
- Pre-label tiny zip bags for storing finished parts by color family.
- Maintain a swatch ring—add at least one chip per session.
- End each pour by filling a color-wheel segment or sample tile.
Rituals turn randomness into rhythm. Over time, you’ll assemble a drawer of perfectly finished components ready to become earrings, bag charms, or embellishments on demand.
Frequently Overlooked Techniques
Micro-insets for bookbinding: Cast ultra-thin plates to inlay into journal covers. Pre-score hinge lines for subtle flex and glue with archival paste.
Edge guards: Create tiny U-channels to protect corners of sketchbooks or to finish macramé ends elegantly.
Skid dots: Place dime-sized hemispheres under planters or speakers to isolate vibration and protect furniture.
Palette tiles: Cure thin tiles to serve as permanent paint-mixing palettes—pigments scrape off easily from slick surfaces.
Shadow pebbles: Dome black-tinted ovals for minimalist desk zen gardens; their weight and sheen provide calming tactile focus.
Quality Control for Small Parts
Consistency matters even in tiny pieces. Batch-test hardware adhesion, colorfastness under light, and scratch resistance. Photograph your micro-objects with a coin or ruler for scale, documenting dimensions for future reproduction. Package sets with care—individual cells or tissue wraps—to avoid micro-abrasion during storage or shipping.
Scaling Up Without Losing the Magic
When a micro-piece becomes a hit, adapt the workflow for multiples. Create a master and duplicate molds to cast five or ten at a time without overextending yourself. Keep color recipes on index cards with exact drop counts, noting ambient temperature and cure behavior. Schedule finishing as a batch: wet-sand all, then polish all, then mount findings together to streamline motion.
Design Language Through Limited Leftovers
Artists develop recognizable signatures from constraints. Perhaps your small pours always include one band of iridescent powder, or your flora pieces use a consistent botanical species. Those choices—initially driven by what was on the bench at the end of a session—become a brand language over time.
Let the scale inform storytelling. Micro-objects invite intimacy: pocket stones etched with a single word, token-sized affirmations, or a pair of studs that tell a tiny narrative from left ear to right. These modest forms often resonate more deeply with buyers than sprawling artworks.
Smart Kit for Leftover Sessions
Maintain a dedicated caddy:
- Silicone micro-spatulas, toothpicks, pipettes
- Mini torch or heat pen
- Dust cover and silicone mat
- Tiny level and ruler
- Pre-cleaned bezels, magnet backs, earring posts
- Labeling tape, fine marker, small scale
- Assorted pigments in pinches: powders, inks, pastes
When your main pour is complete, this kit stands ready so creativity outruns the clock.
Confidence Through Samples
The most overlooked benefit of leftover pours is confidence. Small, repeated experiments demystify surface tension, bubble movement, layer adhesion, and cure windows. You’ll learn when to place foil flakes, how long to wait before adding a second layer to avoid bleed, and what temperature swings do overnight. With each tiny success, you remove friction from future ambitious builds.
Vocabulary That Pays Off
Knowing a few technical terms helps streamline notes and communication with other makers. Document gel time, cure hardness, and open time. Define your preferred doming viscosity—the moment material flows but doesn’t overspill. Track exotherm response in small volumes to anticipate how thin layers behave. The language you build around your micro-work becomes a toolkit for faster problem-solving.
Risk-Free Innovation via Open-Ended Play
Preserve one slot in your mold tray for pure play. Dump the final drops there, layer after layer, never planning the outcome. After several sessions, slice it into cross-sections. You’ll discover unexpected color blends, texture junctions, and composition cues you can deploy intentionally next time. Play doesn’t just produce scraps—it produces strategies.
From Studio to Market
If you sell your crafts, leftover-based items offer accessible price points and impulse-buy appeal at markets. Display them on cards with clear photography and short stories: “Pressed fern from last spring’s hike” or “Terrazzo from studio offcuts.” Bundle sets—stud pairs, magnet trios, or gradient buttons—to nudge collectors toward multiples.
Use consistent backer cards and recyclable packaging. Note care instructions: avoid prolonged heat, wipe with a soft cloth, and store separately to prevent scratching.
Responsible Tool Care
Wipe mixing tools before cure, not after. A spritz of isopropyl on a paper towel lifts tint residue. Silicone spatulas and cups peel clean once fully cured, leaving no flakes. For droplet control, stash a few disposable micro-cups so you’re never tempted to pour straight from a large vessel and overshoot small cavities.
Minimalism Meets Maximal Delight
There’s elegance in doing a lot with a little. A milliliter becomes a gloss that revives a cherished object, a magnet that organizes a chaotic fridge, a bead that completes a favorite bracelet. When you cultivate the habit of saving and shaping leftovers, you don’t just prevent waste—you design a studio where serendipity has structure and every pour ends with a small victory.
Closing Thoughts
Leftover portions invite humility and play: small time windows, tiny canvases, and the thrill of immediate results. Keep your micro-mold tray loaded, your findings within reach, and your notes precise. With this framework, every session concludes with new parts, new learnings, and a richer visual language. In the end, the pieces made from scraps often carry the most heart—not because they were an afterthought, but because they were forged at the intersection of resourcefulness and delight.
Quick Reference: Common Questions
How do I reduce bubbles in tiny pours? Warm the mixture slightly, pour slowly, and pass a low flame quickly across the surface. For delicate botanicals, seal first and pour in two stages: a thin tack layer, then the main fill.
What if the surface stays tacky? Scrape lightly, wash with a mild solvent-safe cloth, and apply a fresh thin coat at correct ratio and room temperature. Consider a dust cover to prevent humidity issues.
Can I drill small pieces? Yes. Use sharp bits, low speed, and back the piece with wood. Dip the bit in water to keep temperature down and avoid micro-cracks.
How do I keep edges crisp? Overfill slightly, then sand flat on a wet sheet over glass. Re-dome if a glossy perimeter is desired.
What’s a rapid win for absolute leftovers? Fill a few open bezels, make two magnet dots, and add one color-chip to your swatch ring. You’ll thank yourself during the next design session.
One Last Nudge
The distance between waste and wonder is measured in seconds and inches: the seconds you spend pre-staging a few forms, and the inches of bench space you reserve for small work. Set your studio up to say yes to leftovers. The tiny objects that emerge will organize your tools, embellish your life, and teach you more about material behavior than any tutorial alone.
Glossary Snapshots
molds: Reusable silicone or rigid forms that shape liquid into predictable solids.
demolding: The act of removing a cured piece from its form without damaging edges.
inclusions: Objects embedded within a cast, such as botanicals, metals, or pigments.
casting: Pouring liquid material into a cavity where it cures into a solid.
encapsulation: Sealing delicate items within a clear or tinted matrix for protection and display.
sanding: Abrading a surface with progressively finer grits to refine edges and clarity.
epoxy, polyester, and UV resin: Common binder chemistries with different cure methods and properties for craft applications.
