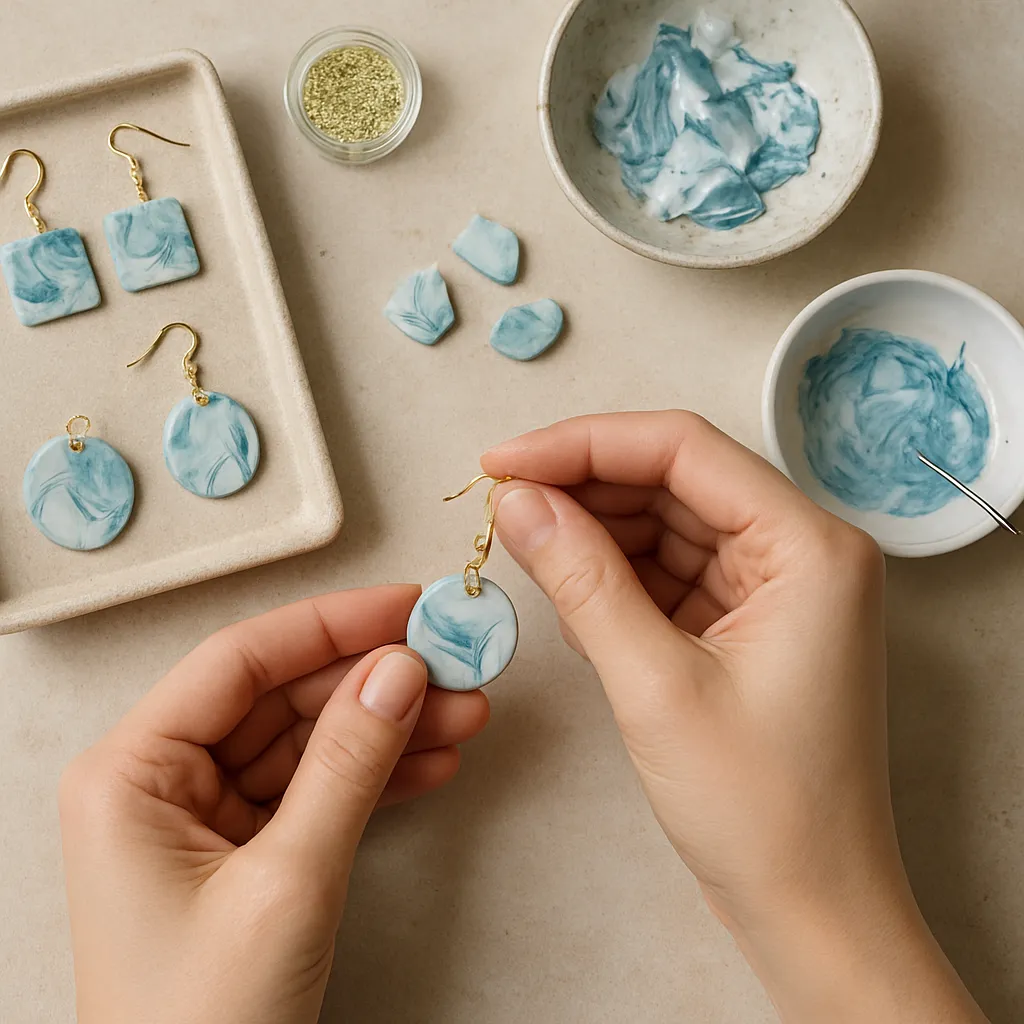
Marbled jewelry captures the quiet drama of stone, the movement of water, and the rhythm of handwork in a form you can wear. It is equally at home in minimal, modern silhouettes and in ornate, old-world settings, making it a versatile path for anyone who enjoys patient craftsmanship and the poetry of controlled chaos. In the guide below you will learn not only how to create convincing swirls and veins, but also how to plan palettes, choose substrates, finish pieces for daily wear, and adapt techniques to your own studio workflow. Whether your aim is to imitate classic Carrara, bold malachite, or galaxy-like nebulae, the heart of marbling is learning to choreograph chance.
What Makes Marbled Jewelry Irresistible
Humans read stone as a record of time. The bands of agate, the wisps in onyx, and the shocks of lightning in lapis reveal pressure, heat, and eons of sediment. When you echo these signatures in jewelry, you harness a language people intuitively understand, even if your materials are contemporary. The appeal is a balance of contrast (light/dark, matte/gloss), rhythm (repeatable motifs vs. unexpected breaks), and believability (vein angles, edge flow, fracture lines).
But unlike quarrying or carving, handicraft marbling lets you write your own geology. You can embed metal leaf for reflective fissures, concentrate color where a cabochon’s dome will magnify it, or feather lines to mimic mineral intrusions. You can also make ethical choices—using lightweight substrates and non-extractive materials—to reduce impact while still delivering visual richness.
Tools and Materials for Studio Success
Core Toolkit
- Cutting tools: craft blades, tissue blades, or flexible micro-saws for ultra-thin slices
- Forming tools: rollers, brayers, acrylic rods, and silicone-tipped shapers
- Measuring and layout: calipers, templates, stencils, and graph paper
- Heat sources: oven (for clay), heat gun or torch (for resin bubble release), hot water bath (for controlled warming)
- Surface prep: sanding sponges, micro-mesh pads, polishing wheels, and buffing compounds
- Detail tools: needle tools, toothpicks, styluses, fine brushes, and cotton swabs
- Safety: nitrile gloves, respirator for resin or spray varnish, eye protection, and adequate ventilation
Substrates and Bases
Marbling is a surface phenomenon that becomes convincing when your base supports fine detail and stable edges.
- Clay-based: polymer clay slabs and cabochons allow you to build pattern into the material rather than merely on the surface. They are lightweight and can be drilled cleanly after curing. Introduce controlled translucency for depth that mimics stone.
- Resin-based: open bezels, silicone molds, and shallow cup settings hold pigmented epoxy or UV resin. Ideal for crisp, high-gloss domes and glasslike depth.
- Metal blanks: brass, copper, or steel shapes can be primed and marbled with nail polish or acrylics, then sealed. Perfect for earrings where low mass and high sheen matter.
- Wood and paper composites: sealed hardwood or engineered paper (resin-impregnated) accepts swirled paints and can be finished to a silky luster.
- Glass cabochons: flat-back domes magnify paint you marble on their underside; set into bezels for a stone-like effect.
Colorants and Media
- Alcohol inks: intense dyes that bloom vividly in resin, great for airy veining
- Mica powders: pearlescent or interference pigments for mineral sparkle
- Acrylic paints: fluid or high-flow formulas for water marbling and wood/metal surfaces
- Oil-based enamels or nail polish: float readily on water for quick-dip techniques
- Dry media: chalk pastels or artist’s crayons shaved into clay for soft, dusty veins
- Metal leaf and foils: add reflective “fault lines” or caldera-like glints
Color and Pattern Foundations
Good marbling relies on a disciplined palette. Limit yourself to two main hues plus an accent and a value anchor (often white or black). Consider proportion: a 60/30/10 split keeps the pattern legible. Think about scale as well; very fine veins are elegant on studs but may vanish on large pendants, where bolder swirls read better at a distance.
Reference natural stones to train your eye. Carrara marble runs cool gray with subtle, branching lines; Calacatta is higher contrast with dramatic, thick veins; malachite features nested bands and eye-like rings; lapis brings ultramarine fields with sparse, golden pyrite-like flecks. Sketch a “flow map” indicating where veining should concentrate to guide your forming and slicing later.
Polymer Clay Marbling: Building Pattern into the Material
Clay marbling is forgiving, quick to iterate, and incredibly robust for daily-wear jewelry. It lets you place pattern throughout the thickness of the piece, so sanding, beveling, or drilling never exposes a plain underlayer.
Conditioning and Palette Setup
- Condition each color until soft and streak-free. Roll into equal-thickness sheets or ropes.
- Reserve a clean, neutral surface for whites and pale tones to avoid tinting.
- For stone-like realism, include a tiny proportion of translucent clay; it diffuses edges and adds depth after curing.
Classic Swirl Method
- Roll ropes of your chosen colors and bundle them lightly without compressing to a solid mass.
- Twist the bundle one or two turns, fold, and twist again. Stop before colors smear—clean separation is your friend.
- Compress the bundle into a loaf and slice thin slabs with a tissue blade. Each slice is a ready-made marbled panel for earrings, pendants, or ring faces.
Feathered Veining
- Lay a sheet of base color. Add wisps of a contrasting hue in thin snakes.
- Place a second thin sheet atop and drag a needle tool gently through the sandwich, perpendicular to the snakes, to feather lines.
- Roll lightly to meld. The result suggests delicate mineral intrusions rather than broad swirls.
Mica Shift and Faux Stone
Metallic-mica clays align their particles under pressure, creating bands that appear to shift under light. Combine them with marbled stacks to mimic layered stone. Carve shallow patterns into a compressed sheet, then shave the high spots; the design remains as a ghost image, a powerful illusion in cabochon centers.
Layered Stack (Inspired by Mokume-gane)
- Stack alternating thin sheets of two to four colors (include a metallic or leaf layer for glints).
- Compress gently, then distort selectively with ball tools or dowels.
- Shave off ultra-thin slices from the stack’s face; the exposed topography yields swirling top maps. Apply these to a base slab and roll flat.
Curing and Surface Finish
- Bake according to manufacturer’s recommendations, using an oven thermometer for accuracy. Tent with parchment to prevent scorching.
- Wet-sand from 400 through 3000 grit, then polish. A resin or wax finish can elevate luster, but an uncoated satin can feel convincingly stone-like.
Resin Marbling: Slow Rivers of Color in High Gloss
Resin excels at depth and gloss. Because it self-levels, it captures delicate filaments and misty transitions if you respect its working time and control its viscosity. Use two-part epoxies formulated for jewelry or doming; UV-cure resin is a quick alternative for small pieces and layered effects.
Setup and Safety
- Work in a dust-free, ventilated space. Wear gloves and a respirator rated for organic vapors if recommended by the manufacturer.
- Warm resin bottles in a water bath for a few minutes to reduce bubbles and improve flow.
- Level your work surface so domes don’t creep over edges.
Mixing and Pigment Strategy
- Mix small batches thoroughly, scraping sides and bottom. Rest the cup briefly to allow bubbles to rise.
- Tint separate micro-cups lightly; overly saturated resin turns opaque and muddies swirls.
- Reserve clear resin to thin colors on the fly and to create transparent windows.
Swirl Control
- Pour a base layer into a bezel or mold. Add drops or fine lines of contrasting tints.
- Use a toothpick to drag through droplets in S-curves. Clean the tip frequently to prevent color transfer.
- For cell-like blooms, touch the surface with high-proof alcohol on a micro-brush; for crisp veining, use a paint pen after partial set, then overcoat.
- Flash bubbles with a heat gun held at a distance; avoid blasting patterns out of place.
Doming and Layering
Thin, multiple pours build optical depth. Embed a foil fragment or micro-flake between layers to simulate a reflective seam. If using UV resin, cure each layer briefly to “gel” before adding the next; this prevents pigment migration and preserves sharp filaments.
Water and Dip Marbling on Metal, Wood, and Glass
Dip marbling creates swirling skins of paint you can transfer to primed blanks, glass cabochons, or sealed wood. You can work with nail polish, oil-based enamels, or properly thinned acrylics over a prepared bath.
Bath Preparation
- For acrylics, add a pinch of borax to lukewarm water to create a lightly “sized” bath that supports paint. Skim often to remove skins.
- Nail polish floats on plain water; work swiftly as it forms films within seconds.
Patterning and Dipping
- Drip colors onto the water surface, alternating hues. The first drop spreads widest; plan accordingly.
- Draw with a stylus to create veins, chevrons, or scallops. Aim for decisive strokes—overworking risks muddiness.
- Dip the piece at an angle, submerge, and sweep away residual film before lifting to keep the pattern crisp.
Sealing
- Let the transfer dry completely. Seal with a compatible clear coat (water-based over acrylics, solvent-based over enamels), or encapsulate under a resin dome for depth and protection.
Surface Enhancements and Mineral Illusions
- Vein inlays: draw fine lines with a metallic paint pen across cured resin or baked clay, then lightly scuff to soften and overcoat.
- Crackle lines: apply a controlled crackle medium to create age-like fracture networks; pick them out with diluted pigment.
- Inclusions: add tiny, torn leaf to simulate pyrite flecks in “lapis,” or green-glitter microflakies for “aventurine.”
- Edge bias: let veins align diagonally across earring pairs for dynamic symmetry.
Shaping, Drilling, and Assembly
Pattern is only half the story; the silhouette and wearability complete the outcome. Think in terms of weight distribution, skin contact, and ergonomics when choosing forms.
- Earrings: keep large statements lightweight by using hollow clay domes or thin resin domes over open bezels.
- Pendants: bevel backs so they lie flat without catching; consider a subtle convex front to amplify visual depth.
- Rings: set small, domed cabochons into low-profile bezels that won’t snag fabric.
- Drilling: use a pin vise for clay, stepping up bit sizes gradually. For resin, flood drilled holes with a drop of thin resin or CA glue to strengthen walls.
- Findings: pair marbled surfaces with minimal, high-quality metals to avoid pattern competition—think fine curb chains, slender ear wires, or tiny rivets.
Finishing, Protection, and Daily-Wear Performance
Durability is about protective layers, edge refinement, and smart material pairing. If your jewelry will see sunlight, track colorfastness of dyes and choose UV-stabilized resins. If it will brush against clothing or skin oils, select a finish that resists abrasion and stains.
- Sanding protocols: progress steadily; skipping grits leaves haze. Wet-sand to control dust and maintain flatness.
- Coatings: thin, multiple coats beat a single heavy one. Resin caps protect paint and amplify depth; wax or varnish can preserve a velvety clay satin.
- Metal care: if you embrace patina, seal it where it contacts skin to avoid transfer; if you prefer brightness, use tarnish-resistant alloys or clear coats.
- Anti-yellowing: store resin in the dark during cure, and include UV inhibitors if your formula allows.
- Edge rounding: a micro-chamfer prevents chipping and improves wearer comfort.
Designing Cohesive Collections
Collections sell stories. Build around a palette anchored in two neutrals and one signature hue, then vary scale: tiny studs with tight marbling, medium pendants with sweeping rivers, and a single “hero” piece with dramatic veining. Repeat micro-motifs—like a diagonal vein or a speckle field—across SKUs to signal kinship. Name series after natural references (Ravine, Glacier, Hearth) and present them with consistent carding, waxed cords, or matching chains for a unified look.
Troubleshooting: From Mud to Marvel
- Muddy colors: too much blending or too many hues. Reset with a limited palette and stop earlier in the twist/drag cycle.
- Flat-looking slabs: add value contrast and a pinch of translucent components. In resin, pour in layers to restore depth.
- Resin bubbles: warm components, stir gently, and pass a heat gun briefly. Consider pressure or vacuum chambers if you scale up.
- Delamination on dip marbling: improve surface prep—degrease and prime. Seal immediately after transfer.
- Clay surface shine before finish: it’s burnish, not polish; wet-sand evenly to get a consistent sheen before topcoating.
Ethical, Sustainable, and Safe Practice
- Waste minimization: save resin drips to make mosaic cabochons; re-marble clay offcuts into inner layers of new slabs.
- Solvent and resin disposal: follow local guidelines; never pour leftover resin down drains—cure it fully before discarding.
- Material transparency: label metals and finishes for buyers with sensitivities; use nickel-safe findings.
- Studio hygiene: segregate food and craft areas, and ventilate when heating or spraying finishes.
Advanced Texture and Depth Tricks
- Ghost veining: in resin, draw lines with a tiny amount of clear tinted barely above zero opacity; they appear only in raking light.
- Underpainting: on primed metal, stipple tonal clouds before marbling for geological “substrata.”
- Faux inclusions: embed micro “geodes” by surrounding a reflective flake cluster with a halo of darker tint.
- Directional sanding: on high-grit satin clay, sand veins in their flow direction to mimic wear patterns of real stone.
Practice Routines to Train Your Hand
- Line economy drills: in a sketchbook, practice single-stroke S-curves; aim for confidence, not perfection.
- Value ladders: mix five steps between white and your key hue, then marble with only those to learn control.
- Scale studies: render the same pattern on a 6 cm pendant and a 1 cm stud to understand visual loss at distance.
- Palette sprints: set a 20-minute timer to complete one micro-batch of earrings; constraints sharpen decisions.
Hardware, Weight, and Comfort
Wearers notice weight and balance before pattern. Keep large earrings under 7–10 grams each by hollowing clay or using thin resin domes. Situate pendant bails near the center of mass so pieces lie flat. Round every touch-point that meets skin. Choices like flexible silicone backs and lever-back ear wires improve security and day-long comfort—subtle details that extend a piece’s perceived longevity.
Photography, Packaging, and Presentation
Marbled surfaces can glare. Diffuse light with a softbox or north-facing window, and angle pieces slightly to avoid hotspot reflections. Shoot macro to reveal tiny veins—buyers love to inspect details. For packaging, choose neutral backers that won’t compete with color. Consider including a small story card explaining your process; it transforms an object into a keepsake.
Care and Maintenance for Collectors
- Storage: keep resin domes out of prolonged direct sunlight and away from high heat.
- Cleaning: wipe with a soft, damp cloth; avoid alcohol on sealed paints unless you know the clear coat’s resistance.
- Metal: refresh shine with a gentle polish cloth; reseal intentional patinas if wear exposes bright metal.
- Avoid impact: domed pieces are strong but can chip at high edges—micro-chamfers help.
Case Studies: Translating Stone into Wearable Art
Quiet Carrara
Palette: white, cool gray, a touch of black. Technique: polymer layered stack with translucent accents; feathering for delicate branches. Finish: satin, to echo honed marble countertops. Hardware: brushed steel for cool harmony.
Regal Lapis
Palette: ultramarine resin with a whisper of violet, sparse gold leaf specks. Technique: two-layer doming with clear windows over flecks to simulate pyrite. Finish: high gloss. Hardware: warm brass to heighten contrast.
Lively Malachite
Palette: three greens stepping light to dark. Technique: clay canes compressed and sliced to form concentric bands; select slices with “eyes.” Finish: semi-gloss to maintain depth without full mirror. Hardware: gold-tone findings to complement green warmth.
Adapting Techniques to Scale and Market
For boutique runs, standardize bezel sizes and template shapes so you can batch-process sanding and polishing. Build color recipes (by volume or sheet thickness) to keep palette continuity across drops. If selling online, produce multiples of bestsellers while rotating seasonal accents—a copper-veined “Autumn Quarry,” a pale “Winter Frost,” a sea-glass “Tidal Pool.”
Checklist: A Repeatable Workflow
- Define palette and reference stone behavior (vein thickness, direction, contrast)
- Prepare base (clay conditioning; bezel cleaning; priming, if needed)
- Create marbled panels or pours using your chosen medium
- Shape, cure, or set; refine edges and faces through measured sanding
- Add enhancements (veining pens, inclusions, selective leaf)
- Seal or dome for protection; allow full cure
- Drill and assemble with quality findings; test comfort and balance
- Photograph under diffuse light; package with consistent branding
A Short Glossary for the Studio
- Vein: a line of contrasting color that suggests mineral deposition
- Feathering: dragging a point through stacked layers to blend edges
- Bloom: the spreading of dye or ink in resin, often circular
- Leaf: ultra-thin metal sheets that create reflective inclusions
- Sizing: adding a small amount of thickener or salt to water to help paints float
Common Myths, Gently Debunked
- “More colors equal better marbling.” In practice, restraint preserves clarity; three hues can outshine eight.
- “High gloss is always superior.” Honed or satin finishes can be more stone-like and wear-friendly for daily pieces.
- “Resin is indestructible.” It’s tough but benefits from thoughtful edges, UV care, and compatible coatings.
From Experiment to Signature Style
The leap from technique to voice happens when you curate what to leave out. Maybe your signature is a single lightning vein that jumps across matched earrings; maybe it’s foggy translucence around a pendant’s rim, or a pencil-thin metallic fault that appears only at certain angles. Track what excites you in a studio log: which ratios gave milky depth, which sands revealed silk, which accents turned ordinary swirls into extraordinary mini-landscapes.
Final Encouragement
Marbling rewards curiosity. Each pull from a stack, each drag of a stylus, each pour of resin participates in a dialogue between your plan and the material’s will. There is no single right pattern—only coherent choices that help viewers believe in your miniature geology. Commit to small, steady practice; let your hands learn the weight of a blade and the speed of a pour. In time, your pieces will carry the quiet authority of well-chosen veins, believable depth, and finishes that speak of deliberate care, from the first color mix to the last gentle polish. And with that, your path in wearable marbled art will feel less like imitation and more like authorship—rooted in material fluency and guided by enduring polymer know-how as much as by playful experimentation.
