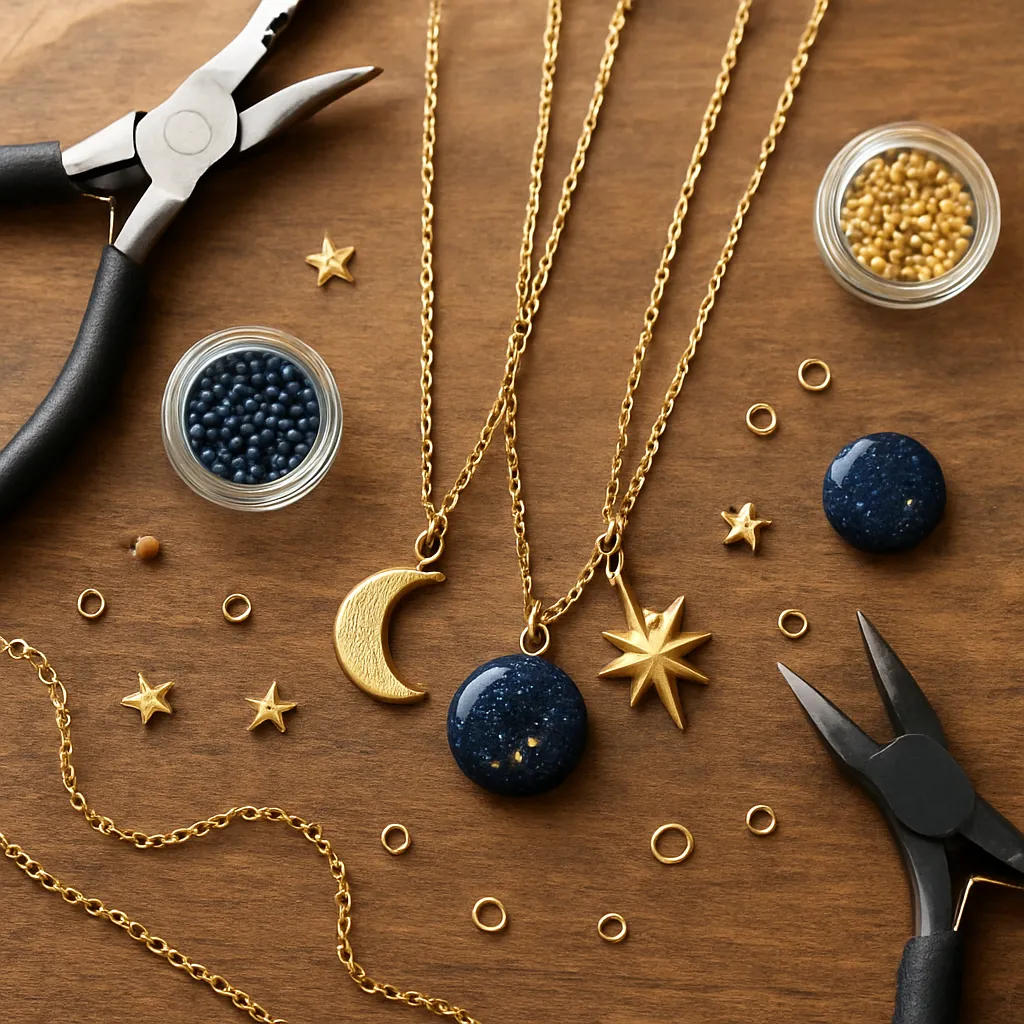
Every sky has a story, and a necklace can carry a constellation of it close to the heart. Celestial-themed jewelry bridges art and astronomy—moons, stars, and comets distilled into wearable tokens that feel both timeless and freshly personal. This guide embraces the joy of making your own starry pieces by hand: it balances studio-tested methods with poetic design thinking, so you can transform metal, resin, clay, and wire into small orbits of beauty. Whether you’re a weekend tinkerer or a seasoned maker focused on craftsmanship, you’ll find techniques, safety cues, and finishing secrets that help your ideas take flight.
Why Celestial Motifs Endure
People have worn the sky for millennia. In ancient Mesopotamia, cylinder seals mapped constellations in tiny reliefs; Egyptian collars scattered gold stars across blue glass; Renaissance navigators tucked astrolabe pendants under their coats; and Romantic and Art Nouveau jewelers celebrated crescents and comets with improbable grace. Part of the power lies in symbolism: a star for guidance, a crescent for cycles and growth, a sunburst for courage, an eclipse for transformation. These meanings cross borders and eras, letting a simple pendant speak—quietly or boldly—to milestones, vows, and personal myth.
Celestial imagery also compresses distance. A sliver of moon over a city roofline is the same moon seen from desert dunes. Wearing constellations translates that shared view into something intimate. The theme invites a harmony of texture (hammered craters, glossy nebulae, satin-finished stardust) and scale (from discreet charms to theatrical talismans). It rewards close looking, asking the hand to match the eye in steadiness and curiosity.
Materials and Tools That Invite the Cosmos In
Metals and Chain
Brass and copper offer warmth and take patinas beautifully; sterling silver provides crisp reflectivity; gold-fill balances luxury and cost; stainless steel favors durability and low maintenance. For chains, consider delicate cable or satellite chain for subtle sparkle, or box and snake chain for smooth, modern silhouettes. Match bail sizes to jump rings (4–6 mm for most pendants) and use 20–22 gauge wire for frames, 26–28 gauge for fine wrapping. Keep in mind finish contrast: a matte pendant on a glossy chain can energize your composition without adding clutter.
Clays, Resins, and Paper
Polymer clay excels at galaxy blends and textured lunar surfaces; it cures at low heat, accepts mica powders, and buffs to a satin glow. Two-part epoxy resin captures depth and suspended stars; UV resin speeds single-layer work but needs mindful curing to avoid brittleness. If you incorporate printed star maps, seal paper thoroughly to an archival standard before embedding in resin to prevent bleeding.
Stone, Glass, and Additives
Labradorite flashes aurora hues; moonstone glows with quiet adularescence; lapis and onyx create night-sky fields; sunstone sprinkles coppery confetti. Crushed opal, mica flakes, and responsibly sourced glitter lend luminosity to nebula pours. Phosphorescent powders create gentle night-glow—use sparingly so your piece remains elegant in daylight.
Findings, Clasps, and Wire
Stock lobster clasps for security, toggles for flourish, and magnet clasps for those who prefer effortless closure. Niobium and titanium findings are ideal for hypoallergenic builds. Store jump rings, crimps, and headpins by metal and size; label them clearly to keep your workflow calm and repeatable.
Core Tools
- Bench block and brass/rawhide hammer for texture without marring
- Metal letter and symbol stamps (stars, moons, dots) for sky glyphs
- Flush cutters, round- and chain-nose pliers for wire finesse
- Needle files, sanding sticks (400–3000 grit), and polishing cloths
- Resin supplies: silicone mats, mixing cups, scales, heat tool or alcohol sprayer
- Clay tools: acrylic roller, texture sheets, blades, oven thermometer
- Safety gear: nitrile gloves, respirator or particulate mask, eye protection
Safety and Workspace
Ventilate resin and sanding work; keep food far from your bench. Dedicate ovenware to clay only. UV-curing requires skin and eye protection. Secure long hair, wear fitted sleeves, and keep a small bowl of water near your soldering or texturing station for quenching hot metal. Label chemical containers clearly. Safety supports curiosity; it lets you practice precision without distraction.
Design Blueprint: Planning for Balance and Story
Before you touch a tool, script your sky. Start with a 3×5 sketch: choose a central theme (e.g., waxing crescent, Orion’s belt, a meteor trail), decide the pendant shape (coin, bar, marquise), and pick a color mood (deep ultramarine, slate gray, champagne gold). Sketch chain lengths—14–16 inches for chokers, 18 inches as a classic drop, 20 inches for layering. Think about motion: will a moon charm swing over a fixed sun disc? Will a hidden back engraving carry a wish?
Scale, Proportion, and Rhythm
Celestial forms feel right when their sizes breathe together. Arrange major, minor, and accent elements as you would stars in a night field. Test with paper cutouts taped to a mirror; check for symmetry or a deliberate tilt. Sometimes the most elegant layout is an asymmetrical cluster with one bright focal and three dimmer echoes.
Color and Finish
Choose finishes the way a painter chooses brushes. Polished edges around a matte face give a crisp crescent. Brushed metal beside glossy resin mimics cloud and clear sky. Enamel dots can punctuate a darkened silver plate like city lights from orbit.
Meaning and Personalization
Assign intent to each choice: a spouse’s birth constellation, a honeymoon new moon, the date of a first launch watched from the backyard. Add coordinates, initials, or a small debossed dot for each year together. Your hands are telling a story only you can author.
Project 1: Stamped Moon-Phase Bar Necklace
What You’ll Make
A horizontal metal bar with the eight lunar phases, darkened to reveal texture and hung on a delicate chain. Minimal, readable, and endlessly giftable.
Materials
- Metal bar blank (sterling, brass, or copper), approx. 40 x 6 mm
- Star and moon stamps or circle/dot stamps for phases
- Bench block, tape, and brass hammer
- Steel hole punch (1.5–2 mm) if blank lacks holes
- Liver of sulfur or enamel paint for darkening
- 600–1500 grit sandpapers, polishing cloth
- Jump rings, chain, clasp
Steps
- Mark your centerline and phase positions with washi tape. Anchor the bar on the bench block.
- Stamp phases from center outward for visual balance. Strike with confidence; a hesitant tap can double-stamp.
- Punch holes at ends if needed; deburr with a needle file.
- Oxidize with liver of sulfur or fill impressions with enamel paint. Rinse or cure, then sand the face lightly to brighten the high spots.
- Attach jump rings, add chain, and test drape on a stand or your neck to confirm hang.
Tip: If a stamp lands crooked, restamp a deliberate star cluster around the error to integrate it. Celestial themes are forgiving to happy accidents.
Project 2: Resin Galaxy in a Bezel
What You’ll Make
A round or oval bezel filled with layered resin: midnight base, nebula mists, and suspended stars—subtle by day, dreamy by evening.
Materials
- Bezel cup (10–30 mm)
- Two-part epoxy resin and hardener
- Alcohol inks or mica powders
- Micro-glitter, crushed opal, and tiny metal star confetti (optional)
- Sealant for any paper insert
- Heat tool or isopropyl alcohol sprayer
Steps
- Seal bezel interior if raw brass could discolor resin. Pre-warm bottles in a hot-water bath for better flow.
- Mix resin by weight per manufacturer’s ratio. Stir slowly to avoid bubbles.
- Tint a first pour to deep blue-black; fill the bezel only one-third. Pop bubbles with brief heat; cover to dust-protect; cure partially.
- Add a translucent layer with mica or ink; set a few metal stars or opal bits. Nudge them gently so they don’t all gravitate to the center.
- Finish with a clear doming layer. Watch edge tension to prevent overflow; rotate the bezel under light to check evenness.
Tip: Keep layers thin. Depth emerges from stacking—like astronomy itself—not from a single thick pour. Thin strata also reduce cure heat and warping.
Project 3: Wire-Wrapped Constellation Pendant
What You’ll Make
An airy frame with beads at star positions connected by fine wire, tracing a favorite constellation. Elegant alone, iconic in layered sets.
Materials
- 20–22 gauge wire for the frame (sterling, brass, or gold-fill)
- 26–28 gauge wire for linking stars
- Seed beads or tiny gemstone rounds for star points
- Mandrels or dowels, pliers, cutters
Steps
- Shape a simple frame (circle, teardrop) with 20 gauge wire; forge lightly for strength.
- Study a star chart; mark bead positions on a paper template placed under your frame.
- Wrap 26–28 gauge wire onto the frame; slide on beads where stars live; bridge them with sparse, straight segments that suggest lines without crowding.
- Secure wire tails neatly behind the frame; file any burrs; add a discrete bail.
Tip: Vary bead sizes to show magnitude—one or two larger “anchor” stars keep the eye oriented, a quiet nod to navigators of old.
Metal Techniques: Texture, Doming, and Darkening
Texturing a circular blank with a peen hammer suggests craters; a dapping block domes discs into soft moons. Use tape to keep blanks from skidding while stamping tiny starbursts. For oxidizing silver, liver of sulfur delivers nuanced gradients; for brass or copper, ammonia fuming (sealed container, monitored) can turquoise-spot a “planet” or halo a crescent. Seal reactive finishes with microcrystalline wax to tame rub-off. A thoughtfully managed patina distinguishes handmade from mass-market shine.
Polymer Clay Galaxies and Moons
Blend a skinner gradient from black to ultramarine to violet; sheet it thin; dust with mica; then twist and re-sheet to mimic nebulosity. For moons, texture with crumpled foil, press a few soft craters with a ball stylus, and brush edges with silver mica for rim light. Bake with an oven thermometer to avoid scorching. Sand through 400–3000 grits and buff for a velvety luster, then finish with a thin varnish if needed for abrasion resistance.
Enamel, Gilding, and Inlay
Cold enamel (two-part epoxy colorants) offers jewel tones without a kiln; heat-cure enamel powders reward patience with vitreous gleam. Try cloisonné wires to fence off a crescent from a star field. Gold leaf on a sealed, lightly adhesive surface adds sun flares that gleam under resin. Stone chip inlay—lapis dust in black epoxy—creates a night sky with genuine mineral sparkle.
Finishing Touches: Edges, Drape, and Care
Edges define intent. Bevel softly with needle files; polish only the rim for a halo effect. Test the drape on three chain lengths to see where the pendant “breathes”—bone structure changes the story. Add a 2-inch extender so wearers can customize. Include a care card: keep dry, buff with a cloth, store flat. These habits protect surfaces and prolong shine, a practical side of poetic design.
Comfort, Accessibility, and Wearability
Balance weight and swing; a heavy bezel at choker length can feel restrictive. Consider silk cord for sensitive skin, and always note metal content. Use smooth solder joints and hidden wire ends to avoid snags. A small section of larger-link chain near the clasp allows easy fastening; magnetic clasps simplify wear for those with limited dexterity.
Ethics and Ecology in the Studio
Choose recycled precious metals and traceable stones when possible; buy from suppliers who publish sourcing data. Explore bio-based resins and mica verified free of child labor. Package with recycled boxes and unbleached tissue; include a cotton pouch for reuse. Limit waste by batching pours and using silicone mats. This is where art meets sustainability—where the night sky you honor in your work mirrors the responsibility you keep on the ground.
Troubleshooting Common Celestial Challenges
- Resin won’t cure: Check ratio by weight, not volume; mix longer and scrape cup sides. Thin layers cure more reliably than thick dome attempts.
- Microbubbles persist: Warm resin, stir slowly, rest the mix a minute, then pour. Kiss bubbles with a brief heat burst or spritz isopropyl alcohol.
- Clay cracks after baking: Under-conditioning or under-baking are culprits. Knead thoroughly until pliant; verify oven temp with a thermometer; cool slowly.
- Stamping drifts: Use tape-straightedges; practice on scrap; strike once with conviction.
- Wire wraps look messy: Downshift to finer gauge for links; plan anchor points; keep tension steady; trim flush and tuck ends with chain-nose pliers.
- Patina rubs off: Degrease metal before finishing; let oxidizer work fully; seal with wax or lacquer in thin coats.
- Domed resin overflows: Stop a fraction shy of the lip; surface tension takes you home. Rotate under light to spot creeping edges.
- Skin irritation: Switch to niobium, titanium, or surgical steel; avoid nickel-heavy chains; look for clearly marked hypoallergenic findings.
Photography, Packaging, and Story
Light your pieces like small planets: a soft key light, a gentle reflector, and a dark gradient backdrop. Macro shots of textures—hammer hits, mica swirls—anchor credibility. For packaging, tuck a printed star map of the piece’s constellation; tie with midnight twine; stamp the box with a tiny moon glyph. Include a card explaining the design’s intent and care tips. These choices turn an object into a keepsake.
Layering Strategies and Wardrobe Pairings
Celestial necklaces layer beautifully: a choker crescent, an 18-inch constellation, and a 22-inch sunburst. Vary pendant scale but keep finishes harmonious—mixing brushed and high-polish creates depth without noise. Neutral tops showcase complex nebula pieces; patterned clothing pairs best with simpler lunar bars. Seasonal shifts matter: summer asks for airy wire frames; winter loves weightier discs and velvet cords.
Advanced Builds for the Adventurous Maker
- Kinetic eclipse: A rotating crescent slides over a sun disc, producing an ever-changing corona.
- Electroformed crystals: Grow copper “meteorites” over quartz points; patinate to deep space tones; seal lightly.
- Mokume-gane galaxy: Layer copper, brass, and nickel silver; pattern to reveal swirling “nebulae” in metal itself.
- Enamel starfields: Wet-pack enamel dots on midnight ground; fire to a speckled Milky Way.
- Cloaked message: Back-engrave coordinates; add a tiny sapphire “North Star” set inside the bail.
- Resin intaglio: Cast a negative crescent; backfill with metallic leaf for a moon that seems carved from shadow.
Quality Control and Longevity
Before a necklace leaves your bench, stress-test jump rings, tug the bail, and check clasp action ten times. Inspect edges with a loupe. Photograph under harsh light to reveal stray scratches, then correct. Apply protective wax to darkened metals; include a polishing cloth in the package. The difference between good and great often lies in invisible discipline—the kind of quiet choices that ensure durability for years.
Pricing, Time, and Value
Track hours and materials, but also account for tool amortization, brand presentation, and post-sale care. A lunar bar may take 45 minutes including finishing; a complex nebula resin could demand three sessions across two days. Communicate value by naming techniques, materials, and stories—people understand handmade work when they can see the journey.
The Poetics of Edge and Orbit
Every necklace is a map: a perimeter that holds a small infinity. The better you get at edgework, the more your orbits sing. Slowing down—filing a little longer, letting patinas mature, waiting for resin to fully set—invites grace. What you leave out matters as much as what you add; a single tiny star can pull a whole night into focus. Let negative space be your sky.
Care Routines for Lasting Starlight
Ask wearers to remove pieces before swimming or strenuous activity, to store flat and dry, and to avoid chemical cleaners on patinated surfaces. Suggest a gentle soap-and-water wipe for resin, immediate dry, then a soft cloth buff. These micro-habits extend life and preserve intent, supporting the piece’s performance day after day with quiet precision.
From Bench to Gift: Rituals That Matter
Consider adding a ritual to your making: a breath before the first strike, a wish engraved on the back, a star counted for each milestone. Include a handwritten note; even a single sentence can anchor memory. Your necklace becomes not just an accessory, but a companion.
Inspiration Prompts and Sketch Seeds
- Seasonal sky: Design for a solstice, an equinox, or a meteor shower date.
- Hometown horizon: Cut a pendant edge in the silhouette of the hills or skyline under a crescent.
- Tidal time: Pair moon phases with tiny etched waves, linking gravity and sea.
- Aurora whisper: Use translucent resin veils over dark enamel to suggest northern lights.
- Lunar library: Develop a set of eight coins, each a phase, strung as a modular ladder of light.
A Note on Texture and Silence
Metal remembers every touch. Clay records your pressure; resin enshrines your choices in layers. Lean into textures that feel like whispers, not shouts—fine hammer taps clustered like far galaxies, sanded micas that catch just enough lamp glow. A necklace that rewards quiet light also rewards time, rewarding both the maker and the wearer with patient gleam.
Closing Orbit
To make a celestial necklace is to compress distance between your bench and the night. You learn to measure time in cure windows and cooling cycles, in the moment a star stamp lands just right, in the hush when a final polish reveals the curve you meant all along. These small rituals create a faithful companion—as steady as Polaris, as surprising as a fireball. Keep reaching for the balance point where materials meet meaning; let your hands and eyes speak a language older than myths. The sky is wide, and your next piece already knows its path.
