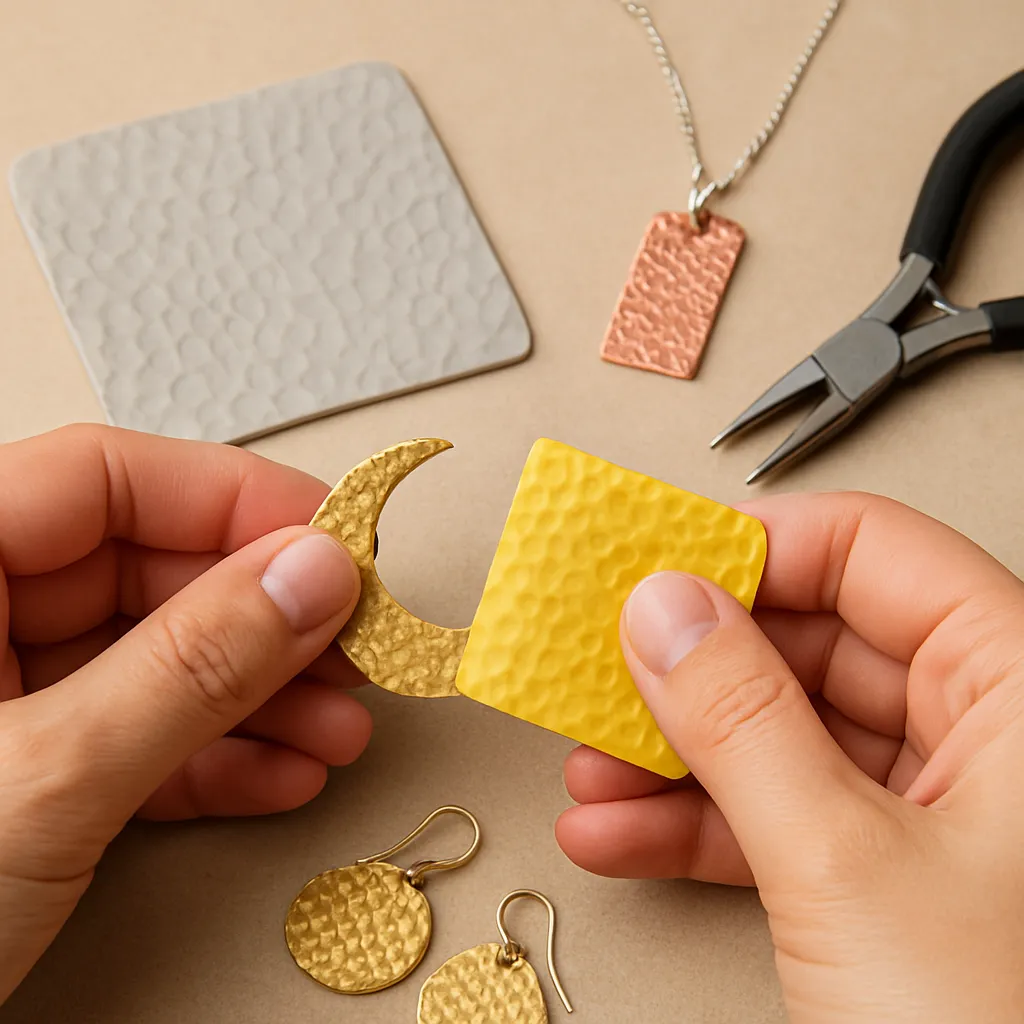
Clay texture sheets open a world of expressive surfaces for jewelry makers, allowing even small studios to produce complex motifs, crisp repeats, and tactile depth without heavy equipment. Whether you craft with polymer, air-dry, or metal clay, the right sheet and a sensitive hand can translate ideas into wearable storytelling: botanical impressions that feel like pressed leaves, geometric rhythm lines that catch the light, and subtle microtextures that read as fabric, bark, or hammered metal. This guide unpacks the materials, methods, and design strategies behind successful impressions, then carries you all the way through to sanding, sealing, and assembling finished pieces that stand up to daily wear.
What Clay Texture Sheets Are and How They Work
Texture sheets are patterned plates—most often silicone, urethane rubber, or rigid plastic—engineered to imprint topography into malleable clays. Some are shallow, lending fine grain and silk-like raised weaves suitable for delicate pendants; others are deep, designed for architectural relief and bold motifs. Because they’re reusable and dimensionally stable, they enable consistent repetition across a collection, essential for earrings that match and for series work.
Common categories include:
- Flexible silicone sheets: Highly detailed and forgiving, great for both shallow and deep impressions and for wrapping around curved forms.
- Thermoformed plastic plates: Rigid and ideal for flat slabs; often used with roller pressure for even contact.
- 3D-printed plates: Customizable patterns, from tessellations to topographic maps; surface finish depends on print quality and post-processing.
- Stamps and rollers: Smaller footprint tools that act like localized texture sheets for borders and accents.
Texture is fundamentally a negotiation between clay plasticity, tool contour, and applied force. With the same sheet, a soft clay will sink deeper into grooves but may smear fine features, whereas a firmer clay preserves edges at a lower impression depth. In practice, you’ll calibrate sheet choice and clay conditioning until you find a sweet spot where your pattern reads cleanly and the slab remains dimensionally stable for cutting.
Choosing the Right Clay for Textured Jewelry
While most malleable clays accept impressions, each behaves differently:
- Polymer clay: A favorite for jewelry due to color range, blending potential, and low-temperature curing. It holds microdetail exceptionally well. Some brands are softer (ideal for deep impressions) while others are formulation-stiff (ideal for crisp lines). Conditioning quality is critical.
- Air-dry clay: Good for light wearable components if sealed properly; tends to show tool marks and benefits from damp working conditions.
- Metal clay (silver, bronze, copper): Captures fine relief that sinters into true metal. Requires careful drying and kiln or torch firing. Shrinkage must be planned into design.
Color and inclusions influence readability: highly speckled mixes may hide microtextures, while pearlescent polymer accentuates subtle ridges via reflective mica plates. For metal clay, darker patinas post-firing bring out recessed details. Plan finish early; your color, luster, and planned patina should harmonize with the scale and density of the texture pattern.
Essential Tools and Bench Setup
Good results come from predictable workflows. A minimal yet complete setup includes:
- Nonstick work surface: Glass tile, acrylic sheet, or a smooth ceramic tile that can go into the oven for polymer clay.
- A brayer or acrylic roller: For even pressure and to compress clay into the sheet’s recesses.
- Pasta machine or thickness guides: For uniform slab thickness and repeatable results across pairs and sets.
- Release agent: Cornstarch, talc, water mist, or a proprietary mold release, applied sparingly to prevent sticking without blurring detail.
- Cutter sets and templates: Nested shapes provide symmetry and proportional variety.
- Blade and needle tools: For clean, confident cuts and freeing trapped air.
- Sanding media: Wet/dry papers (400–2000 grit), micro-mesh pads, and soft backers to preserve contours.
- Drill bits or awls: To define earring holes before curing, or micro-drills for post-cure adjustments.
Stabilize your texture sheet on a non-slip mat. Keep a soft brush handy to dust off particulates; even a few crumbs can emboss unwanted dots across a pristine area. If you use multiple brands of clay, clean aggressively between sessions to avoid cross-contamination of plasticizers or metal particles.
Preparing Clay for Crisp Impressions
Preparation sets the tone for successful texturing:
- Condition thoroughly: Knead or run through a pasta machine until the clay sheet is smooth and homogenous. Under-conditioned clay tears and shows streaks in recesses.
- Set thickness: For pendants and statement earrings, many artisans start around 2–3 mm. Pair this with the depth of your pattern to avoid weakening thin bridges.
- Chill if needed: Softer polymer formulations can benefit from a brief chill (5–10 minutes in the fridge) to resist distortion when lifted from the sheet.
- Use a measured slab: Trim edges so you can align shapes and control where the pattern lands.
Apply a dusting of release agent to the texture sheet and, if necessary, to the clay surface. Aim for transparency: you should not see obvious residue grains, which can obscure fine details.
Core Techniques for Using Texture Sheets
Direct Press Method
Place the clay on the work surface, lay the texture sheet on top (pattern side down), and roll with an acrylic brayer. Keep strokes parallel, then perpendicular, achieving even imprint depth. Rotate the sandwich 90 degrees and repeat to reduce directional bias. Lightly peel from one corner, flexing the sheet, not the clay.
Reverse Press (Clay on Texture)
Lay the sheet flat (pattern up), dust lightly, and place your slab on top. Use a roller and controlled hand pressure to press the clay into the design. This method helps with registration and precise placement of motifs relative to a cutter outline.
Selective Impression and Masking
Mask areas with tape or thin acetate cutouts before rolling to create a contrast of smooth and textured zones. This adds hierarchy and a visual resting point, critical when patterns are busy.
Burnishing for Edge Clarity
After rolling, use a flexible card or spoon to burnish high points gently. This consolidates clay at the ridges, sharpening lines. Moderate pressure is best; overworking can smear crisp microfeatures.
Registration for Symmetry
Mark tiny registration dots on a scrap acetate template or on the back of your sheet using removable ink. Align slab edges to these marks so left and right earrings share the same pattern center. Reliable alignment improves the perceived quality of a collection.
Advanced Surface Effects with Texture Sheets
Mica Shift (Polymer Clay)
With pearlescent polymer, create a textured sheet impression, then shave high points with a sharp blade until the surface becomes glassy-flat. The visual illusion of depth remains because mica platelets realign with compression. Sand and polish to emphasize the optical shift; it reads like inlaid stone.
Sutton Slice and Inlay
Press a contrasting color into a deep texture, slicing flush at the surface to leave pigment only in recesses. Then lay a base sheet over it and roll together. When demolded, the base bears a clean inlay—ideal for sharp two-tone patterns and text.
Multi-Layer Veneers
Texture a thin veneer in one color, back with a second color, then cut shapes that reveal layers at beveled edges. For metal clay, layer textures with slip between. After firing, careful abrasion exposes the relief with a smooth gradient from top to base tones.
Foils, Powders, and Surface Embellishments
Before pressing, apply metal foil or mica powder to raised areas of the texture sheet. When the clay meets the prepared sheet, reflective media transfer selectively, imitating keum-boo-like highlights or textile lusters. Seal after curing to lock in effects.
Design Thinking: Scale, Rhythm, and Composition
Texture is vocabulary; composition is grammar. Consider:
- Scale: Large motifs suit pendants where viewing distance is greater; microtextures excel in earrings and rings for delicate sparkle.
- Density: Alternate dense and open areas to prevent visual fatigue. Negative space acts as punctuation.
- Flow: Align motifs with the pendant’s longest axis to elongate, or against it to compact and energize.
- Hierarchy: Combine a primary texture with a secondary, more subtle one at an edge, bail, or connector.
When cutting shapes, let pattern lead. Rotate cutters over the slab until the motif placement feels inevitable. Test crop with a transparent template. Collect offcuts with great micro-compositions for studs or charms—waste becomes a micro-collection.
Managing Sticking, Distortion, and Other Pitfalls
Common hurdles and remedies:
- Sticking to the sheet: Increase or change release agent; try a different formula (cornstarch vs. water mist). Chill the slab or use a slightly firmer clay brand.
- Loss of crispness: Over-conditioned clay is too soft; add a firmer clay or leach a small amount of plasticizer with paper for a few minutes.
- Air pockets: Pierce with a fine needle before the final pass. Roll from center outward to push air away.
- Warping after lifting: Use a thin flexible blade to slide under the slab. Support on a tile to move and bake without lifting.
- Uneven depth: Switch to a brayer; elbows introduce tilt. Roll in multiple directions with consistent strokes.
Pro tip: If you need ultra-fine lines, dust both the sheet and clay very lightly, then perform a final pass with clean water as a boundary lubricant. Water evaporates quickly and rarely softens detail when used sparingly.
Cutting, Drilling, and Edge Strategy
Once textured, decide how edges will interact with the pattern. For bold relief, bevel edges slightly to reveal contour transitions, creating a dimensional profile. For geometric patterns, maintain a sharp vertical edge so lines resolve cleanly at the perimeter.
- Cutting: Press cutters straight down, then twist slightly to sever fabric-like strands. Lift with the cutter attached; push the clay out onto your tile.
- Drilling: For polymer clay, pre-drill holes with a straw or micro-cutter while raw for ultra-clean edges. Alternatively, drill post-cure at low speed to avoid chatter.
- Beveling: Skive gently with a tissue blade or use a small 45-degree sanding block after curing.
For metal clay, cut while leather-hard for crisp fidelity, and refine holes with micro-files. Remember shrinkage factors—arrange holes and findings with final size in mind.
Curing, Drying, and Firing
Correct thermal processing is the backbone of strength and detail retention. Proper curing or firing solidifies your earlier choices, locking in depth, edge integrity, and planarity.
- Polymer clay: Bake on a flat ceramic tile or cardstock-lined tray to minimize shine. Typical temperatures range from 110–135°C (230–275°F); follow brand specifications and bake longer rather than hotter—30 to 60 minutes for 2–3 mm thickness. Tent with foil to prevent scorching. Use an oven thermometer for accuracy.
- Air-dry clay: Dry slowly under light cover to reduce cracking and curling. Allow full cure per manufacturer guidelines before sealing.
- Metal clay: Dry thoroughly (dehydrator or low oven) before firing. Fire in a kiln according to alloy requirements; silver often sinters between 650–900°C with soak times 30–120 minutes. Bronze and copper may require carbon firing. Torch only if the piece size and alloy allow.
Support curved earrings or cuffs with paper nests or fiber blanket while curing to preserve intentional arcs. Always cool gradually to avoid thermal shock, which can induce hairline fractures or distortions—especially in thin, deeply textured regions.
Refining Surfaces: Sanding, Polishing, and Sealing
Post-process refinement transforms a good impression into a gallery-ready finish. Gentle burnishing prior to sanding compresses high points and reduces scratch risk; then proceed to abrasives.
- Wet sanding sequence: 400 → 600 → 800 → 1200 → 2000 grit, keeping water abundant to float debris. Use soft foam backers to preserve topography and avoid flattening relief.
- Buffing: For polymer, a muslin wheel at low speed or microfiber by hand warms the surface, increasing gloss. For metal clay, polish with radial bristle discs and conclude with a rouge-free compound before patina.
- Sealing: Acrylic varnishes preserve matte or satin looks; two-part resin yields a domed, glass-like coat that amplifies texture shadows. Wax finishes offer a subtle sheen and tactile warmth.
Choose finishes that complement your motif: a hammered-metal pattern may prefer a satin sheen, while geometric tessellations love high gloss. If inclusions or foils were used, test sealers on scraps. Thoughtful finishing elevates perceived craftsmanship and long-term durability.
Attaching Findings and Assembly
For pendants, embed eyelets or create clean drill holes and reinforce with metal tube rivets after curing. For earrings, standard jump rings and wire loops benefit from a small recess pressed with a ball stylus pre-cure; this seats the ring and reduces rotational wear. Use stainless or precious metal findings to prevent discoloration next to skin.
Adhesives: Epoxy provides a strong bond for metal pads or bails on polymer clay; lightly texture the bonding zone with 220-grit sandpaper for mechanical keying. For metal clay post-firing, solder offers the longest-lasting joint when appropriate.
Cleaning and Caring for Texture Sheets
Residue dulls fidelity over time. Keep your sheets pristine:
- Rinse silicone sheets in warm soapy water and pat dry; avoid aggressive solvents that can swell or cloud materials.
- For plastic plates, use isopropyl on a soft cloth sparingly, then rinse; alcohol can craze some plastics, so test first.
- Store flat, out of direct sunlight. Heat-warped sheets print distortion into your slabs.
- Dedicate sheets for dark patinas or oxides to avoid cross-staining lighter clay colors.
Routine maintenance increases consistency and extends tool life. Cleanliness is part of process precision that your customers will see—especially across matched pairs and repeat orders.
Sustainability, Safety, and Ergonomics
Finely detailed work can be surprisingly physical. Good posture, neutral wrist angles, and alternating tasks reduce strain. Arrange tools within comfortable reach and use a height-appropriate bench. Consider a wider brayer to distribute effort and lessen repetitive stress.
Ventilation matters when baking polymer or firing metal clays. Follow manufacturer guidelines, keep ovens dedicated (or scrupulously protected) for craft use, and use carbon for bronze/copper as directed. Collect sanding water and dispose of sludge responsibly; it can contain microplastics or metal fines. Durable design reduces waste: pick findings and finishes that age gracefully, and engineer repairability with accessible jump rings and modular connectors.
Project Pathways: From First Impressions to Signature Lines
Beginner: Classic Botanical Drops
Condition a mid-tone polymer, use a fern-embossed silicone sheet, and cut teardrops. Drill clean holes, bake, sand only edges, and seal with satin varnish. Pair with bronze ear wires for warmth.
Intermediate: Mica-Shift Geometrics
Create a pearl-clay veneer, roll onto a fine geometric sheet, slice flush for mica shift, and back with contrasting color. Bevel edges gently, polish to a glassy finish, and set with minimalist sterling findings.
Advanced: Metal Clay Patinated Pendant
Press silver clay into a deep textile pattern, dry flat, refine edges, and fire to sinter. Apply liver-of-sulfur patina, then polish high points with radial discs so the darker lows amplify depth. Add a forged bail for movement.
Testing, Iteration, and Recording Settings
Iterative practice is the fastest route to reliable excellence. Keep a log of pasta-machine settings, pressure passes, and bake times. Photograph slabs before cutting to record motif placement for future sets. Maintain a library of scrap tiles with labeled temperatures and outcomes—this personal database becomes invaluable as you scale production.
For custom commissions, create small proof tiles textured with the client’s chosen sheet and finish options. These become tactile mood boards that clarify expectations and protect your timeline.
Troubleshooting Reference Quicklist
- Pattern looks muddy: Firm clay, lighter rolling, sharper blade for skiving. Chill slab before demolding.
- Sheet marks not releasing: Increase or switch release medium; consider a silicone-based option.
- Edges crack when curved: Pre-condition longer and increase final thickness slightly; support shape during bake.
- Gloss uneven: Progress through grits fully; residue trapped in recesses requires soft brushes during wet sanding.
- Bubbles in resin seal: Warm resin components gently, mix slowly, and dome in a dust-free enclosure.
Integrating Texture with Patterned Canes and Surface Prints
Texture sheets harmonize with millefiori canes, silkscreens, and alcohol inks. Press texture first for foundational relief, then selectively print on peaks for high-contrast geometry. Alternatively, print first and texture lightly to give the graphic a fabric-like hand. Keep hierarchy clear: let one element lead while others support, avoiding visual shouting matches.
Economy and Value: Making the Most of Each Slab
A single well-textured slab can yield multiple SKUs: a pendant, earrings, and a bracelet tile. Arrange cutters to minimize waste, and collect negative spaces for studs. Keep offcuts sorted by color family; later, laminate them into new veneers or use for test bakes. Smart batching improves time efficiency and material yield while keeping your collection cohesive.
When to Design Your Own Texture Sheet
Commercial patterns are abundant, but distinct branding often springs from custom textures. Hand-carve rubber blocks, laser-etch acrylic, or design 3D-printed plates. Sketch motifs at scale, refining line weights so narrow webs aren’t fragile at your target thickness. Sand or tumble printed plates to reduce layer lines, then test with soft and firm clays. This pathway rewards experimentation and keeps you at the frontier of innovation.
From Studio to Customer: Quality Control and Packaging
Before release, inspect under raking light for sanding swirls and dust. Tug-test findings and flex-test thin areas gently. Photograph with angled lighting to showcase relief. Package pieces so texture won’t abrade during transit: wrap in soft tissue, then place in a rigid box with a nonreactive liner. Include care cards tailored to the finish—varnish, wax, or resin—so customers protect their purchase.
Glossary of High-Impact Terms for Texture Work
- polymer: A synthetic clay that cures at low temperature, prized for color and detail fidelity.
- texture: The patterned surface imparted by a sheet, stamp, or roller that adds relief and tactile interest.
- release: A boundary agent preventing clay from sticking to the sheet, preserving fine features.
- alignment: The deliberate placement of motifs relative to the jewelry shape for symmetry and intent.
- pressure: The controlled force applied during rolling or burnishing that determines impression depth.
- burnishing: Friction-smoothing of high points to compress and refine before or after curing.
- curing: Thermal process that solidifies polymer clay or sets chemically reactive finishes.
- finishing: The combined steps of sanding, polishing, and sealing that define the final surface.
- durability: The ability of a finished piece to resist wear, impact, and environmental exposure.
- precision: The repeatable accuracy in thickness, depth, and placement that elevates craftsmanship.
A Repeatable Workflow You Can Trust
Reliability clarifies creativity. A strong workflow looks like this:
- Plan: Choose motif scale to match jewelry size; sketch focal placements.
- Prepare: Condition clay, set thickness, and ready your sheet with a thin release.
- Impress: Roll with consistent strokes, then burnish high points.
- Cut and drill: Commit to composition and edge strategy; prepare holes or settings.
- Cure or fire: Control temperature, support shape, and bake or sinter fully.
- Refine: Wet sand judiciously, polish, and seal in harmony with the design.
- Assemble: Install findings with mechanically sound methods and quality metals.
- Document: Record settings and observations for future repeats and iterations.
With these steps in place, you can translate ideas to form quickly, then focus on nuance: color stories, seasonal releases, and signature patterns that make your pieces unmistakably yours.
Closing Thoughts
Clay texture sheets are more than tools; they’re collaborators that help transform flat color and mass into articulated surfaces with narrative, movement, and light play. When you control material prep, pressure, and thermal processes, textures stop being accidents and become deliberate design choices. Combine that control with a curiosity for finish chemistry, ergonomic habits that protect your hands, and an eye for motif placement, and you’ll produce jewelry that feels thoughtful at every touchpoint—from first glance to years of wear. Keep testing, take notes, and let the dialogue between clay and pattern guide each new piece you make.
