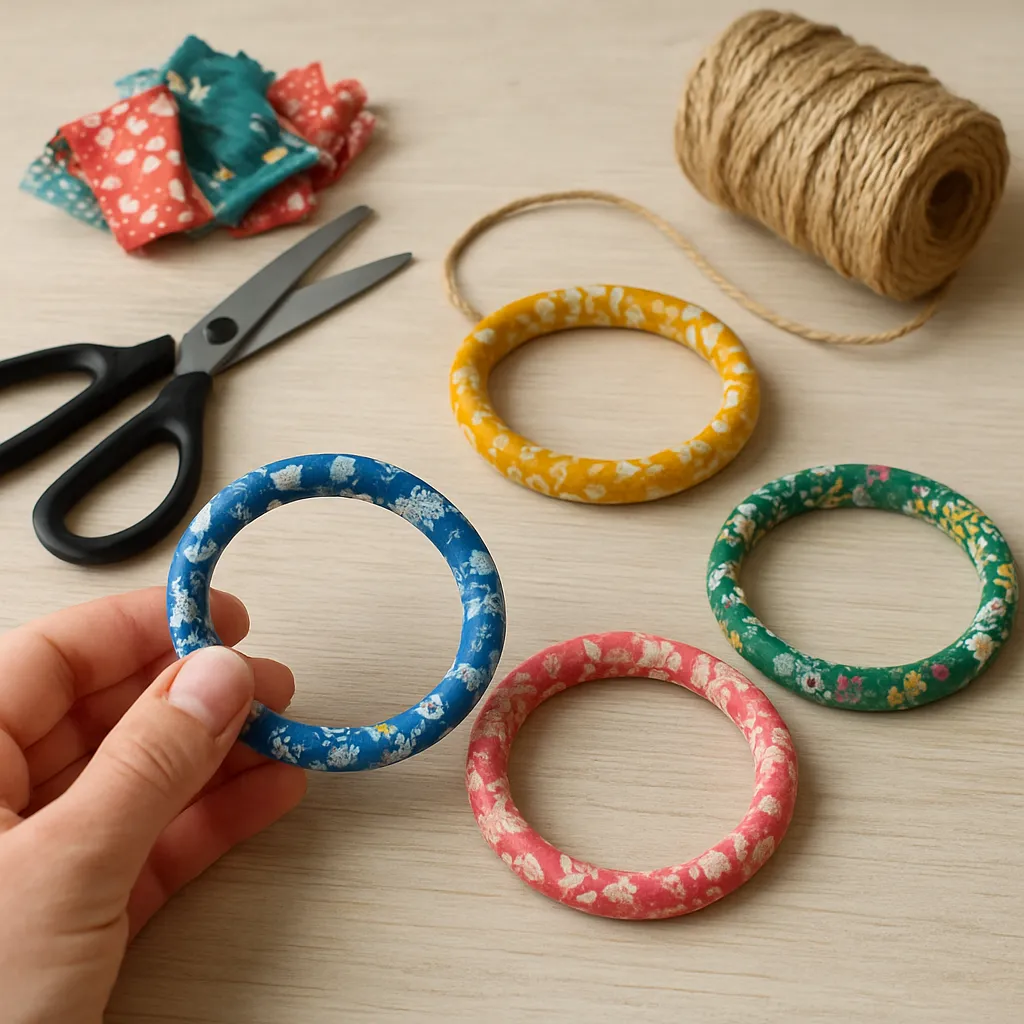
Fabric-wrapped bracelets combine the warmth of textiles with the structure of jewelry, turning leftover cloth into wearable stories. They are approachable for beginners, endlessly adaptable for seasoned makers, and delightfully portable—everything fits into a small pouch for crafting on the go. With only a handful of materials, you can transform a plain bangle or a length of cord into a tactile piece that reflects your color sense, cultural references, and mood. Along the way, you’ll practice the quiet art of craftsmanship, discover the rhythm of wrapping, and learn how a few thoughtful techniques elevate simple materials into something cherished.
Materials and Tools: Foundations for Reliability and Beauty
Choosing the right materials determines how comfortable, resilient, and polished your bracelet will be. Before you begin, gather a few essentials and consider how each element affects appearance and wearability.
- Base cores: rigid bangles (metal, acrylic, wood), memory wire, plastic cuffs, cotton piping cord, paracord, or hollow silicone tubing. Each core has a distinct personality—metal offers sleek minimalism; wood feels warm and organic; tubing is light and flexible.
- Fabrics: lightweight cotton lawn for crisp lines, silk for gloss, jersey for softness, denim for rugged texture, or bias tape for effortless wrapping around curves. Look for tightly woven cloth to reduce fraying. Remnants of kimonos, saris, or bandanas make meaningful starting points.
- Adhesives: fabric glue or PVA thinned slightly with water; contact cement in tiny amounts for stubborn starts; a low-temp hot glue gun only if necessary. The bonding strategy should favor clean adhesion with minimal seep-through.
- Thread and needles: polyester or cotton thread, preferably waxed for tangle-free stitching. Use a fine needle for surface work; a stouter one for attaching beads.
- Cutting and measuring: fabric scissors or rotary cutter, cutting mat, flexible measuring tape, and a fabric-safe marker or chalk.
- Edge control: Fray-check liquid, clear-drying glue, or a quick zigzag stitch along strip edges if you plan to leave them raw.
- Finishing aids: end caps, crimps, ribbon clamps, or tidy knots; small pliers; narrow double-sided tape to anchor starting and ending points without bulges.
- Embellishments: seed beads, bugle beads, metal chain, pearls, tiny appliqués, and charms. Keep profile low for daily wear to avoid snagging sweaters or hair.
Start with materials you already own and gradually refine. Your second or third bracelet teaches more about fabric behavior than any instruction sheet—how tightly to wrap, what textures pop, and which adhesives keep the inside tidy.
Design Planning: Color, Scale, and Tactile Experience
A few moments of planning will save you time later and guide you toward a coherent bracelet that feels as good as it looks.
- Color strategy: choose a dominant hue with one or two accents. Analogous palettes (e.g., teal, blue, violet) feel serene; complementary pops (e.g., coral against teal) add drama. Consider skin undertones—warm golds flatter olive skin; icy blues sing on cool complexions.
- Pattern scale: small florals or tight geometrics read clearly on thin bangles; bold stripes and ikat patterns shine on wider cuffs.
- Strip width: for a 4–6 mm bangle, use 1.2–1.5 cm strips; for a 10–15 mm cuff, use 2–3 cm strips. Test on a scrap core: wider strips cover faster but may crease on curves.
- Edge choices: folded edges produce a crisp, tailored look; raw edges create a soft, handcrafted vibe—tame fray with a stitch or liquid sealant.
- Comfort inside: if your skin is sensitive, line the interior with smooth cotton or suede-like microfiber. Good interior design is about ergonomics as much as style.
If you plan to gift or sell, create a design board with fabric swatches, threads, and metal findings. A cohesive set of three bracelets—thin, medium, and wide—often looks more intentional than a single piece.
Core Techniques: From Simple Wraps to Sculpted Surfaces
These foundational methods let you build nearly any style. Practice on a sample first to learn how your fabric handles curves, glue, and pressure.
1) The Classic Spiral Wrap
- Prepare the strip: cut on the bias for woven fabric to hug curves; for jersey, cut cross-grain for a clean, curl-resistant edge. Pre-seal edges if needed.
- Anchor the start: place a 1–2 cm tab of double-sided tape on the inside of the bangle. Lay the strip end over the tape and press. This temporary hold prevents slips while glue cures.
- Wrap with consistent tension: angle the strip so each turn overlaps the previous wrap by 1–3 mm. Smooth with your thumb as you go to expel air and prevent ripples.
- Minimal glue: dot a whisper-thin line of fabric glue along the core every few centimeters. Too much glue stiffens fabric and dulls sheen.
- Finish invisibly: when you reach the start, trim the strip so it tucks neatly under the final wrap. Secure with glue and, if desired, a few hidden stitches using matching thread.
2) The Padded Comfort Cuff
- Add soft batting or felt to the outside of a cuff core for a gentle cushion. Keep it thin to avoid bulk.
- Wrap the padded cuff with a wider strip; fold the visible edges under for a tailored look.
- Topstitch the outermost edge by hand with small slip stitches. The result feels plush and protects the fabric from sharp cuff edges, improving long-term durability.
3) Hybrid Rope Bracelet
- Use cotton piping cord or paracord as the base. Join ends with a discreet heat-shrink tube or stitched sleeve to create a continuous circle.
- Wrap with knit jersey or bias-cut silk; jersey offers easy stretch, while silk adds luster. A small bar of beeswax rubbed along the strip can help the fabric glide and resist lint.
- Cover the seam with a thin contrast wrap or a metal tube bead for polish.
4) Segment Wrapping and Color Blocking
- Divide the bracelet into sections—one-third, one-half, or irregular intervals—and assign each fabric a zone.
- Secure each section with a tiny overlap under a slim metal ring or a stitched ridge to hide transitions.
- Balance matte and glossy textures to create depth without visual noise.
5) Spiral Embellishments and Couching
- After the base wrap, lay a thin cord or metallic thread in a spiral and couch it down with tiny stitches. This creates subtle ridges that catch light.
- For a folk-inspired look, add spaced seed beads along the spiral at regular intervals.
Mastering Edges, Joints, and Invisible Finishes
Many fabric-wrapped bracelets look charming from a distance but reveal lumpy joins up close. Clean transitions are the hallmark of precision work and elevate your piece instantly.
- Feathered trims: instead of a blunt cut, slice the final 1 cm of the strip at a shallow angle to reduce bulk where it tucks under.
- Lock stitches: two or three tiny backstitches at critical points keep ends from creeping, especially on slick fabrics like satin.
- Covers for joins: narrow ribbon clamps, end caps, or small metal tubes slide over cut ends for a jewelry-store finish. Choose findings that match the bracelet’s mood—antique brass for vintage florals, bright silver for modern geometrics.
- Inside tape: a sliver of washi or linen tape on the interior seam can tidy glue marks and add a signature flourish, such as a printed motif or your monogram.
Adhesives, Stitching, and Clean Work Surfaces
Balancing glue with stitching yields secure bracelets that still flex with the wrist. Too much glue leads to stiffness; too little invites unraveling. Work atop parchment or a silicone mat to prevent accidental bonding to your table.
- Spot-glue strategy: place small dots every 2–3 cm rather than a continuous line; press, hold for a few seconds, then continue.
- Stitch invisibly: slip stitches or ladder stitches disappear between layers. Match thread color to the darkest hue in your fabric.
- Dry time: let bracelets cure fully before wear—usually 12–24 hours, depending on adhesive—so they don’t snag or shift.
- Cleanup: keep cotton swabs and a micro-brush nearby to wick away squeeze-out immediately for a crisp finishing touch.
Style Variations: From Minimal to Maximal
One beauty of this craft is how easily you can shift moods. The same core technique supports both restraint and exuberance.
- Minimalist bands: choose solid, high-quality linen or silk in a single hue; keep wraps tight and edges folded. Pair three thin bands for a quiet statement.
- Boho layers: combine block prints, hand-dyed indigo, and softly frayed edges; add sparse talismanic charms and spaced beads.
- Graphic modern: wrap with bold stripes or color blocks; insert a single metal ring spacer to punctuate the rhythm.
- Heirloom fusion: line the inside with a scrap of your grandmother’s dress fabric and the outside with contemporary cloth—secret sentiment meets present-day flair.
Global Inspirations and Respectful Referencing
Textiles carry place, memory, and identity. You might echo the saturated hues of West African wax prints, the calm geometry of Japanese sashiko, or the glimmer of Indian zari borders. When borrowing motifs, honor context: credit the origin, buy from artisans where possible, and avoid framing another culture’s symbols as mere trends.
- Japanese minimalism: indigo-dyed cotton with white running stitches; the texture pairs well with matte silver findings.
- South Asian radiance: sari trims or brocade snippets with gold thread; keep the profile slim so opulence feels wearable.
- Andean brights: narrow woven bands (fajas) adapted as wraps; accent with tiny pom-poms for playful movement.
Sizing and Wearability
Comfort begins with fit. Measure the widest part of your hand when your thumb is tucked toward your palm. If sliding over the hand is tricky, choose an open cuff base or memory wire that gently expands. For stacked sets, vary widths to distribute weight and prevent pinch points. Thoughtful sizing supports daily wear and celebrates ergonomics in design.
Care, Cleaning, and Longevity
Fabric bracelets live close to skin and should handle real life: washing hands, moving groceries, typing at a desk. To keep them fresh, avoid saturating them with water and apply perfume or lotion before you put them on. Spot-clean with a barely damp cloth and a microdrop of mild soap; blot dry. A brief sunbath freshens natural fibers, but store out of direct light to prevent fading. Over years, gentle patina can add character—proof of well-loved wear and thoughtful upcycling.
Eco-Minded Making and Material Stories
Because bracelets need little fabric, they’re perfect for remnant bins and garments with worn collars but beautiful sleeves. Embrace sustainability: pair deadstock silk with thrifted denim; repurpose a child’s outgrown dress into matching mother–child bangles; catalog the origin of each fabric on a tiny tag. Designing for disassembly—using minimal permanent glue and reversible wraps—lets you rewrap cores when trends shift or cloth tires, reducing waste while renewing your favorites.
Surface Detail: Embroidery, Beading, and Painting
Surface techniques let your bracelet converse with light and shadow:
- Embroidery: scatter French knots or seed stitches along one quadrant; restraint ensures bracelets remain smooth against sleeves.
- Couching: anchor slim metallic cord in graphic arcs. This adds sparkle without bulk.
- Beading: run a single row of seed beads at the centerline for a subtle glint; secure every third bead with a tiny backstitch.
- Fabric paint or block print: stamp motifs before wrapping. Pre-wash to remove sizing and heat-set paint for longevity.
Troubleshooting: Common Pitfalls and Smart Fixes
- Gapping between wraps: your angle may be too shallow. Slightly increase overlap and maintain steady pressure for reliable coverage.
- Lumpy joins: feather-cut the final centimeter and tuck under a neighboring wrap; reinforce with two hidden stitches.
- Glue bleed: apply glue sparingly with a toothpick; if bleed occurs, wick immediately with a cotton swab and press under parchment until set.
- Fraying edges: switch to bias-cut strips or apply fray-check lightly along edges and let dry before wrapping.
- Twisting strip: stabilize with a quick press using a warm iron; for knits, cut narrower to reduce torque, and wrap with consistent tension.
Working Rhythm and Mindful Making
Set up a small tray with tools, a pin cushion, and a lint roller. Put on music or a podcast and aim for a flow that balances speed and control. A gentle pace honors the bond between hand and material, and a measured cadence often translates into cleaner wraps and calmer thoughts.
Gifting, Packaging, and Small-Batch Selling
Handmade bracelets carry stories. Tuck each one into a fabric pouch sewn from coordinating scraps; include a small card that notes fiber content and washing tips. If selling, price for time and materials—track actual minutes spent cutting, wrapping, and embellishing. Photograph on a neutral background and also on a wrist to show scale. Offer custom sizing and personalization through fabric choices, initials stitched inside, or accent beads tied to symbolic meanings. Clear, consistent packaging reassures customers that what they love online is what they’ll receive in hand.
Comfort Science: Weight, Texture, and Movement
Even the prettiest bracelet should disappear in wear. Keep embellishments low-profile to avoid catching on knitwear. Distribute mass across a stack—one wider cuff plus two slim bangles feels lighter than a single heavy piece. Smooth interiors and modest seam allowances prevent hotspots during desk work or exercise. These choices improve day-long comfort and whisper the language of thoughtful design.
Seasonal and Thematic Ideas
- Spring: pale linen with hand-embroidered buds and a single pearl accent.
- Summer: striped cotton shirting with a nautical rope couching line.
- Autumn: tweed or herringbone wool wrapped on a wide cuff; edge with velvet ribbon.
- Winter: metallic jacquard with matte black findings for a festive but understated glimmer.
- Travel journal: collect tiny fabric snippets from places visited and combine them in a segmented wrap—a map around your wrist.
Step-by-Step Project: Clean-Line Bias-Wrapped Bangle
Try this project to master the basics while producing a wardrobe staple.
- Measure your bangle’s circumference and width. Cut a bias strip 1.5–2 cm wide and at least 10% longer than the circumference.
- Press the strip with steam. If using fray-check, apply sparingly to edges and let dry thoroughly.
- Anchor the start on the inside with a tiny square of double-sided tape. Fold the raw end under before your first wrap for a neat interior.
- Wrap at a 30–45° angle, overlapping slightly. Add a microdot of glue under the strip every few centimeters to secure without stiffness.
- At the final turn, mark the cut line so the end tucks perfectly beneath the previous wrap. Feather the last centimeter; glue and press.
- Optional: slide a slim metal ring over the joint to conceal and reinforce. Let cure overnight on a clean surface.
Advanced Project: Two-Fabric Color-Block Cuff
This design showcases contrast while practicing invisible transitions.
- Choose a cuff base 15–20 mm wide. Select Fabric A (matte) and Fabric B (lustrous) for a yin–yang effect.
- Mark the midpoint of the cuff. Wrap Fabric A from the left toward center; finish with a feathered end at the midpoint.
- Repeat with Fabric B from the right. At the center, overlap the feathered ends by 2–3 mm and secure with tiny ladder stitches.
- Cover the transition with a narrow satin ribbon, couched with invisible stitches along both edges. This hides the seam and adds a polished stripe.
- Press gently with a warm iron (protect with a pressing cloth). Cure flat for 12 hours.
Material Experiments: Texture and Structure
- Denim deconstructed: use the selvedge edge for a crisp white line; fray selectively for a casual fringe.
- Silk organza: double-layer the strip for translucent depth; overlap to create subtle plaid effects as layers intersect.
- Knits and jerseys: roll edges inward slightly as you wrap for a soft corded look that resists unraveling.
- Leather and faux leather: punch tiny holes at the ends and stitch instead of gluing; the discipline of stitch spacing improves precision elsewhere too.
Safety and Skin Considerations
Keep adhesives away from open skin until cured. If you or your recipient has metal sensitivities, either use hypoallergenic cores or fully line the interior so no metal touches skin. For children, avoid small detachable charms and use secure stitching over glue where possible. Comfort and safety are part of responsible making and speak to the quiet integrity of your practice.
Documenting Your Process
Photograph steps and jot notes about fabric type, strip width, and wrap angle. Over time, you’ll build a personal library of recipes—what worked, what didn’t, and how to reproduce successes. This documentation also helps if you teach workshops or create kits, and it reinforces iterative improvement through small, thoughtful adjustments.
Mind the Details: Micro-Techniques That Matter
- Thumb press and glide: after each wrap, slide your thumb along the fabric to smooth fibers and express hidden glue for an even surface.
- Stitch cadence: count a steady rhythm—one, two, back—to keep stitches uniform and memory-friendly.
- Angle memory: commit to one wrap angle early; fluctuating angles create visual wobble. Consistency reads as professional quality.
- Light discipline: work in diffuse daylight or under a lamp with a color-correct bulb to judge true hues and spot glue sheen.
Ethics of Reuse and Storytelling
Old textiles deserve new chapters. Incorporate shirt cuffs, quilt trimmings, or curtain hems into your bracelets and include a compact origin story. A label that says “Outer: vintage kimono silk; Inner: reclaimed linen napkin” transforms an accessory into a conversation piece, and it folds memory into the everyday ritual of getting dressed.
From Prototype to Collection
Once you refine a design, build a small collection with shared DNA: one signature color, a repeated stitch motif, or a consistent metal finish. Collections help audiences grasp your point of view, streamline photography, and simplify reordering. Consider limited editions using rare remnants, and keep a swatch book to track availability.
Economy of Motion and Bench Setup
Arrange tools from left to right in the order you use them; pre-cut strips; pre-seal edges. These micro-optimizations reduce fatigue and errors. Over a session, you’ll notice cleaner wraps and less wasted fabric, supporting both craft quality and gentle production rhythms.
Why Fabric-Wrapped Bracelets Endure
They’re light, expressive, and forgiving. They invite tactile interactions that metal alone can’t match and thrive on small scraps that might otherwise be discarded. With a mindful approach to sustainability, thoughtful finishing, and resilient construction, they become daily companions rather than costume novelties. They also welcome learning: your hands grow steadier, your eye sharper, and your sense of proportion keener with every wrap.
Quick Reference: Do’s and Don’ts
- Do test adhesives on scrap fabric first.
- Do keep wraps consistent and edges tidy.
- Do let glue cure fully before wear.
- Don’t flood fabric with glue; favor secure but flexible bonds.
- Don’t overbuild bulk at joins; feather and tuck.
- Don’t ignore comfort—line interiors as needed and honor ergonomics.
FAQ
- How long should a strip be? At least 10–20% longer than the core circumference to account for overlap and error.
- Bias or straight grain? Bias for wovens to hug curves; straight for knits that already stretch.
- Can I wash them? Spot-clean only; avoid soaking. Rewrap if a bracelet becomes heavily soiled.
- What if edges fray over time? Either embrace the weathered look or refresh with a new wrap—designing for rewrapping keeps the bracelet in rotation.
- How do I avoid skin irritation? Choose skin-friendly fabrics and fully cover metal cores; let adhesives cure completely.
Closing Thoughts: The Art of Simple Means
With a strip of cloth and a steady hand, you can craft bracelets that carry memory, color, and touch. The process rewards patience and curiosity—every fabric behaves a little differently, every wrap teaches control, and every finished piece whispers its own small narrative. Aim for honest materials, mindful adhesion, and the kind of construction choices that support both beauty and everyday wear. Over time, the collection on your wrist becomes a living archive of practice and play—a testament to small acts that, added together, speak volumes.
