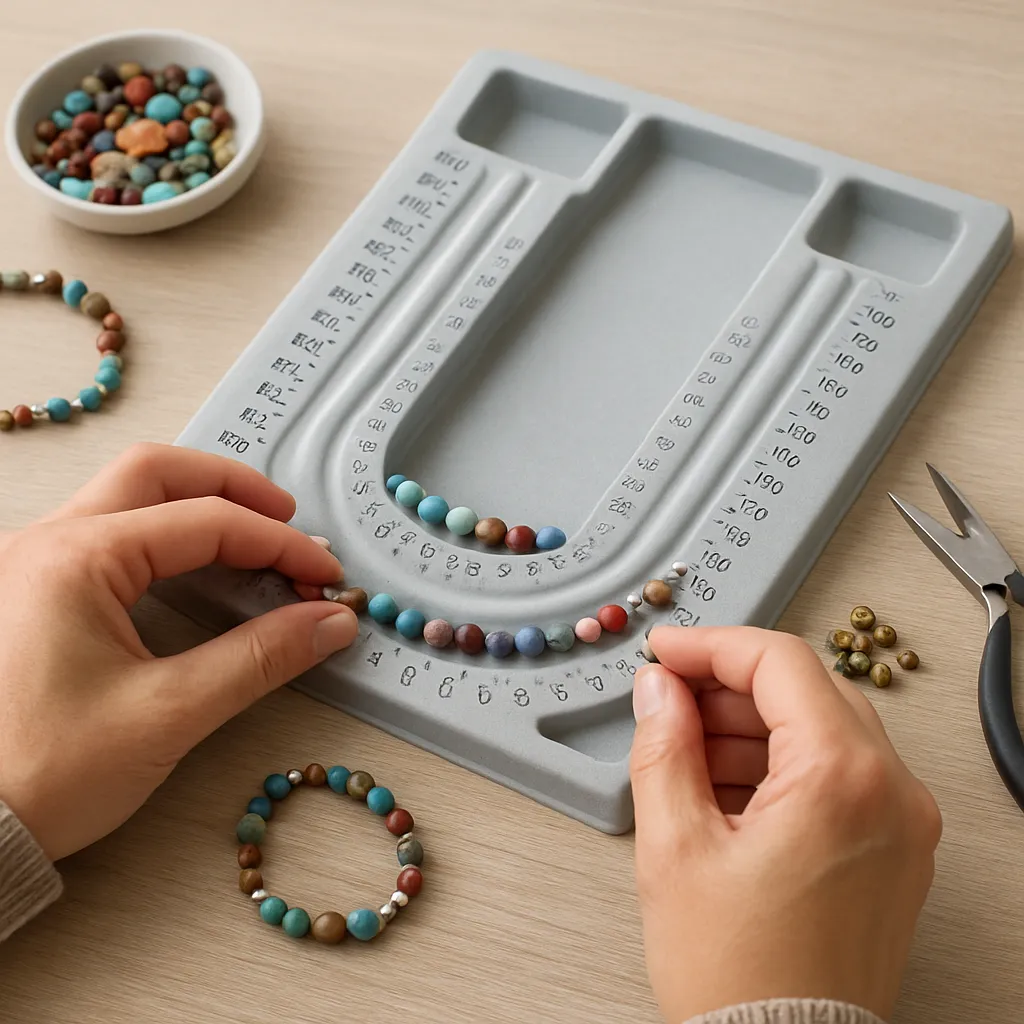
Bead boards turn creative intention into measurable, movable plans. Instead of juggling loose strands and mental notes, a well-chosen board lets you visualize scale, spacing, color balance, and drape before you commit a single cut of thread or wire. In the hands of hobbyists and studio professionals alike, bead boards reduce errors, sharpen choices, and speed up production while preserving the joy of tactile exploration. Think of them as the sketchbook and ruler of jewelry making combined—an adaptable surface where ideas become visible, testable, and reliably repeatable.
What a Bead Board Really Does
A bead board is a planning surface—often with gentle channels, measurement guides, and small compartments—designed to help you map a piece at full size. The benefits accrue before you ever pick up your stringing material: you can audition focal beads, trial spacer patterns, and check clasp placement within an accurate overall length. Most boards are flocked to prevent beads from rolling away and to reduce glare while you evaluate color. Their numbers and curves are not decoration; they are prompts guiding you toward balanced, wearable compositions that hang correctly on the body and translate cleanly from intention to assembly.
Key capabilities include:
- Mocking up full-length necklaces, bracelets, and anklets to true scale
- Measuring inside curves and outside perimeters for multi-strand spacing
- Sorting and staging components—spacers, crimps, bead caps, charms—within easy reach
- Testing drape, focal balance, and clasp visibility at a glance
- Capturing a visual bill of materials before you cut or crimp
Types of Bead Boards and When to Use Them
Bead boards vary by shape, material, and feature set. Choosing the right one depends on the work you do most often and the space where you do it.
Classic Necklace Boards
These are the iconic U-shaped boards with measurement markers in both inches and centimeters. They are excellent for necklaces and multi-strand planning. Channels create a secure path for beads, allowing you to distribute weight and focal points in a crescent that approximates how a piece will hang when worn.
Bracelet Boards and Bars
Straight channels, sometimes stacked in rows, help with repeating patterns and clasp placement on shorter pieces. Many bracelet boards include centimeter guides for small size adjustments, ideal for gift-making or small-batch production.
Seed Bead and Bead Mats
Flocked mats provide a flat, grippy surface that’s gentle on delicate finishes. Use these for loom work, peyote or brick stitch layouts, and off-loom sampling. Mats pair well with shallow trays to keep color families organized.
Tacky and Foam Boards
Lightweight boards that lightly grab beads are useful for travel or lap work. They keep elements in place without deep channels. Foam offers a cushy base for pins or temporary anchors when you’re trialing unusual components like curved tubes or sculptural pieces.
Modular and Magnetic Systems
Some boards offer removable channel inserts or magnetic rulers and corners. These let you create custom shapes for collars, fringe-heavy designs, or layered curves. They shine when you need repeat setups for a series or a product line.
The Anatomy of a Bead Board
Understanding the landmarks will make your process smoother:
- Channels: Curved or straight grooves where you lay beads at full size.
- Measurements: Printed rulers along the channels, usually in inches and centimeters.
- Wells/Compartments: Shallow pockets to park components by type or step.
- Center Notch: Often present on U-boards; marks the necklace midpoint for focal alignment.
- Reference Lines: Helpful for layering strands at even or stepped distance.
Some boards add surface textures to keep beads stable, color-contrasted backgrounds to improve visual judgment, and angle markers to remind you where a clasp or pendant should transition across the collarbone.
Core Principles for Smarter Bead Board Use
Bead boards support good design practice when you use them to externalize intentions and test decisions. Four principles guide the craft:
1. Plan to Scale
Laying beads within measured channels is not just convenient; it’s how you prevent end-of-project surprises. If the board says 18 inches and your clasp adds 1 inch, you plan 17 inches of beads. Accounting for clasp lengths, crimp lengths, and bead tips transforms guesswork into control.
2. Visualize Balance
Balance is both visual and physical. A pendant-heavy front might swing unless counterweighted with beads of modest mass near the nape. The board shows you where to distribute weight and color to stabilize the piece without sacrificing style.
3. Test Transitions
Hard-to-predict moments—between focal and strand, from bead to chain, or wire to clasp—can be trialed on a board. Swap out bead caps, cones, and transitions until the silhouette feels clean and the drape reads intentional.
4. Lock in Constraints
Let the board hold your practical constraints: budget per piece, maximum grams for comfortable wear, clasp visibility preferences, or metal allergies dictating findings. Physical reminders—sticky notes near wells, colored pins—help keep constraints top-of-mind as you iterate.
Measuring, Math, and Fit
Translate measurements into reliable fit by combining board rulers with simple math:
- Standard lengths: Choker ~14–16 in, Princess ~18 in, Matinee ~20–24 in, Opera ~30–36 in, Rope ~45 in+.
- Add clasp length: If your clasp assembly is 1 in, subtract it from the beaded portion on the board.
- Seed bead counts per inch (approximate): 15/0 ≈ 25; 11/0 ≈ 17–19; 8/0 ≈ 13; 6/0 ≈ 9.
- Allowance for curvature: In tight curves, wider beads occupy more “arc” distance than on a flat line; lay them in-channel to measure true length.
- Drape factor: Soft stringing (silk, nylon) drapes longer under weight than stiff wire; build in 2–4 mm allowance for heavy focal clusters.
Before planning a final cut, model the clasp stack—wire guardians, crimps, covers, and jump rings—right on the board end. Seeing their combined length protects your total measurement.
Color and Composition on a Board
Color choices improve when you can view interactions at real size. Try the 60–30–10 rule: 60% dominant hue, 30% secondary, 10% accent. The board lets you nudge ratios by adding or removing spacer beads and adjusting focal sizes.
- Value contrast: Arrange from light to dark in a channel and test where your focal has maximum presence without overpowering.
- Texture contrast: Alternate matte and glossy to prevent flatness in monochrome schemes.
- Temperature: Warm and cool beads can neutralize or heighten each other; trial small swaps to see cumulative effects.
Mirror symmetry on either side of the center notch gives classic balance, while graduated sizes establish a sense of proportion. Asymmetry benefits from the board even more—mark the “visual weight” center and ensure the off-center focal still hangs comfortably.
Step-by-Step: From Idea to Ready-to-String
Use this repeatable sequence to reduce rework and increase clarity:
- Define purpose and constraints: Target length, budget, metal restrictions, and occasion (daily wear, statement, gift).
- Stage materials: Place focal(s), color families, spacers, and findings in separate wells. Pre-cut a test length of stringing wire or cord as a visual guide.
- Sketch with components: Lay a minimal backbone—center focal, mirror pairs, endpoint accents. Resist filling everything at once.
- Adjust rhythm: Establish beats with spacers and repeats. Countable patterns make sizing alterations painless.
- Refine ends: Trial clasps, cones, and crimps in situ. Confirm they complement both style and thickness.
- Photo and annotate: Snap a clear photo. Note bead sizes and counts. This is your blueprint.
- Dry run drape: Gently lift the arranged line (still in-channel) to preview curvature and spacing. Make micro-adjustments now.
- Commit to stringing: Secure one end with a clip or stopper, string in sequence, test length on a sizing cone or ruler, then finish findings.
At each step, minimize backtracking by treating the board as your pre-assembly truth.
Boosting Your Workflow With Boards
Used intentionally, boards power your entire process, not just the layout stage. Organize your bench so the board sits center stage with tools flanking it. Pre-group common sequences—e.g., spacer, accent, spacer—in wells to accelerate stringing. Color-code wells with washi tape or labels to denote sizes or steps. Keep a small brush on hand to sweep strays without scattering the entire design.
Documenting every setup pays future dividends. A quick phone photo plus a short note—“18 in, 3 mm gold spacer every 4th bead, 12 mm focal”—creates a living library. Over time, this elevates your workflow into a personal knowledge base with tested recipes and dependable outcomes.
Multi-Strand Mastery
Boards with multiple curved channels make layered designs manageable. Plan each strand at its intended final length, but also think in terms of clearance: the inner strand must not crowd the neck, and the outer must avoid flipping under. Step differences of 0.75–1.25 inches between adjacent strands often work for medium beads; increase spacing for larger components to preserve a graceful arc.
To prevent tangles, stagger heavy components across strands so their masses do not align vertically. Match end-cones and multi-strand clasps early in planning; their inner diameters and loop counts dictate how many and which cords you can finish neatly. A board preserves these constraints visually, preventing last-minute wrestling with cones that are too small.
Asymmetry Without Chaos
Asymmetric designs succeed when intent is unmistakable. Use the board to:
- Fix a visual “gravity point” by placing the focal slightly off center.
- Counterbalance with smaller echoes—color, shape, or texture—distributed toward the opposite side.
- Track negative space: leave micro-gaps between bigger elements to maintain airflow and prevent visual clogging.
A board encourages iterative swaps, giving you the confidence to push beyond safe choices without sacrificing wearability.
Transferring From Board to String Without Losing the Plan
The moment of transfer is where many layouts go off-script. Maintain control with these habits:
- Work left to right (or right to left) consistently, mirroring the board’s orientation in your photo.
- Employ bead stoppers or bulldog clips to prevent mid-string spills.
- String in modules: repeatable subsequences that can be measured and verified individually.
- Check endpoints early: test-fit crimp covers, wire guardians, and cones before the final tighten.
- Final test: Before crimping, hang the piece vertically to reveal unexpected gaps caused by gravity.
Careful transfer practices preserve your board-tested choices and minimize emergency rework.
From Creative Play to Documented Systems
What starts as intuitive play becomes a reliable system when you add lightweight documentation. Number the board’s wells and log which component resides in each. Note the source, cost, and bead size. Over time, this log doubles as a cost-of-goods record and a color reference library, letting you reorder with fewer mismatches and plan collections with foresight.
Tracking your bead inventory also stabilizes quality: if you know you can fulfill three identical orders from available stock, you can confidently market small batches without the risk of scrambling for replacements that don’t quite match.
Ergonomics, Focus, and Comfort
Boards protect your focus by containing rollaways and reducing neck strain as you scan lengths. Slightly elevating the board (2–3 inches) brings details into a more natural focal plane, reducing fatigue. Good lighting—high-CRI lamps angled at 30–45 degrees—improves color judgment. These small investments in ergonomics pay compound dividends during long sessions or production runs.
Photographing Board Layouts for Clients and Records
Boards provide neutral, tidy backgrounds for client approvals. Place a color checker or a small white card on the board to aid post-processing accuracy. Include a ruler edge in frame for scale. Shoot a quick alternate under warm and cool light to preview how the piece reads in different environments, then confirm with the client before assembly to avoid scope creep.
Advanced: Rapid Prototyping and Variations
Use boards as a low-risk sandbox for rapid prototyping. Start with a core spine, then spin off variants by making one change at a time: different focal, altered spacer rhythm, or shifted accent ratio. Photograph each variant and label them A, B, C. Small-batch sellers can test these side-by-side on social media or with wholesale buyers and then build only the winners.
For repeat lines, create a template strip—paper or thin card marked with bead counts and spacer positions—and clip it at the board’s edge. This ensures repeatability even when a substitute bead is 0.5 mm off.
Seed Bead Planning and Stitch Work
Although seed-bead stitches happen off-board, mats and boards remain invaluable for planning palettes, spacing focal drops, and pre-counting. Lay out color runs in short rows and label them by stitch row or round. Test fringe density by laying multiple strands across a ruler to check length variability and swing. For looming, pre-stage each row’s color counts in small wells—you’ll stitch faster with fewer counting errors.
Hardware Choices and Structural Integrity
Plan hardware at the board before you commit:
- Clasp style: Lobster, toggle, magnetic—each affects total length and usability.
- Wire vs. cord: 0.018–0.024 in beading wire for heavier beads; silk or nylon for pearls and knots.
- Crimps and guardians: Size them to wire and cone openings. Trial-fit on the board’s end so you know everything nests correctly.
- Weight distribution: Place heavier beads where they won’t flip or twist the design unnaturally.
These choices shape comfort and durability as much as aesthetics. A board helps you see the mechanical realities early, before any irreversible cuts.
Common Pitfalls and How the Board Prevents Them
- Crowded ends: Without a board, last-minute clasp assemblies steal precious length; planning shows you the real estate they need.
- Color drift: In the tray, hues can look perfect; lined up at scale, you catch subtle clashes in saturation or undertone.
- Uneven drape: Heavy front, light back? The board helps you rebalance mass distribution.
- Mismatched pairs: For earrings or mirrored necklaces, channels make pairing automatic; see both sides at once.
- Spacer miscounts: Channels encourage countable patterns that translate cleanly to stringing.
Studio Hygiene, Storage, and Transport
Keep boards lint-free with a sticky roller or a soft vacuum brush. Avoid harsh cleaners that might strip flocking; a slightly damp microfiber cloth is usually sufficient. For transport, slip the board in a zip envelope or a lidded tray; add a light sheet of foam to press designs gently in place. Dedicated shelves or vertical racks preserve flatness and prevent warping, especially for foam-based boards.
Workflow for Production and Teaching
In small-scale production, dedicate specific boards to bestsellers. Tape printed recipes along the edge and store pre-counted kits in labeled baggies nested into the wells. For classes and workshops, boards become both demonstration tools and personal workstations—students can see the plan, follow measurements, and adapt with fewer missteps.
Time each stage—layout, verification, stringing, finishing—to identify where to boost efficiency. Often, pre-sorting spacers or standardizing clasp assemblies yields the biggest gains.
DIY and Sustainable Board Ideas
If commercial boards are out of reach or you need custom sizes, make your own:
- Foam core + felt: Glue felt onto foam core; draw measurement marks with a fine archival pen.
- Wood + cork: Inset a cork layer into a shallow wood tray; add a magnetic steel strip for keeping small tools nearby.
- 3D-printed channels: Print modular curves sized for chokers to opera lengths; snap into a base as needed.
Upcycling old picture frames as shallow trays, lined with velvet, creates elegant, stackable work surfaces that double as photo backgrounds.
Earrings and Small Forms
Boards are not just for necklaces. For earrings, lay out pairs side-by-side to verify perfect matching (or deliberate mismatch). Use compartments to pre-stage headpins, ear wires, and charms per pair. For charms and pendants, line up jump-ring sizes and test orientations so dangles face forward, not sideways, when worn.
Macramé, Knotting, and Fiber Considerations
Macramé boards with gridlines help preserve knot spacing. Test bead fit on cords directly on the board; some beads with small holes may snag on thicker fibers. For pearl knotting, stage pearls in order and check graduation visually; the board reveals abrupt size jumps that the eye might miss when beads are loose.
Safety, Accessibility, and Comfort
Bead boards keep tiny parts contained—critical around pets and children. For makers with limited grip strength, boards reduce the need to hold multiple items at once. Color-contrast boards improve visibility for low-vision makers; pair them with task lights and magnifiers. If repetitive strain is a concern, schedule quick stretching breaks tied to layout milestones.
Quality Assurance Checklist
Before you crimp or tie the final knot, run this quick pass right on the board:
- Length and clasp math verified
- Pattern integrity—no accidental repeats or dropped spacers
- Drape test passed—no heavy components fighting gravity
- Metal mix consistent—platings match, no unintended clashes
- Comfort points smooth—no sharp edges near neckline or wrist
This checklist becomes second nature and protects your brand standard.
From Craft to Craftsmanship
Ultimately, a bead board is a conversation space between idea and reality. It foregrounds the iterations that lead to better work: patient trials, small swaps, smart constraints, and careful notes. Over time, you will recognize patterns in what pleases the eye and what feels good to wear, and your board will reflect that evolving knowledge through faster decisions and cleaner assemblies.
When used this way, the board is neither a training wheel nor a crutch; it is a partner in clarity that helps you think with your hands. It documents what works, catches what doesn’t, and invites new experiments at low risk. In short, it’s a quiet engine of creative control, guiding you to pieces that are beautiful, durable, and a pleasure to make.
Quick Reference: Why Bead Boards Elevate the Craft
- Reduce rework by revealing issues early
- Clarify choices through side-by-side trials
- Strengthen pattern logic and count accuracy
- Improve client communication with visual proofs
- Turn creative play into documented process
When you align planning habits with the practical intelligence of a bead board, your projects benefit across the board—fewer mistakes, cleaner finishes, and more satisfying results for both maker and wearer.
Final Pointers to Put Into Practice
- Start small: pick one board and master its features before expanding your toolkit.
- Standardize: keep a handful of go-to spacer patterns ready in labeled wells.
- Validate: perform a five-minute pre-crimp review every time.
- Record: photo + short notes turn experiments into assets.
- Iterate: change one variable at a time for learnable outcomes.
These habits compound. With each project, you gain sharper eyes, steadier hands, and a studio where every tool has a purpose—including the humble, powerful bead board that transformed your bench from scattered parts into a reliable laboratory of craft.
By working intentionally—measuring with care, composing with intent, and finishing with confidence—you’ll find the board not only elevates what you make but how you make it. The result is jewelry that reflects both imagination and method: wearable art shaped by structure, guided by practice, and honed by the steady discipline of the board beneath your beads.
In the end, one tool unites concept and craft: the board shows you the piece before the piece exists. Harness that preview, and you unlock the quiet superpower at the heart of better making: choices made visible, and therefore, choices made right.
