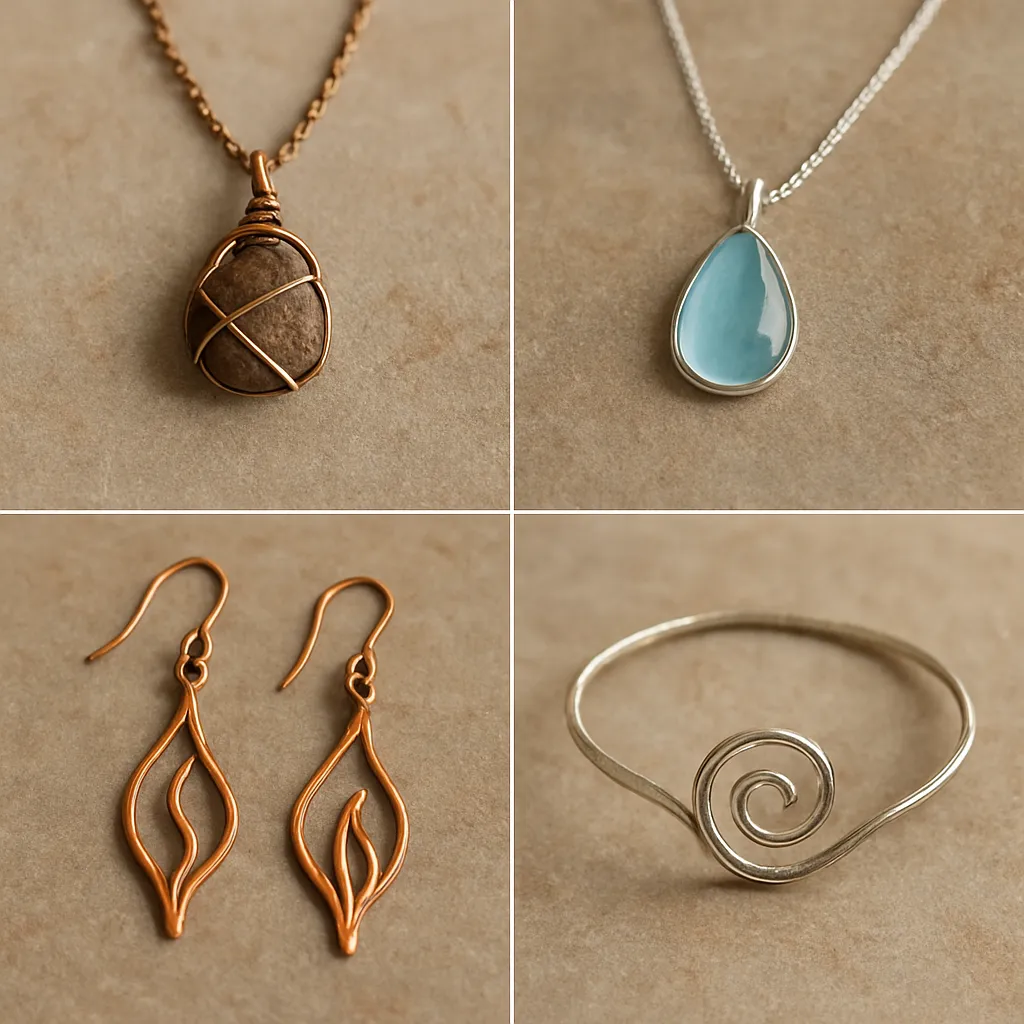
Jewelry that channels earth, water, air, and fire invites the maker to translate nature’s rhythms into wearables that move with the body. This is a realm where studio know-how meets intuition, where slow, deliberate handicraft nurtures pieces with presence and poise. Think of it as a dialogue between your hands and the elements: the grounded hush of stone, the tidal shimmer of glass, the buoyant dance of featherlight links, the incandescent glow of metal coaxed by flame. In making, you don’t just copy nature—you distill it. By observing color, form, movement, and meaning, you can create work that feels both timeless and intimately personal.
Materials, Tools, and Elemental Palettes
Start by curating a materials library that echoes each element’s voice. Earth suggests matte finishes, mineral grains, woods with visible grain, unplated metals. Water leans toward translucency and motion—sea glass, pearls, rippled wire, flowing chains. Air calls for lightness and lift—aluminum, titanium, silk cords, openwork patterns, negative space. Fire thrives in metals that hold heat’s memory—copper, brass, silver, and vitreous enamel that fuses into inviolate color.
Keep a foundational toolkit: smooth- and chain-nose pliers, flush cutters, a jeweler’s saw, needle files, sandpaper in progressive grits, a steel bench block, chasing hammer, mallet, mandrels, and polishing cloths. Heat-friendly ventures ask for a micro torch, pick, soldering board, and—if you venture into metal clay or enamel—a small kiln. For resin waterscapes, you’ll want mixing cups, stir sticks, a silicone mat, pigments or mica, and a butane torch or heat gun to release bubbles. For thread-based air pieces, fine needles, waxed linen, and silk beading thread keep things graceful and strong.
Color palettes emerge from place and memory. Earth: lichen green, russet bark, slate, ochre, smoke. Water: teal, ultramarine, silver-gray, seafoam, mother-of-pearl. Air: dawn peach, pale gold, dove gray, cloud white, faint blues. Fire: ember orange, garnet, copper red, midnight enamel, oily heat-treated plum. Build palettes with a tactile swatch board—tape wire snippets, bead samples, patinated chips—so you can hold color and texture against the skin.
Design Language and Symbolism of the Elements
Good designs flow from clear intent. Define a vocabulary of shapes, edges, and patterns that capture your elemental theme. Earth benefits from irregularities and asymmetry that feel unearthed rather than manufactured—fracture lines, mossy edges, hammered marks that mimic rock fissures. Water designs move—dangling charms that sway, rings with undulating edges, necklaces that cascade like a rill finding its channel. Air begs for negative space, filigree, open links, airy silhouettes, and kinetic components. Fire loves radial motifs, starbursts, sun disks, char lines, and fused textures where heat has left its signature.
Beyond look and feel is meaning. Consider cultural and mythic symbolism: labyrinths for earth’s endurance, wave knots for safe passage over water, spiral whorls for air currents and breath, radiant circles for hearth and sun. Use motifs sparingly and with respect—let research guide your hand so your references become homage rather than pastiche. A small engraved glyph on the reverse of a pendant or an inner-band message can grant a quiet intimacy that the wearer alone discovers.
Earth-Inspired Jewelry
Materials and Techniques
Earth jewelry speaks through weight, grit, and grounded harmony. Stone cabochons, raw crystal points, ceramic shards, bone or antler offcuts (ethically sourced), and wood slices invite a language of layered textures. Metals like brass and copper warm the palette, while matte sealants and satin finishes preserve a sense of weathered calm. Patination techniques using liver of sulfur or cupric nitrate can deepen valleys and raise peaks visually—subtle patina catches light in a way that reads as time made visible.
Structural strategies include bezel setting for stones, cold connections (rivets, tabs) that leave surfaces unpierced, and carved wax castings that retain tool marks. Even simple hammering on a dappled stake can mimic sedimentary striations. Consider embedding fragments—crumbled terracotta, seed husks—in bio-based resin for a fossil-like effect. Leather or cotton cords suit earth’s tactility; hand-braided or macramé structures echo rootwork and mycelial webs.
Project: Forest Path Pendant
Imagine a pendant like a pocket of soil after rain—dark, soft, flecked with stone.
- Materials: oval jasper cabochon, 0.5 mm and 0.8 mm brass sheet, 1.0 mm brass wire, liver of sulfur gel, fine sandpaper (400–2000 grit), matte sealant, rivet wire, beeswax for polishing.
- Tools: jeweler’s saw, files, drill bits, dapping block, bezel pusher, burnisher, doming punches, bench block, small riveting hammer, pliers.
Steps:
- Sketch a meandering outline resembling a forest trail. Saw the base from 0.8 mm brass, file smooth. Dap lightly to create a shallow dish that cradles the stone.
- Form a bezel from 1.0 mm brass wire, shaping it around the jasper. Solder or rivet the bezel closed, then fit it to the base. If avoiding flame, design tab prongs to fold over the stone’s edge.
- Texture the base with a rounded hammer against a dappled stake, then add piercings along the “path” to evoke footfalls. Soften edges with 800–2000 grit paper.
- Apply liver of sulfur to develop an earthy patina; neutralize and card back the high points so the low textures stay dark. Seal with matte finish.
- Seat the jasper and set the bezel with a pusher. Add discreet rivets to secure an overlay if desired.
- String on a hand-braided cotton cord; finish with a simple hand-forged S-clasp.
Variations: Use wood veneer as an inlay, stabilized with thin epoxy; carve shallow grooves that accept powdered stone and CA glue, then sand flush for marquetry-like pathways.
Water-Inspired Jewelry
Materials and Techniques
Water pieces thrive on reflection and movement. Pearls, opals, aquamarine, labradorite, and sea glass bend light and evoke tidepools and surf. Glass seed beads stitched in peyote or herringbone can undulate like currents. Ripple hammers and bouged stakes form wave profiles; chain tassels, flexible wire, and articulated hinges let designs sway and sway back. Resin’s controllable flow grants you a laboratory for luminosity—add transparent dyes, mica, microglitter, and foil to cast shallow pools over engraved metal beds.
Mirror-backed bezels intensify depth beneath translucent stones. Saw-out patterns like eddies or fishtails; leave a millimeter between lines to keep strength. Consider channel settings for line-like sparkle that mimics glints on water, or keum-boo for golden sun streaks across an oxidized surface.
Project: Tidal Pool Cuff
A cuff that looks as though the shoreline paused at your wrist.
- Materials: 1.5 mm sterling strip (25 mm wide), small round and oval bezel cups, tiny pearls and aquamarine chips, two-part castable epoxy resin, mica powders in teal and pearl, silver foil, UV-stable dye, polishing cloth.
- Tools: bracelet mandrel, rawhide mallet, punches, micro torch (optional), drill and tiny burrs, needle files, heat gun or butane torch to pop resin bubbles, masking tape.
Steps:
- Plan your shoreline: scribe a ragged inner edge onto the strip. Refine with saw and files, leaving a naturalistic, tumbled contour.
- Form the cuff on a mandrel with the rawhide mallet. Test fit; leave a slight gap.
- Mark tidepool “basins” and recess them with burs, leaving 0.5 mm at the bottom so the cuff keeps strength. File edges smooth.
- Polish the interior basins to a mirror or line with silver foil for a glinting floor.
- Mix a small batch of resin; tint parts with teal dye and pearl mica. Pour thinly into basins, coaxing swirls with a toothpick. Lay a chip of aquamarine or a tiny pearl in a few pools for life.
- Pass a heat source briefly to chase bubbles; cure as recommended. Topcoat if needed for level surfaces.
- Finish the cuff with a satin exterior and bright-polished inner edges to suggest wetness against skin.
Variations: Set a single domed glass cabochon over a textured silver bed engraved with concentric ripples; the glass magnifies the pattern like a drop of rain.
Air-Inspired Jewelry
Materials and Techniques
Air wants lift, shimmer, and light-on-skin presence. Aluminum anodized in pale hues, titanium with heat color, ultra-fine chain, silk thread, and sheer organza can coexist in buoyant assemblies. Pierced lacework and filigree create visual weightlessness while keeping structural integrity. Kinetic components—spinners, gyroscopic cages, swivels—invoke currents and thermals. The success of airy designs often hinges on ergonomics: if they snag or swing too heavy, the illusion of effortlessness vanishes.
Prioritize balance and articulation. Use micro jump rings (welded if possible) to reduce friction and noise; keep edges silky smooth. Marry matte and gloss to mimic cloud and glint. Think in layers, with transparency and shadow interacting as the wearer moves.
Project: Kinetic Wind-Chime Earrings
Earrings that barely whisper, shifting with every breath.
- Materials: aluminum sheet 0.5 mm, stainless micro jump rings, tiny ball bearings (jewelry grade), fine chain, moonstone briolettes, hypoallergenic ear wires.
- Tools: saw, needle files, fine emery buffers, dapping punches, bench block, light peening hammer, hole punches, tumbler (optional).
Steps:
- Sketch three nested, crescent-like shapes per earring. Saw from aluminum; gently dome the centers for stiffness without mass.
- File to feather-thin edges; burnish to a soft glow. Punch tiny holes on the tips for micro jump rings.
- Assemble crescents with ball bearings at pivots so each shape can rotate independently with minimal friction.
- Hang a single moonstone drop from the innermost crescent via fine chain. Keep length proportional so drops clear the jawline comfortably.
- Tumble-polish or hand-sand to a satin finish. Test movement; if sway is too wild, shorten chain or add a hair more weight to stabilize.
Variations: Replace crescents with wire “isobars” formed in tempered titanium for springy resilience; heat-color for gradients reminiscent of dawn sky.
Fire-Inspired Jewelry
Materials and Techniques
Fire is immediacy, transformation, the edge between control and surrender. Techniques like granulation, fusing, reticulation, and enameling rely on heat’s choreography. Learning clean, confident soldering underpins reliable structure; from there, you can flirt with chaos in deliberate ways—reticulate a silver surface to raise molten ridges, torch-fire enamel for quick color, or heat-bring copper to crimson and auburn before sealing.
Texture with flame-brushed strokes using a slightly reducing torch; chase heat along a strip to coax color blooms. Perforate in starbursts, set fiery stones—garnet, carnelian, sunstone—or let the metal be the flame with layered copper and brass, edges fused and ground to reveal striations like cross-sections of ember.
Project: Ember Glow Necklace
A statement piece that captures the afterimage of coals.
- Materials: 0.8 mm copper sheet, 0.5 mm fine silver sheet (for fusing), medium solder, garnet cabochon, clear enamel (or reds/oranges), liver of sulfur, high-temp flux, matte lacquer.
- Tools: torch with fine control, soldering block, third hand, tweezers, files, enameling trivet and sifters (if enameling), steel wool, burnisher.
Steps:
- Saw an irregular oval backplate from copper. Anneal, then texture lightly with a cross-peen to create valleys where color will gather.
- Fuse thin silver chips to the copper surface—scatter like ash. Heat gently to bond without fully melding, preserving speckles.
- Form and attach a bezel for the garnet at a focal point. If enameling, mask the bezel or set the stone post-enamel.
- Sift translucent orange enamel in zones, fire until glassy. Let raw copper glow through in other areas to retain warmth.
- Oxidize perimeter with liver of sulfur; card back high areas to reveal silver gleam amid darkened copper.
- Set the garnet. Seal bare copper with matte lacquer for longevity. Hang from a forged link chain with occasional heat-colored brass rings.
Variations: Skip enamel and instead torch-paint copper to peacock tones, then trap the color under Renaissance wax. Add a pierced flame aperture backed with a thin silver sheet for reflective pop.
Core Techniques to Elevate Your Craft
While gemstone setting and solder joins make structures strong, refined detailing gives jewelry its “finished” aura. Master clean file work—draw-filing straight edges, rolling transitions with half-round files, chasing scratches through grit steps until a single, coherent sheen remains. Learn meticulous wire-wrapping to seat briolettes securely without bulk. Practice making jump rings and soldering them shut to prevent stress failures. Hone rivets so they dome snugly with no lateral wiggle. Keep drill bits razor-sharp and clear burrs frequently; a wandering bit can spell asymmetry you can never unsee.
Finessing surfaces matters: planish hammer marks to a rhythmic pattern instead of a random scatter. Burnish edges to skin-friendly smoothness; a beautifully contoured edge not only feels luxurious but looks brighter than a flat face because it catches light at many angles. Wherever two materials meet—metal and stone, resin and metal—create clean shoulders so seams appear intentional.
Surface Finishes, Color Theory, and Light
Nature’s palette works because of value and contrast. Put matte against gloss to tell the eye where to rest; frame transparent with opaque so depth reads. Use complementary hints—teal vs. copper orange, moss vs. plum—to vibrate without shouting. Inside a bezel, a mirror polish doubles sparkle for transparent stones, while a sandblasted floor mutes brilliance for a meditative look. If your design looks flat, revisit value rather than color itself; deepen shadows with patina or oxidation, or brighten edges with a whisper of compound.
Consider light conditions: a necklace meant for candlelit dinners benefits from high specular points; a daytime bracelet wants diffuse, low-glare surfaces. Plan where the brightest highlight will live and guide the wearer’s gaze purposefully along arcs of reflection the way a composer places crescendos.
Comfort, Durability, and Wearability
Jewelry succeeds when it disappears into comfort. Gauge ear weight under 7 grams per earring for all-day wear. In bracelets, avoid proud prongs or snag points; test with a silk scarf. For necklaces, balance pendants at the collarbone’s natural notch or longer lines that clear sternum movement during walking. Choose clasps for context—lobster for reliability, toggles for easy dressing, magnetic for accessibility (backed up with a safety chain for security). Double-check connections that take torque: first and last links, bail joins, and jump rings behind pendants.
Think ahead to maintenance. Offer matte options that can be renewed with a 3000-grit pad at home; include a care card. Build in micro-adjustments so a single piece suits multiple bodies. Above all, pursue forms that invite touch; human hands will seek them out.
Sustainability and Ethical Making
Elemental jewelry pairs naturally with mindful choices. Source recycled silver and gold, or reclaim copper and brass. Practice upcycling: retired watch crystals become water lenses; broken heirloom china, once shaped and bezel-set, reads as ocean pottery; offcuts of hardwood turn into studs that carry forest warmth. Keep scrap jars and a habit of melting or trading in metal sweepings. Favor low-VOC sealants and citric acid pickle; capture sanding dust with a dedicated vacuum and mask to protect lungs and waterways. When using shells, seeds, or bones, document ethical origins and respect local regulations.
Packaging can echo the theme. Seeded-paper tags, linen pouches dyed with onion skins or indigo, and minimal, recyclable boxes align with earth’s grounded ethos. A small maker’s note explaining materials and care deepens connection. Transparency—who made it, where metals came from—builds trust and meaning.
Safety Notes for Heat, Dust, and Chemicals
Respect process. Ventilate when using torches, enamels, or resins; wear an appropriate respirator and nitrile gloves for resin mixing. Keep a clear fire zone, a neat bench, and a metal tray to corral hot tools. Quench thoughtfully—thermal shock can crack stones or glass. Secure long hair, avoid loose sleeves, and keep baking soda or a Class B fire extinguisher nearby when working with flammables. For acids and patinas, label clearly and store locked away from children and pets. Your studio is a living ecosystem; treat it with the same care you bring to your materials.
Troubleshooting and Maker’s Notebook
When resin yellows or cures tacky, suspect incorrect ratios, old stock, or UV exposure—mix by weight if possible, pour thin, and top with a UV-stable varnish. If patina blotches, degrease thoroughly before oxidizing and warm the metal for even reaction. Should a stone rattle in its bezel, burnish strategically at the shoulders, or add a shim of fine silver under the cab. If kinetic earrings tangle, reduce chain length, widen the spacing of elements, or introduce a stiffer central spine. Keep a notebook: date, materials, brand names, ratios, torch settings, curing times, and sketches. Over time, it becomes a personal encyclopedia, preventing repeat mistakes and catalyzing new designs.
Four Element Mini-Collections: Planning and Cohesion
Building a four-element capsule strengthens storytelling and helps you evaluate cohesion. Decide on a unifying thread—one silhouette carried across all elements, a shared clasp design, or a signature hallmark. Create 3–5 pieces per element: a statement, a daily-wear, and a few bridges that blend elements (e.g., earth-water bracelet with stone inlays under a resin “stream”). Design with price tiers to welcome varied budgets: simple studs, mid-range pendants, a showpiece necklace or cuff.
Photograph pieces in natural light with props that respect, not distract from, the work—lichen for earth, a shallow bowl of water for reflections, gauzy fabric for air, charred wood for fire. Lighting angles can reinforce story; raking light reveals hammered topographies, while backlight turns translucent beads into glowing droplets.
Advanced Ideas: Movement, Mechanisms, and Mixed Media
Push your practice by adding articulation. Hidden hinges inside pendants let segments fold and unfold like petals; tension springs can keep shapes floating. A small differential gear transforms a simple twist into counter-rotation—perfect for “air” medallions that spin in calm air. Combine metal with textiles: weave a silk kumihimo cord that threads through a riveted copper leaf; embroider beads onto a leather-backed filigree for tactile depth. Create “memory” forms by cold-working aluminum wire to a set curve that recalls wind-bent grass.
Consider micro-inlay: saw thin channels into a brass cuff and press in stone dust and CA glue for earth’s strata, then seal. For water, trap wisps of iridescent film beneath domed glass for rippled light. For fire, layer thin shakudo or shibuichi panels for complex alloy color; raise surface copper for selective patination. In air, explore photo-etched lattices that render lacy shadows on skin.
Teaching, Sharing, and Community
Elemental jewelry is rich ground for workshops and community exchange. Design exercises—like translating a sound (waves, wind through pines, crackling embers) into a brooch—sharpen interpretation. Group critiques that focus on intention, execution, and wear experience build resilience and clarity. Trade scrap, swap techniques, and co-source ethical materials. Offer repair and refresh services; extending the life of a piece honors both maker and earth.
Presentation, Storytelling, and Gifting
Jewelry carries stories best when the wearer becomes the narrator. Include a small card that explains design cues: “This cuff holds three tidepools; the smallest is set at the wrist’s pulse to mark changing tides.” Use naming to frame meaning without closing interpretation—“Moraine,” “Thermal,” “Crosswind.” When gifting, size thoughtfully and provide a tiny polish cloth. For markets or online listings, pair macro images of surface with photos of wear to reassure about scale and feel. A short video capturing the sway of air earrings or the gleam shift of fire enamel can speak volumes that stills cannot.
From First Spark to Signature Style
At its best, elemental jewelry isn’t a checklist of tropes; it’s a practice of looking closely, building fluency in materials, and letting your own perspective refine every curve and clasp. Keep scouting the world: the grain of basalt, the way rain beads on waxy leaves, the hush before a match strikes. Translate those micro-observations into design moves—an undercut that catches shadow, a link that always returns to center, a flared edge that breathes. With steady hands and curious eyes, you’ll find that the elements become partners in your studio, teaching scale through pebbles, rhythm through waves, lift through breezes, and courage through flame.
Return often to fundamentals—clean joins, fair curves, reliable mechanics—so your ideas stand on secure bones. As your vocabulary grows, so, too, will your confidence in bending rules. Earth grounds you, water teaches flow, air grants lightness, fire proves transformation. Worn against the body, these lessons turn tactile: the cool of metal warming to skin, the swing that syncs with a stride, the soft clack of bead against bead like surf on stones. Make generously. Wear attentively. Let the elements guide your next piece from sketch to clasp.
