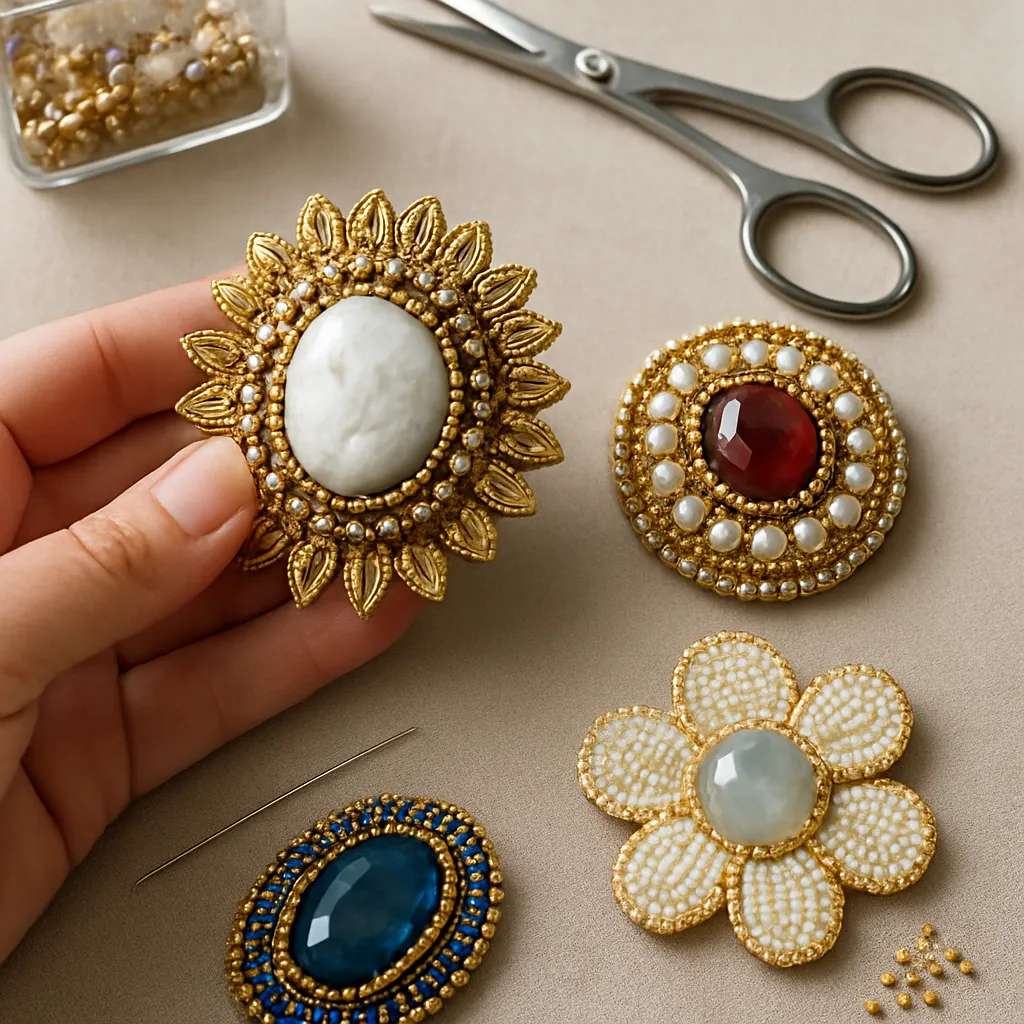
Few accessories communicate personality as instantly as a bold brooch. Perched on a lapel, anchoring a scarf, or punctuating a hat, a statement brooch is a compact stage where materials, form, and story converge. Making one by hand is both an old-world practice and a contemporary playground for texture, color, and technique. This guide walks you through inspiration, materials, design principles, and processes so you can craft brooches that feel collectible, wearable, and unmistakably yours.
The Allure of Statement Brooches
The brooch is a small object with an outsized voice. It has served as closure, talisman, political banner, and miniature sculpture. What sets a statement brooch apart is scale and intention: it doesn’t apologize for being seen. It commands attention without requiring a head-to-toe outfit change, and it can be swapped in seconds to transform mood. For makers, the brooch offers a manageable canvas for experimentation, allowing for technical depth within a compact timeframe and budget.
A short timeline of influence
From Bronze Age fibulae to Victorian mourning jewels, from Art Deco geometrics to mid-century modernist studio pieces, brooches have mirrored cultural shifts. The twentieth century expanded materials: bakelite, lucite, anodized aluminum, enamel on copper, and textile hybrids. Contemporary makers often hybridize eras—think a geometric brass arc paired with hand-embroidered silk, or a carton of milk turned into a polished plastic cameo. This history is permission: choose your lineage or defy it, but know the thread you’re tugging.
Why large scale works on the body
The larger size of a statement brooch interacts with clothing architecture—seams, collars, vents. It can re-balance a strong shoulder, echo a collar’s curve, or interrupt a straight lapel with a burst of roundness. Scale also expands your technical vocabulary: more room for layered appliqué, multi-level wire armatures, dimensional beadwork, or small kinetic components. In other words, it’s a stage big enough to showcase deliberate craftsmanship.
Materials and Tools
Statement brooches thrive on tactile richness. Combining at least two material families—textile, metal, resin, ceramic, paper—often yields the most dynamic results. Choose materials for both impact and wearability.
- Fabrics and fibers: felt (wool or wool-blend), silk dupioni, velvet, linen, denim, organza, ultraseude for backing, leather offcuts, specialty trims and ribbons.
- Beads and stones: seed beads (sizes 11/0 and 15/0 for detail), cut bugles, glass pearls, crystals, cabochons, natural stones, freshwater pearls.
- Metals: brass and copper sheet (24–20 gauge for brooch fronts; 18–16 gauge for structural brackets), brass wire (18–26 gauge), sterling or gold-filled wire for premium pieces, pre-made pin backs (bar pins, tie-tack pins, rotating safety clasps).
- Resin and plastics: two-part epoxy resin for encapsulating small objects; thermoplastics (Worbla, kydex) for sculptural forms; acrylic shapes.
- Found and natural objects: porcelain shards, shells, vintage buttons, watch parts, dried botanicals (sealed), small wood veneers.
- Adhesives: fabric glue for temporary tacking, contact cement for leather, cyanoacrylate for quick bonds, two-part epoxy for structural joins, jeweler’s solder (hard/medium) for metal builds.
- Tools: fine needles, beading mat, thimble, embroidery hoops, small bench block, chasing hammer, jeweler’s saw with 2/0–4/0 blades, files, sandpaper (400–2000 grit), dapping block, pliers (round-nose, chain-nose, flat), flush cutters, awl, craft knife, rivet tools, burnishers.
- Finishing and safety: respirator for resin and dust, safety glasses, nitrile gloves, polishing compounds, microcrystalline wax, soft cloths.
Sample swatches are invaluable. Keep a library of test stitches, wire textures, resin tints, and patinas. When you design, you’ll compose from known behaviors rather than guesswork.
Design Principles for Impact
A brooch must succeed as a small-scale sculpture and as a functional accessory. Consider the following principles as your design compass.
- Composition and silhouette: Decide the dominant shape—circle, crescent, arrow, bloom. A bold silhouette reads from across the room. Avoid overly intricate edges that can snag; echo garment lines for harmony or deliberately oppose them for drama.
- Balance and rhythm: Distribute visual weight with clusters, repeats, and rests. Strategic negative space prevents visual fatigue and makes the dense areas feel richer.
- Scale and proportion: Statement doesn’t mean unwearable. Try paper cutouts pinned to clothing to test scale before committing. Shrink or expand until the piece feels assertive but not cumbersome.
- Color and contrast: Anchor with a limited palette, then add a high-contrast accent. Metallics can behave as neutrals. Use the garment as a “fifth color” to avoid clashes.
- Texture and light: Mix matte (felt, satin) with gloss (glass, polished metal). Directional stitches catch light; hammered metal scatters it. Repetition of a texture in two places creates cohesion.
- Movement and articulation: Subtle dangling elements or hinged plates add life. Thoughtful articulation can enhance comfort while creating sound or shimmer.
- Wearability: Map the pin so the brooch sits upright on thick and thin fabrics. Account for coat-weight wools versus summer linens; adaptability is part of good ergonomics.
Design on tracing paper so you can overlay options—pin placement, color swatches, and material callouts. Annotate with notes such as “hammered texture here” or “edge bound in leather.” These micro-decisions accumulate into a confident macro-statement.
Core Techniques
Hand embroidery and beadwork
Felt and fabric are forgiving platforms for sculptural stitch. Stabilize your base with interfacing, then build relief with padding (felt cutouts, corded lines, or thread-sculpted motifs). Employ compact stitches—backstitch, couching, satin stitch—and reserve long floats for protected areas. For bead embroidery, tack a cabochon with a glue dot, bezel it with seed beads in peyote, then branch outward with stacks, picots, or fringe. Keep tension even; beads should sit upright without gapping.
Wire and metal sheet
Wire armatures create crisp edges and light frameworks. Anneal brass wire to improve malleability, then form with round-nose pliers; harden work-hardened sections on a bench block. For sheet builds, saw shapes with a jeweler’s saw, file edges, and dome lightly on a dapping block for dimensionality. Texture with a cross-peen hammer or roll-print organic patterns using a rolling mill and leaves. Riveting allows cold-connection between metal and non-metal without heat.
Resin and mixed media
Encapsulate small objects—pressed flowers, lace snippets, tiny drawings—in thin resin domes. Work in dust-free conditions; warm the resin slightly to reduce bubbles. Color with alcohol inks or mica, but avoid heavy loads that inhibit curing. Combine resin plates with fabric bases or metal frames for contrast between sleek and soft.
Felt and fabric sculpting
Wet-felting wool roving over resist shapes yields lightweight, seamless forms. Needle-felt to add motifs or edges. For woven fabrics, create wired bias bindings to hold curves and undulations; pad-ladder stitch around the wire, then coax into scrolls and arcs. Fabric stiffeners can add crispness to delicate textiles like organza.
Step-by-Step Projects
Project 1: Couture beaded moth brooch
This project delivers theater with elegance, balancing bead-luster against matte felt and a strong outline.
- Sketch a moth silhouette at 11–13 cm wingspan; translate to two layers of wool felt (top decorative, bottom base) with a third smaller layer as a padded thorax.
- Back the top felt with lightweight fusible interfacing to resist distortion; baste layers together.
- Position a cabochon for the thorax and secure with a peyote bezel using 11/0 beads; add 15/0 beads for a refined rim.
- Define wing veins with couching: lay metallic thread and tack with seed beads at intervals.
- Fill wing panels using gradients—matte to gloss—maintaining consistent tension so beads lie flush.
- Edge-bead the entire outline with a brick stitch to lock the silhouette.
- Cut an ultrasuede backing to match; set a 30–40 mm bar pin between base and backing, slightly above centerline for stability.
- Join front and back with a neat whip stitch, hiding knots beneath beads. Add minimal fringe to the lower wings for controlled articulation.
Test on a coat and a blouse; adjust pin placement if the body tilts. The goal is a confident perch, not a forward flop.
Project 2: Geometric brass arc
A metal-forward piece that plays with curve, shadow, and crisp geometry.
- Draw a 9 cm crescent with a 2 cm width; saw from 22-gauge brass sheet.
- File and sand edges to 600 grit; dome slightly in a dapping block to lift the form off the fabric.
- Texture half the surface with a cross-peen for contrast; leave the other half satin-brushed.
- Drill two tiny holes near each tip to accept a hidden wire bridle that attaches to the pin back plate.
- Solder or rivet a low-profile pin back aligned along the inner curve so the arc sits parallel to collars.
- Apply a selective liver-of-sulfur patina to deepen the textured half; seal with microcrystalline wax.
The minimal form demands perfect edges and finish. Tiny deviations show at this scale; work patiently.
Project 3: Upcycled porcelain shard talisman
Give a second life to a chipped plate with a tactile blend of ceramic, leather, and thread.
- Wet-sand the shard edges to a soft bevel; clean thoroughly.
- Trace the shard on thin vegetable-tanned leather; cut a 3–4 mm larger silhouette for a protective “bumper.”
- Pierce stitching holes around the leather perimeter; saddle-stitch with waxed linen, encasing the shard’s edge.
- Mount the leather-wrapped shard to a felt base with epoxy; weight lightly while curing.
- Add a fringe or tassel at the bottom with waxed cords and a few accent beads.
- Back with ultrasuede and a stout pin; ensure the weight is balanced to avoid rotation.
This piece celebrates history and repair—a perfect bridge to conversations about material memory and responsible making.
Backs, Pins, and Wearability
The back is the anchor of comfort, safety, and longevity. Select the mechanism based on fabric type and brooch weight.
- Bar pins: Versatile and strong, available in multiple lengths; look for locking clasps to prevent loss.
- Rotating safety clasps: Ideal for heavy coats; bulkier but very secure.
- Tie-tack pins: Minimal visual intrusion; best for light pieces or as secondary stabilizers.
- Magnetic backs: Useful for delicate fabrics; choose high-strength neodymium pairs and shield with felt to prevent fabric damage.
Placement matters. The center of mass should sit slightly above the pin axis. For broad designs, use a second pin or a stabilizing tack to prevent spinning. A contoured back plate—leather or ultraseude—spreads pressure and protects stitches from abrasion. All edges that touch clothing should be smoothed, sealed, or bound.
Finishing, Care, and Longevity
Quality finishing elevates a brooch from craft experiment to heirloom. Attend to edges, stitch density, and connections. Burnish metal and seal reactive finishes. On fabric builds, consider a catch-stitch inside to lock thread tails. For beadwork, weave in multiple directions and use conditional knots in inconspicuous spots. Think ahead to durability: select abrasion-resistant threads (polyester or nylon where appropriate), avoid long unsupported bead spans in high-contact areas, and reinforce hinge points.
Care guidelines can travel with the piece on a small card: wear last, remove first; avoid perfumes and hairsprays; store flat in a pouch; keep resin and pearls out of prolonged sunlight; periodically check clasps. Offer repair services when you can; it deepens the relationship between maker, wearer, and object.
Storytelling, Themes, and Collections
Memorable brooches carry narrative. Let a theme guide material choices: a coastal series mixing shells, linen, and oxidized copper; a night-garden collection of velvet blooms and blackened silver; an architecture line with angles, arches, and shadow-play. Build families of three to five related pieces with variations in scale and color. Use recurring motifs—stitch patterns, hammered textures, or a signature backplate shape—to tie collections together without repetition fatigue.
Names matter. A title can frame the wearer’s experience, shifting a “big flower brooch” into “Moonlit Peony No. 2.” Keep a sketchbook of words alongside drawings; language can spark form and vice versa.
Troubleshooting and Quality Control
- Brooch tilts forward: The pin is too low or the piece is top-heavy. Raise the pin back by 5–8 mm; add a thin lead or brass counterweight hidden near the base; switch to a longer bar pin.
- Beads pucker the fabric: Your tension is uneven or the base is under-stabilized. Add interfacing; reduce thread pull; stitch outward in balanced increments rather than filling one area completely first.
- Adhesive failures: Surface wasn’t prepped, or glue choice was mismatched. Degrease metal with alcohol, scuff-sand glossy plastics, and choose epoxy for structural bonds; allow full cure time.
- Metal edges snag: You stopped sanding too soon. Progress through grits to at least 800–1000; break the arris (sharp corner) with a light bevel; polish and wax.
- Weight fatigue on fabric: Use a broader backplate; split the load with two pins; lighten the front by switching dense beads to lighter acrylic or wood in hidden zones.
Institute a ritualized final check: clasp action, pin sharpness, seam uniformity, edge smoothness, backing adhesion, label placement, and a 24-hour wear test on a dummy garment.
Pricing, Presentation, and Gifting
Even if you make for pleasure, treat each brooch as a small design product. Track time and material costs; add a margin for design development, overhead, and packaging. Photograph on a neutral garment and on a body for scale. Package with a card that includes the piece’s name, materials, and care instructions; a simple box or rigid card prevents crushing. For markets, display brooches on mannequin torsos and on swatches of cloth that echo real garments, helping customers visualize wear.
When gifting, tailor themes to the recipient: birthstones, favorite flowers, or motifs hinting at shared stories. Add a note on how you built it; process often deepens appreciation.
Sustainable Practice
The brooch is an ideal format for mindful making. Small surfaces invite thoughtful use of remnants and repaired elements. Upcycle textiles, salvage metal from offcuts, and thrift vintage beads. Source from ethical suppliers when buying new. Design for disassembly so components can be repaired or recycled later. Communicate your approach—wearers value pieces aligned with sustainability beyond trend.
Advanced Details: Edges, Depth, and Harmony
Edges are where brooches meet clothing and fingers; they should delight in both look and touch. Consider leather piping, beaded picot borders, or rolled hems for textiles; for metal, a micro-chamfer followed by a satin burnish. Build depth in tiers: a low-relief base, a middle plane carrying core textures, and a top plane for focal accents or kinetic parts. These tiers create shadows that enrich composition even under flat indoor lighting.
Harmony often rides on invisible math. Test for rough symmetry where intended, but embrace intentional asymmetry with counterweights of color or texture. Repeat small elements (a trio of seed-bead stacks echoing three hammered dots) to knit disparate materials together.
Health, Safety, and Studio Habits
Ventilation and eye protection are non-negotiable when soldering, sanding, or casting resin. Label adhesives and chemicals; store away from sunlight. Keep separate scissors for paper and fabric to preserve edges. Sharpen awls and replace needles periodically to avoid snags. A clean beading mat prevents runaway beads and improves speed. Schedule short breaks to assess from a distance; stepping back helps you see with fresh eyes.
Exploration: Movement and Sound
Beyond visual drama, consider subtle sound. A trio of thin brass leaves can chime delicately, or seed-bead fringes can whisper with motion. Test wearability: movement should be felt as liveliness, not annoyance. Anchor moving parts with hidden washers, wire wraps, or micro-rivets to prevent wear on soft components.
Ethos: Making With Intent
The best statement brooches aren’t loud for its own sake—they’re balanced, specific, and alive. They respect the body and clothing while offering a focal point. They reflect a point of view you can articulate: a material fascination, a place, a mood, a question. Keep a log of each piece’s decisions—materials, stitches, finishes—and the rationale behind them. Over time, your vocabulary will sharpen into a signature.
Quick Reference: Proportions and Practicalities
- Common sizes: 6–12 cm for statement wear; consider garment weight when exceeding 10 cm.
- Metal gauges: 24–22 for light fronts, 20–18 for structural plates, 18–16 for brackets.
- Threads: polyester for strength in textile/metal junctions; nylon for beadwork; silk for high-end embroidery.
- Backing: ultrasuede for glide and grip; thin leather for durability; cork fabric for vegan alternatives.
- Testing: pin prototypes to multiple garment types—blazer, tee, coat, dress—to confirm posture.
From Prototype to Collection
Begin with a small run of three prototypes exploring a shared idea: for instance, “shadow and shine” expressed through hammered brass, matte felt, and gloss beads. Iterate with micro-changes—swap a texture, shift the balance point, change the edge treatment. Photograph them uniformly, gather feedback from wearers, and refine. Document pin placements that worked across fabric weights; consistency shortens future design cycles and improves durability outcomes.
Closing Thoughts
A statement brooch compresses design, craft, and emotion into a palm-sized artifact. Treat the surface like a miniature landscape with peaks, paths, and pauses; treat the back like a machine part engineered for ease. Protect the clothing; invite the hand; seduce the eye. In that synthesis—material poetry meeting practical wisdom—you’ll find the satisfying click of a piece that belongs on the body and in memory, an object that broadcasts your sensibility every time it catches the light and the gaze of a passerby. Attend to proportion, honor materials, and let the body teach you. Over time, your brooches will move from beautiful objects to wearable confidants.
As you continue, circle back to fundamentals: clean composition, resilient joins, and generous negative space. Maintain your tools, iterate with intention, and embrace the quiet authority of a refined silhouette. Whether your voice leans botanical, architectural, or abstract, the lapel is ready to host your imagination—securely pinned, thoughtfully balanced, and alive with the quiet confidence of true craftsmanship.
